本文主要介绍在 Tomcat 集群中如何进行 Session 复制,文中所使用到的软件版本:Centos 7.9.2009、Java 1.8.0_321、Tomcat 8.5.87。
1、快速配置
取消 conf/server.xml 文件中的以下注释来启用集群:
<Cluster className="org.apache.catalina.ha.tcp.SimpleTcpCluster"/>
使用上述配置将启用 all-to-all 会话复制,它使用 DeltaManager 进行会话增量复制。all-to-all 意味着每个会话都将被复制到群集中的所有其他节点。这对于较小的集群非常有效,但不建议在大型集群(超过4个节点左右)中使用它。此外,当使用 DeltaManage r时,Tomcat 将会话复制到所有节点,甚至是没有部署该应用程序的节点。
为了解决这些问题,您将需要使用 BackupManager。BackupManager 仅将会话数据复制到一个备份节点,并且仅复制到已部署该应用程序的节点。一旦您使用 DeltaManage r运行了一个简单的集群,您可能希望随着增加集群中节点的数量而迁移到 BackupManager。
上述配置对应的详细默认配置如下:
<Cluster className="org.apache.catalina.ha.tcp.SimpleTcpCluster"
         channelSendOptions="8">

  <Manager className="org.apache.catalina.ha.session.DeltaManager"
           expireSessionsOnShutdown="false"
           notifyListenersOnReplication="true"/>

  <Channel className="org.apache.catalina.tribes.group.GroupChannel">
    <Membership className="org.apache.catalina.tribes.membership.McastService"
                address="228.0.0.4"
                port="45564"
                frequency="500"
                dropTime="3000"/>
    <Receiver className="org.apache.catalina.tribes.transport.nio.NioReceiver"
              address="auto"
              port="4000"
              autoBind="100"
              selectorTimeout="5000"
              maxThreads="6"/>

    <Sender className="org.apache.catalina.tribes.transport.ReplicationTransmitter">
      <Transport className="org.apache.catalina.tribes.transport.nio.PooledParallelSender"/>
    </Sender>
    <Interceptor className="org.apache.catalina.tribes.group.interceptors.TcpFailureDetector"/>
    <Interceptor className="org.apache.catalina.tribes.group.interceptors.MessageDispatchInterceptor"/>
  </Channel>

  <Valve className="org.apache.catalina.ha.tcp.ReplicationValve"
         filter=""/>
  <Valve className="org.apache.catalina.ha.session.JvmRouteBinderValve"/>

  <Deployer className="org.apache.catalina.ha.deploy.FarmWarDeployer"
            tempDir="/tmp/war-temp/"
            deployDir="/tmp/war-deploy/"
            watchDir="/tmp/war-listen/"
            watchEnabled="false"/>

  <ClusterListener className="org.apache.catalina.ha.session.ClusterSessionListener"/>
</Cluster>
以下是一些重要的默认值:
1、组播地址为 228.0.0.4
2、组播端口为 45564(端口和地址一起确定集群成员身份)
3、广播的 IP 是 java.net.InetAddress.getLocalHost().getHostAddress()(确保不要广播127.0.0.1,这是一个常见错误)
4、用于监听复制消息的 TCP 端口是在 4000-4100 范围内第一个可用的服务器套接字
5、侦听器配置为 ClusterSessionListener
6、配置了两个拦截器 TcpFailureDetector 和 MessageDispatchInterceptor
2、Session 复制实现步骤
1、所有会话属性必须实现 java.io.Serializable 接口。
2、在 conf/server.xml 文件中取消注释 Cluster 元素。
3、如果您定义了自定义集群阀门,请确保在 conf/server.xml 文件的 Cluster 元素下也定义了 ReplicationValve。
4、如果 Tomcat 实例在同一台机器上运行,确保每个实例的 Receiver.port 属性是唯一的。在大多数情况下,Tomcat 可以通过自动检测 4000-4100 范围内可用端口来解决此问题。
5、确保应用的 web.xml 具有 <distributable/> 元素。
6、如果使用 mod_jk,请确保在 Engine(<Engine name="Catalina" jvmRoute="node01">) 中设置 jvmRoute 属性,并且 jvmRoute 属性值与 workers.properties 中的 worker 名称匹配。
7、确保所有节点具有相同的时间并与 NTP 服务同步.
8、确保负载均衡器配置为粘性会话模式。
3、实际操作
3.1、规划
| IP | 端口 | 用途 |
| 10.49.196.10 | 8080 | Tomcat1 |
| 10.49.196.11 | 8080 | Tomcat2 |
| 10.49.196.13 | 8080 | 反向代理(Nginx) |
3.2、修改 server.xml
取消 Tomcat 中 conf/server.xml 文件的以下注释:
<Cluster className="org.apache.catalina.ha.tcp.SimpleTcpCluster"/>
3.3、添加 <distributable/>
这里直接使用 Tomcat 自带的应用 ROOT 做测试,在 webapps/ROOT/WEB-INF/web.xml 文件中增加 <distributable/>:
<web-app xmlns="http://xmlns.jcp.org/xml/ns/javaee"
  xmlns:xsi="http://www.w3.org/2001/XMLSchema-instance"
  xsi:schemaLocation="http://xmlns.jcp.org/xml/ns/javaee
                      http://xmlns.jcp.org/xml/ns/javaee/web-app_3_1.xsd"
  version="3.1"
  metadata-complete="true">

  <display-name>Welcome to Tomcat</display-name>
  <description>
     Welcome to Tomcat
  </description>
  <distributable/>
</web-app>
3.4、添加测试页面
新增 webapps/ROOT/index2.jsp 文件:
<body>
SessionID:<%=session.getId()%>
<br>
SessionIP:<%=request.getLocalAddr()%>
<br>
SessionPort:<%=request.getLocalPort()%>
</body>
3.5、配置反向代理
Nginx 的配置如下:
upstream tomcat {
  server 10.49.196.30:8080;
  server 10.49.196.31:8080;
}

server {
  listen 7070;
  server_name  localhost;

  location / {
    proxy_pass  http://tomcat;
  }
}
3.6、测试
启动两个 Tomcat 及 Nginx,访问代理页面:
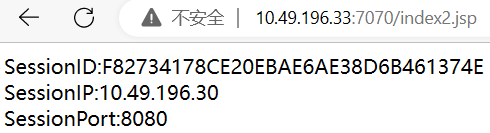
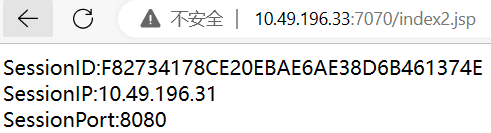
多次访问代理页面,可以看到 IP 不停的变化,但 SessionID 不变,说明 Session 复制有效。
参考:https://tomcat.apache.org/tomcat-8.5-doc/cluster-howto.html。