一、前言
| 问题介绍: |
- 在利用typora进行写文档的时候,插入图片后,由于图片位于本地所以在博客园上传时会出现图片无法加载的情况。
- 如果利用其他图传,比如gitee,github又会出现在博客园中有时可以加载,有时没办法加载的情况。(应该是由于防盗链机制)
- 在进行博客迁移,比如自己从CSND迁移至博客园,由于博客园对于网络图片上传时不会自动存储在自己的服务器(不像CSDN可以直接将比如在gitee上的图片转载在自己的服务器)
由于上述几种情况均会导致图片在博客园中无法正常显示,所以一种理想状态我觉得是:自己写的博客中的图片是粗存储于博客的服务器上,这样除非博客网站崩了,不然都是可以正常显示的。
所以由于一般都是用typora撰写文档,那么在上传本地图片的同时直接将图片上传至博客园服务器——即将博客园作为图床是目前我觉得较好的选择。
1.这里我主要是参考这篇文章对图进行配置:基于博客园搭建Typora免费图床
2.但是由于这篇文章中,只能针对电脑本地图片进行上传,我通过对代码的修改使得可以实现对:在typora中自动将电脑本地图片和网络图片上传到博客园服务器上。
话不多说,我们接下来开始配配置吧~
二、配置步骤
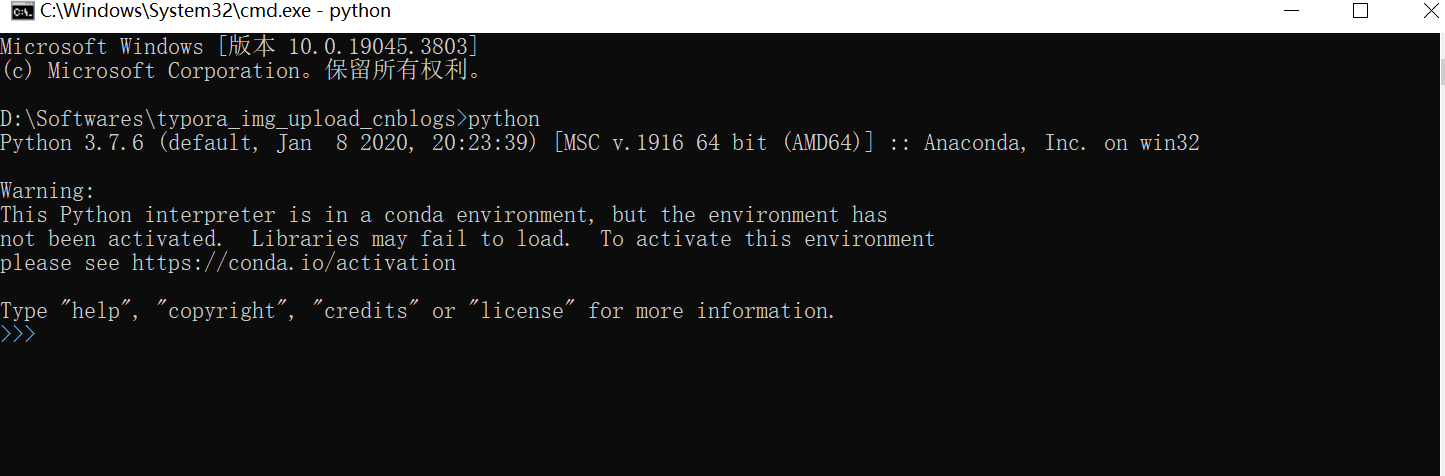
- 首先检查自己的电脑具备python3环境,通过在终端窗口输入
python可以查看
- 将下面的代码进行复制,并保存为py文件,例如我的是
ImageUplod.py
import os
import sys
import xmlrpc.client as client
import mimetypes
import requests

CONFIGS = {
    "url": "",
    "username": "",
    "password": "",
    "blogID": "",
}

# def get_image(image_path):
#     image_mimetype = mimetypes.guess_type(image_path, True)[0]
#     image_name = os.path.basename(image_path)
#     image_bits = client.Binary(open(image_path, 'rb').read())
#     image = {
#         "name": image_name,
#         "type": image_mimetype,
#         "bits": image_bits,
#     }
#     return image

def get_image(image_path):
    if image_path.startswith('http://') or image_path.startswith('https://'):
        try:
            response = requests.get(image_path)
            if response.status_code == 200:
                image_mimetype = response.headers.get('content-type', 'image/jpeg')
                if image_mimetype is None:
                    image_mimetype = 'image/jpeg'  # Set default MIME type
                image_name = os.path.basename(image_path)
                image_bits = client.Binary(response.content)
                image = {
                    "name": image_name,
                    "type": image_mimetype,
                    "bits": image_bits,
                }
                return image
            else:
                print(f"Failed to download image from URL: {image_path}. Status code: {response.status_code}")
                return None
        except requests.exceptions.RequestException as e:
            print(f"Failed to download image from URL: {image_path}. Error: {e}")
            return None
    else:
        image_mimetype = mimetypes.guess_type(image_path, True)[0]
        image_name = os.path.basename(image_path)
        image_bits = client.Binary(open(image_path, 'rb').read())
        image = {
            "name": image_name,
            "type": image_mimetype,
            "bits": image_bits,
        }
        return image

def upload_image(image_path):
    image = get_image(image_path)
    server = client.ServerProxy(CONFIGS.get("url"))
    url = server.metaWeblog.newMediaObject(CONFIGS.get("blogID"), CONFIGS.get("username"),
                                           CONFIGS.get("password"), image).get("url")
    return url

def main(argv):
    args = iter(argv)
    next(args)
    for image_path in args:
        print(upload_image(image_path))

if __name__ == "__main__":
     main(sys.argv)
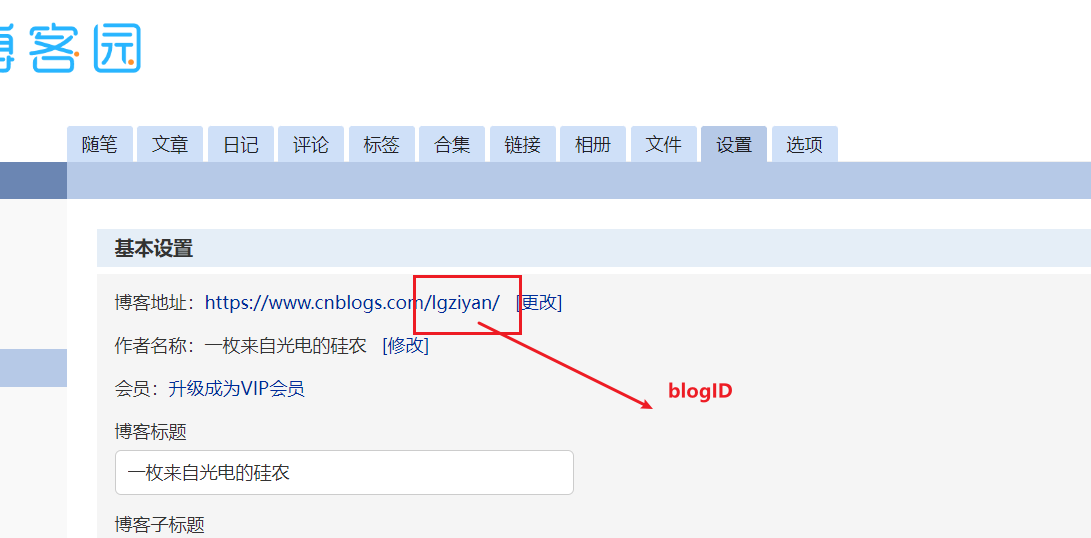
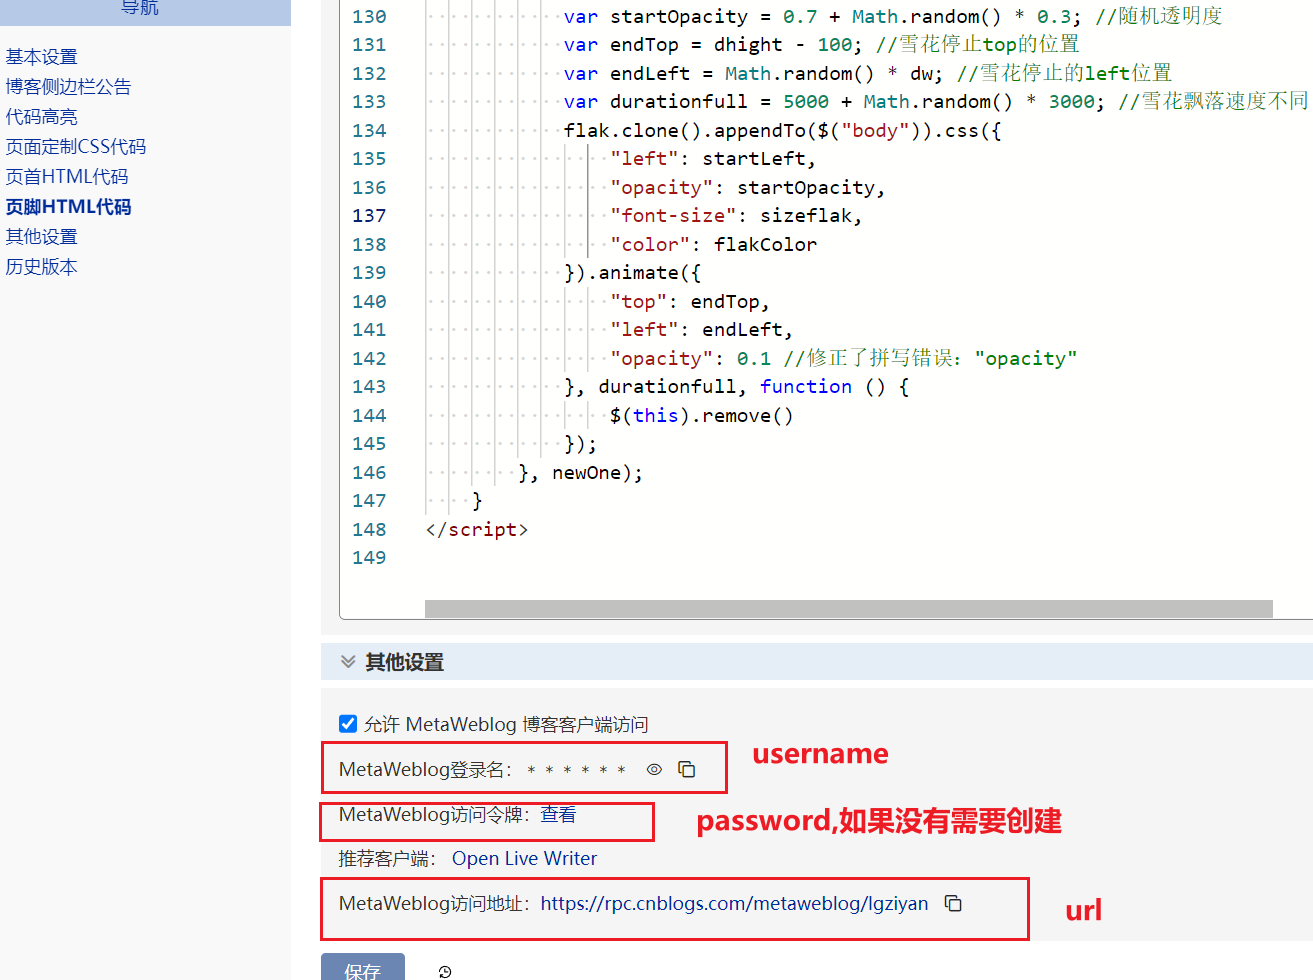
- 根据自己博客园的账号信息配置:
CONFIGS参数。
- 打开Typora 文件 =》 偏好设置 =》图像 设置界面,按照下图所示进行配置
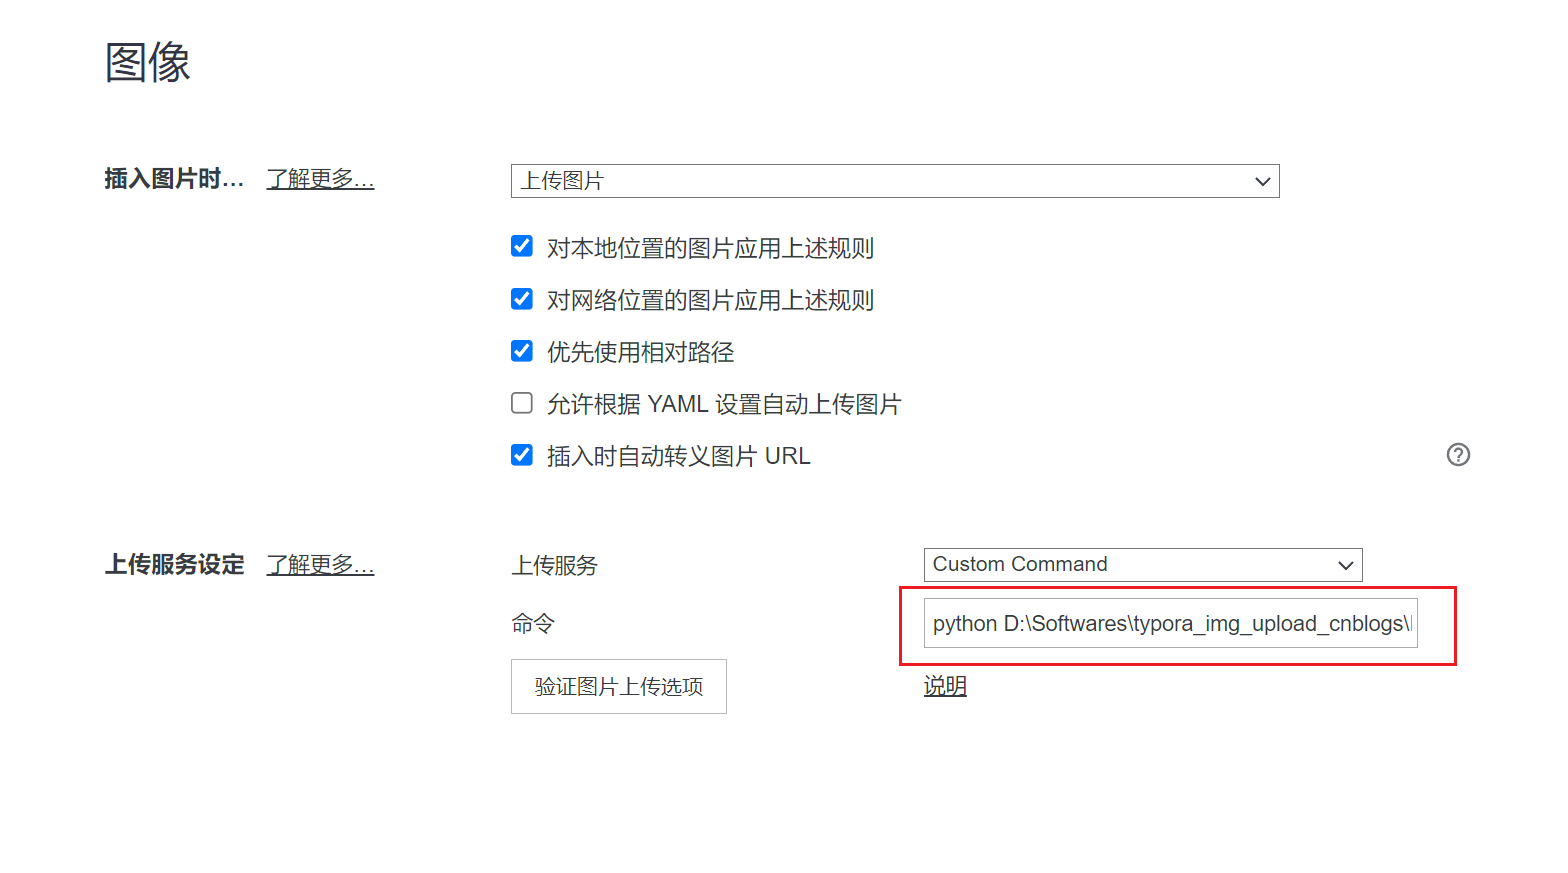
注意:红色框选部分需要根据你存放ImageUplod.py地址进行填写,比如我的是:
python D:\Softwares\typora_img_upload_cnblogs\ImageUplod.py
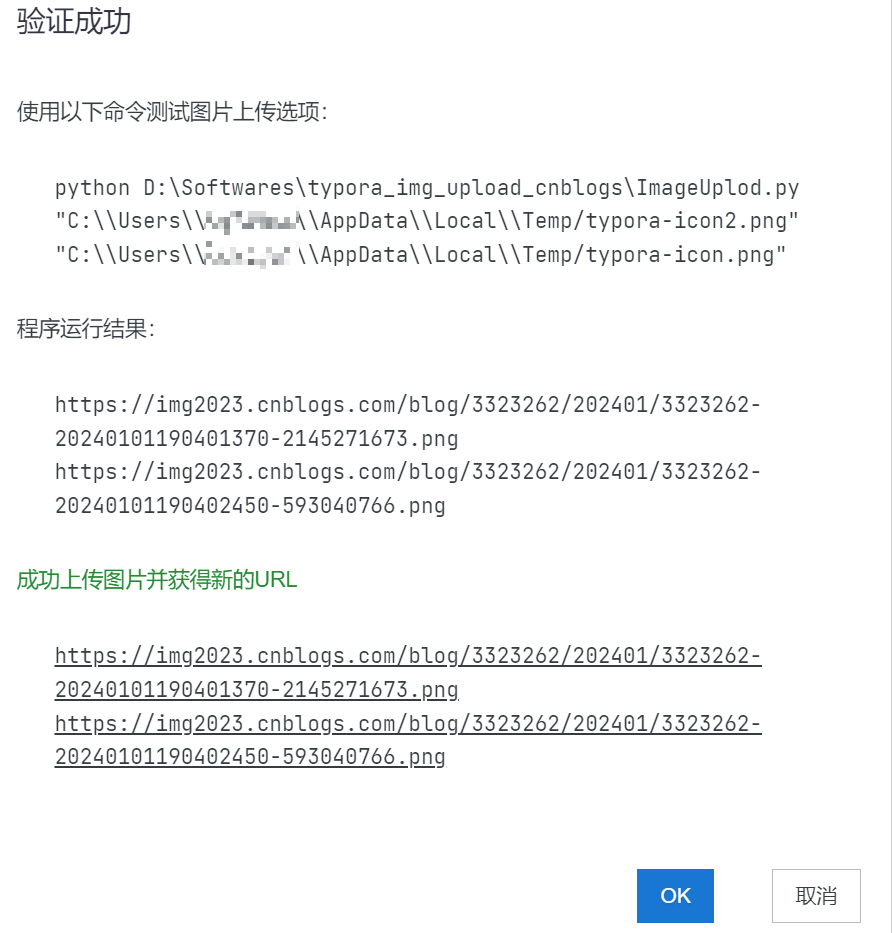
- 设置好后点击:验证图片上传选项,看到如下图所示即配置成功~?
三、后话
我觉得博客园毕竟不是专门用作图床的存储的平台,所以我认为最好在需要撰写博客发布到博客园时,可以这样使用。其他文档最好使用其他平台作为图床,毕竟没有免费的午餐?,rt
也希望各位大佬不吝赐教更好的方法~