这里给大家分享我在网上总结出来的一些知识,希望对大家有所帮助

DOM小练习
- 弹幕
- 电梯导航
- 倒计时
- 随机点名
- 购物放大镜
1.弹幕
效果预览

功能:输入弹幕内容,按下回车显示一条弹幕(弹幕颜色、字体随机生成)
思路:设置按钮抬起事件,在事件中判断如果按下的是回车键则将输入框中替换掉敏感词的数据追加到标签中,字体的颜色、大小、位置按照生成的随机数进行随机设置,并使其从屏幕右侧移动到屏幕左侧后,动画结束删除子标签
var input = document.querySelector(".bottomBar input");
var content = document.querySelector(".content");
//随机函数
function ram (min, max) {
  return Math.floor(Math.random() * (max - min + 1) + min);
}
input.onkeyup = function (e) {
  if (e.keyCode == 13) {
    var text = this.value.replace(/性感|暴力/gi, "**");
    var p = document.createElement("p");
    content.appendChild(p);
    p.innerHTML = text;
    p.style.color = `rgba(${ram(0, 255)},${ram(0, 255)},${ram(0, 255)})`;
    p.style.fontSize = ram(20, 40) + "px";
    p.style.top = ram(20, 200) + "px";
    p.className = "move";
  }
};
//弹幕动画结束,删除子标签
content.onwebkitanimationend = function (e) {
  e.target.remove();
};
2.电梯导航
效果预览
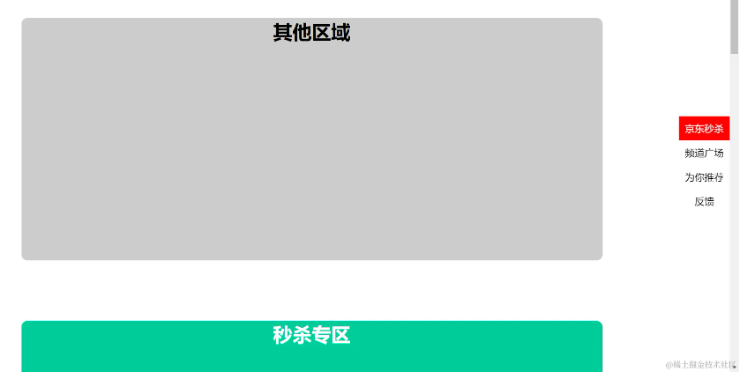
功能:点击侧边栏跳转到响应的区域
思路:
- 给侧边栏所有元素绑定点击事件,移除掉已有的样式,给点击的元素添加样式,将滚动条移动到盒子的距离位置上
- 监听滚动事件,滚动条发生变化,执行onscroll函数中的内容,在函数中先获取滚动条垂直位置,循环遍历判断该位置是否超过当前元素的文档顶部,超过则移除所有元素已有的样式,给当前元素加样式
// 侧边栏所有元素
var items = document.querySelectorAll(".item");
//秒杀专区、频道广场区、为你推荐好物、客服服务父元素
var content = document.querySelector(".content");
//秒杀专区、频道广场区、为你推荐好物、客服服务数组
var neirongs = document.querySelectorAll(".neirong");
items.forEach(function (item, index) {
item.onclick = function () {
  document.querySelector(".active").classList.remove("active");
  this.classList.add("active");
  //滚动条移动到盒子的距离位置上
  document.documentElement.scrollTop = neirongs[index].offsetTop;
};
});
onscroll = function () {
//滚动条的位置改变,导航的类名跟着改变
var scro = document.documentElement.scrollTop;
neirongs.forEach(function (item,index) {
  if (scro >= item.offsetTop) {
    document.querySelector(".active").classList.remove("active");
    items[index].classList.add("active");
  }
});
};
3.下班倒计时

功能:使用间歇函数完成倒计时
思路:获取到目标时间减去当前时间的时间戳,再将该时间戳转换为时分秒替换掉页面上的时间
<div class="countdown">
<p class="next">今天是2023年3月20日</p>
<p class="title">下班倒计时</p>
<p class="clock">
  <span id="hour">00</span>
  <i>:</i>
  <span id="minutes">00</span>
  <i>:</i>
  <span id="scond">00</span>
</p>
<p class="tips">下班时间17:00:00</p>
</div>
<script>
// 修改今天日期
var next = document.querySelector('.next');
var date = new Date();
// 目标时间
var timeTarget = '2023-05-12 17:00:00'
next.innerHTML = `今天是${date.getFullYear()}年${date.getMonth() + 1}月${date.getDate()}日`
//修改倒计时时分秒
var spans = document.querySelectorAll('span');
var countdown = document.querySelector('.countdown');
function times () {
  var times = (+new Date(timeTarget) - +Date.now()) / 1000
  spans[0].innerHTML = parseInt(times / 3600).toString().padStart(2, '0');
  spans[1].innerHTML = parseInt(times / 60 % 60).toString().padStart(2, '0');
  spans[2].innerHTML = parseInt(times % 60).toString().padStart(2, '0');
  countdown.style.backgroundColor = `rgba(${Math.floor(Math.random() * 256)},${Math.floor(Math.random() * 256)},${Math.floor(Math.random() * 256)})`

}
times();
setInterval(() => {
  times();
}, 1000);
4.班级点名
效果预览
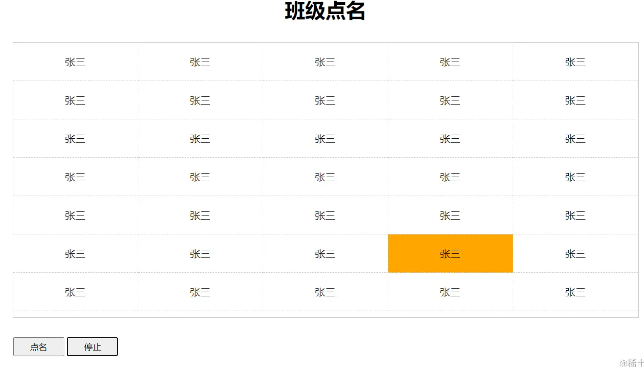
功能:
- 点击点名按钮,开始随机点名
- 点击停止按钮,停止点名
问题:多次点击会开启多个定时器,点击停止点名动作不会停止
解决:每次点击点名按钮,把上一个定时器关闭或者定时器未关闭则置灰点名按钮
思路:根据数组内容创建数组中所有的姓名标签,当点击点名按钮时,生成定时器,随机给不同的元素节点添加背景颜色,实现点名效果
var students = [数据];
//创建标签添加所有姓名
var stuNames = document.querySelector('.stuNames')
stuNames.innerHTML = students.map(function(item){
return `<div class = 'item'>${item.stuName}</div>`
}).join('');
//随机函数
var rand = function(min,max){
return Math.floor(Math.random()*(max-min+1)+min);
}
//点名按钮功能
var start = document.querySelector('.start');
var names = document.querySelectorAll('.item');
var stop;
start.onclick = function(){
// 方法一:关闭定时器
clearInterval(stop);
 stop = setInterval(() => {
  for(var i=0;i<names.length;i++){
    names[i].style.backgroundColor = '';
  }
  names[rand(0,names.length-1)].style.backgroundColor = 'orange';
 }, 100);
//  方法二:点击一次置灰点名按钮
// start.disabled = true;

}
// 结束功能
var end = document.querySelector('.end');

end.onclick = function() {
clearInterval(stop);
//方法二:点击停止,点名按钮放开
// start.disabled = false;
}
5.放大镜
效果预览:

思路:
- 当鼠标进入到左侧盒子时,盒子遮罩层显示,右侧放大图片盒子显示
- 当鼠标在左侧盒子移动时,遮罩层随着鼠标的移动跟随移动,并以鼠标为中心点,对遮罩层范围进行限制,不能移动出左侧盒子之外,
- 根据遮罩层的位置改变右侧大图片的展示效果。
//左侧可视盒子
var left = document.querySelector(".left");
//右侧可视盒子
var right = document.querySelector(".right");
//左侧遮罩盒子
var leftCover = document.querySelector(".leftCover");
//最外层的大盒子
var container = document.querySelector(".container");
//移入显示遮罩层和右侧盒子
container.onmouseenter = function () {
  leftCover.style.display = "block";
  right.style.display = "inline-block";
  //计算遮罩层的最大值
  var maxX = this.offsetWidth - leftCover.offsetWidth;
  var maxY = this.offsetHeight - leftCover.offsetHeight;
  container.onmousemove = function (e) {

    //跟随鼠标移动
    leftCover.style.left = e.pageX - this.offsetLeft - leftCover.offsetWidth / 2 + 'px';
    leftCover.style.top = e.pageY - this.offsetTop - leftCover.offsetHeight / 2 + 'px';
    //设置遮罩层不溢出
    var currentX = leftCover.offsetLeft;
    var currentY = leftCover.offsetTop;
    currentX = currentX <= 0 ? 0 : currentX;
    currentX = currentX >= maxX ? maxX : currentX;
    currentY = currentY <= 0 ? 0 : currentY;
    currentY = currentY >= maxY ? maxY : currentY;
    // console.log(currentX, currentY)
    leftCover.style.left = currentX + "px";
    leftCover.style.top = currentY + "px";
    //改变大图像
    var img = document.querySelector('.right img')
    img.style.left = -2 * leftCover.offsetLeft + 'px';
    img.style.top = -2 * leftCover.offsetTop + 'px';

  };

};
//移出隐藏遮罩盒子和右侧盒子
container.onmouseleave = function () {
  leftCover.style.display = "none";
  right.style.display = "none";
};
本文转载于:
https://juejin.cn/post/7311219067200258086
如果对您有所帮助,欢迎您点个关注,我会定时更新技术文档,大家一起讨论学习,一起进步。
