王有志,一个分享硬核Java技术的互金摸鱼侠
加入Java人的提桶跑路群:共同富裕的Java人
大家好,我是王有志。今天我会通过一个真实的项目改造案例和大家聊一聊如何优雅的实现 Java 中常用的的重试机制。
业务背景
在我们的系统中当客户完成支付后,保单管理系统会通过 MQ 推送出一条包含保单信息的消息,该消息被多个系统订阅。
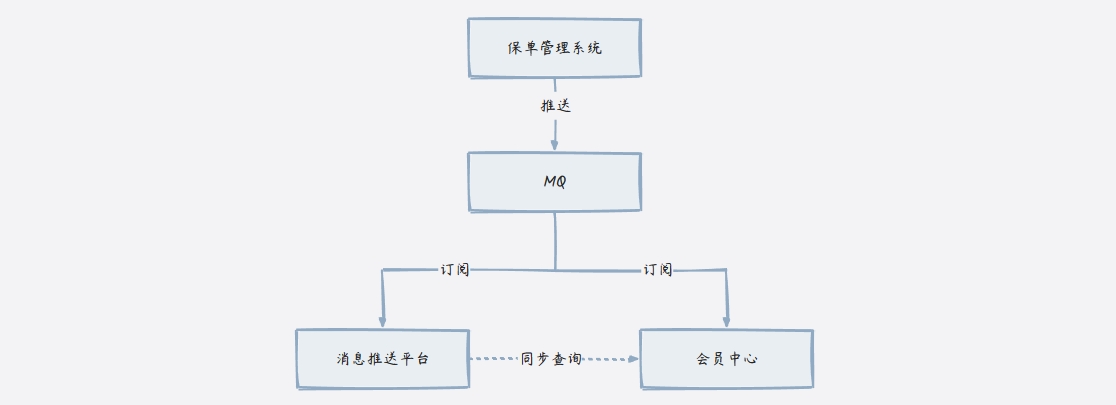
消息推送平台会根据保单信息发送各式各样的通知(短信,微信通知等),会员中心则根据保单信息,完成会员的积分累积和会员等级变更。在早期推送的通知中,并不包含会员的等级信息,现在为了彰显客户的身份,要求在通知中表明客户的等级。
理想的情况是,消息推送平台查询客户信息前,会员中心已经完成了客户等级的变更,但现实中可能因为各种原因,客户中心无法及时处理会员等级变更,导致消息推送平台无法查询到最新的会员等级。为了“避免”这种情况,我们在查询客户信息时引入了重试机制。
我们的业务要求中,通知中的客户的会员等级允许稍有偏差, 但通知一定要及时发出,因此我们的重试策略较为宽松,判断是否由该订单或之后的订单引起的会员信息变更,如果是则跳出重试,否则重试 3 次,每次间隔 1 秒,如果依旧没有获取到预期的结果,则使用当前结果发送通知。
技术选型
最容易想到的方案是通过 while 循环进行重试,对查询结果和重试次数加以限制,决定何时跳出重试,例如:
CustomerInfo customerInfo;
int count = 0;

while(count < 3) {
  customerInfo = CustomerCenter.queryCustomerInfo(customerid);
  if(判断条件) {
    break;
  }
  count ++;
  if(count < 3) {
    TimeUnit.SECONDS.sleep(1);
  }
}
虽然这么写已经能够满足业务需求,但重试条件,重试次数,休眠时间与重试机制耦合在一起,任意点的变动都相当于修改整个重试机制,这样显得不够优雅,甚至非常粗糙,因此我们想到了市面上两个较为流行的重试框架:Spring Retry 和 Guava Retry。
Spring Retry
Spring Retry 支持通过注解和代码实现重试机制,但问题是 Spring Retry 只支持在抛出异常时进行重试,例如我们通过代码构建一个 ReteyTemplate:
RetryTemplate retryTemplate = RetryTemplate.builder().retryOn(Exception.class).build();
重试条件通过RetryTemplateBuilder#retryOn来设置,我们来看该方法的声明:
public class RetryTemplateBuilder {
  public RetryTemplateBuilder retryOn(Class<? extends Throwable> throwable) {
    // 省略
  }

  public RetryTemplateBuilder retryOn(List<Class<? extends Throwable>> throwables) {
    // 省略
  }
}
可以看到RetryTemplateBuilder#retryOn方法的入参仅支持 Throwable 及其子类,因此 Spring Retry 并不能满足我们的业务需求被否决。
Guava Retry
再来看 Guava Retry,它提供了比较灵活的重试条件,允许在抛出异常时,或在结果不符合预期时进行重试。
public class RetryerBuilder<V> {
  public RetryerBuilder<V> retryIfException() {
    // 省略
  }

  public RetryerBuilder<V> retryIfRuntimeException() {
    // 省略
  }

  public RetryerBuilder<V> retryIfExceptionOfType(@Nonnull Class<? extends Throwable> exceptionClass) {
    // 省略
  }

  public RetryerBuilder<V> retryIfException(@Nonnull Predicate<Throwable> exceptionPredicate) {
    // 省略
  }

  public RetryerBuilder<V> retryIfResult(@Nonnull Predicate<V> resultPredicate) {
    // 省略
  }
}
结合实际的业务需求,Guava Retry 能够满足我们的业务需求。
使用 Guava Retry
首先是引入 Guava Retry 的依赖:
<dependency>
  <groupId>com.github.rholder</groupId>
  <artifactId>guava-retrying</artifactId>
  <version>2.0.0</version>
</dependency>
引入依赖后,我们就可以构建并使用重试器 Retryer 了,接下来我们来看构建 Retryer 的两种方式:通过构造器创建和通过建造者创建。
Tips:以下涉及到源码的部分,均会省略参数检查的部分。
Retryer 的构造器
先来看 Retryer 的构造器:
public final class Retryer<V> {
  public Retryer(@Nonnull StopStrategy stopStrategy,
                 @Nonnull WaitStrategy waitStrategy,
                 @Nonnull Predicate<Attempt<V>> rejectionPredicate) {
    this(AttemptTimeLimiters.<V>noTimeLimit(), stopStrategy, waitStrategy, BlockStrategies.threadSleepStrategy(), rejectionPredicate);
  }

  public Retryer(@Nonnull AttemptTimeLimiter<V> attemptTimeLimiter,
                 @Nonnull StopStrategy stopStrategy,
                 @Nonnull WaitStrategy waitStrategy,
                 @Nonnull Predicate<Attempt<V>> rejectionPredicate) {
    this(attemptTimeLimiter, stopStrategy, waitStrategy, BlockStrategies.threadSleepStrategy(), rejectionPredicate);
  }

  public Retryer(@Nonnull AttemptTimeLimiter<V> attemptTimeLimiter,
                 @Nonnull StopStrategy stopStrategy,
                 @Nonnull WaitStrategy waitStrategy,
                 @Nonnull BlockStrategy blockStrategy,
                 @Nonnull Predicate<Attempt<V>> rejectionPredicate) {
    this(attemptTimeLimiter, stopStrategy, waitStrategy, blockStrategy, rejectionPredicate, new ArrayList<RetryListener>());
  }

  @Beta
  public Retryer(@Nonnull AttemptTimeLimiter<V> attemptTimeLimiter,
                 @Nonnull StopStrategy stopStrategy,
                 @Nonnull WaitStrategy waitStrategy,
                 @Nonnull BlockStrategy blockStrategy,
                 @Nonnull Predicate<Attempt<V>> rejectionPredicate,
                 @Nonnull Collection<RetryListener> listeners) {
    this.attemptTimeLimiter = attemptTimeLimiter;
    this.stopStrategy = stopStrategy;
    this.waitStrategy = waitStrategy;
    this.blockStrategy = blockStrategy;
    this.rejectionPredicate = rejectionPredicate;
    this.listeners = listeners;
  }
}
Retryer 提供了 4 个构造器,前 3 个构造器都会回归到包含 6 个参数的构造器中,分别解释下这 6 个参数的作用:
- AttemptTimeLimiter<V>,允许设置请求的超时时间,当超过该时间后,Retryer 会被中断;
- StopStrategy,重试次数策略,用于设置最大的重试次数,当达到最大的重试次数时 Retryer 中断;
- WaitStrategy,休眠时间策略,计算每次请求后的休眠时间;
- BlockStrategy,阻塞策略,同样作用于请求后的,决定 Retry 以何种方式阻塞(需借助 WaitStrategy 计算的时间);
- Predicate<Attempt<V>>,条件谓词,决定是否需要进行重试;
- Collection<RetryListener>,监听器,允许在请求后进行回调。
以上 6 个参数均为接口,除了 RetryListener 外,Guava Retry 都提供了默认的实现,同时我们也可以根据业务需求自行实现定制化的策略。
Retryer 的建造者
除了使用构造器创建 Retryer 对象外,Guava Retry 还提供了建造者模式 RetryerBuilder:
public class RetryerBuilder<V> {

  public static <V> RetryerBuilder<V> newBuilder() {
    return new RetryerBuilder<V>();
  }

  // 省略设置策略的部分

  public Retryer<V> build() {
    AttemptTimeLimiter<V> theAttemptTimeLimiter = attemptTimeLimiter == null ? AttemptTimeLimiters.<V>noTimeLimit() : attemptTimeLimiter;
    StopStrategy theStopStrategy = stopStrategy == null ? StopStrategies.neverStop() : stopStrategy;
    WaitStrategy theWaitStrategy = waitStrategy == null ? WaitStrategies.noWait() : waitStrategy;
    BlockStrategy theBlockStrategy = blockStrategy == null ? BlockStrategies.threadSleepStrategy() : blockStrategy;

    return new Retryer<V>(theAttemptTimeLimiter, theStopStrategy, theWaitStrategy, theBlockStrategy, rejectionPredicate, listeners);
  }
}
RetryerBuilder#build方法最终也是调用了 Retryer 的构造器,我们举个通过建造者创建 Retryer 的例子:
Retryer<Long> retryer = RetryerBuilder.<Long>newBuilder()
.retryIfException() // 抛出异常时重试
.withStopStrategy(StopStrategies.stopAfterAttempt(3)) // 最大重试次数 3 次
.withWaitStrategy(WaitStrategies.fixedWait(1, TimeUnit.SECONDS)) // 每次重试间隔 1 秒
.build();
在这里我使用了不同策略对应的工具类来获取 Guava 中提供的默认策略。
当我们通过构造器或者建造者创建了重试器 Retryer 后,就可以直接使用Retryer#call进行包含重试机制的调用了,如:
Long time = retryer.call(new Callable<Long>() {
	@Override
	public Long call() throws Exception {
		return System.currentTimeMillis();
	}
});
接下来我们就通过源码来分析 Retryer 的重试机制和 Guava Retry 提供的策略。
源码分析
Retryer 重试器
Retryer 是 Guava Retry 的核心类,提供了重试机制,除了构造方法外 Retryer 只提供了两个方法:Retryer#call和Retryer#warp。
其中Retryer#warp提供了对 Retryer 和 Callable 的包装,源码非常简单,不再过多赘述,重点来看Retryer#call方法:
public V call(Callable<V> callable) throws ExecutionException, RetryException {
  long startTime = System.nanoTime();
  // 创建计数器
  for (int attemptNumber = 1; ; attemptNumber++) {
    Attempt<V> attempt;
    try {
      // 调用 Callable 接口
      V result = attemptTimeLimiter.call(callable);
      // 封装结果未 ResultAttempt 对象
      attempt = new ResultAttempt<V>(result, attemptNumber, TimeUnit.NANOSECONDS.toMillis(System.nanoTime() - startTime));
    } catch (Throwable t) {
      // 封装异常为 ExceptionAttempt 对象
      attempt = new ExceptionAttempt<V>(t, attemptNumber, TimeUnit.NANOSECONDS.toMillis(System.nanoTime() - startTime));
    }

    // 调用监听器
    for (RetryListener listener : listeners) {
      listener.onRetry(attempt);
    }

    // 判断是否满足重试条件
    if (!rejectionPredicate.apply(attempt)) {
      return attempt.get();
    }

    // 判断是否达到最大重试次数
    if (stopStrategy.shouldStop(attempt)) {
      throw new RetryException(attemptNumber, attempt);
    } else {
      // 计算休眠时间
      long sleepTime = waitStrategy.computeSleepTime(attempt);
      try {
        // 调用阻塞策略
        blockStrategy.block(sleepTime);
      } catch (InterruptedException e) {
        Thread.currentThread().interrupt();
        throw new RetryException(attemptNumber, attempt);
      }
    }
  }
}
Retryer#call的源码并不复杂,与我们最开始想到的通过 while 循环进行重试的原理是一样的,只不过 Guava Retry 使用了各种策略接口来代替我们耦合到代码中的重试次数,重试条件,休眠时间等,并且对结果和异常进行了封装。
Guava Retry 中使用接口将各种策略与重试机制解耦,当需要修改其中任意策略或替换策略时,只需要修改对应策略的实现,或者新增策略并替换即可,而不需要去改动重试机制的代码,这是它使用起来非常优雅的关键。
接下来,我们按照Retryer#call方法中各种策略调用的顺序,来逐个分析每个策略接口所提供的功能。
Tips:以下涉及到Retryer#call方法的行数,均为该章节展现源码的行数。
AttemptTimeLimiter 接口
首先来看Retryer#call方法中的第 8 行:
V result = attemptTimeLimiter.call(callable);
这行代码中使用了 AttemptTimeLimiter 接口,该接口只提供了一个方法:
public interface AttemptTimeLimiter<V> {
  V call(Callable<V> callable) throws Exception;
}
该方法用于调用 Callable 接口的实现,Guava Retry 中提供了两个 AttemptTimeLimiter 的实现:NoAttemptTimeLimit 和 FixedAttemptTimeLimit。它们均为工具类 AttemptTimeLimiters 的内部类:
public class AttemptTimeLimiters {
  @Immutable
  private static final class NoAttemptTimeLimit<V> implements AttemptTimeLimiter<V> {
    @Override
    public V call(Callable<V> callable) throws Exception {
      return callable.call();
    }
  }

  @Immutable
  private static final class FixedAttemptTimeLimit<V> implements AttemptTimeLimiter<V> {

    private final TimeLimiter timeLimiter;
    private final long duration;
    private final TimeUnit timeUnit;

    // 省略构造方法

    @Override
    public V call(Callable<V> callable) throws Exception {
      return timeLimiter.callWithTimeout(callable, duration, timeUnit, true);
    }
  }
}
从源码中可以很清晰的看到NoAttemptTimeLimit#call不限制调用的超时时间,而FixedAttemptTimeLimit#call添加了超时时间。其中带有超时的调用时通过 Guava 中的 TimeLimiter 实现的。
因为 NoAttemptTimeLimit 和 FixedAttemptTimeLimit 是工具类 AttemptTimeLimiters 的私有内部类,所以我们无法直接在外部类中使用,但是可以通过工具类 AttemptTimeLimiters 来获取 NoAttemptTimeLimit 和 FixedAttemptTimeLimit,源码如下:
public class AttemptTimeLimiters {
  public static <V> AttemptTimeLimiter<V> noTimeLimit() {
    return new NoAttemptTimeLimit<V>();
  }

  public static <V> AttemptTimeLimiter<V> fixedTimeLimit(long duration, @Nonnull TimeUnit timeUnit) {
    return new FixedAttemptTimeLimit<V>(duration, timeUnit);
  }

  public static <V> AttemptTimeLimiter<V> fixedTimeLimit(long duration, @Nonnull TimeUnit timeUnit, @Nonnull ExecutorService executorService) {
    return new FixedAttemptTimeLimit<V>(duration, timeUnit, executorService);
  }
}
Attempt 接口
接着来看Retryer#call方法中第 5 行中声明的 Attempt,该接口声明如下:
public interface Attempt<V> {

  public V get() throws ExecutionException;

  public boolean hasResult();

  public boolean hasException();

  public V getResult() throws IllegalStateException;

  public Throwable getExceptionCause() throws IllegalStateException;

  public long getAttemptNumber();

  public long getDelaySinceFirstAttempt();
}
Attempt 接口提供了对重试机制结果(正确调用的结果或发生的异常)的封装,接口中提供了 7 个方法,相信大家通过方法名就可以得知每个方法的作用(下面也会通过实现类解释每个方法的作用)。
我们看 Attempt 接口的两个实现类 ResultAttempt 和 ExceptionAttempt,这两个类是 Retryer 的静态内部类,先来看Retryer#call方法中是如何使用 ResultAttempt 的:
attempt = new ResultAttempt<V>(result, attemptNumber, TimeUnit.NANOSECONDS.toMillis(System.nanoTime() - startTime));
创建 ResultAttempt 对象时,传入了 3 个参数,分别是 Callacle 的调用结果,重试次数和自首次调用后的耗时。下面来看 ResultAttempt 的源码:
@Immutable
static final class ResultAttempt<R> implements Attempt<R> {
  private final R result;
  private final long attemptNumber;
  private final long delaySinceFirstAttempt;

  // 省略构造方法

  // 获取调用结果
  @Override
  public R get() throws ExecutionException {
    return result;
  }

  // 是否包含结果,ResultAttempt 的实现中只返回 true
  @Override
  public boolean hasResult() {
    return true;
  }

  // 是否包含异常,ResultAttempt 的实现中只返回 false
  @Override
  public boolean hasException() {
    return false;
  }

  // 获取调用结果
  @Override
  public R getResult() throws IllegalStateException {
    return result;
  }

  // 获取异常原因,因为 ResultAttempt 是成功调用,因此无异常
  @Override
  public Throwable getExceptionCause() throws IllegalStateException {
    throw new IllegalStateException("The attempt resulted in a result, not in an exception");
  }

  // 获取重试次数
  @Override
  public long getAttemptNumber() {
    return attemptNumber;
  }

  // 获取自首次调用后的耗时
  @Override
  public long getDelaySinceFirstAttempt() {
    return delaySinceFirstAttempt;
  }
}
实现上非常的简单,这里我们就不过多赘述了。再来看Retryer#call方法中是如何使用 ExceptionAttempt 的:
try {
  // 此处是使用 ResultAttempt的逻辑
} catch (Throwable t) {
  attempt = new ExceptionAttempt<V>(t, attemptNumber, TimeUnit.NANOSECONDS.toMillis(System.nanoTime() - startTime));
}
同样是 3 个参数,只是将 ResultAttempt 中的结果替换为了异常信息。
至于 ExceptionAttempt 的源码实现,因为同样是实现 Attempt 接口,因此我们很容易就能想到 ExceptionAttempt 只是与 ResultAttempt“反过来了”。
RetryListener 接口
Retryer#call方法中第 17~19 行中调用了 RetryListener:
for (RetryListener listener : listeners) {
  listener.onRetry(attempt);
}
RetryListener 接口只提供了一个方法:
@Beta
public interface RetryListener {
  <V> void onRetry(Attempt<V> attempt);
}
RetryListener 是作为重试过程中的监听器出现的,为扩展处理提供了回调机制。Guava Retry 并没有提供默认实现,另外,RetryListener 被标记为 Beta,在 Guava 的解释中,使用注解 Beta 标识的,未来可能会做出较大改动或者被移除。
Predicate 接口
Retryer#call方法中的第 22 ~ 24 行调用了 Predicate:
if (!rejectionPredicate.apply(attempt)) {
  return attempt.get();
}
Predicate 是 Guava 中的谓词接口,我们来看 Predicate 接口中提供的方法:
public interface Predicate<T extends @Nullable Object> extends java.util.function.Predicate<T> {

  // Guava Retry 中定义的方法
  boolean apply(@ParametricNullness T input);

  // 继承自 Java 中的 Object 类
  @Override
  boolean equals(@CheckForNull Object object);
}
除了以上两个方法外,Guava 的 Predicate 接口还继承了 Java 的 Predicate 接口,不过这些并不是我们今天的重点。
Predicate 接口在 Guava Retry 中有 3 个实现类,ResultPredicate,ExceptionClassPredicate 和 ExceptionPredicate,它们均是作为 RetryerBuilder 的内部类出现的:
private static final class ResultPredicate<V> implements Predicate<Attempt<V>> {

  private Predicate<V> delegate;

  public ResultPredicate(Predicate<V> delegate) {
    this.delegate = delegate;
  }

  @Override
  public boolean apply(Attempt<V> attempt) {
    // 判断 Attempt 中是否包含结果
    if (!attempt.hasResult()) {
      return false;
    }
    // 获取结果并调用条件谓词的 apply 方法
    V result = attempt.getResult();
    return delegate.apply(result);
  }
}

private static final class ExceptionClassPredicate<V> implements Predicate<Attempt<V>> {

  private Class<? extends Throwable> exceptionClass;

  public ExceptionClassPredicate(Class<? extends Throwable> exceptionClass) {
    this.exceptionClass = exceptionClass;
  }

  @Override
  public boolean apply(Attempt<V> attempt) {
    if (!attempt.hasException()) {
      return false;
    }
    return exceptionClass.isAssignableFrom(attempt.getExceptionCause().getClass());
  }
}

private static final class ExceptionPredicate<V> implements Predicate<Attempt<V>> {

  private Predicate<Throwable> delegate;

  public ExceptionPredicate(Predicate<Throwable> delegate) {
    this.delegate = delegate;
  }

  @Override
  public boolean apply(Attempt<V> attempt) {
    if (!attempt.hasException()) {
      return false;
    }
    return delegate.apply(attempt.getExceptionCause());
  }
}
我们通过一段代码来重点解释下 ResultPredicate 的工作原理。首先通过建造者模式创建 Retryer 对象:
Retryer<Integer> retryer = RetryerBuilder.<Integer>newBuilder()
.retryIfResult(new Predicate<Integer>() {
  @Override
  public boolean apply(Integer result) {
    return result > 0;
  }
}).withStopStrategy(StopStrategies.stopAfterAttempt(3))
.build();
接着来看RetryerBuilder#retryIfResult方法的源码:
public class RetryerBuilder<V> {
  public RetryerBuilder<V> retryIfResult(@Nonnull Predicate<V> resultPredicate) {
    rejectionPredicate = Predicates.or(rejectionPredicate, new ResultPredicate<V>(resultPredicate));
    return this;
  }
}
可以看到RetryerBuilder#retryIfResult中使用Predicates#or去构建条件谓词,第一个参数是 RetryerBuilder 的成员变量 rejectionPredicate,通过前面的 RetryerBuilder 的源码,我们可以知道 RetryerBuilder 的 rejectionPredicate 最终会成为 Retryer 的成员变量,第二个参数是通过我们传入的 Predicate 对象构建的 ResultPredicate 对象。
Predicates#or方法的作用是将传入的参数合并为新的 Predicate 对象:
public static <T extends @Nullable Object> Predicate<T> or(Predicate<? super T> first, Predicate<? super T> second) {
  return new OrPredicate<>(Predicates.<T>asList(checkNotNull(first), checkNotNull(second)));
}
注意合并后的 Predicate 对象是其实现类 OrPredicate,该类中的成员变量private final List<? extends Predicate<? super T>> components,包含了所有的通过 RetryerBuilder 添加的条件谓词。
OrPredicate#apply方法是通过循环调用不同的 Predicate 对象的:
private static class OrPredicate<T extends @Nullable Object> implements Predicate<T>, Serializable {

  private final List<? extends Predicate<? super T>> components;

  @Override
  public boolean apply(@ParametricNullness T t) {
    for (int i = 0; i < components.size(); i++) {
      if (components.get(i).apply(t)) {
        return true;
      }
    }
    return false;
  }
}
OrPredicate#apply方法会循环遍历条件谓词并调用Predicate#apply方法,这就回到了ResultPredicate#apply方法中了。
我们注意到在RetryerBuilder#retryIfResult构建 ResultPredicate 对象时,我们传入的内部类 Predicate 对象会作为 ResultPredicate 的成员变量 delegate,而最终判断结果是否满足条件的也正是通过成员变量 delegate 实现的:
private static final class ResultPredicate<V> implements Predicate<Attempt<V>> {
  @Override
  public boolean apply(Attempt<V> attempt) {
    if (!attempt.hasResult()) {
      return false;
    }
    V result = attempt.getResult();
    return delegate.apply(result);
  }
}
至此,我们已经知晓了 ResultPredicate 在Retryer#call方法中的工作原理,至于 ExceptionClassPredicate 和 ExceptionPredicate,由于原理和 ResultPredicate 相似,我就不做解释了。
StopStrategy 接口
Retryer#call方法中第 27 行中调用了 StopStrategy:
if (stopStrategy.shouldStop(attempt)) {
  throw new RetryException(attemptNumber, attempt);
} else {
  // 省略休眠策略
}
StopStrategy 接口只提供了一个方法,用于判断是否需要重试,接口声明如下:
public interface StopStrategy {
  boolean shouldStop(Attempt failedAttempt);
}
Guava Retry 中提供了 3 个实现类:NeverStopStrategy,StopAfterAttemptStrategy 和 StopAfterDelayStrategy。这 3 个实现类均为工具类 StopStrategys 的内部类:
public final class StopStrategies {
  @Immutable
  private static final class NeverStopStrategy implements StopStrategy {
    @Override
    public boolean shouldStop(Attempt failedAttempt) {
      return false;
    }
  }

  @Immutable
  private static final class StopAfterAttemptStrategy implements StopStrategy {
    private final int maxAttemptNumber;

    // 省略构造方法

    @Override
    public boolean shouldStop(Attempt failedAttempt) {
      return failedAttempt.getAttemptNumber() >= maxAttemptNumber;
    }
  }

  @Immutable
  private static final class StopAfterDelayStrategy implements StopStrategy {
    private final long maxDelay;

    // 省略构造方法

    @Override
    public boolean shouldStop(Attempt failedAttempt) {
      return failedAttempt.getDelaySinceFirstAttempt() >= maxDelay;
    }
  }
}
来解释下这 3 个策略的功能:
- NeverStopStrategy,永远不会停止重试,除非满足条件谓词的情况出现
- StopAfterAttemptStrategy,在指定次数后停止重试;
- StopAfterDelayStrategy,在指定时间后停止重试。
通常我们会选择 StopAfterAttemptStrategy,在有时间要求的场景下也可以选择 StopAfterDelayStrategy。
需要注意的是,在Retryer#call的方法中,如果是因为触发 StopStrategy 而导致的停止重试,则会抛出异常 RetryException,该异常中封装了异常信息和最后一次请求的结果。这就要求在使用 Retryer 时,需要做好异常处理。
WaitStrategy 接口和 BlockStrategy 接口
这两个接口分别在Retryer#call方法的第 31 行和 34 行调用:
if (stopStrategy.shouldStop(attempt)) {
  throw new RetryException(attemptNumber, attempt);
} else {
  // 调用计算休眠时间策略
  long sleepTime = waitStrategy.computeSleepTime(attempt);
  try {
    // 调用阻塞策略
    blockStrategy.block(sleepTime);
  } catch (InterruptedException e) {
    Thread.currentThread().interrupt();
    throw new RetryException(attemptNumber, attempt);
  }
}
WaitStrategy 接口提供了计算休眠时间的策略,而 BlockStrategy 接口提供了重试阻塞策略,接口声明如下:
public interface WaitStrategy {
  long computeSleepTime(Attempt failedAttempt);
}

public interface BlockStrategy {
  void block(long sleepTime) throws InterruptedException;
}
两者的功能是相辅相成的,WaitStrategy#computeSleepTime计算每次要休眠的时间,而BlockStrategy#block负责执行阻塞策略。
我们先来看 Guava Retry 中提供的 BlockStrategy 的实现 ThreadSleepStrategy,该实现作为工具类 BlockStrategys 的内部类出现,实现非常简单:
public final class BlockStrategies {
  @Immutable
  private static class ThreadSleepStrategy implements BlockStrategy {

    @Override
    public void block(long sleepTime) throws InterruptedException {
      // 休眠指定时间
      Thread.sleep(sleepTime);
    }
  }
}
接着来看 WaitStrategy 的实现类,Guava Retry 中提供了 7 种 WaitStrategy 接口的实现:
- FixedWaitStrategy,固定休眠时间策略;
- RandomWaitStrategy,随机休眠时间策略;
- IncrementingWaitStrategy,按步长增长的休眠时间策略;
- ExponentialWaitStrategy,指数增长的休眠时间策略;
- FibonacciWaitStrategy,通过斐波那契数列计算休眠时间的策略;
- CompositeWaitStrategy,混合的休眠时间策略;
- ExceptionWaitStrategy,发生异常时的休眠时间。
以上 7 种策略均为工具类 WaitStrategys 的内部类,可以直接通过 WaitStrategys 来使用:
public final class WaitStrategies {

	// 使用固定休眠时间策略
	public static WaitStrategy fixedWait(long sleepTime, @Nonnull TimeUnit timeUnit) throws IllegalStateException {
		return new FixedWaitStrategy(timeUnit.toMillis(sleepTime));
	}

	// 使用随机休眠时间策略
	public static WaitStrategy randomWait(long maximumTime, @Nonnull TimeUnit timeUnit) {
		return new RandomWaitStrategy(0L, timeUnit.toMillis(maximumTime));
	}

	public static WaitStrategy randomWait(long maximumTime, @Nonnull TimeUnit timeUnit) {
		return new RandomWaitStrategy(0L, timeUnit.toMillis(maximumTime));
	}

	// 使用按步长增长的休眠时间策略
	public static WaitStrategy incrementingWait(long initialSleepTime,  @Nonnull TimeUnit initialSleepTimeUnit, long increment, @Nonnull TimeUnit incrementTimeUnit) {
		return new IncrementingWaitStrategy(initialSleepTimeUnit.toMillis(initialSleepTime), incrementTimeUnit.toMillis(increment));
	}

	// 使用指数增长的休眠时间策略
	public static WaitStrategy exponentialWait() {
		return new ExponentialWaitStrategy(1, Long.MAX_VALUE);
	}

	public static WaitStrategy exponentialWait(long maximumTime, @Nonnull TimeUnit maximumTimeUnit) {
		return new ExponentialWaitStrategy(1, maximumTimeUnit.toMillis(maximumTime));
	}

	public static WaitStrategy exponentialWait(long multiplier, long maximumTime, @Nonnull TimeUnit maximumTimeUnit) {
		return new ExponentialWaitStrategy(multiplier, maximumTimeUnit.toMillis(maximumTime));
	}

	// 使用通过斐波那契数列计算休眠时间的策略
	public static WaitStrategy fibonacciWait() {
		return new FibonacciWaitStrategy(1, Long.MAX_VALUE);
	}

	public static WaitStrategy fibonacciWait(long maximumTime, @Nonnull TimeUnit maximumTimeUnit) {
		return new FibonacciWaitStrategy(1, maximumTimeUnit.toMillis(maximumTime));
	}

	public static WaitStrategy fibonacciWait(long multiplier, long maximumTime, @Nonnull TimeUnit maximumTimeUnit) {
		return new FibonacciWaitStrategy(multiplier, maximumTimeUnit.toMillis(maximumTime));
	}

	// 使用混合的休眠时间策略
	public static WaitStrategy join(WaitStrategy... waitStrategies) {
		List<WaitStrategy> waitStrategyList = Lists.newArrayList(waitStrategies);
		return new CompositeWaitStrategy(waitStrategyList);
	}

	// 使用发生异常时的休眠时间
	public static <T extends Throwable> WaitStrategy exceptionWait(@Nonnull Class<T> exceptionClass, @Nonnull Function<T, Long> function) {
		return new ExceptionWaitStrategy<T>(exceptionClass, function);
	}
}
最后我们来逐个分析每种策略的实现方式。
FixedWaitStrategy
最常用的策略,每次重试后休眠固定的时间,源码如下:
@Immutable
private static final class FixedWaitStrategy implements WaitStrategy {
  private final long sleepTime;

  public FixedWaitStrategy(long sleepTime) {
    this.sleepTime = sleepTime;
  }

  @Override
  public long computeSleepTime(Attempt failedAttempt) {
    return sleepTime;
  }
}
RandomWaitStrategy
每次在最小休眠时间和最大休眠时间之间随机出一个休眠时间,源码如下:
@Immutable
private static final class RandomWaitStrategy implements WaitStrategy {
  private static final Random RANDOM = new Random();
  private final long minimum;
  private final long maximum;

  public RandomWaitStrategy(long minimum, long maximum) {
    this.minimum = minimum;
    this.maximum = maximum;
  }

  @Override
  public long computeSleepTime(Attempt failedAttempt) {
    long t = Math.abs(RANDOM.nextLong()) % (maximum - minimum);
    return t + minimum;
  }
}
计算方法并不复杂,计算出最小时间到最大时间中的一个随机数,再加上最小时间即可。
IncrementingWaitStrategy
随着每次重试,休眠时间都会固定增长的策略:
@Immutable
private static final class IncrementingWaitStrategy implements WaitStrategy {
  private final long initialSleepTime;
  private final long increment;

  public IncrementingWaitStrategy(long initialSleepTime, long increment) {
    this.initialSleepTime = initialSleepTime;
    this.increment = increment;
  }

  @Override
  public long computeSleepTime(Attempt failedAttempt) {
    long result = initialSleepTime + (increment * (failedAttempt.getAttemptNumber() - 1));
    return result >= 0L ? result : 0L;
  }
}
参数为初始的休眠时间和每次增长的步长,通过 Retryer 中的重试次数计算每次增长的时间。
ExponentialWaitStrategy
按照重试次数指数增长休眠时间的策略:
@Immutable
private static final class ExponentialWaitStrategy implements WaitStrategy {
  private final long multiplier;
  private final long maximumWait;

  public ExponentialWaitStrategy(long multiplier, long maximumWait) {
    this.multiplier = multiplier;
    this.maximumWait = maximumWait;
  }

  @Override
  public long computeSleepTime(Attempt failedAttempt) {
    double exp = Math.pow(2, failedAttempt.getAttemptNumber());
    long result = Math.round(multiplier * exp);
    if (result > maximumWait) {
      result = maximumWait;
    }
    return result >= 0L ? result : 0L;
  }
}
传入参数为最大休眠时间和系数,以 2 位底,以重试次数为指数计算出休眠时间的基数,并乘以传入的系数,得出真正的休眠时间,当计算结果超过最大休眠时间时,使用最大休眠时间。
FibonacciWaitStrategy
按照重试次数获取对应斐波那契数作为休眠时间的策略:
@Immutable
private static final class FibonacciWaitStrategy implements WaitStrategy {
	private final long multiplier;
	private final long maximumWait;

	public FibonacciWaitStrategy(long multiplier, long maximumWait) {
		this.multiplier = multiplier;
		this.maximumWait = maximumWait;
	}

	@Override
	public long computeSleepTime(Attempt failedAttempt) {
		long fib = fib(failedAttempt.getAttemptNumber());
		long result = multiplier * fib;

		if (result > maximumWait || result < 0L) {
			result = maximumWait;
		}

		return result >= 0L ? result : 0L;
	}

	private long fib(long n) {
		if (n == 0L) return 0L;
		if (n == 1L) return 1L;

		long prevPrev = 0L;
		long prev = 1L;
		long result = 0L;

		for (long i = 2L; i <= n; i++) {
			result = prev + prevPrev;
			prevPrev = prev;
			prev = result;
		}

		return result;
	}
}
与 ExponentialWaitStrategy 的策略非常相似,传入参数为最大休眠时间和系数,获取重试次数对应的斐波那契数为休眠时间的基数,并乘以传入的系数,得出真正的休眠时间,当计算结果超过最大休眠时间时,使用最大休眠时间。
CompositeWaitStrategy
融合多种计算休眠时间策略的策略:
@Immutable
private static final class CompositeWaitStrategy implements WaitStrategy {
	private final List<WaitStrategy> waitStrategies;

	public CompositeWaitStrategy(List<WaitStrategy> waitStrategies) {
		this.waitStrategies = waitStrategies;
	}

	@Override
	public long computeSleepTime(Attempt failedAttempt) {
		long waitTime = 0L;
		for (WaitStrategy waitStrategy : waitStrategies) {
			waitTime += waitStrategy.computeSleepTime(failedAttempt);
		}
		return waitTime;
	}
}
计算出每种休眠时间策略的休眠时间,并相加得到最终的休眠时间。
ExceptionWaitStrategy
这种策略用于发生异常时计算休眠时间:
@Immutable
private static final class ExceptionWaitStrategy<T extends Throwable> implements WaitStrategy {
	private final Class<T> exceptionClass;
	private final Function<T, Long> function;

	public ExceptionWaitStrategy(@Nonnull Class<T> exceptionClass, @Nonnull Function<T, Long> function) {
		this.exceptionClass = exceptionClass;
		this.function = function;
	}

	@SuppressWarnings({"ThrowableResultOfMethodCallIgnored", "ConstantConditions", "unchecked"})
	@Override
	public long computeSleepTime(Attempt lastAttempt) {
		if (lastAttempt.hasException()) {
			Throwable cause = lastAttempt.getExceptionCause();
			if (exceptionClass.isAssignableFrom(cause.getClass())) {
				return function.apply((T) cause);
			}
		}
		return 0L;
	}
}
需要传入异常类型和 Function 的实现,当发生相应类型的异常时,执行Function#apply方法计算休眠时间,可以实现不同异常的休眠时间不相同。
举个例子,首先定义 3 个异常以及它们的父类:
public class BaseException extends Exception {
	public BaseException(String message) {
		super(message);
	}
}

public class OneException extends BaseException {
	public OneException(String message) {
		super(message);
	}
}

public class TwoException extends BaseException {
	public TwoException(String message) {
		super(message);
	}
}

public class ThreeException extends BaseException {
	public ThreeException(String message) {
		super(message);
	}
}
接着实现 Function 接口:
public class ExceptionFunction implements Function<BaseException, Long> {

	@Override
	public Long apply(BaseException input) {
		if (OneException.class.isAssignableFrom(input.getClass())) {
			System.out.println("触发OneException,休眠1秒!");
			return 1000L;
		}
		if (TwoException.class.isAssignableFrom(input.getClass())) {
			System.out.println("触发TwoException,休眠2秒!");
			return 2000L;
		}
		if (ThreeException.class.isAssignableFrom(input.getClass())) {
			System.out.println("触发ThreeException,休眠3秒!");
			return 3000L;
		}
		return 0L;
	}
}
该接口中根据不同的异常,返回不同的休眠时间。
最后我们来构建重试器,并调用Retryer#call方法:
Retryer<Integer> retryer = RetryerBuilder.<Integer>newBuilder()
.retryIfException()
.withWaitStrategy(WaitStrategies.exceptionWait(BaseException.class, new ExceptionFunction()))
.withStopStrategy(StopStrategies.stopAfterAttempt(4))
.build();

int number = retryer.call(new Callable<>() {
	private int count = 1;
	@Override
	public Integer call() throws Exception {
		if (count < 2) {
			count++;
			throw new OneException("One");
		}
		if (count < 3) {
			count++;
			throw new TwoException("Two");
		}
		if (count < 4) {
			count++;
			throw new ThreeException("Three");
		}
		return count;
	}
});
System.out.println(number);
重试器 Retryer 在调用接口异常时进行重试,最大重试次数为 4 次,休眠时间的策略上,选择发生异常时,根据不同的异常休眠不同的时间。Retryer.call调用的 Callable 接口中,前 3 次调用分别抛出 OneException,TwoException 和 ThreeException,在第 4 次调用时返回数字 4。执行代码后可以观察到如下输出内容:
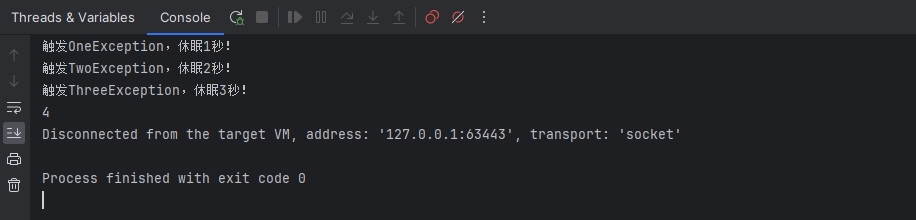
证明在发生不同异常时,触发了不同的休眠时间策略。
实战演练
目前为止,我们已经从使用和原理上了解了 Guava Retry,接下来我们就以开篇所说的场景为例,进行实战演练。
我们的业务场景中,可以接受通知中会员等级的变化不够及时,但因为金融监管的要求,不能接受因为客户等级的变化,导致延后发送通知。因此我们在重试策略的制定中非常宽松:重试 3 次每次间隔 1 秒,如果 3 次后依旧没有获取到最新的数据,就使用前一次请求的结果。
首先创建客户类:
public class CustomerDTO {

  private Long customerId;

  private String customerName;

  private CustomerLevel customerLevel;

  private Long lastOrderId;
}
其中 lastOrderId 记录了最后一次引起客户等级,客户积分发生变化的订单 Id,我们需要以此来判断是否获取到对应的客户信息。
接着创建获取客户信息的方法,用来模仿客户中心:
public class CustomerCenter {

  private static int count = 0;

  public static CustomerDTO getCustomerInfo(Long customerId) {
    if (count < 1) {
      count++;
      return createCustomerInfo(customerId, CustomerLevel.JUNIOR_MEMBER, 1234567L);
    } else if (count < 2) {
      count++;
      return createCustomerInfo(customerId, CustomerLevel.INTERMEDIATE_MEMBER, 12345678L);
    } else {
      count = 0;
      return createCustomerInfo(customerId, CustomerLevel.SENIOR_MEMBER, 123456789L);
    }
  }

  private static CustomerDTO createCustomerInfo(Long customerId, CustomerLevel customerLevel, Long lastOrdertId) {
    CustomerDTO customerDTO = new CustomerDTO();
    customerDTO.setCustomerId(customerId);
    customerDTO.setCustomerName("WYZ");
    customerDTO.setCustomerLevel(customerLevel);
    customerDTO.setLastOrderId(lastOrdertId);

    return customerDTO;
  }
}
其中CustomerCenter#getCustomerInfo模拟了在第 3 次查询时获取到最新的客户信息。
最后我们来写重试的代码:
public static void main(String[] args) throws ExecutionException {

  Long lastOrderId = 123456789L;

  Retryer<CustomerDTO> retryer = RetryerBuilder.<CustomerDTO>newBuilder()
  .retryIfResult(customerDTO -> !lastOrderId.equals(customerDTO.getLastOrderId()))
  .withWaitStrategy(failedAttempt -> 1000)
  .withStopStrategy(attempt -> attempt.getAttemptNumber() > 2)
  .build();

  CustomerDTO customerDTO;
  try {
    customerDTO = retryer.call(() -> CustomerCenter.getCustomerInfo(1L));
  } catch (RetryException e) {
    Attempt<?> attempt = e.getLastFailedAttempt();
    customerDTO = (CustomerDTO) attempt.get();
  }
}
创建 Retryer 的过程我就不过多解释了,我们来看第 15,16 行中的部分,通过前面源码的部分我们可以看到,Guava Retry 在超出重试次数后,依旧无法获取到预期结果时,会抛出 RetryException 异常,该异常中除了包含异常信息外,还包含最后一次执行后的 Attempt,因此,我可以通过 Attempt 来获取到最后一次的执行结果,刚刚好满足了我们的业务需求。
好了,今天的内容就到这里了。
如果本文对你有帮助的话,希望多多点赞支持。如果文章中出现任何错误,还请批评指正。最后欢迎大家关注分享硬核Java技术的金融摸鱼侠王有志,我们下次再见!