1. spring 简单介绍
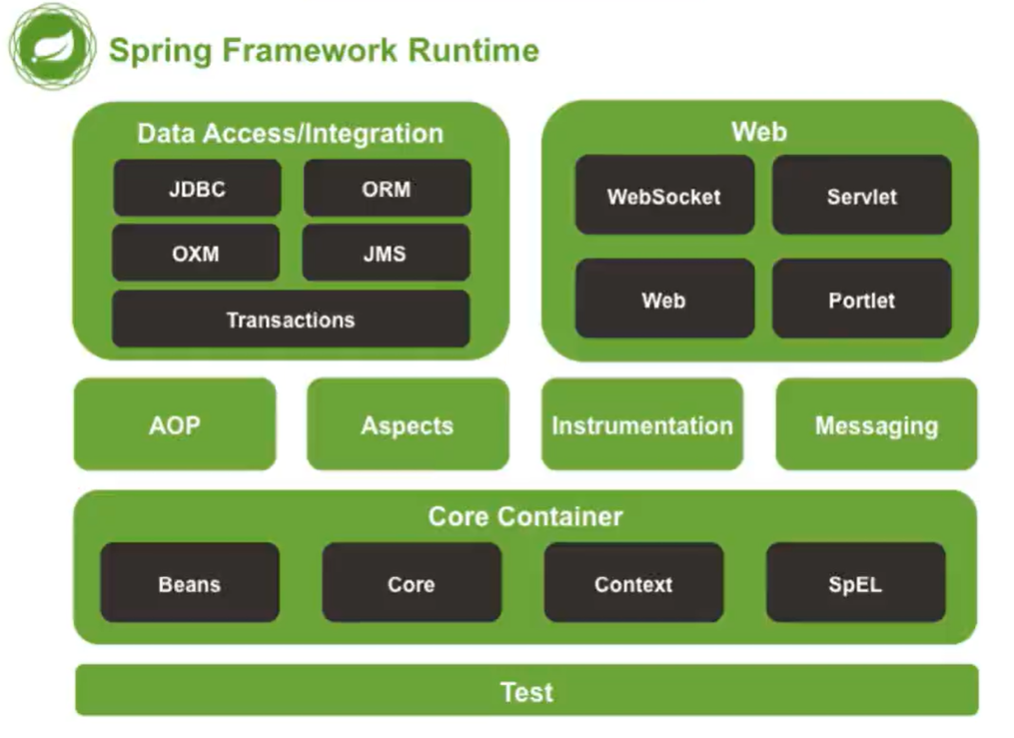
什么事 SSM?
spring-mvc
spring-framework -- web服务层
mybatis --数据持久化
2. IOC/DI --控制反转--是啥
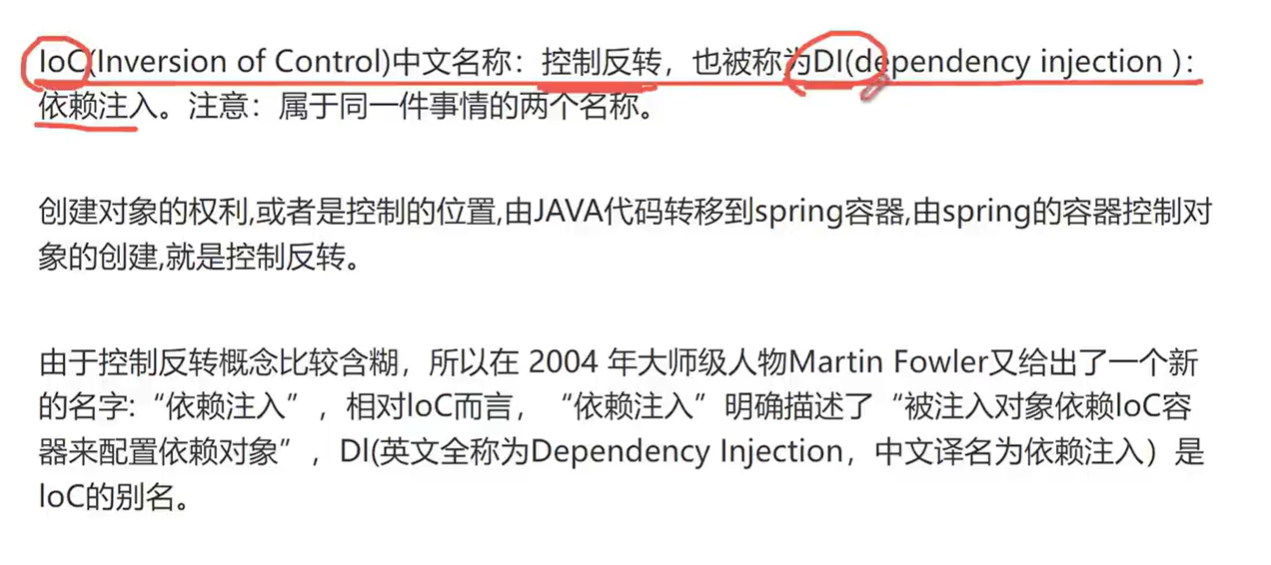
控制反转 Inversion of Control
依赖注入 DI dependency inject
创建对象的权利或者决定位置 转移到 spring,由spring容器来创建对象
演变:
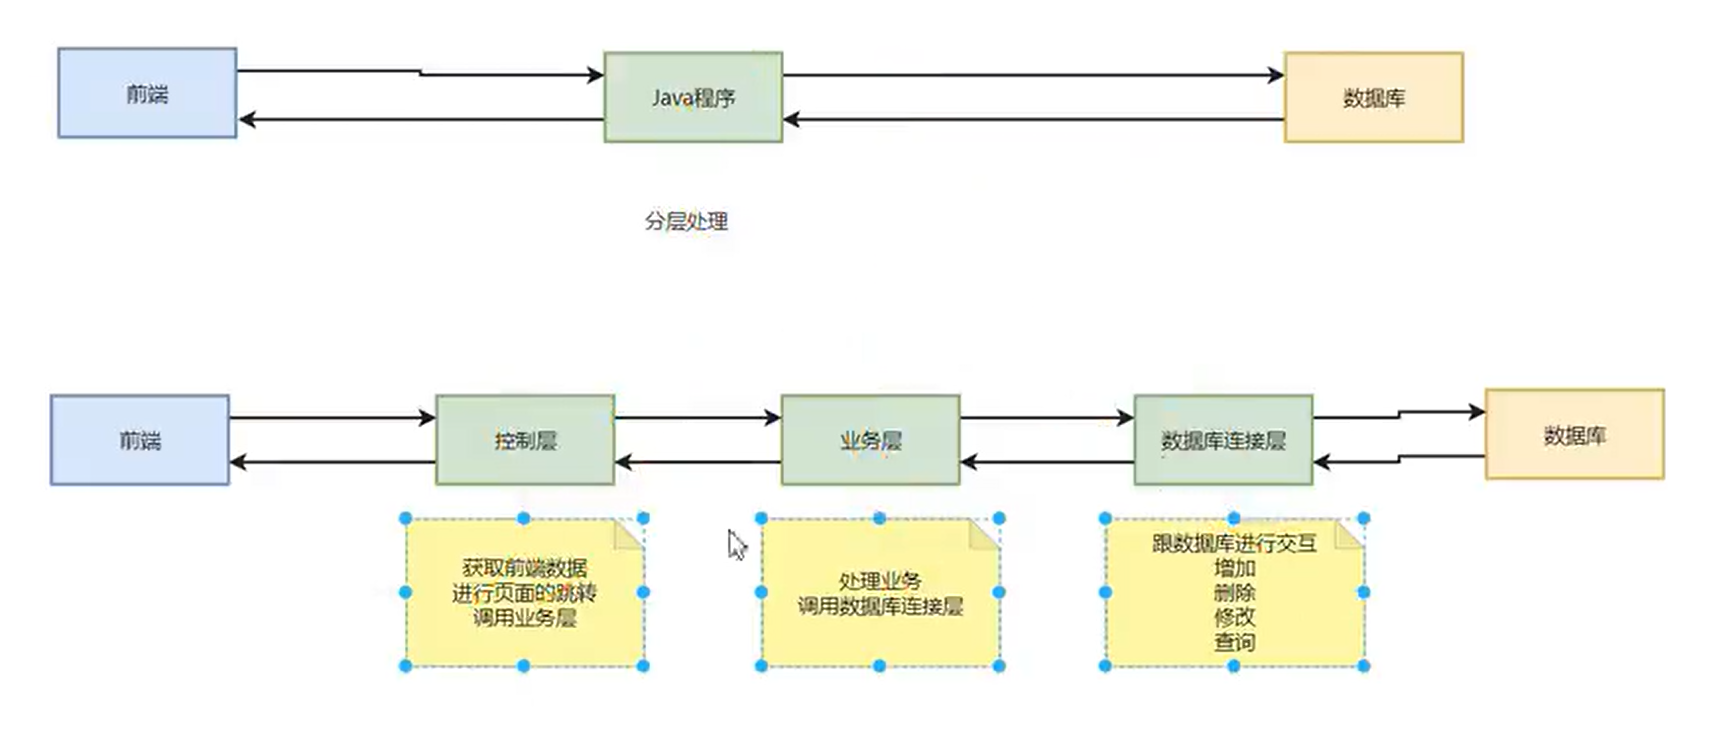
举个例子:
对所有商品打打5折
查出所有的商品 将价格打五折 保存
再次演变 接口以及实现
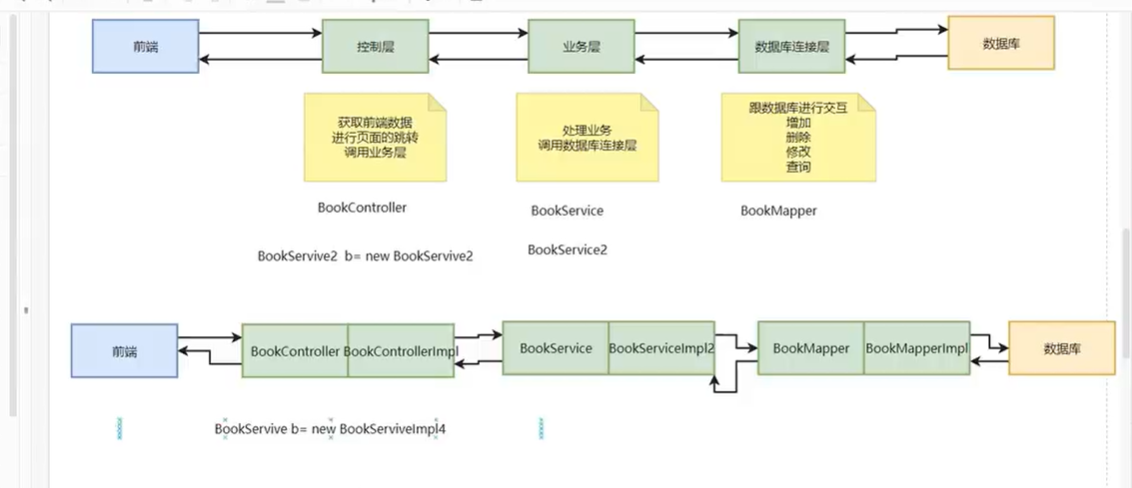
业务接口没变但是 实现由多种形式 可以根据需要切换到不同的实现
同样的举个例子:
对所有商品打打5折
直接一条sql就能实现 不用查找再更新
接着演进 创建对象也由spring来完成
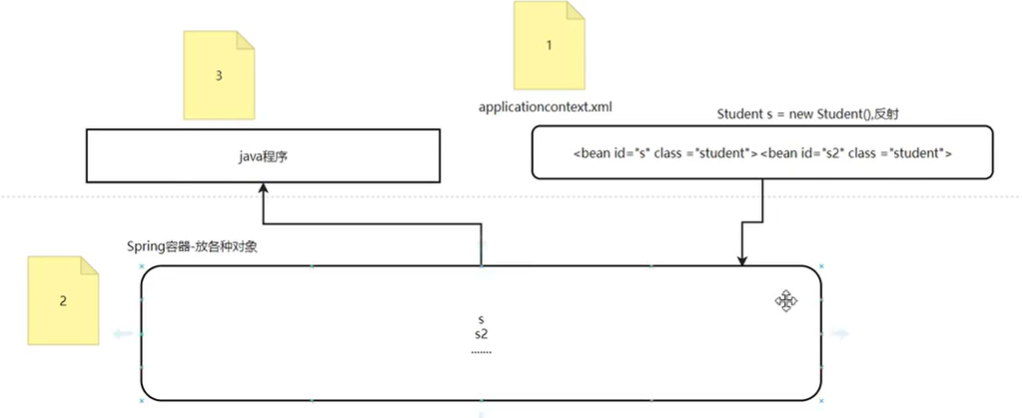
原理的同属理解:
根据xml配置文件创建对象
将对象放入容器 (map)
根据需要 通过名字 获取对象
3. 实现
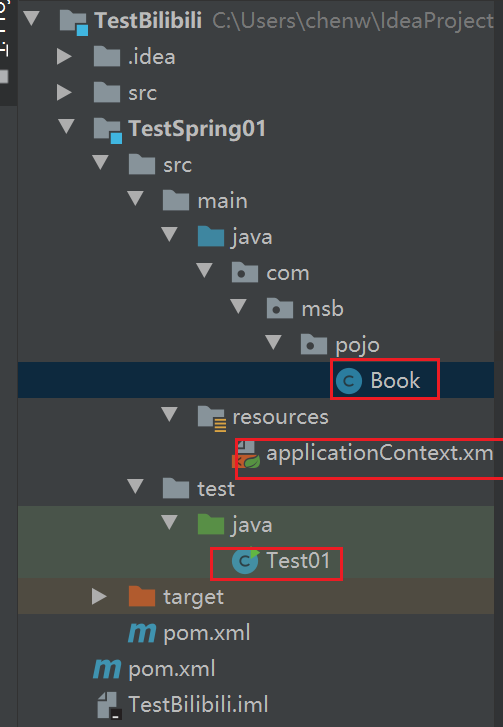
package com.msb.pojo;

/**
 * @Auther: jack.chen
 * @Date: 2023/11/12 - 11 - 12 - 15:46
 * @Description: com.msb.pojo
 * @version: 1.0
 */
public class Book {
    private int id;
    String name;
    String author;
    double price;

    public Book() {
    }

    public Book(int id, String name, String author, double price) {
        this.id = id;
        this.name = name;
        this.author = author;
        this.price = price;
    }

    public int getId() {
        return id;
    }

    public void setId(int id) {
        this.id = id;
    }

    public String getName() {
        return name;
    }

    public void setName(String name) {
        this.name = name;
    }

    public String getAuthor() {
        return author;
    }

    public void setAuthor(String author) {
        this.author = author;
    }

    public double getPrice() {
        return price;
    }

    public void setPrice(double price) {
        this.price = price;
    }

    @Override
    public String toString() {
        return "Book{" +
                "id=" + id +
                ", name='" + name + '\'' +
                ", author='" + author + '\'' +
                ", price=" + price +
                '}';
    }
}
<?xml version="1.0" encoding="UTF-8"?>
<beans xmlns="http://www.springframework.org/schema/beans"
       xmlns:xsi="http://www.w3.org/2001/XMLSchema-instance"
       xmlns:context="http://www.springframework.org/schema/context"
       xsi:schemaLocation="http://www.springframework.org/schema/beans
        https://www.springframework.org/schema/beans/spring-beans.xsd
        http://www.springframework.org/schema/context
        https://www.springframework.org/schema/context/spring-context.xsd">

    <bean id="b" class="com.msb.pojo.Book" ></bean>

</beans>
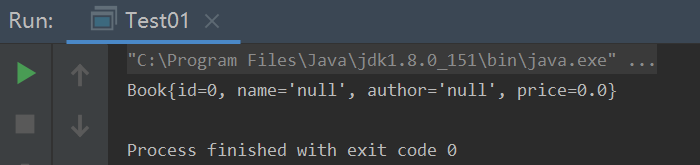
public class Test01 {
    public static void main(String[] args) {
        ClassPathXmlApplicationContext context = new ClassPathXmlApplicationContext("applicationContext.xml");
        Book b = (Book)context.getBean("b");
        System.out.println(b);

    }
}
上面的实现确实能实例化一个Book对象
但是如何传参 实例化对象?
- 使用setter方法
- 使用构造器
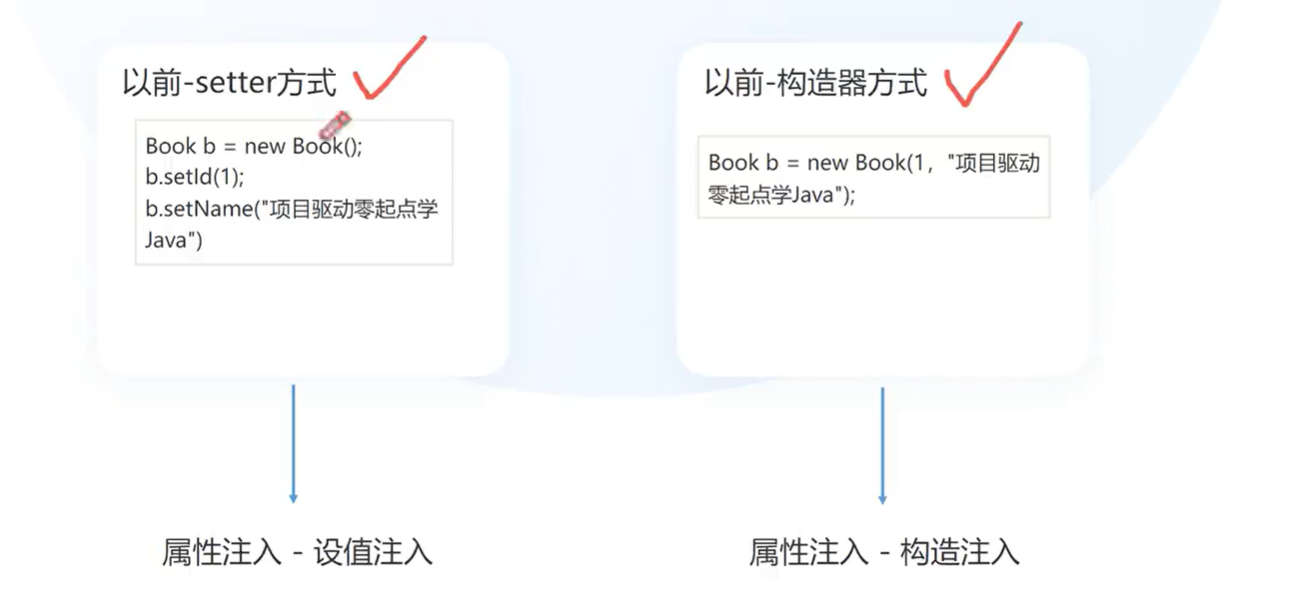
    <bean id="b" class="com.msb.pojo.Book" >
        <property name="id" value="4"></property>
        <property name="name" value="水浒传"></property>
        <property name="author" value="施耐庵"></property>
        <property name="price" value="39.98"></property>
    </bean>

说明:这里通过setter的方式来设置属性 name="xxx" 实际上是调用setterxxxx方法来实现
    <bean id="b2" class="com.msb.pojo.Book" >
        <constructor-arg name="id" value="5"></constructor-arg>
        <constructor-arg name="name" value="时间简史"></constructor-arg>
        <constructor-arg name="author" value="霍金"></constructor-arg>
        <constructor-arg name="price" value="25.5"></constructor-arg>
    </bean>
说明:这里通过调用构造器的方式来实例化对象 name=xxx 实际上是 构造器里面形参的名称
public class Test01 {
    public static void main(String[] args) {
        ClassPathXmlApplicationContext context = new ClassPathXmlApplicationContext("applicationContext.xml");
        Book b = (Book)context.getBean("b2");
        System.out.println(b);

    }
}
3. 如果 对象的 属性为引用数据类型 如何 实例化对象
Girl Boy girl的boyfriend是boy
package com.msb.pojo;

/**
 * @Auther: jack.chen
 * @Date: 2023/11/12 - 11 - 12 - 20:42
 * @Description: com.msb.pojo
 * @version: 1.0
 */
public class Boy {

    private String name;
    private int age;

    public Boy() {
    }

    public Boy(String name, int age) {
        this.name = name;
        this.age = age;
    }

    public String getName() {
        return name;
    }

    public void setName(String name) {
        this.name = name;
    }

    public int getAge() {
        return age;
    }

    public void setAge(int age) {
        this.age = age;
    }

    @Override
    public String toString() {
        return "Boy{" +
                "name='" + name + '\'' +
                ", age=" + age +
                '}';
    }
}
package com.msb.pojo;

/**
 * @Auther: jack.chen
 * @Date: 2023/11/12 - 11 - 12 - 20:40
 * @Description: com.msb.pojo
 * @version: 1.0
 */
public class Girl {
    private int age;
    private String name;
    private Boy boyfriend;


    public Girl() {
    }

    public Girl(int age, String name) {
        this.age = age;
        this.name = name;
    }

    public int getAge() {
        return age;
    }

    public void setAge(int age) {
        this.age = age;
    }

    public String getName() {
        return name;
    }

    public void setName(String name) {
        this.name = name;
    }

    public Girl(int age, String name, Boy boyfriend) {
        this.age = age;
        this.name = name;
        this.boyfriend = boyfriend;
    }

    @Override
    public String toString() {
        return "Girl{" +
                "age=" + age +
                ", name='" + name + '\'' +
                ", boyfriend=" + boyfriend +
                '}';
    }
}
public class Test02 {

    public static void main(String[] args) {
        Boy boy = new Boy("小刚", 27);

        Girl lili = new Girl(25, "lili", boy);
        System.out.println(lili);
    }
}

很简单的一个例子 但是 如何用注解来实现创建对象?
    <bean id="boy1" class="com.msb.pojo.Boy">
        <property name="name" value="小帅aaa"></property>
        <property name="age" value="27"></property>
    </bean>

    <bean id="girl1" class="com.msb.pojo.Girl">
        <property name="age" value="25"></property>
        <property name="name" value="小美1"></property>
        <property name="boyfriend" ref="boy1"></property>
    </bean>
    public static void main(String[] args) {
        ClassPathXmlApplicationContext context = new ClassPathXmlApplicationContext("applicationContext.xml");
        Girl girl1 = (Girl)context.getBean("girl1");
        System.out.println(girl1);
    }
4 如何用注解的方式 以少量的代码实现对象的创建于获取
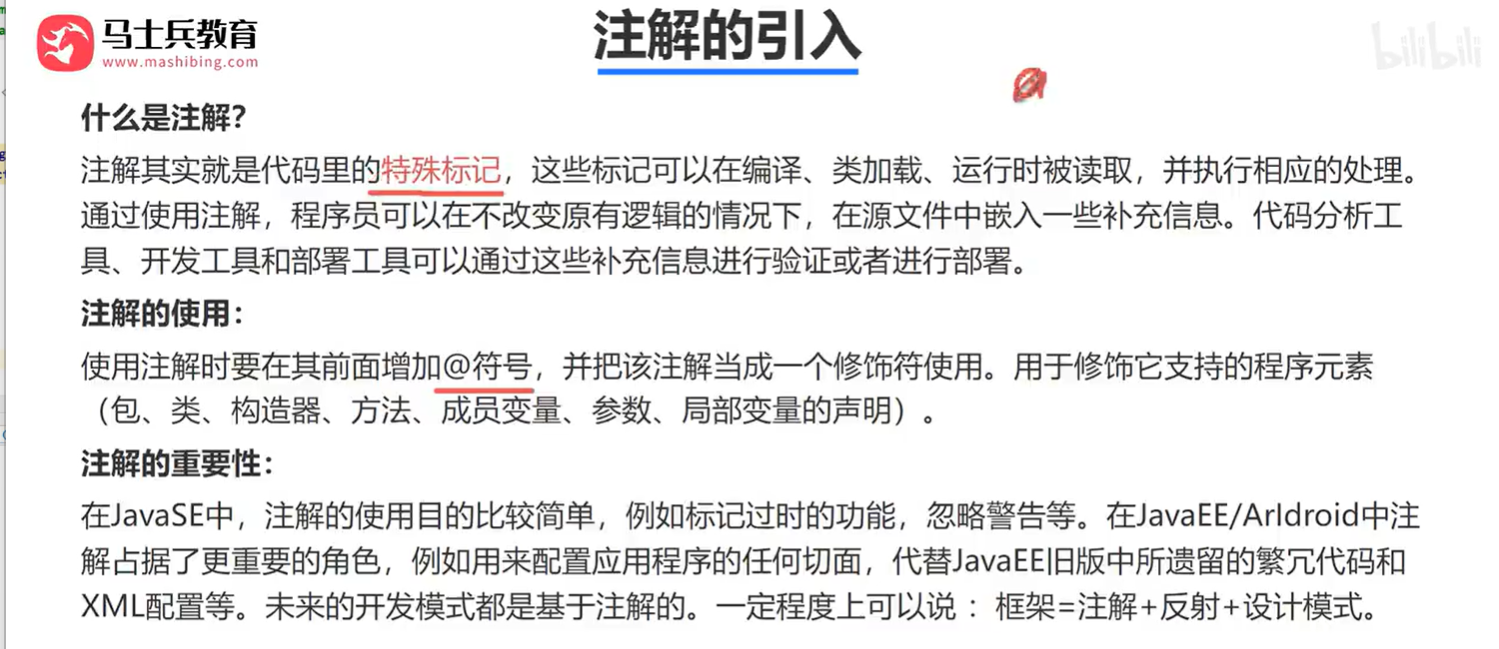
复习一下 什么是注解
定义扫描的位置:
<beans xmlns="http://www.springframework.org/schema/beans"
       xmlns:xsi="http://www.w3.org/2001/XMLSchema-instance"
       xmlns:context="http://www.springframework.org/schema/context"


       xsi:schemaLocation="http://www.springframework.org/schema/beans
        https://www.springframework.org/schema/beans/spring-beans.xsd
        http://www.springframework.org/schema/context
        https://www.springframework.org/schema/context/spring-context.xsd">

    <context:component-scan base-package="com.msb.pojo"></context:component-scan>
</beans>

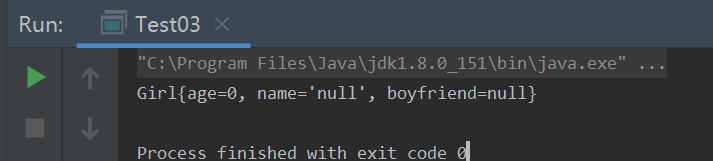
public class Test03 {
    public static void main(String[] args) {
        ClassPathXmlApplicationContext context = new ClassPathXmlApplicationContext("applicationContext.xml");
        Girl girl1 = (Girl)context.getBean("girl");
        System.out.println(girl1);
    }
}
其他的注解 不同之处 是使用的层 不同 加以区分 @Component 不区分层
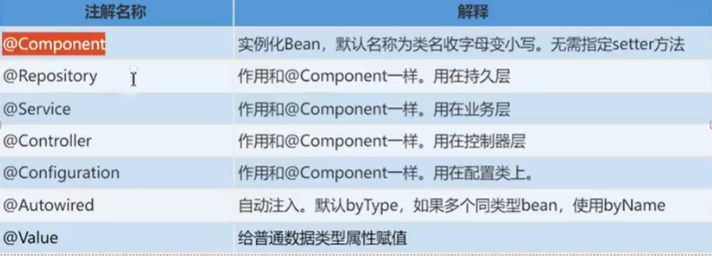
@value 实力化对象将基本数据类型的属性注入 不易依赖setter方法
@Autoaired 将引用数据类型的属性设置
@Component
public class Boy {
    @Value("小帅11111")
    private String name;
    @Value("18")
    private int age;

    public Boy() {
    }
@Component
public class Girl {
    @Value("18")
    private int age;

    @Value("xiaomei111")
    private String name;

    @Autowired
    private Boy boyfriend;


    public Girl() {
    }
    public static void main(String[] args) {
        ClassPathXmlApplicationContext context = new ClassPathXmlApplicationContext("applicationContext.xml");
        Girl girl1 = (Girl)context.getBean("girl");
        System.out.println(girl1);
    }
