配置探针监控Pod
定义存活命令
apiVersion: v1
kind: Pod
metadata:
  labels:
    test: liveness
  name: liveness-exec
spec:
  containers:
  - name: liveness
    image: registry.k8s.io/busybox
    args:
    - /bin/sh
    - -c
    - touch /tmp/healthy; sleep 30; rm -f /tmp/healthy; sleep 600
    livenessProbe:
      exec:
        command:
        - cat
        - /tmp/healthy
      initialDelaySeconds: 5
      periodSeconds: 5
initialDelaySeconds: 5表示探针要等5秒执行检查
periodSeconds: 5表示每5 秒探测一次
探活条件是/tmp/healthy文件是否存在,通过容器定义中的arg字段可知容器创建时会先创建一个/tmp/healthy文件,然后30秒之后删除它,接着再等600秒结束。
所以我们刚开始的35秒以内查看pod状态应该是存活
root@lxt-master:~/podTest/probe# kubectl describe pod liveness-exec
Name:             liveness-exec
Namespace:        kube-system
Priority:         0
Service Account:  default
Node:             lxt-master/192.168.20.113
Start Time:       Sat, 06 May 2023 17:23:53 +0800
Labels:           test=liveness
Annotations:      <none>
Status:           Running
IP:               10.244.0.6
IPs:
  IP:  10.244.0.6
Containers:
  liveness:
    Container ID:  docker://332e403586b2d9ccf2e9f2eda85ba1131972715de0987d6bdb089714627593ef
    Image:         busybox
    Image ID:      docker-pullable://busybox@sha256:5acba83a746c7608ed544dc1533b87c737a0b0fb730301639a0179f9344b1678
    Port:          <none>
    Host Port:     <none>
    Args:
      /bin/sh
      -c
      touch /tmp/healthy; sleep 30; rm -rf /tmp/healthy; sleep 600
    State:          Running
      Started:      Sat, 06 May 2023 17:24:10 +0800
    Ready:          True
    Restart Count:  0
    Liveness:       exec [cat /tmp/healthy] delay=5s timeout=1s period=5s #success=1 #failure=3
    Environment:    <none>
    Mounts:
      /var/run/secrets/kubernetes.io/serviceaccount from kube-api-access-j4djg (ro)
Conditions:
  Type              Status
  Initialized       True
  Ready             True
  ContainersReady   True
  PodScheduled      True
Volumes:
  kube-api-access-j4djg:
    Type:                    Projected (a volume that contains injected data from multiple sources)
    TokenExpirationSeconds:  3607
    ConfigMapName:           kube-root-ca.crt
    ConfigMapOptional:       <nil>
    DownwardAPI:             true
QoS Class:                   BestEffort
Node-Selectors:              <none>
Tolerations:                 node.kubernetes.io/not-ready:NoExecute op=Exists for 300s
                             node.kubernetes.io/unreachable:NoExecute op=Exists for 300s
Events:
  Type    Reason     Age   From               Message
  ----    ------     ----  ----               -------
  Normal  Scheduled  36s   default-scheduler  Successfully assigned kube-system/liveness-exec to lxt-master
  Normal  Pulling    36s   kubelet            Pulling image "busybox"
  Normal  Pulled     20s   kubelet            Successfully pulled image "busybox" in 15.575784303s (15.575800541s including waiting)
  Normal  Created    20s   kubelet            Created container liveness
  Normal  Started    20s   kubelet            Started container liveness
而35秒之后由于删除了healthy文件,探针检测不到会杀死这个pod,然后重建pod

重启后再看
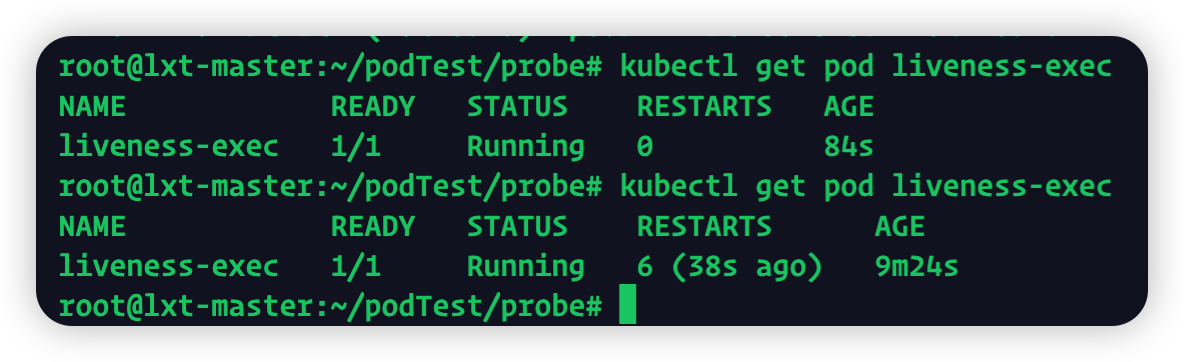
Pod的READY字段比1/1表示重启了一次
定义一个存活态HTTP请求接口
apiVersion: v1
kind: Pod
metadata:
  labels:
    test: liveness
  name: liveness-http
spec:
  containers:
  - name: liveness
    image: registry.k8s.io/liveness
    args:
    - /server
    livenessProbe:
      httpGet:
        path: /healthz
        port: 8080
        httpHeaders:
        - name: Custom-Header
          value: Awesome
      initialDelaySeconds: 3
      periodSeconds: 3
这个镜像国内拉不到
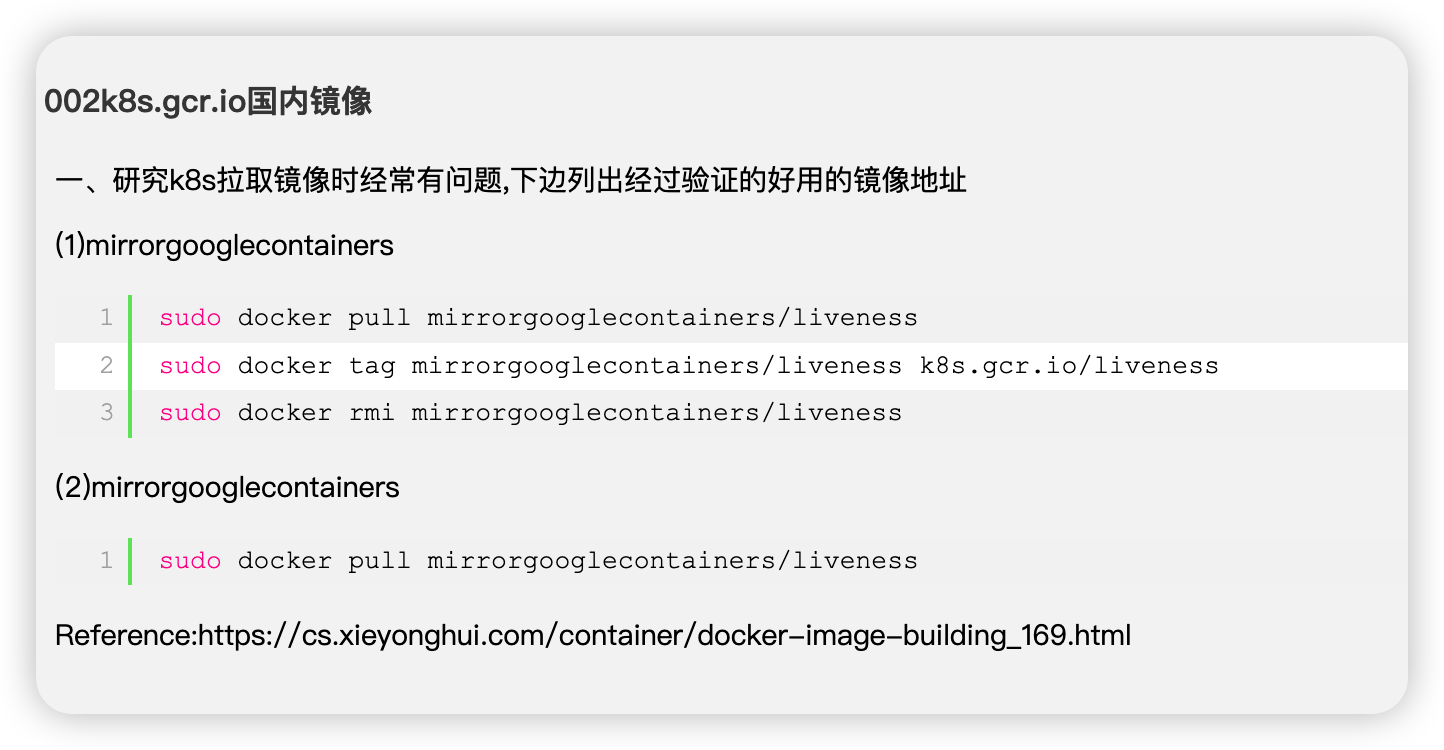
用这个办法,其实不用打tag,直接docker pull mirrorgooglecontainers/liveness然后yaml文件里也用这个名字就好
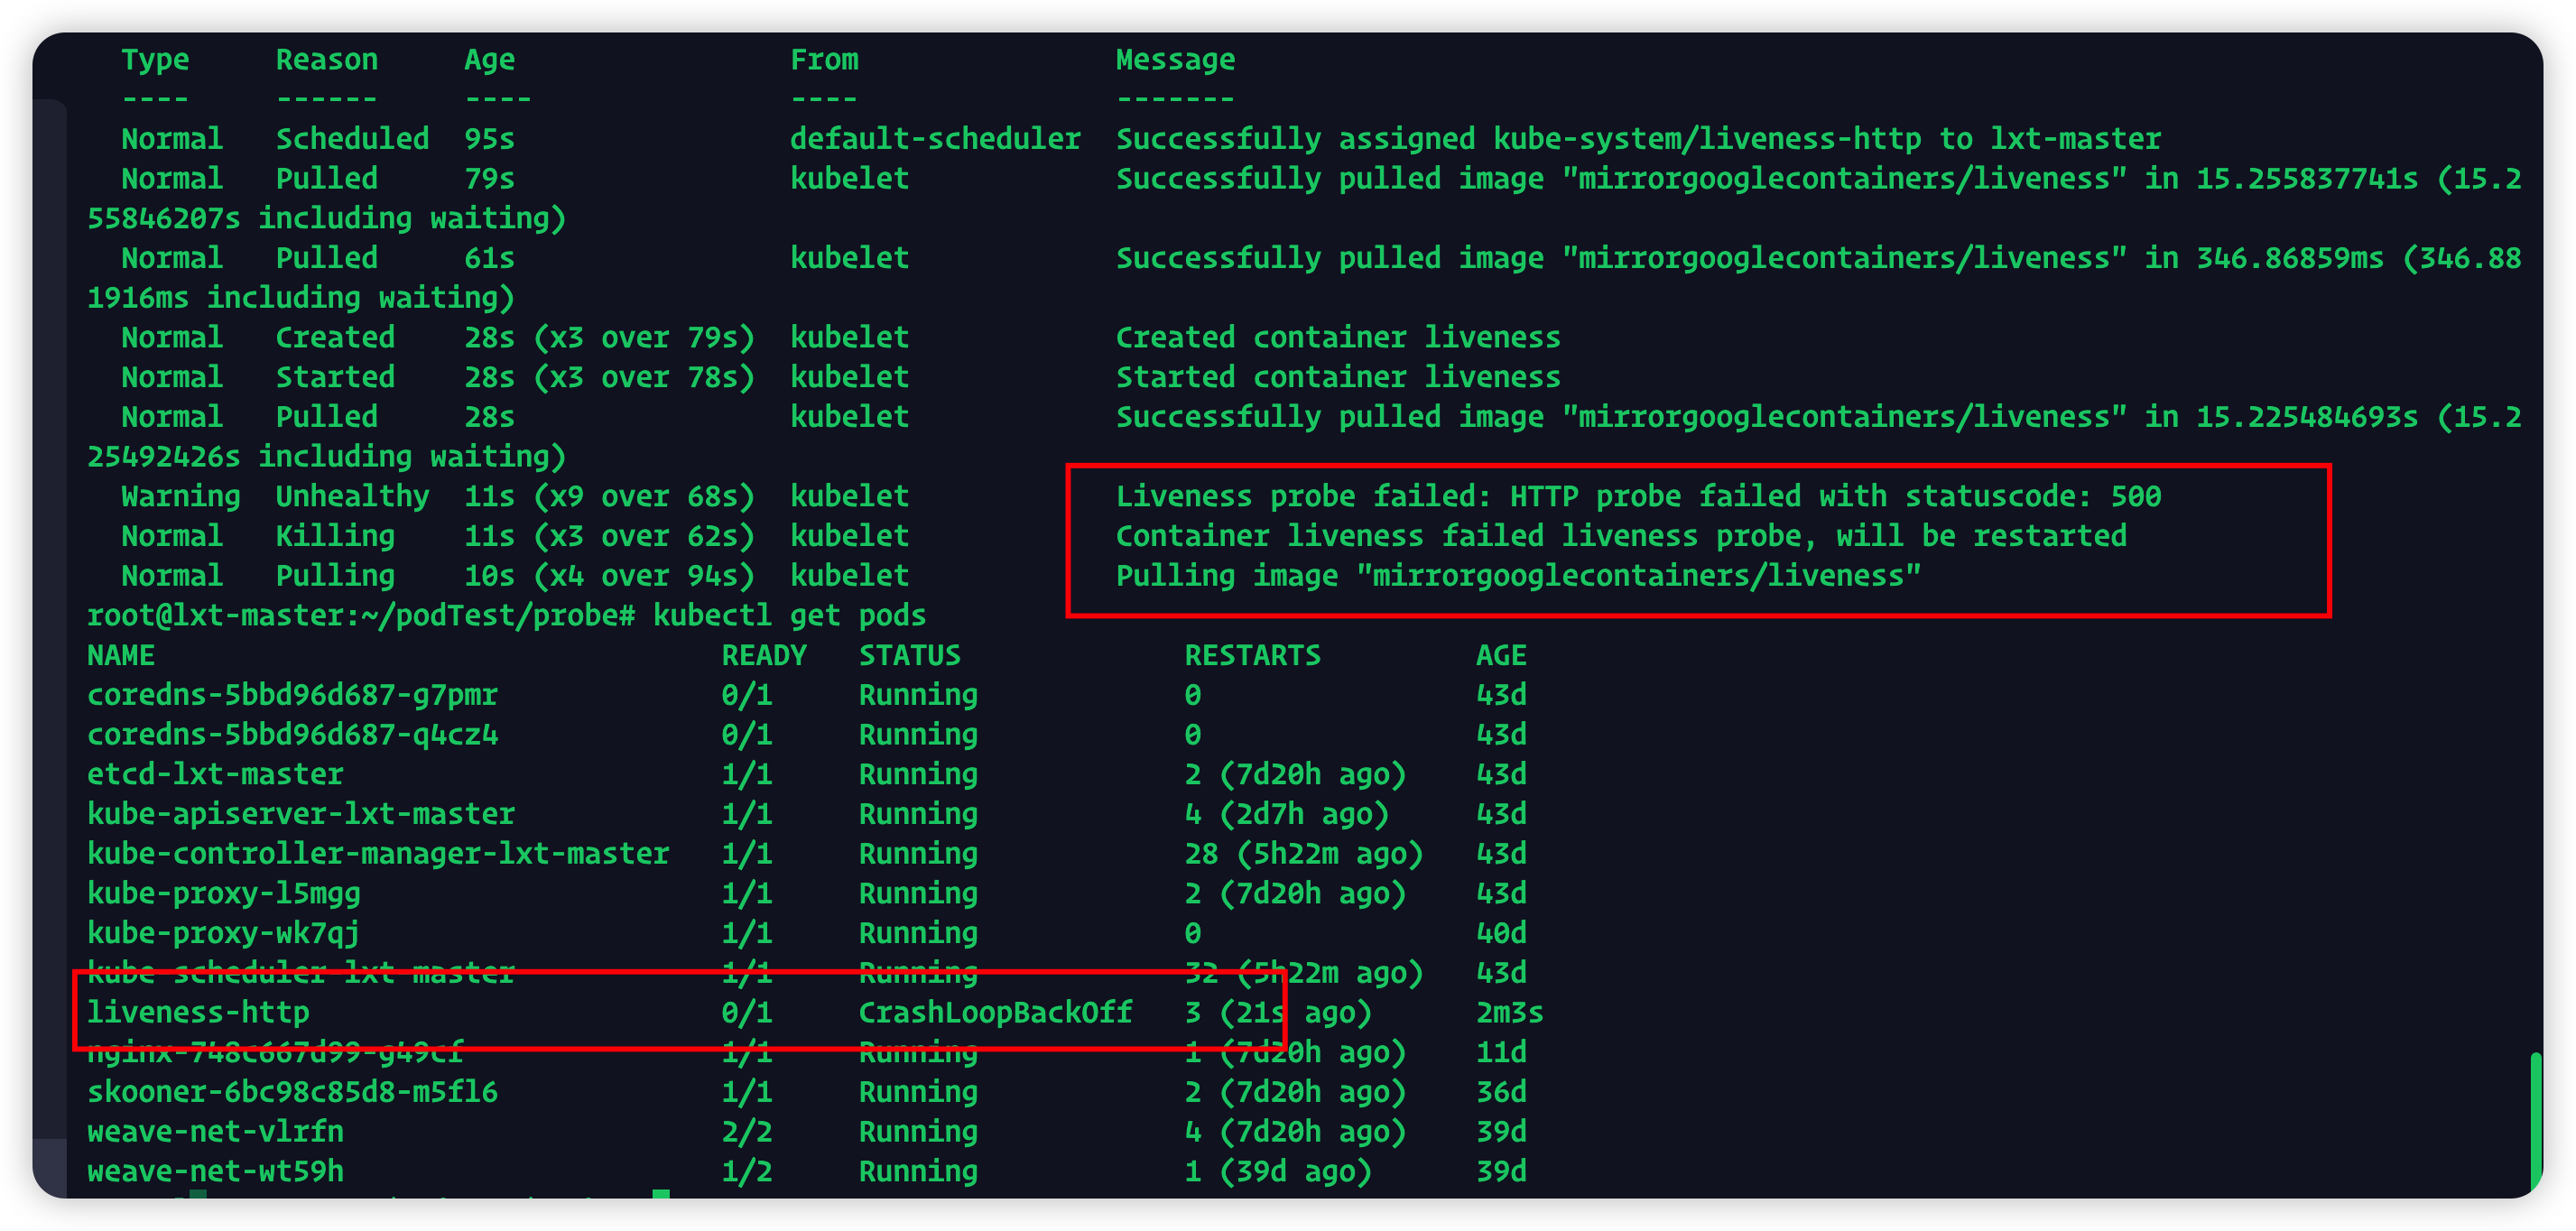
根据server.go源码
http.HandleFunc("/healthz", func(w http.ResponseWriter, r *http.Request) {
    duration := time.Now().Sub(started)
    if duration.Seconds() > 10 {
        w.WriteHeader(500)
        w.Write([]byte(fmt.Sprintf("error: %v", duration.Seconds())))
    } else {
        w.WriteHeader(200)
        w.Write([]byte("ok"))
    }
})
10秒以内我们的探针返回正常,10秒之后探测失败,杀死这个pod并重建
TCP探活
#tcp-liveness-readiness.yaml
apiVersion: v1
kind: Pod
metadata:
  name: goproxy
  labels:
    app: goproxy
spec:
  containers:
  - name: goproxy
    image: mirrorgooglecontainers/goproxy:0.1
    ports:
    - containerPort: 8080
    readinessProbe:
      tcpSocket:
        port: 8080
      initialDelaySeconds: 5
      periodSeconds: 10
    livenessProbe:
      tcpSocket:
        port: 8080
      initialDelaySeconds: 15
      periodSeconds: 20
这个配置文件有两个探针:
- 5秒之后每10秒探测一次的就绪探针
- 15秒之后每20秒探测一次的存活探针
容器启动5秒之后会发送第一个就绪探针,探针尝试连接容器的8080端口,如果成功就标记为就绪状态。
启动15秒之后进行第一次存活探测,如果探测存活失败,容器会被重新启动
使用kubectl describe pod goproxy查看Pod详细信息
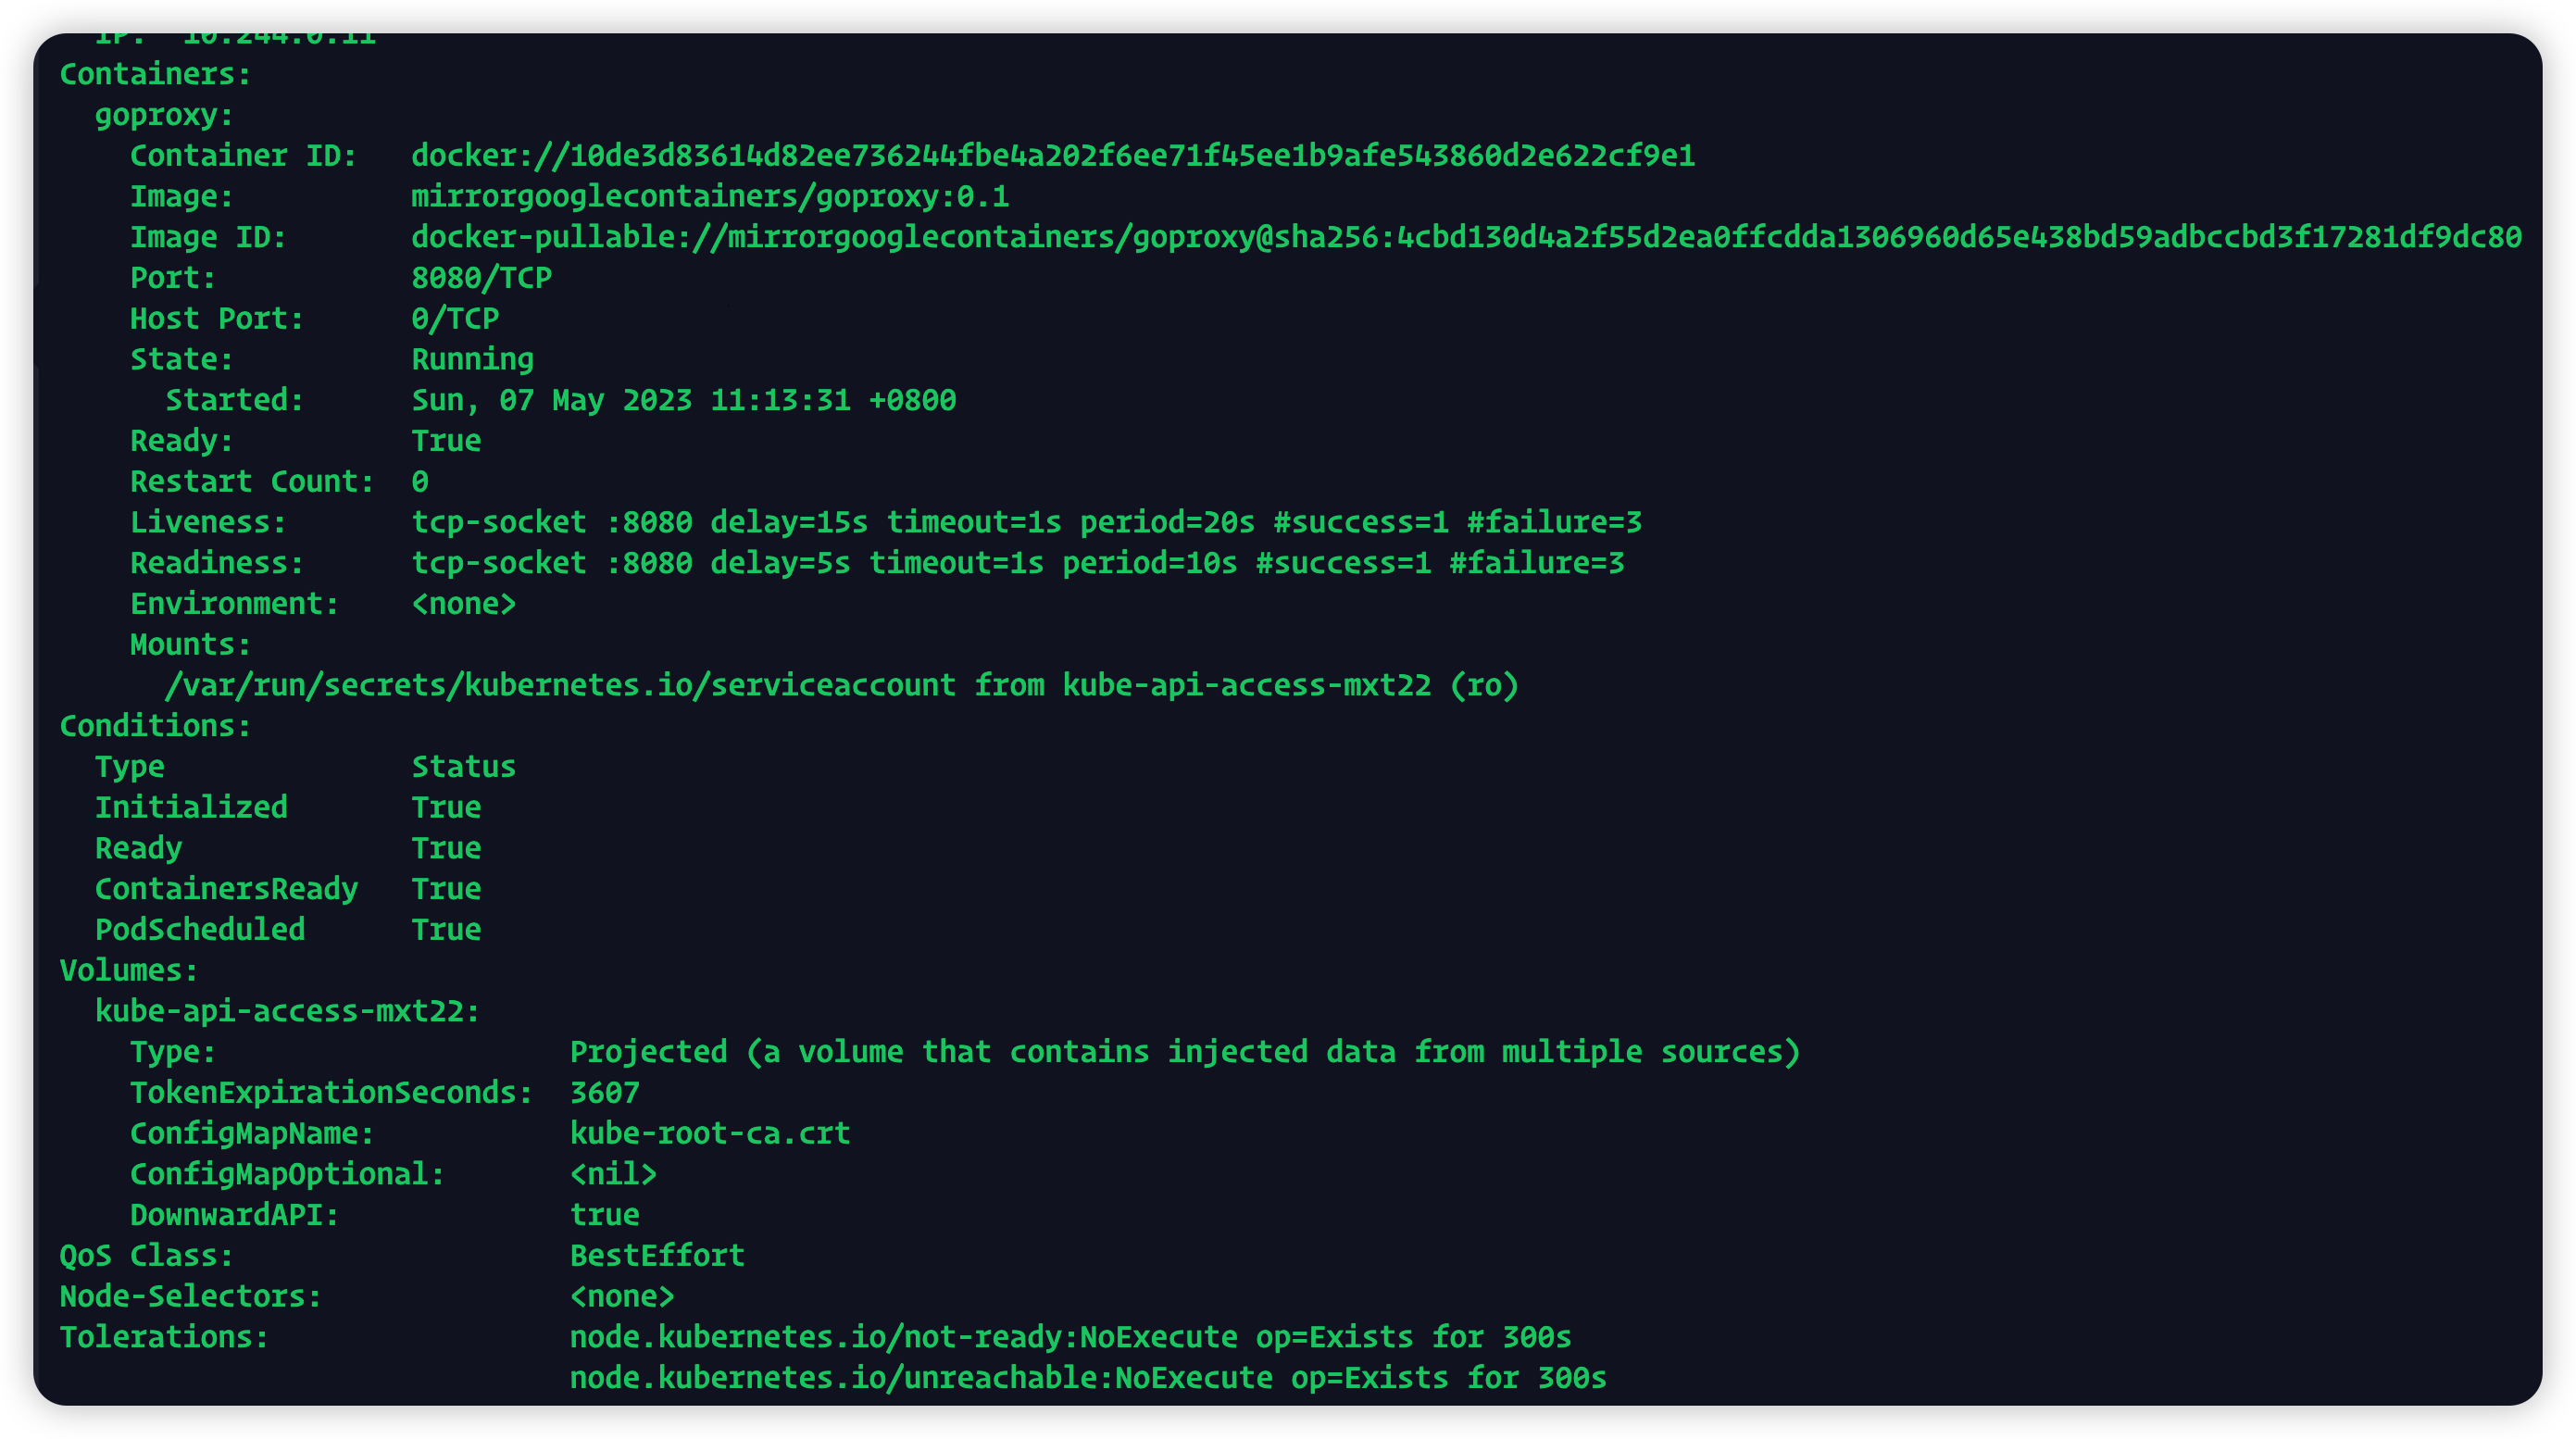
从这里可以看出探针在探测时如果存活会返回1,失败会返回3,探测超时时间为1秒
定义gRPC存活探针
apiVersion: v1
kind: Pod
metadata:
  name: etcd-with-grpc
spec:
  containers:
  - name: etcd
    image: mirrorgooglecontainers/etcd:3.5.1-0
    command: [ "/usr/local/bin/etcd", "--data-dir",  "/var/lib/etcd", "--listen-client-urls", "http://0.0.0.0:2379", "--advertise-client-urls", "http://127.0.0.1:2379", "--log-level", "debug"]
    ports:
    - containerPort: 2379
    livenessProbe:
      grpc:
        port: 2379
      initialDelaySeconds: 10
要使用 gRPC 探针,必须配置 port 属性。 如果要区分不同类型的探针和不同功能的探针,可以使用 service 字段。 你可以将 service 设置为 liveness,并使你的 gRPC 健康检查端点对该请求的响应与将 service 设置为 readiness 时不同。 这使你可以使用相同的端点进行不同类型的容器健康检查(而不需要在两个不同的端口上侦听)。 如果你想指定自己的自定义服务名称并指定探测类型,Kubernetes 项目建议你使用使用一个可以关联服务和探测类型的名称来命名。 例如:myservice-liveness(使用 - 作为分隔符)。
(这段没用过,官方文档给出的解释)
命名端口
类似变量
ports:
- name: liveness-port
  containerPort: 8080
  hostPort: 8080

livenessProbe:
  httpGet:
    path: /healthz
    port: liveness-port
gRPC探针不支持这种写法
定义就绪探针
就绪探针在容器的整个生命周期中保持运行状态
存活探针不等待就绪探针成功,也就是两者并行,如果要实现等待就绪探针成功后再探活可以使用initialDelaySeconds 或 startupProbe
其实上面的例子已经用过就绪探针了,就绪探针和存活探针可以同时存在,配置的时候写在同一级下
spec:
  containers:
  - name: goproxy
    image: mirrorgooglecontainers/goproxy:0.1
    ports:
    - containerPort: 8080
    readinessProbe:
      tcpSocket:
        port: 8080
      initialDelaySeconds: 5
      periodSeconds: 10
    livenessProbe:
      tcpSocket:
        port: 8080
      initialDelaySeconds: 15
      periodSeconds: 20
配置探针
Probe字段
-
initialDelaySeconds:容器启动后要等待多少秒后才启动启动、存活和就绪探针, 默认是 0 秒,最小值是 0。 -
periodSeconds:执行探测的时间间隔(单位是秒)。默认是 10 秒。最小值是 1。 -
timeoutSeconds:探测的超时后等待多少秒。默认值是 1 秒。最小值是 1。 -
successThreshold:探针在失败后,被视为成功的最小连续成功数。默认值是 1。 存活和启动探测的这个值必须是 1。最小值是 1。 -
failureThreshold:探针连续失败了failureThreshold次之后, Kubernetes 认为总体上检查已失败:容器状态未就绪、不健康、不活跃。 对于启动探针或存活探针而言,如果至少有failureThreshold个探针已失败, Kubernetes 会将容器视为不健康并为这个特定的容器触发重启操作。 kubelet 会考虑该容器的terminationGracePeriodSeconds设置。 对于失败的就绪探针,kubelet 继续运行检查失败的容器,并继续运行更多探针; 因为检查失败,kubelet 将 Pod 的Ready状况设置为false。 -
terminationGracePeriodSeconds:为 kubelet 配置从为失败的容器触发终止操作到强制容器运行时停止该容器之前等待的宽限时长。 默认值是继承 Pod 级别的terminationGracePeriodSeconds值(如果不设置则为 30 秒),最小值为 1。