Text组件
Text(文本)组件用于显示和处理多种任务。虽然该组件的主要目的是显示多行文本,但它常常也被用于作为简单的文本编辑器和网页浏览器使用。
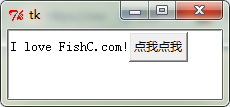
实例1:插入内容
 1 from tkinter import *
 2
 3 root = Tk()
 4 text = Text(root,width=30,height=2)
 5 text.pack()
 6 #INSERT索引表示插入光标当前的位置
 7 text.insert(INSERT,"I love\n")#光标当前的位置插入
 8
 9 #END,对应Text组件的文本缓存区最后一个字符的下一个位置
10 text.insert(END,"FishC.com!")
11
12 mainloop()

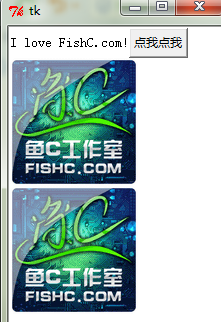
实例2:插入image对象windows组件
 1 from tkinter import *
 2
 3 def show():
 4     print("哟,我被点了一下~")
 5
 6 root = Tk()
 7 text = Text(root,width=30,height=5)
 8 text.pack()
 9
10 #INSERT索引表示插入光标当前的位置
11 text.insert(INSERT,"I love FishC.com!")#光标当前的位置插入
12
13 #创建一个按钮
14 b1=Button(root,text="点我点我",command=show)
15 text.window_create(INSERT,window=b1)
16
17 mainloop()
实例3:单击按钮显示一张图片
 1 from tkinter import *
 2
 3 def show():
 4     text.image_create(INSERT,image=photo)
 5
 6 root = Tk()
 7 text = Text(root,width=30,height=50)
 8 text.pack()
 9
10 #INSERT索引表示插入光标当前的位置
11 text.insert(INSERT,"I love FishC.com!")#光标当前的位置插入
12
13 photo = PhotoImage(file='fishc.gif')
14
15 #创建一个按钮
16 b1=Button(root,text="点我点我",command=show)
17 text.window_create(INSERT,window=b1)
18
19 mainloop()
Indexer用法
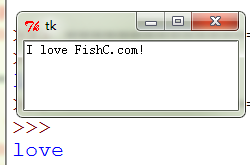
实例1:“line.column”
 1 from tkinter import *
 2
 3 root = Tk()
 4 text = Text(root,width=30,height=5)
 5 text.pack()
 6
 7 #INSERT索引表示插入光标当前的位置
 8 text.insert(INSERT,"I love FishC.com!")#光标当前的位置插入
 9 #注意,行号从1开始,列号则从0开始
10 print(text.get(1.2,1.6))#获取第一行第2列到第一行第六列的数据
11
12 mainloop()
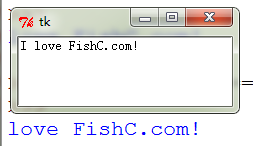
实例2:“line.end”
行号加上字符串".end"格式表示为该行最后一个字符的位置
实例:
 1 from tkinter import *
 2
 3 root = Tk()
 4 text = Text(root,width=30,height=5)
 5 text.pack()
 6
 7 #INSERT索引表示插入光标当前的位置
 8 text.insert(INSERT,"I love FishC.com!")#光标当前的位置插入
 9 #注意,行号从1开始,列号则从0开始
10 print(text.get("1.2","1.end"))#获取第一行第2列到第一行第六列的数据
11
12 mainloop()
Mask用法
mask(标记)通常是嵌入到Text组件文本中的不可见对象。事实上,Marks是指定字符间的位置,并跟随相应的字符一起移动。
实例:Mark事实上就是索引,用于表示位置
 1 from tkinter import *
 2
 3 root = Tk()
 4 text = Text(root,width=30,height=5)
 5 text.pack()
 6
 7 #INSERT索引表示插入光标当前的位置
 8 text.insert(INSERT,"I love FishC.com!")#光标当前的位置插入
 9 #注意,行号从1开始,列号则从0开始
10 text.mark_set("here","1.2")#设置光标位置为1.2
11 text.insert("here","插")
12
13 mainloop()

实例2:如果Mark前面的内容发生改变,Mark的位置也会跟着移动
 1 from tkinter import *
 2
 3 root = Tk()
 4 text = Text(root,width=30,height=5)
 5 text.pack()
 6
 7 #INSERT索引表示插入光标当前的位置
 8 text.insert(INSERT,"I love FishC.com!")#光标当前的位置插入
 9 #注意,行号从1开始,列号则从0开始
10 text.mark_set("here","1.2")#设置当前光标位置为1.2
11 text.insert("here","插")#执行后当前光标位置(Mark位置)变成了1.3
12 text.insert("here","入")
13 #text.insert("1.3","入")
14
15 mainloop()

实例3:如果Mark周围的文本被删除了,Mark仍然存在
 1 from tkinter import *
 2
 3 root = Tk()
 4 text = Text(root,width=30,height=5)
 5 text.pack()
 6
 7 #INSERT索引表示插入光标当前的位置
 8 text.insert(INSERT,"I love FishC.com!")#光标当前的位置插入
 9 #注意,行号从1开始,列号则从0开始
10 text.mark_set("here","1.2")#设置当前光标位置为1.2
11 text.insert("here","插")#执行后当前光标位置变成了1.3
12 text.delete("1.0",END)
13 text.insert("here","入")#here表示当前Mark的位置,如果Mark左边并没有数据则会插入到最左边
14
15 mainloop()
例4:只有mark_unset()方法可以解除Mark的封印
 1 from tkinter import *
 2
 3 root = Tk()
 4 text = Text(root,width=30,height=5)
 5 text.pack()
 6
 7 #INSERT索引表示插入光标当前的位置
 8 text.insert(INSERT,"I love FishC.com!")#光标当前的位置插入
 9 #注意,行号从1开始,列号则从0开始
10 text.mark_set("here","1.2")#设置当前光标位置为1.2
11 text.insert("here","插")#执行后当前光标位置变成了1.3
12 text.mark_unset("here")
13
14 text.delete("1.0",END)
15 text.insert("here","入")#here表示当前Mark的位置
16
17 mainloop()

默认插入内容是插入到Mark左侧(就是说插入一个字符后,Mark向后移动了一个字符的位置)
实例5:插入内容到Mark的右侧
 1 from tkinter import *
 2
 3 root = Tk()
 4 text = Text(root,width=30,height=5)
 5 text.pack()
 6
 7 #INSERT索引表示插入光标当前的位置
 8 text.insert(INSERT,"I love FishC.com!")#光标当前的位置插入
 9 #注意,行号从1开始,列号则从0开始
10 text.mark_set("here","1.2")#设置当前Mark位置为1.2
11 text.mark_gravity("here",LEFT)
12
13 text.insert("here","插")#执行后当前Mark位置变成了1.3
14 text.insert("here","入")#here表示当前Mark的位置
15
16 mainloop()
