一 什么是线刷,什么是卡刷
# 线刷(通过连接计算机进行刷机):factory完整包,可以降级
线刷是指使用计算机通过USB连接将刷机文件传输到设备上,并通过命令行工具(如ADB和Fastboot)执行刷机操作的方式。
在线刷过程中,设备进入Fastboot模式,通过Fastboot命令将分区映像(如boot、system、recovery等)刷入设备。
线刷通常需要安装ADB和Fastboot工具,并具备一定的命令行操作能力。

# 卡刷(通过恢复模式和刷机包进行刷机):OTA升级包,只能升级,不可以降级
卡刷是指将刷机包文件(如Factory Image或OTA更新)保存到设备的存储介质(如SD卡或内部存储)上,然后通过恢复模式选择刷机包进行刷机的方式。
在卡刷过程中,设备进入恢复模式,用户通过菜单导航选择刷机包并确认刷机操作,系统会将刷机包中的内容刷入设备相应的分区。
卡刷通常不需要计算机,而是直接在设备自身的恢复模式中完成操作。
两种刷机方式各有优劣和适用场景。线刷通常提供更多的控制和灵活性,适合开发者和高级用户;而卡刷相对简单且无需计算机,适合普通用户进行系统恢复、升级和刷入官方固件等操作
二 Pixel 2xl 线刷流程
# 1 下载官方的factory完整包
https://developers.google.cn/android/images?hl=zh-cn#taimen
# 2 选择版本下载(factory完整包,指定手机型号,选择系统)
-taimen-rp1a.201005.004.a1-factory-2f5c4987.zip
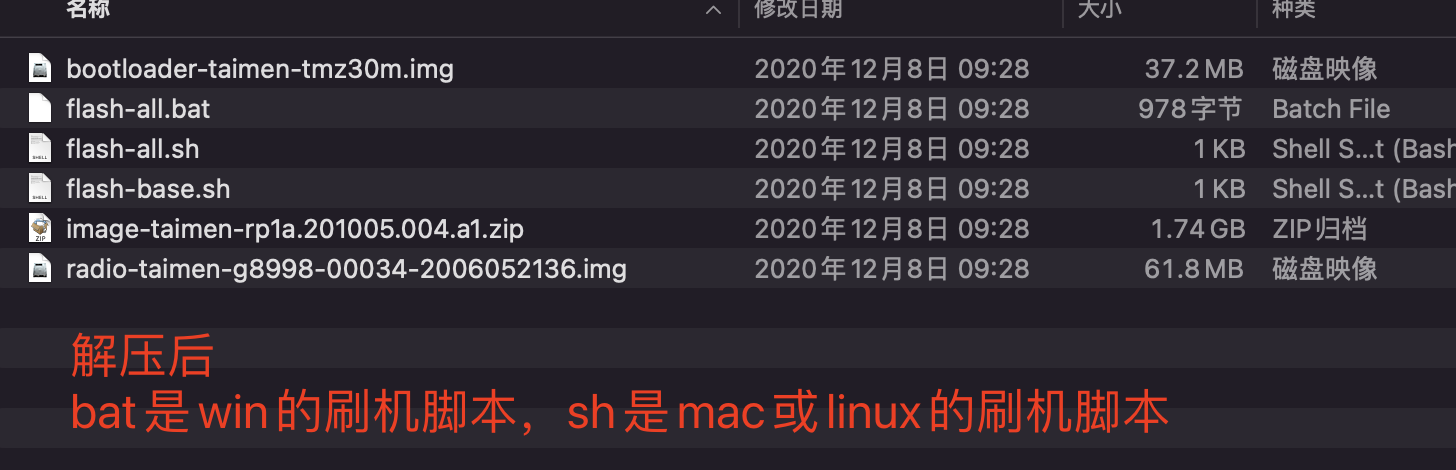
# 3 解压,flash-all.bat 是win机器线刷脚本,flash-all.sh是mac或linux线刷脚本
'''
bootloader-taimen-tmz30m.img
flash-all.bat
flash-all.sh
flash-base.sh
image-taimen-rp1a.201005.004.a1.zip
radio-taimen-g8998-00034-2006052136.img
'''
# 4 进入Fastboot模式 重启手机,fastboot模式
adb reboot bootloader
# 又见到了熟悉的界面
# 5 查看fastboot是否正常连接手机
fastboot devices
# 6 执行脚本(注意路径要在factory完整包,解压路径)
#### 注意### 亲测使用最新的adb刷入失败,选择Version 30.0.5
sudo ./flash-all.sh
'''
Sending 'bootloader_a' (36356 KB) OKAY [ 1.019s]
Writing 'bootloader_a' OKAY [ 0.374s]
Finished. Total time: 1.397s
Rebooting into bootloader OKAY [ 0.001s]
Finished. Total time: 0.001s
Sending 'radio_a' (60388 KB) OKAY [ 1.716s]
Writing 'radio_a' OKAY [ 0.582s]
Finished. Total time: 2.302s
Rebooting into bootloader OKAY [ 0.000s]
Finished. Total time: 0.000s
--------------------------------------------
Bootloader Version...: TMZ30m
Baseband Version.....: g8998-00034-2006052136
Serial Number........: 801KPUU1367574
--------------------------------------------
extracting android-info.txt (0 MB) to RAM...
Checking 'product' OKAY [ 0.001s]
Checking 'version-bootloader' OKAY [ 0.001s]
Checking 'version-baseband' OKAY [ 0.001s]
Setting current slot to 'a' OKAY [ 0.008s]
extracting boot.img (40 MB) to disk... took 0.139s
archive does not contain 'boot.sig'
Sending 'boot_a' (40960 KB) OKAY [ 0.986s]
Writing 'boot_a' OKAY [ 0.370s]
extracting dtbo.img (8 MB) to disk... took 0.021s
archive does not contain 'dtbo.sig'
Sending 'dtbo_a' (8192 KB) OKAY [ 0.192s]
Writing 'dtbo_a' OKAY [ 0.077s]
archive does not contain 'dt.img'
archive does not contain 'recovery.img'
extracting vbmeta.img (0 MB) to disk... took 0.000s
archive does not contain 'vbmeta.sig'
Sending 'vbmeta_a' (4 KB) OKAY [ 0.001s]
Writing 'vbmeta_a' OKAY [ 0.003s]
archive does not contain 'vbmeta_system.img'
archive does not contain 'vendor_boot.img'
archive does not contain 'super_empty.img'
archive does not contain 'boot_other.img'
archive does not contain 'odm.img'
archive does not contain 'odm_dlkm.img'
archive does not contain 'product.img'
extracting system.img (2450 MB) to disk... took 8.392s
archive does not contain 'system.sig'
Sending sparse 'system_a' 1/6 (458752 KB) OKAY [ 11.095s]
Writing 'system_a' OKAY [ 2.115s]
Sending sparse 'system_a' 2/6 (458752 KB) OKAY [ 10.636s]
Writing 'system_a' OKAY [ 2.121s]
Sending sparse 'system_a' 3/6 (458752 KB) OKAY [ 10.727s]
Writing 'system_a' OKAY [ 2.103s]
Sending sparse 'system_a' 4/6 (458752 KB) OKAY [ 10.719s]
Writing 'system_a' OKAY [ 2.121s]
Sending sparse 'system_a' 5/6 (524200 KB) OKAY [ 12.073s]
Writing 'system_a' OKAY [ 2.411s]
Sending sparse 'system_a' 6/6 (150336 KB) OKAY [ 3.472s]
Writing 'system_a' OKAY [ 0.693s]
archive does not contain 'system_ext.img'
extracting system_other.img (311 MB) to disk... took 1.298s
archive does not contain 'system.sig'
Sending 'system_b' (318468 KB) OKAY [ 7.554s]
Writing 'system_b' OKAY [ 1.492s]
extracting vendor.img (325 MB) to disk... took 1.367s
archive does not contain 'vendor.sig'
Sending 'vendor_a' (333468 KB) OKAY [ 8.089s]
Writing 'vendor_a' OKAY [ 1.554s]
archive does not contain 'vendor_dlkm.img'
archive does not contain 'vendor_other.img'
Erasing 'userdata' OKAY [ 0.897s]
mke2fs 1.45.4 (23-Sep-2019)
Creating filesystem with 13902843 4k blocks and 3481600 inodes
Filesystem UUID: 5fe38325-8737-4798-8b4a-263e023faf66
Superblock backups stored on blocks:
32768, 98304, 163840, 229376, 294912, 819200, 884736, 1605632, 2654208,
4096000, 7962624, 11239424
Allocating group tables: done
Writing inode tables: done
Creating journal (65536 blocks): done
Writing superblocks and filesystem accounting information: done
Sending 'userdata' (316 KB) OKAY [ 0.008s]
Writing 'userdata' OKAY [ 0.013s]
Rebooting OKAY [ 0.000s]
Finished. Total time: 102.961s
'''
# 7 刷入成功,等待重启,重新开启调试模式

三 ROOT手机
# 1 下载Magisk给手机root
地址: https://github.com/topjohnwu/Magisk/releases
# 2 下载 Magisk-v26.1.apk
# 3 把Magisk-v26.1.apk安装在手机上
adb install -r /Users/lqz/soft/Magisk-v26.1.apk
# 显示安装成功
Performing Streamed Install
Success
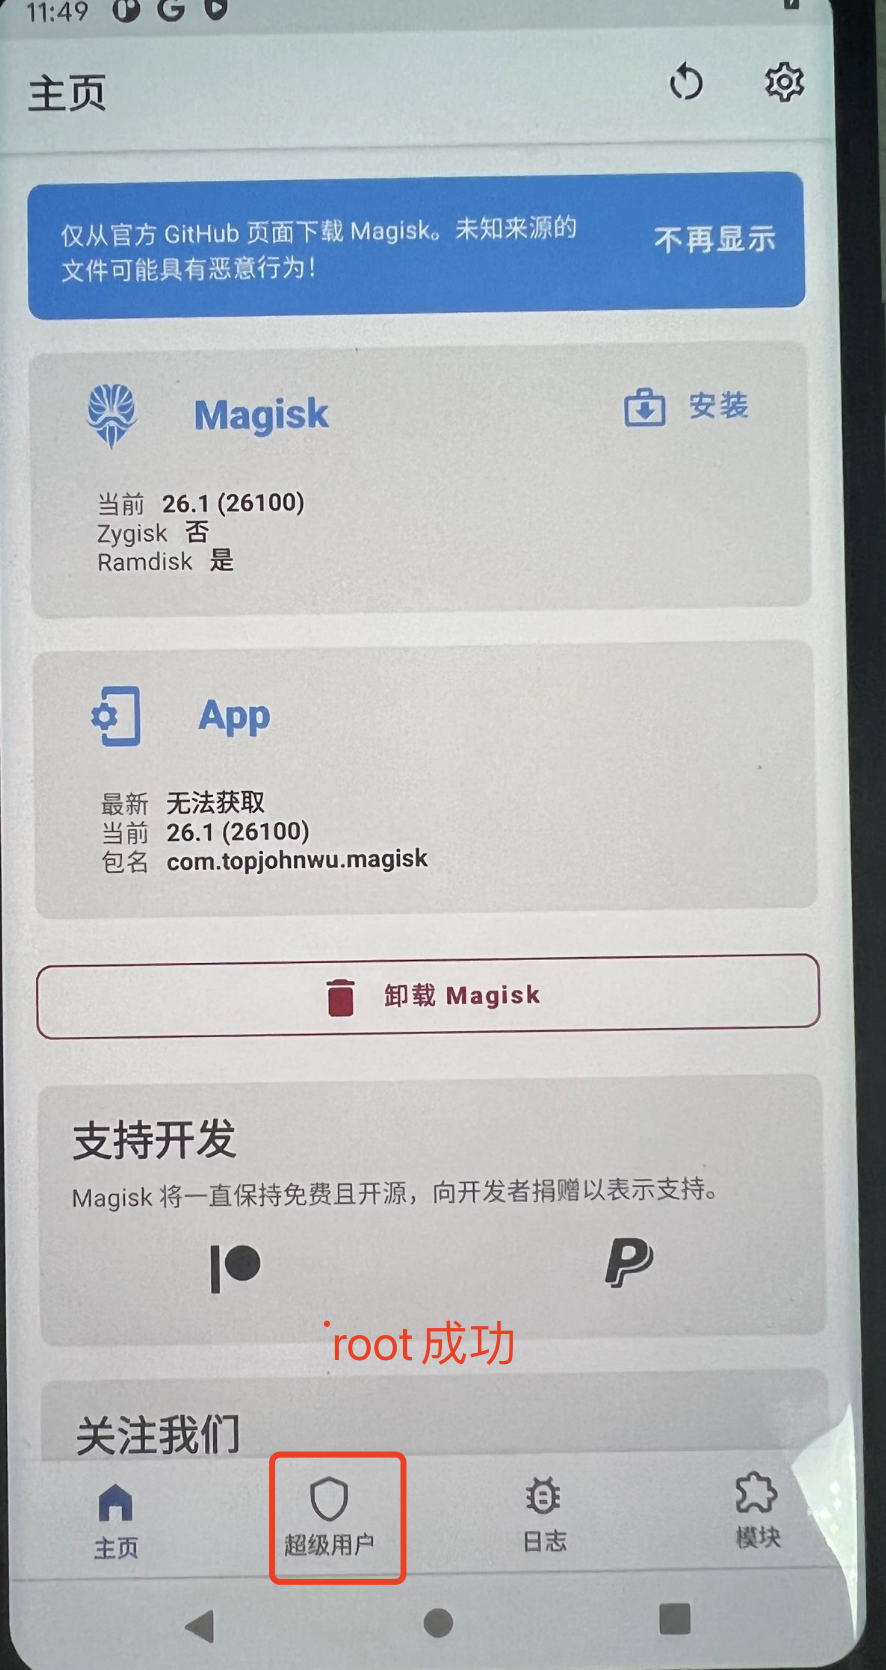
# 此时打开Magisk,看到超级用户栏是无法点选的,因为没有root
# 4 解压压缩包,刚刚装系统的压缩包解压后有image-taimen-rp1a.201005.004.a1.zip,把它解压
'''
bootloader-taimen-tmz30m.img
flash-all.bat
flash-all.sh
flash-base.sh
image-taimen-rp1a.201005.004.a1.zip
radio-taimen-g8998-00034-2006052136.img
'''
# 5 文件如下
'''
android-info.txt
boot.img # 引导镜像
dtbo.img
system_other.img
system.img
vbmeta.img
vendor.img
'''
# 6 把引导镜像[boot.img],使用Magisk修补[一定要注意文件路径]
adb push ./boot.img /sdcard/Download
# 7 在手机上打开Magisk,选择安装--》选择修补一个文件---》选择上传的 boot.img ---》点击开始---》修补完成后变成
adb pull /sdcard/Download/magisk_patched-26100_0DQpw.img /Users/lqz/soft
# 从手机拖到电脑上了
# 8 手机进入fastboot模式
adb reboot bootloader
fastboot devices
# 9 执行
fastboot flash boot /Users/lqz/soft/magisk_patched-26100_0DQpw.img
# 10 重启手机,root完成
adb reboot bootloader
# 11 设备有A/B分区的话,需要执行
fastboot flash boot_a /Users/lqz/soft/magisk_patched-26100_0DQpw.img
fastboot flash boot_b /Users/lqz/soft/magisk_patched-26100_0DQpw.img
# 重启设备
fastboot reboot
# 12 开启手机,打开Magisk,发现root成功