当缓存数据存入到Redis中,下次在访问相同的数据时,就不在直接操作数据库,直接从Redis中取缓存数据
【注:我们通常会把查询频率高的数据、修改频率低的数据、数据安全性要求不高的数据放入Redis中】
【注:缓存可以提高我们的查询效率,可以降低数据库的访问频率,减少数据库的压力】
示意图:

1.2使用Redis作为缓存
1.2.1 自己手写Redis缓存非业务代码
准备:
新建springboot工程,记得勾选以下的依赖包

创建好后我这里将版本改成2.3.2.RELEASE
如果你们要跟我一样的版本,那么刚才所勾选的mysql是不兼容的,所以需要改动依赖
而且我们也需要MybatisPlass,所以也需要加MybatisPlass依赖
      <!-- 2.3.2版本下的mysql依赖 -->
    <dependency>
         <groupId>mysql</groupId>
         <artifactId>mysql-connector-java</artifactId>
     </dependency>
    <!-- MybatisPlass依赖 -->
     <dependency>
         <groupId>com.baomidou</groupId>
         <artifactId>mybatis-plus-boot-starter</artifactId>
         <version>3.5.1</version>
     </dependency>
application文件中添加配置:
#mysql连接数据库信息
spring.datasource.driver-class-name=com.mysql.cj.jdbc.Driver
spring.datasource.url=jdbc:mysql://localhost:3306/aaasql?serverTimezone=Asia/Shanghai
spring.datasource.username=root
spring.datasource.password=root

#redis
spring.redis.host=192.168.235.135
spring.redis.port=6379

#mybatis-plus
mybatis-plus.configuration.log-impl=org.apache.ibatis.logging.stdout.StdOutImpl
实体类:
@Data
@NoArgsConstructor
@AllArgsConstructor
@TableName(value = "tbl_student")
public class student {
    @TableId(type = IdType.AUTO)
    private int id;
    @TableField(value = "s_name")
    private String sname;
    private String sex;
    private int cid;
}
vo-Result实体类:
@Data
@NoArgsConstructor
@AllArgsConstructor
public class Retust {
    private int code;
    private String msg;
    private Object data;
}
dao层:
public interface StudentDao extends BaseMapper<student> {
}
service层与service实现类:
public interface StudentService {
    Retust seleid(Integer id);
}
@Service
public class StudentServiceim implements StudentService {
@Autowired
private StudentDao studentDao;
@Autowired
private RedisTemplate redisTemplate;
@Override
public Retust seleid(Integer id) {
//首先从Redis中查询数据
Object o = redisTemplate.opsForValue().get("stu::" + id);
//判断缓存中是否存在,存在就直接将数据返回回去
if (o != null && o instanceof student){
return new Retust(200,"查询成功",o);
}
//判断数据库中是否存在所要查询的结果,如果有就将结果返回且将结果存入到缓存中
student student = studentDao.selectById(id);
if (student != null){
redisTemplate.opsForValue().set("stu::"+id,student);
return new Retust(200,"查询成功",student);
}
return new Retust(500,"查询失败",null);
}
}controller层:
@RestController
public class StudentController {

    @Autowired
    private StudentService service;

    @GetMapping("/sele")
    private Retust sele(Integer id){
        return service.seleid(id);
    }
}
运行测试:

【注:第一次运行,缓存中并没有要查找的数据,所以需要从数据库中查找数据,查找成功后,其将数据返回且存入了缓存中】

【注:那么第二次查询,其将会直接从缓存中取出数据返回】
1.2.1 springboot提供注解来实现Redis缓存
【@Cacheable(cacheNames = "key",key = "#id")】--查询缓存注解
【@CachePut(cacheNames = "key",key="#student.id")】--修改缓存注解
【@CacheEvict(cacheNames = "key",key = "#id")】--删除缓存注解
性能更好,更加人性化
【注:首先必须让redisTemplate支持缓存】
在已有的config包中的RedisConfig文件中【没有创建一个】
@Bean
    public CacheManager cacheManager(RedisConnectionFactory factory) {
        RedisSerializer<String> redisSerializer = new StringRedisSerializer();
        Jackson2JsonRedisSerializer jackson2JsonRedisSerializer = new Jackson2JsonRedisSerializer(Object.class);
        //解决查询缓存转换异常的问题
        ObjectMapper om = new ObjectMapper();
        om.setVisibility(PropertyAccessor.ALL, JsonAutoDetect.Visibility.ANY);
        om.enableDefaultTyping(ObjectMapper.DefaultTyping.NON_FINAL);
        jackson2JsonRedisSerializer.setObjectMapper(om);
        // 配置序列化(解决乱码的问题),过期时间600秒
        RedisCacheConfiguration config = RedisCacheConfiguration.defaultCacheConfig()
                .entryTtl(Duration.ofSeconds(600)) //缓存过期10分钟 ---- 业务需求。
                .serializeKeysWith(RedisSerializationContext.SerializationPair.fromSerializer(redisSerializer))//设置key的序列化方式
                .serializeValuesWith(RedisSerializationContext.SerializationPair.fromSerializer(jackson2JsonRedisSerializer)) //设置value的序列化
                .disableCachingNullValues();
        RedisCacheManager cacheManager = RedisCacheManager.builder(factory)
                .cacheDefaults(config)
                .build();
        return cacheManager;
    }
在主启动类上添加开启缓存注解
@SpringBootApplication
@MapperScan(basePackages = "com.aaa.dao")
@EnableCaching //开启缓存注解驱动
public class RedisSpringBoot02Application {
    public static void main(String[] args) {
        SpringApplication.run(RedisSpringBoot02Application.class, args);
    }
}
在业务层使用该注解: @Cacheable(cacheNames = "key 的名字",key = "#id")
@Service
public class StudentServiceim implements StudentService {
    @Autowired
    private StudentDao studentDao;

    //该注解用于查询功能方法上。 先查询缓存中是否存在cacheNames+"::"+key是否存在,
    // 如果存在则不执行该方法,如果不存在则执行该方法并把该方法的返回结果存入缓存中。以cacheName+"::"+key作为缓存的key
    @Cacheable(cacheNames = "stu",key = "#id")
    public Retust seleid(Integer id) {
        student student = studentDao.selectById(id);
        return student!=null?new Retust(200,"查询成功",student):new Retust(500,"查询失败",null);
    }
}
测试运行:
结果与手动的一样,当缓存中没有查询所需的结果就会去数据库中查找返回,且将结果存入缓存中,第二次访问时,就会直接从redis中取所需的值
这里只演示了查询,剩下的只需大家一一测试即可
完整增删改查:【注:service接口+service实现类】
public interface StudentService {
    //查询
    Retust seleid(Integer id);
    //修改
    Retust updata(student student);
    //添加
    Retust insert(student student);
    //删除
    Retust del(Integer id);
}
@Service
public class StudentServiceim implements StudentService {
@Autowired
private StudentDao studentDao;
//该注解用于查询功能方法上。 先查询缓存中是否存在cacheNames+"::"+key是否存在,
// 如果存在则不执行该方法,如果不存在则执行该方法并把该方法的返回结果存入缓存中。以cacheName+"::"+key作为缓存的key
@Cacheable(cacheNames = "stu",key = "#id")
public Retust seleid(Integer id) {
student student = studentDao.selectById(id);
return student!=null?new Retust(200,"查询成功",student):new Retust(500,"查询失败",null);
}
//更改
//把该方法的返回结果重新写入到缓存中
@CachePut(cacheNames = "stu",key="#student.id")
public Retust updata(student student) {
int i = studentDao.updateById(student);
return i!=0?new Retust(200,"修改成功",student):new Retust(500,"修改失败",null);
}
//插入 [注:添加不需要进行缓存,因为添加过后的数据会通过查询来直接插入到缓存中]
@Override
public Retust insert(student student) {
int i = studentDao.insert(student);
return i!=0?new Retust(200,"添加成功",student):new Retust(500,"添加失败",null);
}
//删除
//把缓存中的数据进行移除,以cacheName+"::"+key作为缓存的key移除
@CacheEvict(cacheNames = "stu",key = "#id")
public Retust del(Integer id) {
int i = studentDao.deleteById(id);
return i!=0?new Retust(200,"删除成功",null):new Retust(500,"删除失败",null);
}
}
【注;可以继续使用上面的springboot工程模板】
实体类:
@Data
@TableName("tbl_stock")
public class Stock {
    @TableId(type = IdType.AUTO)
    private int id;
    private int goodsnum;
}

dao层:
@Mapper
public interface StockDao {
    @Select("select goodsnum from tbl_stock where id=#{id}")
    int findById(Integer productid);

    @Update("update tbl_stock set goodsnum=goodsnum-1 where id=#{id} ")
    void update(Integer productid);
}
service层:
@Service
public class StockService02 {

    @Autowired
    private StockDao stockDao;
    //---通过jmeter压测后发现商品出现--线程安全问题。
    //--如何解决上面的线程安全问题: 加锁。【自动锁synchronized 或手动锁 Lock】
    //--如果我们现在的项目部署时为一个集群--如果再高并发下使用【自动锁synchronized 或手动锁 Lock】有出现了线程安全问题。【自动锁synchronized 或手动锁 Lock】他们属于jvm锁。
    //--如何解决集群下线程安全问题。
    public String decrement(Integer productid) {
        synchronized (this) {

            int num = stockDao.findById(productid);
            if (num > 0) {
                stockDao.update(productid);
                System.out.println("商品编号为:" + productid + "的商品库存剩余:" + (num - 1) + "个");
                return "商品编号为:" + productid + "的商品库存剩余:" + (num - 1) + "个";
            } else {
                System.out.println("商品编号为:" + productid + "的商品库存不足。");
                return "商品编号为:" + productid + "的商品库存不足。";
            }
        }
    }
}
controller:
@RestController
public class StockController {

    @Autowired
    private StockService02 stockService;

    //根据商品编号减库存
    @GetMapping("/incr/{productid}")
    public String incr(@PathVariable Integer productid){
         return stockService.decrement(productid);
    }
}
测试运行:

现在只是单一测试,在实际应用场景中,有时可能会达到几万的并发量,这里就可能会出现超卖的情况
2.1 模拟多服务
现在我们模拟多服务,多线程并发的场景
这里使用两款工具:
第一,我们需要两台服务共同运行
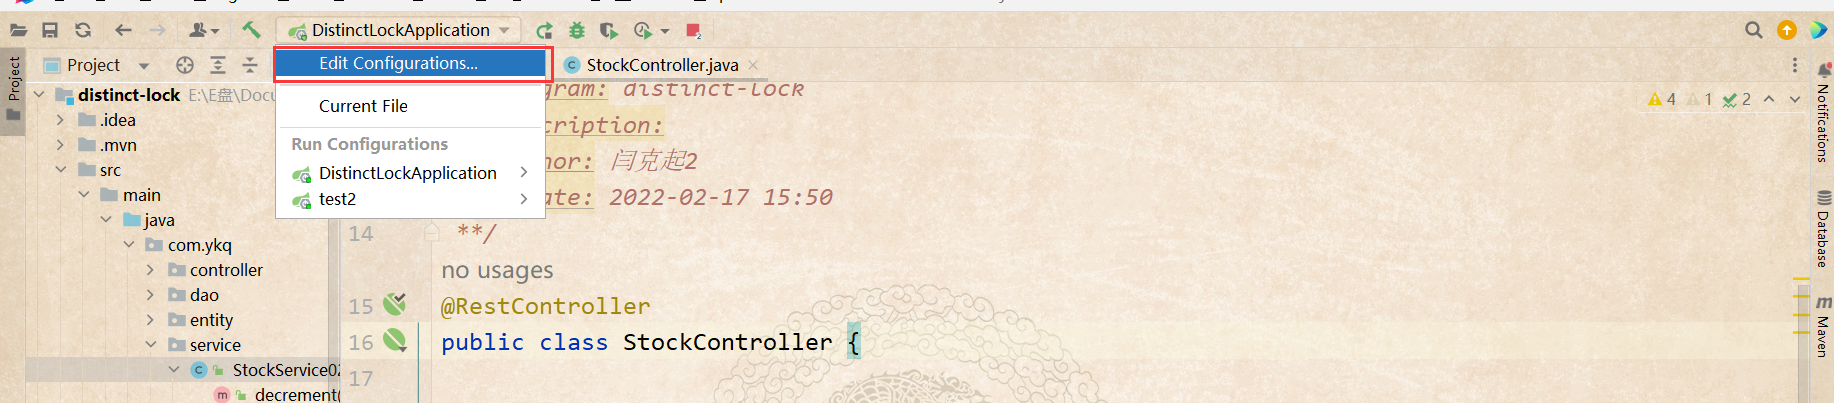

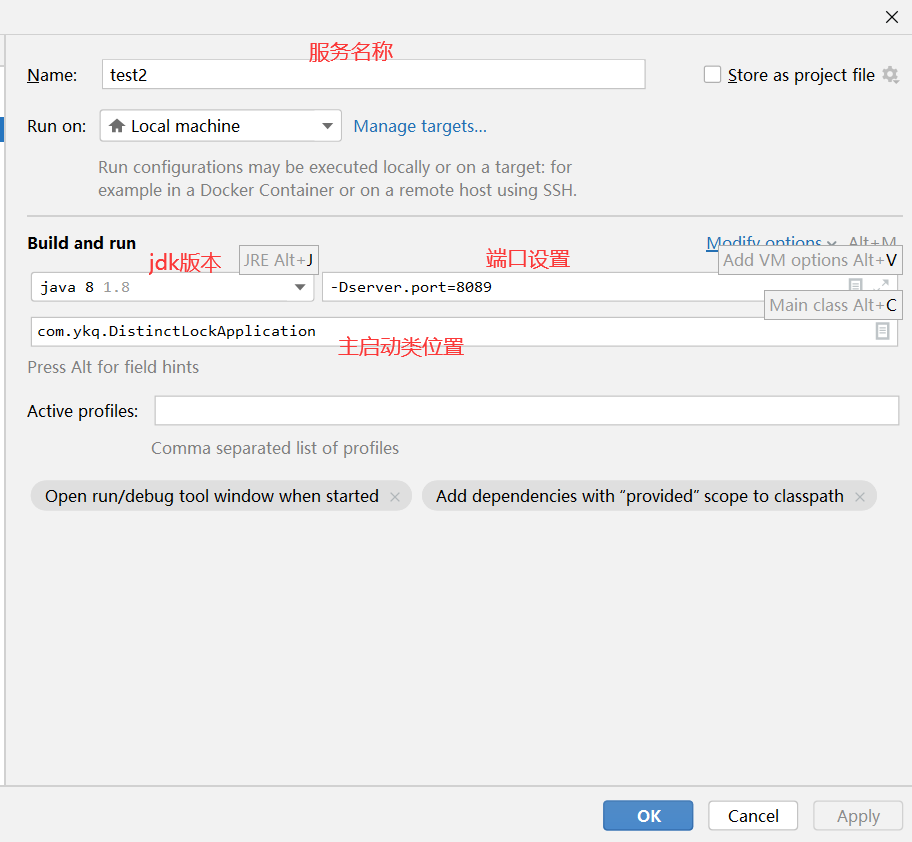
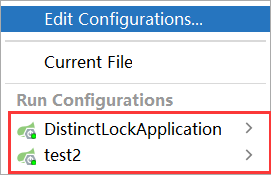
启动两台服务器
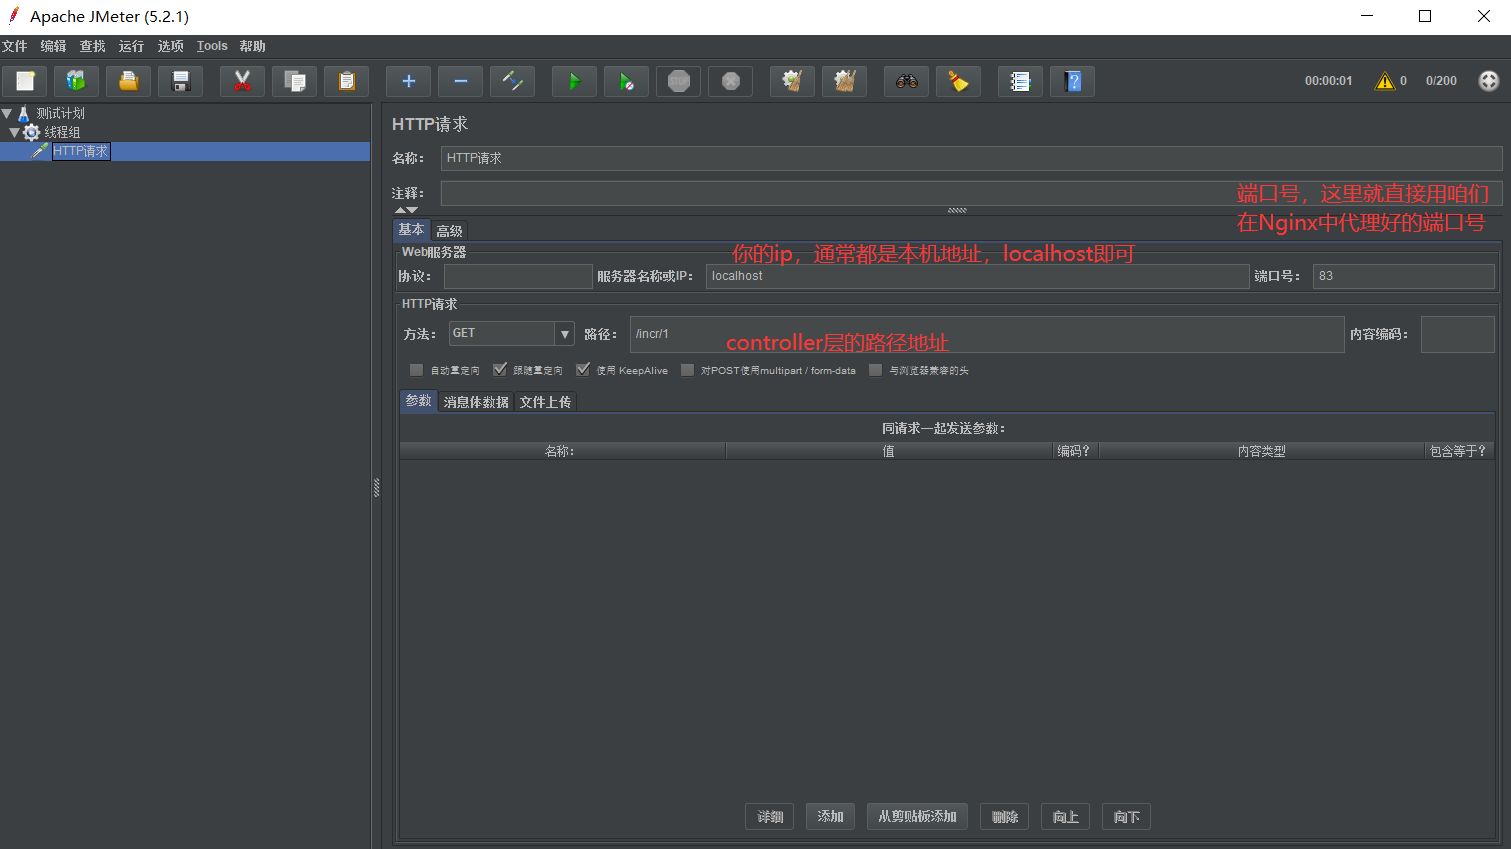
2.2使用Nginx代理
这里使用windows版Nginx软件
Nginx百度云盘链接 提取码:6666
下载解压后
打开里面的conf目录,打开nginx.conf配置文件
将我们两台服务代理
#定义被负载均衡的所有服务器地址【upstream: 定义集群信息】
upstream  aaa{
server localhost:8088;
server localhost:8089;
}

#定义负载均衡代理端口
server {
    listen 83;
    server_name localhost;

    location /{
    proxy_pass http://aaa;
    }
}
2.3使用JMeter工具
【注:使用Jmeter工具用来模拟多用户多线程并发场景】
jmerer百度云盘链接 提取码:6666
下载后解压
打开文件目录进入到bin目录中,打开jmeter.bat文件进入

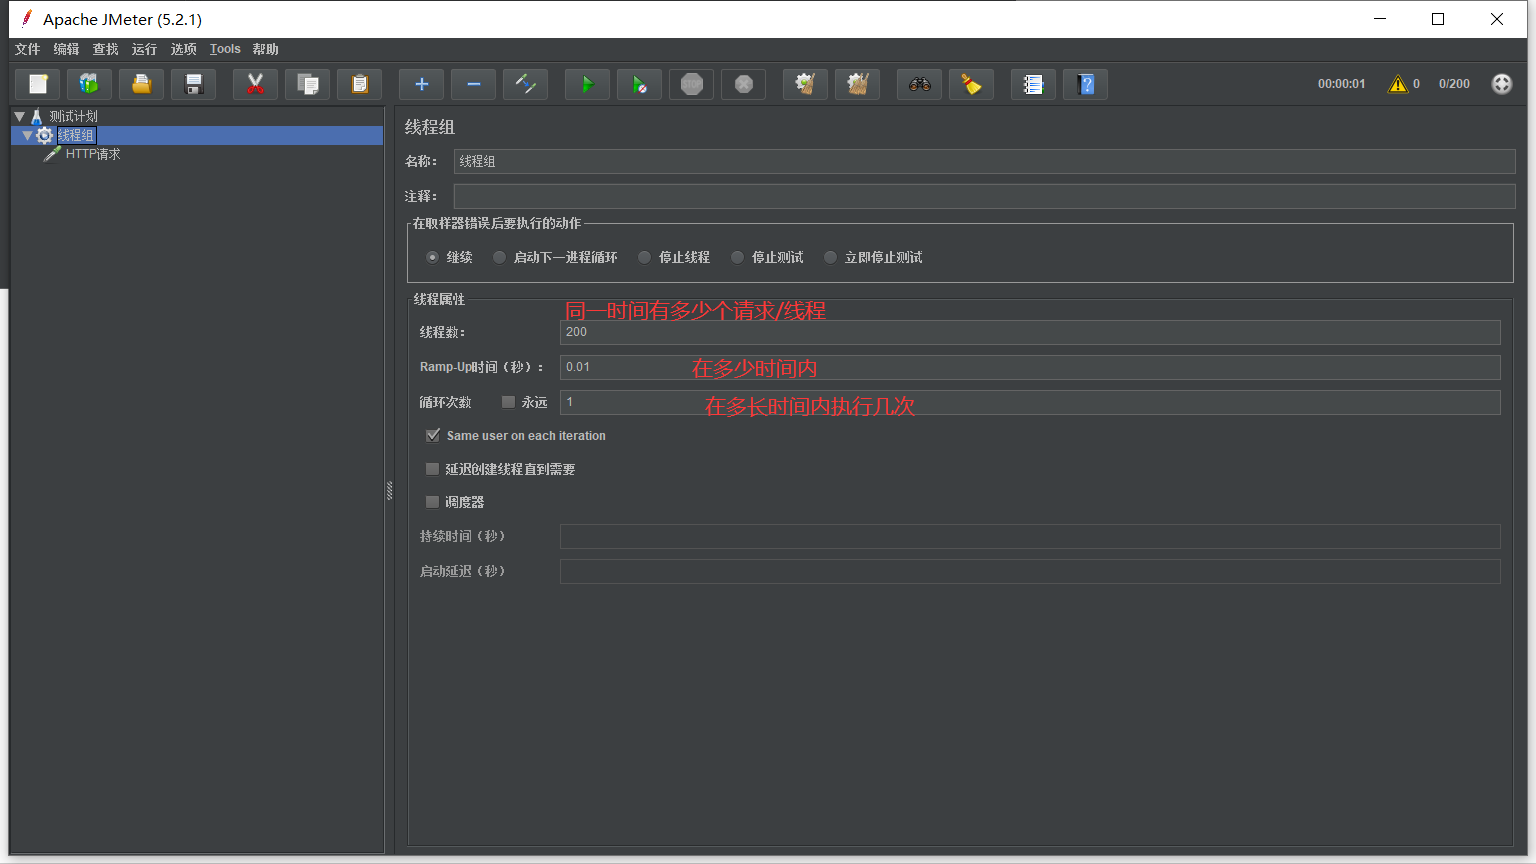
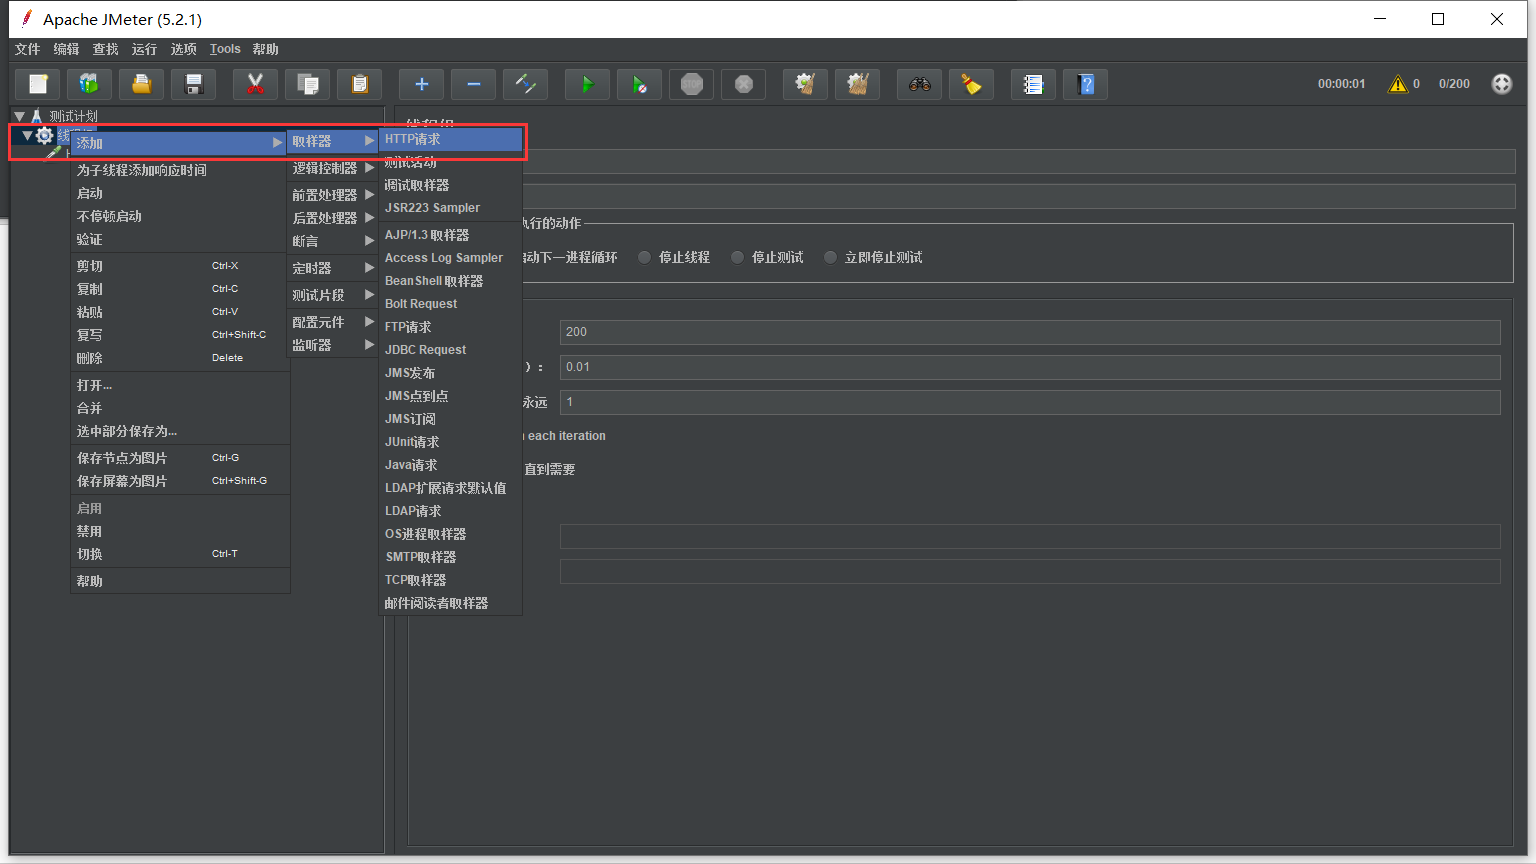
点击运行
【注:前提是你的idea两台服务都要启动】
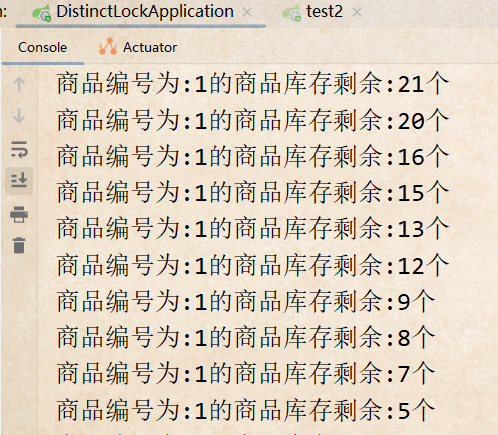
2.4使用线程自动锁测试结果

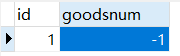
果然,在多线程的并发下,出现了超卖现象,这种是及不被允许的
【注:这里是已经使用线程自动锁的情况下】

2.5使用Redis分布式锁
service层代码:
@Service
public class StockService02 {

    @Autowired
    private StockDao stockDao;
    @Autowired
    private RedisTemplate redisTemplate;
    //---通过jmeter压测后发现商品出现--线程安全问题。
    //--如何解决上面的线程安全问题: 加锁。【自动锁synchronized 或手动锁 Lock】
    //--如果我们现在的项目部署时为一个集群--如果再高并发下使用【自动锁synchronized 或手动锁 Lock】有出现了线程安全问题。【自动锁synchronized 或手动锁 Lock】他们属于jvm锁。
    //--如何解决集群下线程安全问题。
    public String decrement(Integer productid) {
        ValueOperations valueOperations = redisTemplate.opsForValue();
        //使用opsForValue()中的setIfAbsent方法来实现Redis分布式锁
        Boolean flss = valueOperations.setIfAbsent("pro::" + productid, "test", 30, TimeUnit.SECONDS);
        //判断是否已经拿到锁,true为已拿到锁
        if (flss){
            try {
                int num = stockDao.findById(productid);
                if (num > 0) {
                    stockDao.update(productid);
                    System.out.println("商品编号为:" + productid + "的商品库存剩余:" + (num - 1) + "个");
                    return "商品编号为:" + productid + "的商品库存剩余:" + (num - 1) + "个";
                } else {
                    System.out.println("商品编号为:" + productid + "的商品库存不足。");
                    return "商品编号为:" + productid + "的商品库存不足。";
                }
            }finally {
                //释放锁资源
                redisTemplate.delete("pro::"+productid);
            }//如果没有拿到锁进行以下尝试
        }else {
            //休眠100毫秒再次尝试调用锁
            try {
                Thread.sleep(100);
            }catch (InterruptedException e){
                e.printStackTrace();
            }
            //递归锁
            return decrement(productid);
        }


    }
}
再次测压运行测试:

分布式锁成功起到作用
Redis分布式锁测试成功!!!

以上便是Redis实例应用(应用场景+分布式锁)中的内容,如有漏缺请在下方留言告知,我会及时补充