参考:
https://docs.opencv.org/4.x/d7/d9f/tutorial_linux_install.html
Build with opencv_contrib
# 1. Install minimal prerequisites, libgtk2.0-dev pkg-config 用来显示图像
sudo apt update && sudo apt install -y cmake g++ wget unzip libgtk2.0-dev pkg-config

# 2. Download and unpack sources
# cd 到自己要放 opencv 的路径下,比如我们的是:/home/h/programs/cv
cd /home/h/programs/cv
sudo wget -O opencv.zip https://github.com/opencv/opencv/archive/4.2.0.zip --no-check-certificate
sudo wget -O opencv_contrib.zip https://github.com/opencv/opencv_contrib/archive/4.2.0.zip --no-check-certificate
unzip opencv.zip && unzip opencv_contrib.zip

# 3. Create build directory and switch into it
mkdir build && cd build

# 4. Configure, build 目录内, 我们把 opencv 安装到 $HOME/.local  下
cmake -DCMAKE_INSTALL_PREFIX=$HOME/.local  -DOPENCV_EXTRA_MODULES_PATH=../opencv_contrib-4.2.0/modules ../opencv-4.2.0

# 5. build 目录内,编译
make -j 16

# 6. 安装
make install

# 删除压缩包
cd .. && sudo rm opencv.zip opencv_contrib.zip
编译时候报错:opencv_contrib/modules/xfeatures2d/src/boostdesc.cpp:673:20: fatal error: boostdesc_bgm.i: No such file or directory
opencv_contrib-4.2.0/modules/xfeatures2d/src/boostdesc.cpp:654:20: fatal error: boostdesc_bgm.i: 没有那个文件或目录
解决:网络问题,添加代理,然后重复 4,5 步
参考:https://www.cnblogs.com/arxive/p/11778731.html
Using OpenCV with gcc and CMake
参考:https://docs.opencv.org/4.x/db/df5/tutorial_linux_gcc_cmake.html
// DisplayImage.cpp
#include <stdio.h>
#include <opencv2/opencv.hpp>

using namespace cv;
int main(int argc, char** argv )
{
	if ( argc != 2 )
	{
		printf("usage: DisplayImage.out <Image_Path>\n");
		return -1;
	}
	Mat image;
	image = imread( argv[1], IMREAD_COLOR );
	if ( !image.data )
	{
		printf("No image data \n");
		return -1;
	}
	namedWindow("Display Image", WINDOW_AUTOSIZE );
	imshow("Display Image", image);
	waitKey(0);
	return 0;
}
CMakeLists.txt:
cmake_minimum_required(VERSION 2.8)
set(OpenCV_DIR /home/h/.local/lib/cmake/opencv4)
project( DisplayImage )
find_package( OpenCV REQUIRED )
include_directories( ${OpenCV_INCLUDE_DIRS} )
add_executable( DisplayImage DisplayImage.cpp )
target_link_libraries( DisplayImage ${OpenCV_LIBS} )
Create build directory and switch into it
mkdir build && cd build
目录:
.
├── build
├── CMakeLists.txt
└── DisplayImage.cpp
cmake ..
报错: By not providing "FindOpenCV.cmake" in CMAKE_MODULE_PATH this project has
asked CMake to find a package configuration file provided by "OpenCV", but
CMake did not find one.
Could not find a package configuration file provided by "OpenCV" with any
of the following names:
OpenCVConfig.cmake
opencv-config.cmake
Add the installation prefix of "OpenCV" to CMAKE_PREFIX_PATH or set
"OpenCV_DIR" to a directory containing one of the above files. If "OpenCV"
provides a separate development package or SDK, be sure it has been
installed.
解决:
方式1:
# CMakeLists.txt:
set(OpenCV_DIR /home/h/.local/lib/cmake/opencv4)
方式2:
cmake -DOpenCV_DIR=/home/h/.local/lib/cmake/opencv4 ..
然后:
# 在build 文件夹下
make
./DisplayImage lena.jpg
报错:
Gtk-Message: 23:48:54.655: Failed to load module "canberra-gtk-module"
解决:
sudo apt-get install libcanberra-gtk-module
其他:
为python3构建opencv:https://stackoverflow.com/a/39409570
参考:https://cloud.tencent.com/developer/article/1657529
安装 opencv with cuda
参考:https://zhuanlan.zhihu.com/p/640084627
1. 卸载 opencv
找到之前装opencv的build文件夹,进入后执行卸载指令
sudo make uninstall
然后再把之前留在 usr 文件夹里的剩余文件都删掉。我之前直接按照官网说明安装的,所以东西都在 usr/local/ 下
//需要根据自己的情况修改
sudo rm -r /usr/local/include/opencv4 /usr/local/share/opencv4 /usr/local/lib/libopencv*
注意:我们这里是 /home/h/.local 替换掉 /usr/local/
2. 下载 opencv
https://github.com/opencv/opencv/archive/4.5.4.zip
https://github.com/opencv/opencv_contrib/archive/4.5.4.zip
解压、放到一个文件夹中。
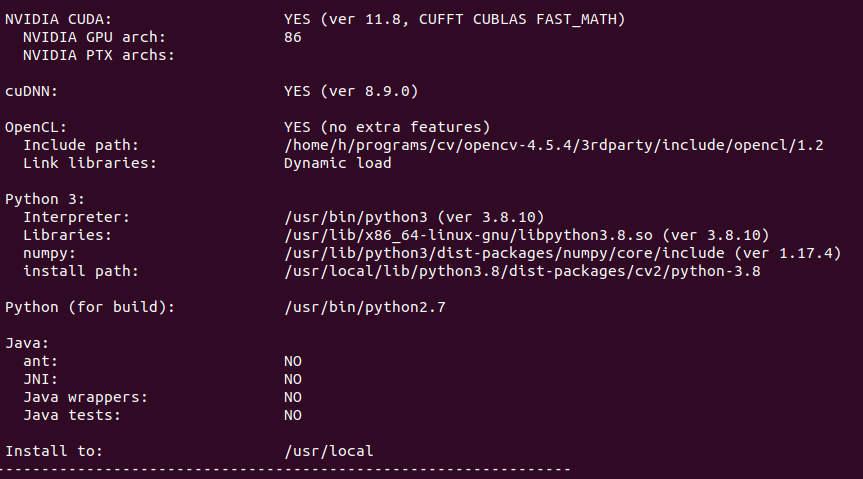
3. 编译支持GPU加速的OpenCV
切记:注意:如果已经在 build 中编译,每次 cmake 前请把 rm CMakeCache.txt 删了再编译就可。
cd opencv-4.5.4
mkdir build && cd build
cmake -D CMAKE_BUILD_TYPE=RELEASE \
  -D CMAKE_INSTALL_PREFIX=/usr/local \
  -D OPENCV_EXTRA_MODULES_PATH=../../opencv_contrib-4.5.4/modules \
  -D CUDA_TOOLKIT_ROOT_DIR=/usr/local/cuda \
  -D CUDA_ARCH_BIN=8.6 \
  -D WITH_CUDA=ON  \
  -D OPENCV_DNN_CUDA=ON  \
  -D WITH_CUDNN=ON  \
  -D ENABLE_FAST_MATH=ON  \
  -D CUDA_FAST_MATH=ON  \
  -D WITH_CUBLAS=ON  \
  -D OPENCV_GENERATE_PKGCONFIG=1  \
  -D BUILD_EXAMPLES=ON \
  -D BUILD_NEW_PYTHON_SUPPORT=ON \
  -D BUILD_opencv_python3=ON \
  -D HAVE_opencv_python3=ON  \
  -D OPENCV_ENABLE_NONFREE=ON  \
  -D INSTALL_PYTHON_EXAMPLES=ON \
  -D OPENCV_PYTHON3_INSTALL_PATH=/usr/local/lib/python3.8/dist-packages  \
  -D PYTHON_EXECUTABLE=/usr/bin/python3.8 \
  ..
分行写 -D 有空格,写在一行无空格: -DCUDA_ARCH_BIN
网络问题需要梯子
查询 DCUDA_ARCH_BIN=8.6 ,我的 3060是这个。https://developer.nvidia.com/cuda-gpus#compute
lscpu 查看有多少个内核可用,然后使用 。
架构: x86_64
CPU 运行模式: 32-bit, 64-bit
字节序: Little Endian
Address sizes: 48 bits physical, 48 bits virtual
CPU: 12
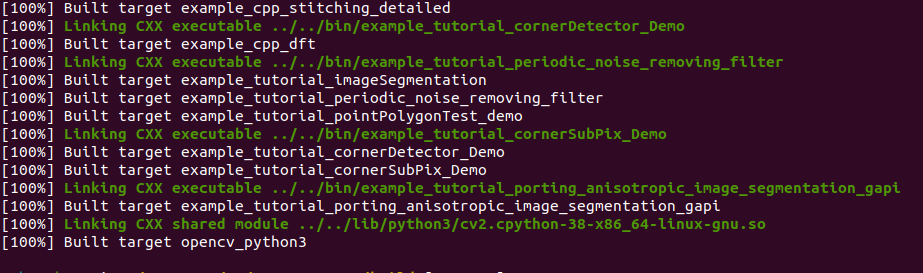
make -j 12
参考: https://blog.csdn.net/woshicver/article/details/124763031#t4
请注意该教程,不要做软链接
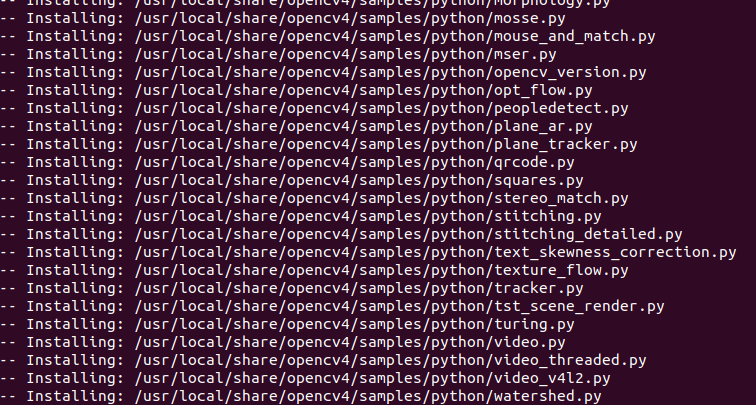
4. 安装 OpenCV
sudo make install -j 12
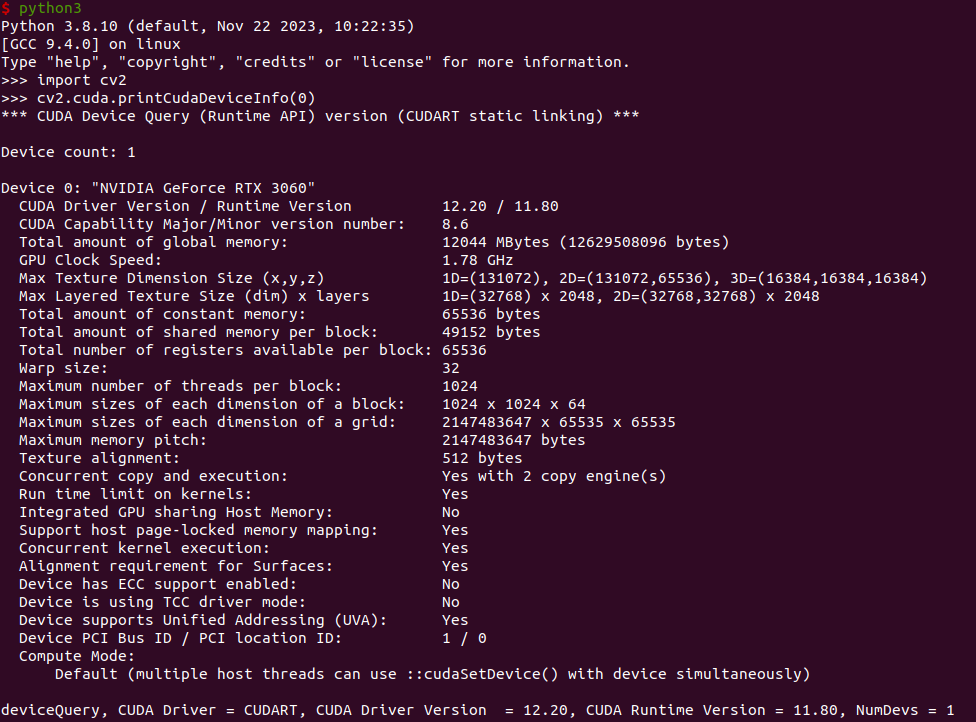
使用 python3 解释器和 cv2.cuda.printCudaDeviceInfo(0) 来验证库是否正常工作:
5. 清理
安装后,有些文件我们将不再需要,可以安全删除:
cd ..
rm -rf opencv-4.5.4 opencv_contrib-4.5.4
使用的 CMake 标志参考
CMAKE_BUILD_TYPE =RELEASE:禁用调试选项
CMAKE_INSTALL_PREFIX =/usr/local: 设置生成的二进制文件的根目录
WITH_CUDA =ON:启用 CUDA 支持
WITH_CUDNN=ON:(未记录)启用 cuDNN 支持
WITH_CUBLAS=ON:(未记录)启用 cuBLAS 支持
WITH_TBB =ON:使用线程构建块启用并行编程
OPENCV_DNN_CUDA =ON:启用 CUDA 后端并构建dnn模块(需要 CUDA、cuDNN 和 cuBLAS)
https://docs.opencv.org/4.x/db/d05/tutorial_config_reference.html#tutorial_config_reference_dnn
OPENCV_ENABLE_NONFREE =ON:启用受专利保护的算法
https://docs.opencv.org/4.x/db/d05/tutorial_config_reference.html#tutorial_config_reference_misc
CUDA_ARCH_BIN =8.7:指定NVIDIA GPU架构版本,根据自己的来
https://github.com/opencv/opencv/blob/4.x/cmake/OpenCVDetectCUDA.cmake#L217
OPENCV_EXTRA_MODULES_PATH =$HOME/opencv_contrib/modules:包含 OpenCV 的额外模块
BUILD_EXAMPLES =OFF:禁用构建示例
HAVE_opencv_python3 =ON:强制依赖opencv_python3
https://docs.opencv.org/4.x/db/d05/tutorial_config_reference.html#tutorial_config_reference_func
#include <opencv2/opencv.hpp>
#include <vector>
#include <string>
#include <eigen3/Eigen/Core>
#include <unistd.h>
#include <opencv2/cudastereo.hpp>
#include <chrono>
#include <iostream>

using namespace std;

void calcu_disparity(cv::Mat& left, cv::Mat& right, cv::Mat& disparity)
{
	auto t_a = chrono::high_resolution_clock::now();
	cv::Ptr<cv::StereoSGBM> sgbm = cv::StereoSGBM::create(
		0, 96, 9, 8 * 9 * 9, 32 * 9 * 9, 1, 63, 10, 100, 32);
	cv::Mat disparity_sgbm;
	sgbm->compute(left, right, disparity_sgbm);
	disparity_sgbm.convertTo(disparity, CV_32F, 1.0 / 16.0f);
	auto t_b = chrono::high_resolution_clock::now();
	cout<<"no cuda:"<< chrono::duration_cast<chrono::microseconds>(t_b-t_a).count() / 1000<<"ms"<<endl;
}

void calcu_disparity_cuda(cv::Mat& left, cv::Mat& right, cv::Mat& disparity)
{
	auto t_a = chrono::high_resolution_clock::now();
	cv::Ptr<cv::cuda::StereoSGM> sgbm = cv::cuda::createStereoSGM(
		0, 128, 8, 180, 3, cv::cuda::StereoSGM::MODE_HH);
	cv::Mat disparity_sgbm(left.size(), CV_16S);
	cv::cuda::GpuMat cudaDisparityMap(left.size(), CV_16S);
	cv::cuda::GpuMat cudaDrawColorDisparity(left.size(), CV_8UC4);
	cv::cuda::GpuMat cudaLeftFrame, cudaRightFrame;
	cudaLeftFrame.upload(left);
	cudaRightFrame.upload(right);
	sgbm->compute(cudaLeftFrame, cudaRightFrame, cudaDisparityMap);
	cudaDisparityMap.download(disparity_sgbm);
	disparity_sgbm.convertTo(disparity, CV_32F, 1.0 / 16.0f);
	auto t_b = chrono::high_resolution_clock::now();
	cout<<"with cuda:"<< chrono::duration_cast<chrono::microseconds>(t_b-t_a).count() / 1000<<"ms"<<endl;
}

void get_data(int i, std::string& left_path, std::string& right_path)
{
	std::string data_path = "/home/h/projects/C++/2011_09_26_drive_0048_sync/2011_09_26/2011_09_26_drive_0048_sync/";
	std::string left_data_path = data_path+"image_00/data/";
	std::string right_data_path = data_path+"image_01/data/";
	char ss[22];
	sprintf(ss,"%010d",i);
	left_path = left_data_path + ss+".png";
	right_path = right_data_path + ss+".png";
}

int main(int argc, char **argv)
{
	int data_size = 22;
	for(int i = 0;i<data_size;++i){
		std::string left_image_path, right_image_path;
		get_data(i, left_image_path, right_image_path);
		cv::Mat left_image = cv::imread(left_image_path, 0);
		cv::Mat right_image = cv::imread(right_image_path, 0);

		// if (!left_image.data || !right_image.data) {
		//     // 图像加载失败,处理错误逻辑
		//     std::cerr << "Failed to load images." << std::endl;
		// } else {
		//     // 图像加载成功,显示图像
		//     cv::imshow("Left Image", left_image);
		//     cv::imshow("Right Image", right_image);
		//     // cv::waitKey(0); // 等待按键
		// }
		cv::Mat disparity;
		calcu_disparity(left_image, right_image, disparity);
		cv::imshow("disparity Image", disparity);
		cv::Mat disparity_cuda;
		calcu_disparity_cuda(left_image, right_image, disparity_cuda);
		cv::imshow("disparity_cuda Image", disparity_cuda);
		const char c = cv::waitKey(1);
		if (c == 27) // ESC
			break;
	}
	return 0;
}
cmakelist
cmake_minimum_required(VERSION 2.8)
set(OpenCV_DIR /usr/local/lib/cmake/opencv4)
project( main )
find_package( OpenCV REQUIRED )
include_directories( ${OpenCV_INCLUDE_DIRS} )
add_executable( main main.cpp )
target_link_libraries( main ${OpenCV_LIBS} )
- opencv 笔记 opencv_contrib contrib ubuntuopencv笔记opencv_contrib contrib opencv_contrib opencv opencv_contrib xfeatures2d xfeatures2 opencv opencv_contrib opencv4 contrib opencv_contrib contrib opencv mingw opencv-contrib-python opencv-contrib-python contrib opencv python opencv4 contrib opencv vscode ubuntu opencv opencv4 ubuntu opencv 5.5