本系列旨在交流 ESP32-S3 硬件开发环境的搭建,通过一些基本的示例来展示怎么用 ESP-IDF (Espressif IoT Development Framework) 来安装、配置环境,并编译、下载固件至 ESP32-S3 开发板等步骤。如果有什么没提到或者有问题的,欢迎各位留言交流。
原文链接: https://qubot.org/2023/03/22/install-esp-idf-for-bananapi-bpi-leaf-s3/
作者:[Qubot](https://qubot.org)
## 前言
ESP-IDF是一个面向ESP32系列的官方开发框架,用于开发嵌入式应用程序。目前ESP-IDF已经支持了很多芯片,下面是具体的型号。

最新的支持列表在[这里](https://github.com/espressif/esp-idf/blob/master/README_CN.md) 获取
## 安装前的准备
### 必备硬件
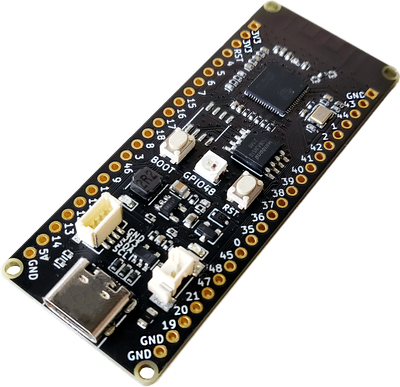
* BPI-Leaf-S3开发板:[购买链接](https://item.taobao.com/item.htm?id=677287234553)(其他ESP32板子也可以)
* USB 数据线 (USB-A 转 Type-C)
* 电脑(Windows、Linux 或 macOS都可以)
### 必备软件
在安装ESP-IDF之前,需要安装一些必要的软件:
* Git:用于从GitHub上克隆ESP-IDF存储库。
* Python:ESP-IDF需要Python 3.5或更高版本。
* CMake:用于生成构建文件。
#### Windows系统
在Windows系统中,可以从以下链接下载和安装这些软件:
Git: https://git-scm.com/download/win
Python: https://www.python.org/downloads/windows/
CMake: https://cmake.org/download/
#### Linux系统
在Linux系统中,可以使用以下命令来安装这些软件(Linux下我没有装过,这里是根据官方文档加上的):
* Ubuntu 和 Debian:
```shell
sudo apt-get install git wget flex bison gperf python3 python3-venv python3-setuptools cmake ninja-build ccache libffi-dev libssl-dev dfu-util libusb-1.0-0
```
* CentOS 7 & 8(官方这里说为了好的体验建议用CentOS 8):
```shell
sudo yum -y update && sudo yum install git wget flex bison gperf python3 python3-setuptools cmake ninja-build ccache dfu-util libusbx
```
* Arch:
```shell
sudo pacman -S --needed gcc git make flex bison gperf python cmake ninja ccache dfu-util libusb
```
#### MacOS系统
在MacOS中,需要先安装一个HomeBrew(MacPorts也行,不过没试过)
```shell
brew install cmake ninja dfu-util
```
或者(MacPorts下)
```shell
sudo port install cmake ninja dfu-util
```
如果你想加快编译速度,需要装一个ccache
```shell
brew install ccache
```
或者(MacPorts下)
```shell
sudo port install ccache
```
## 安装
我这里是基于VS Code的安装,所以首先需要再安装一个VS Code,下载地址:[Visual Studio Code](https://code.visualstudio.com/)
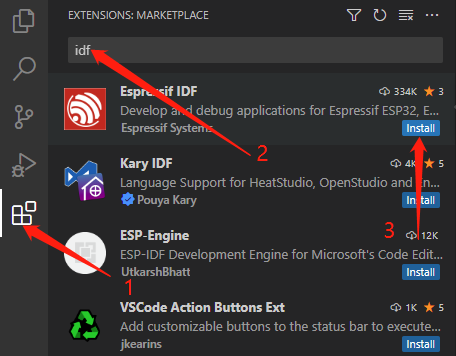
安装完成之后,单击 Visual Studio Code 一侧活动栏中的扩展图标,打开扩展视图或者快捷键Ctrl+Shift+X,Mac下是⇧+⌘+X),并在搜索框内输入idf搜索,下面第一个就是,点击Install安装,并等待右下角加载完
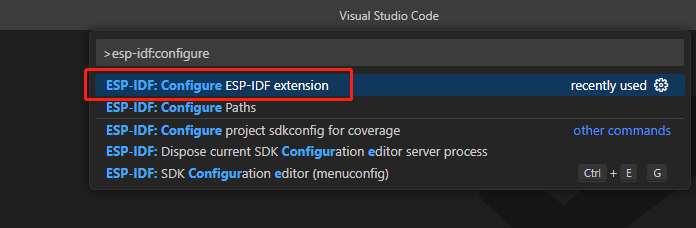
点击右上角的View > Command Palette(或者Ctrl+Shift+P,Mac下是⇧+⌘+P),输入ESP-IDF: Configure(不分大小写)并选择第一个
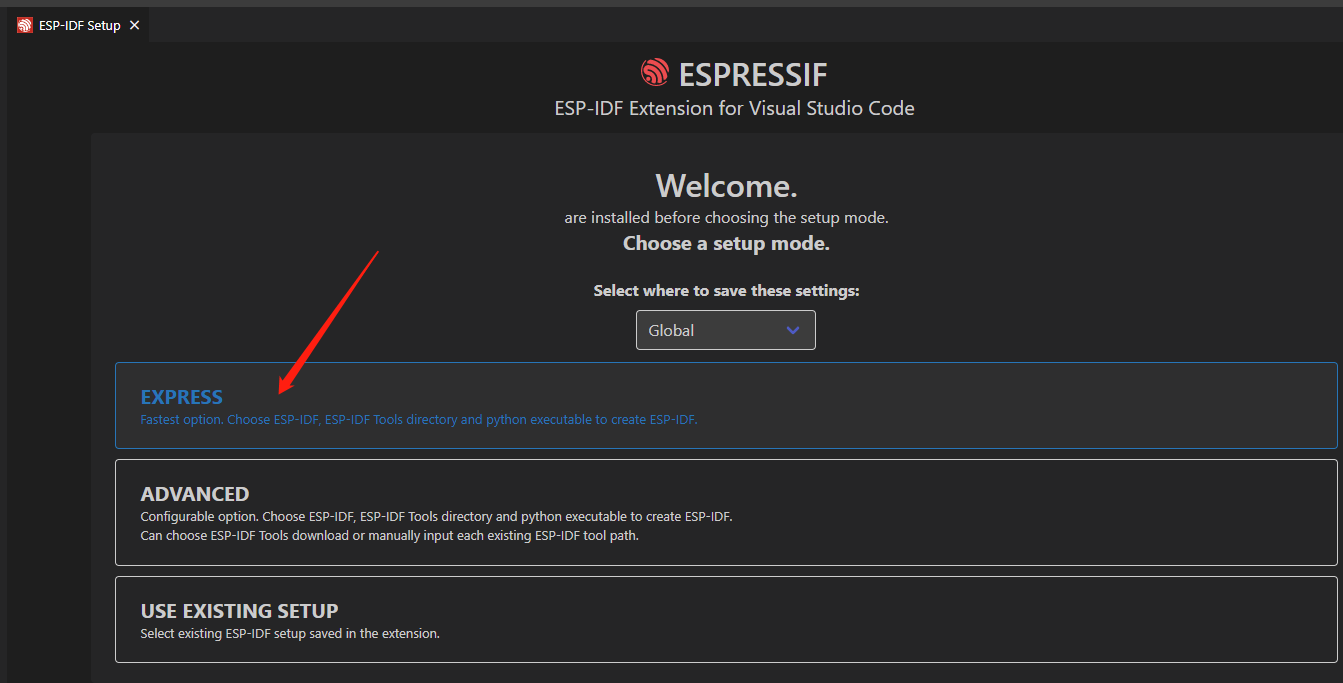
接下来就是开始下载选择ESP-IDF安装在哪里,点击EXPRESS选择快速安装(或者如果你已经安装了 ESP-IDF,则使用现有设置,选择第三个)
这一步是选择下载源(Github还是Espressif),IDF的版本(这里我选择的是5.0.1),IDF容器的路径(这里是Docker安装?)以及IDF工具的路径,选好之后点Install
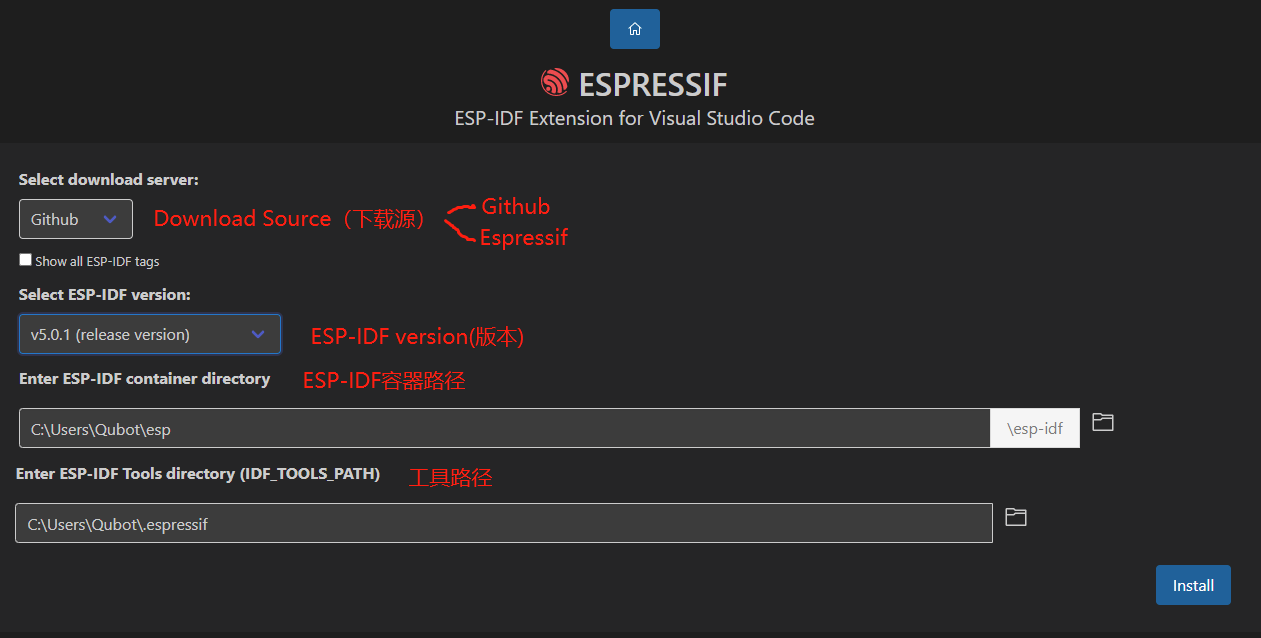
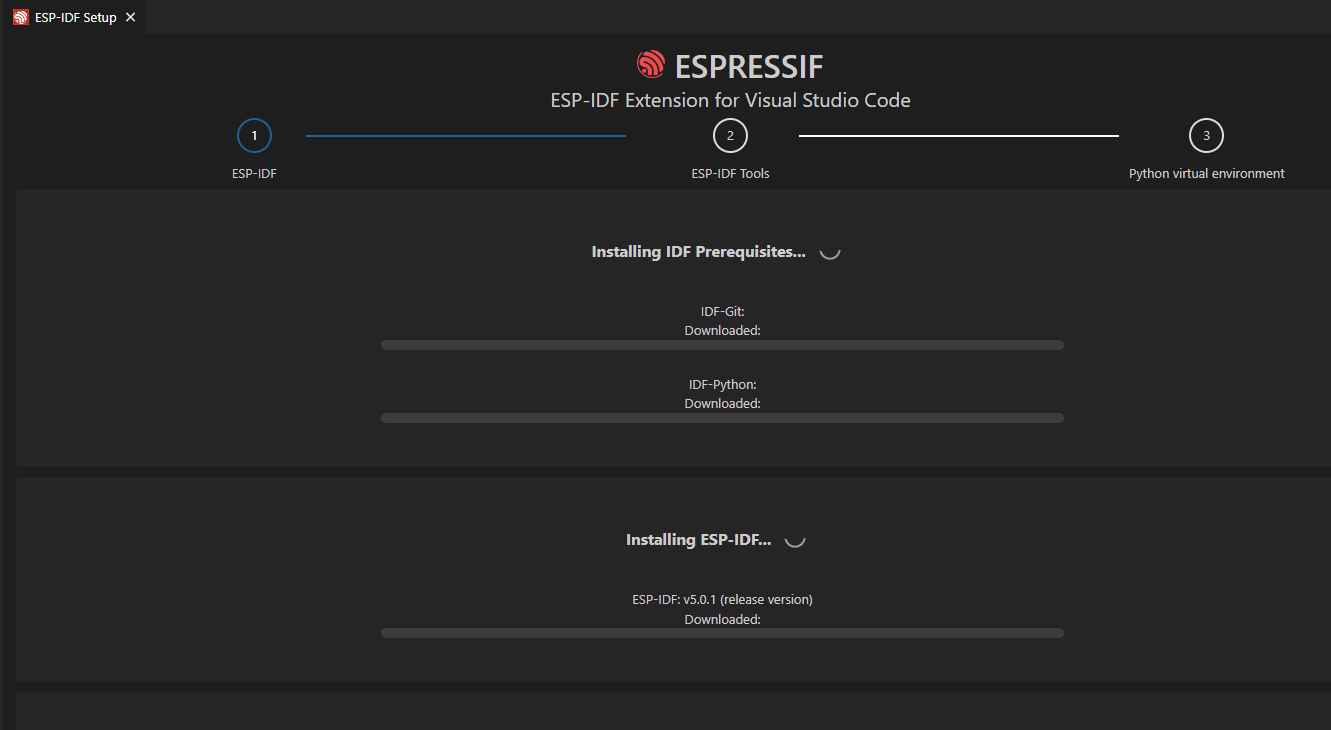
接下来等待安装完成就行了,如果你在国内,可能会遇到网络故障问题,需要你自备工具解决,如果没有的话就反复安装就行。(或者选择spressif源试试?这个我没试过)
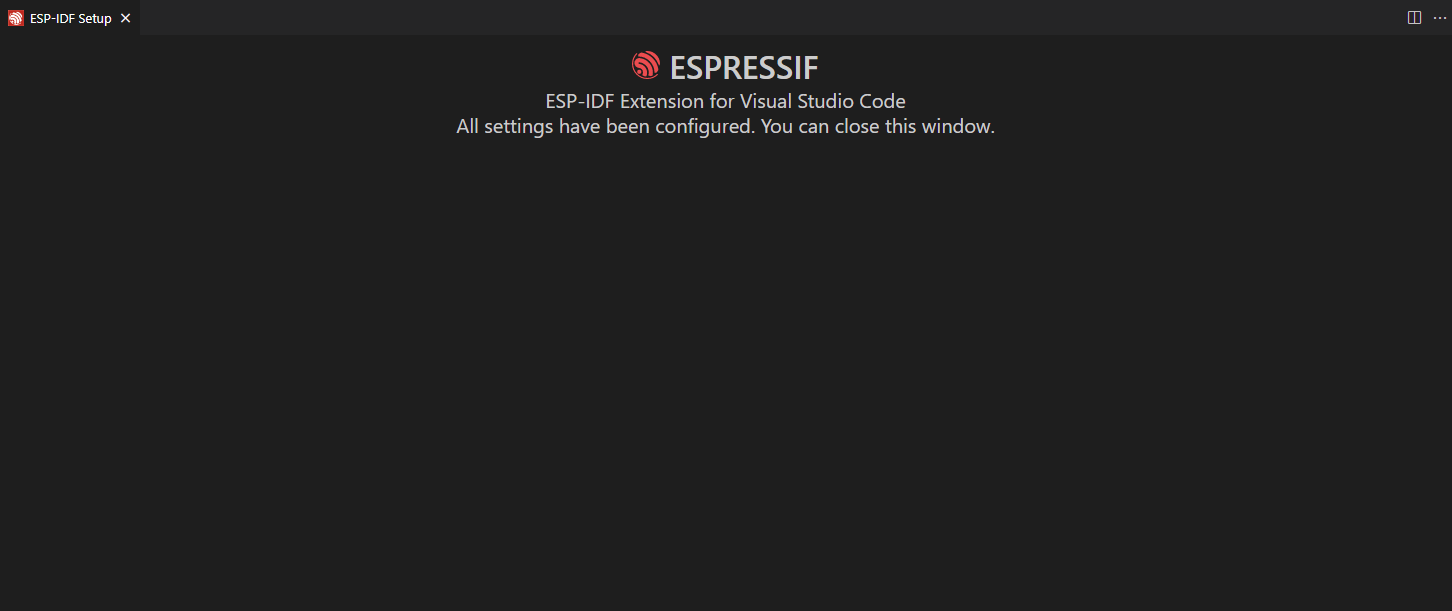
安装结束之后,会如图显示All settings have been configured. You can close this window.
## 总结
ESP-IDF的安装不难,主要是网络问题,国内用户可能会反复安装好几次,其他的不会有什么大的问题。