一、docker安装nexus
wget https://mirrors.aliyun.com/docker-ce/linux/centos/docker-ce.repo
yum clean all && yum makecache fast
um install docker
systemctl start docker
docker pull sonatype/nexus3:3.49.0
docker run -itd -p 8081:8081 --privileged=true --name nexus3 -v /data/nexus-data:/var/nexus-data --rest:3.49.0
docker ps
netstat -tnlp
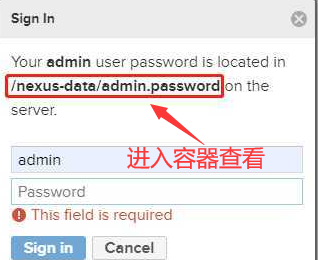
docker exec -it nexus3 /bin/bash
/nexus-data/admin.password
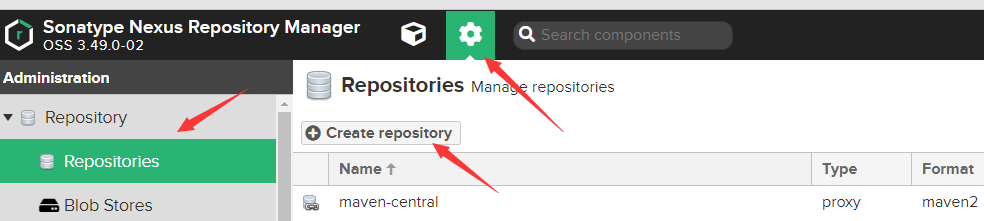
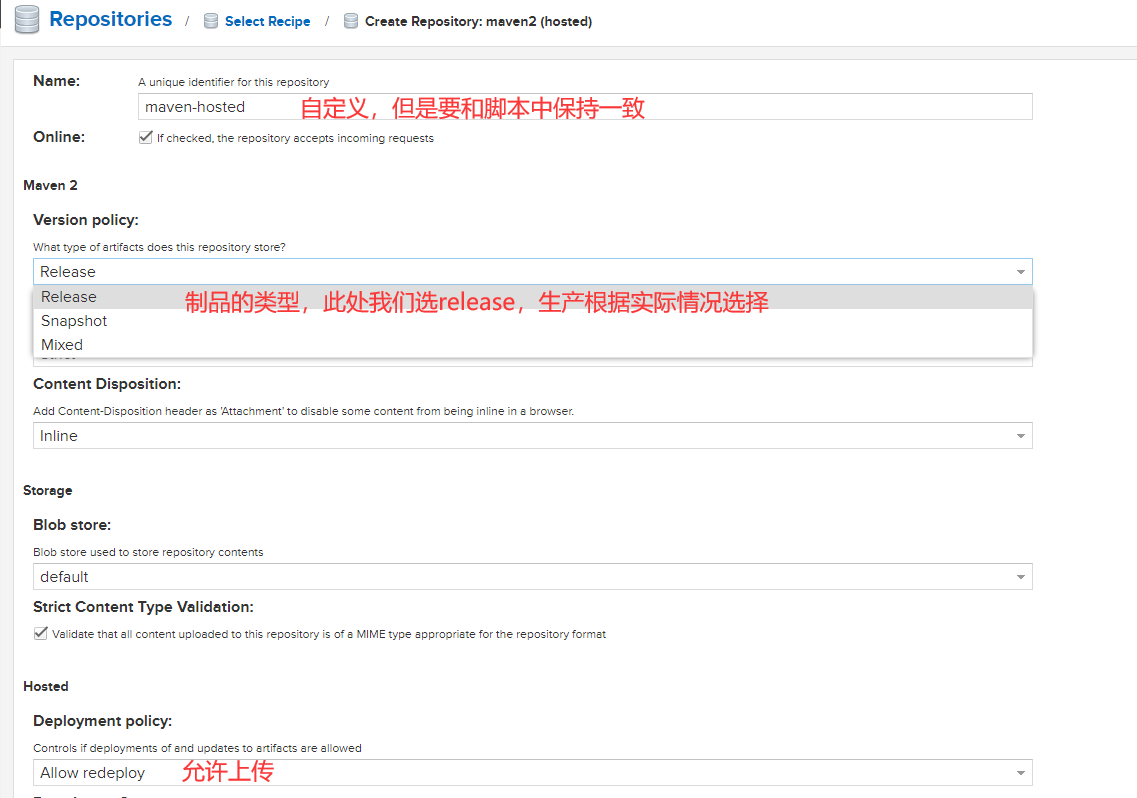
二、创建仓库

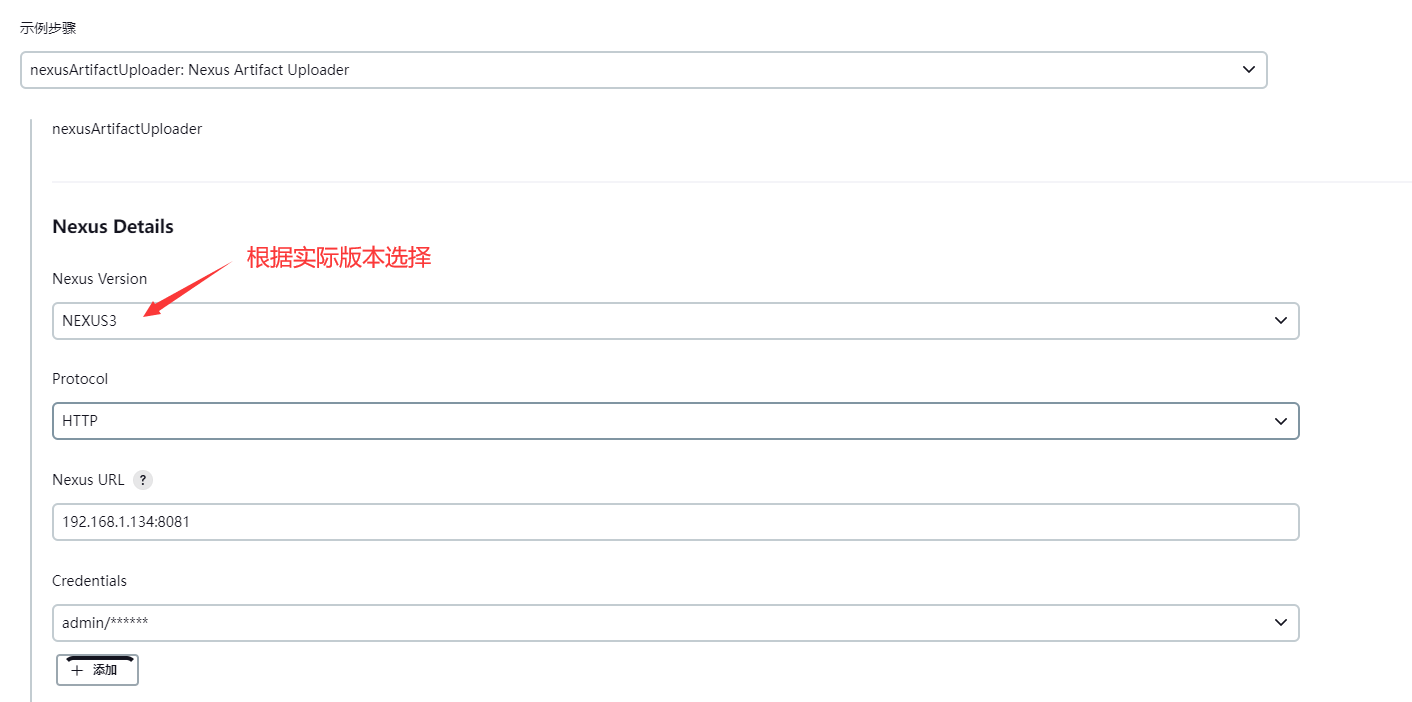
三、使用插件上传制品
1.安装插件

查看插件使用帮助
3.创建nexus的sharelibrary及jenkins file调用
nexus.groovy
pakcage org.devops


//获取POM中的坐标
def GetGav(){
   //上传制品
    def jarName = sh returnStdout: true, script: "cd target;ls *.jar"
    env.jarName = jarName - "\n"

    def pom = readMavenPom file: 'pom.xml'
    env.pomVersion = "${pom.version}"
    env.pomArtifact = "${pom.artifactId}"
    env.pomPackaging = "${pom.packaging}"
    env.pomGroupId = "${pom.groupId}"

    println("${pomGroupId}-${pomArtifact}-${pomVersion}-${pomPackaging}")

    // 以上变量使用env定义为全局变量此处可以不return
    return ["${pomGroupId}","${pomArtifact}","${pomVersion}","${pomPackaging}"]
}


//Nexus plugin deploy
def NexusUpload(){
    //use nexus plugin
    nexusArtifactUploader artifacts: [[artifactId: "${pomArtifact}",
                                        classifier: '',
                                        file: "${filePath}",
                                        type: "${pomPackaging}"]],
                            credentialsId: 'nexus-admin',
                            groupId: "${pomGroupId}",
                            nexusUrl: '192.168.1.134:8081',
                            nexusVersion: 'nexus3',
                            protocol: 'http',
                            repository: "${repoName}",
                            version: "${pomVersion}"
}

//mvn deploy repositoryId需要和Maven中设置的ID保持一致
def MavenUpload(){
    def mvnHome = tool "M3"
    sh  """
        cd target/
        ${mvnHome}/bin/mvn deploy:deploy-file -Dmaven.test.skip=true  \
                                -Dfile=${jarName} -DgroupId=${pomGroupId} \
                                -DartifactId=${pomArtifact} -Dversion=${pomVersion}  \
                                -Dpackaging=${pomPackaging} -DrepositoryId=maven-hosted \
                                -Durl=http://192.168.1.134:8081/repository/maven-hosted
        """
}

//制品晋级
def ArtifactUpdate(updateType,artifactUrl){

    //晋级策略
    if ("${updateType}" == "snapshot -> release"){
        println("snapshot -> release")

        //下载原始制品
        sh "  rm -fr updates && mkdir updates && cd updates && wget ${artifactUrl} && ls -l "

        //获取artifactID

        artifactUrl = artifactUrl -  "http://192.168.1.134:8081/repository/maven-hosted/"
        artifactUrl = artifactUrl.split("/").toList()

        println(artifactUrl.size())
        env.jarName = artifactUrl[-1]
        env.pomVersion = artifactUrl[-2].replace("SNAPSHOT","RELEASE")
        env.pomArtifact = artifactUrl[-3]
        pomPackaging = artifactUrl[-1]
        pomPackaging = pomPackaging.split("\\.").toList()[-1]
        env.pomPackaging = pomPackaging[-1]
        env.pomGroupId = artifactUrl[0..-4].join(".")
        println("${pomGroupId}##${pomArtifact}##${pomVersion}##${pomPackaging}")
        env.newJarName = "${pomArtifact}-${pomVersion}.${pomPackaging}"

        //更改名称
        sh " cd updates && mv ${jarName} ${newJarName} "

        //上传制品
        env.repoName = "maven-release"
        env.filePath = "updates/${newJarName}"
        NexusUpload()
    }
}


def main(uploadType){
    GetGav()
    if ("${uploadType}" == "maven"){
        MavenUpload()
    } else if ("${uploadType}" == "nexus") {
        env.repoName = "maven-hosted"
        env.filePath = "target/${jarName}"
        NexusUpload()
    }
}
ci.jenkinsfile(新增以下两行代码)
def nexus = new org.devops.nexus() #引用

nexus.main("nexus") #在想要的阶段调用
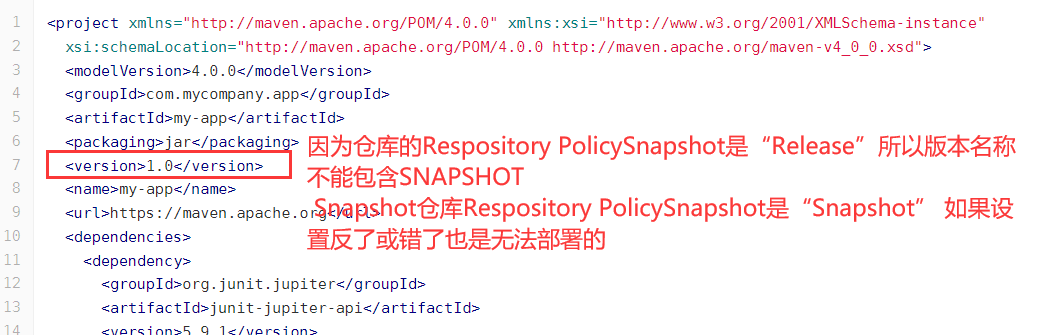
4.修改代码版本名称
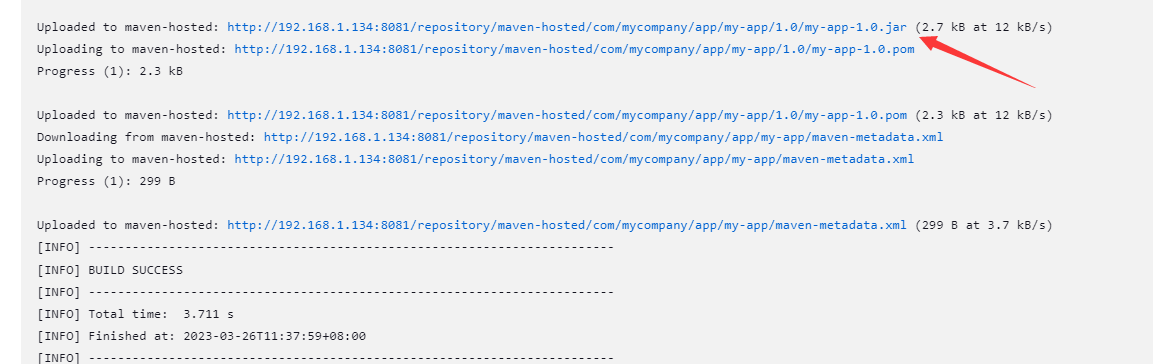
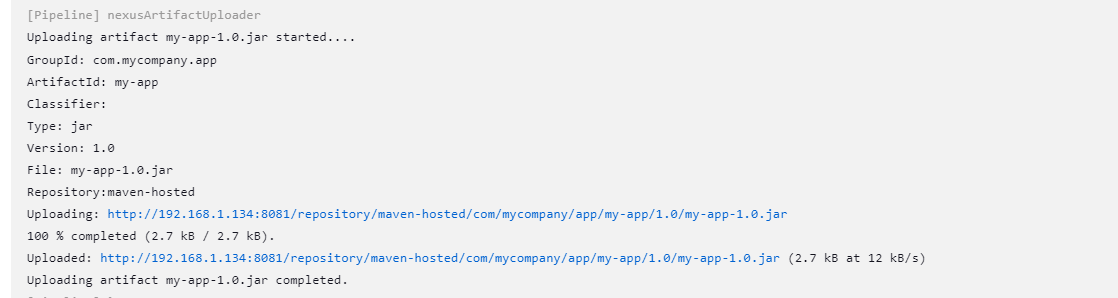
5.验证

四、使用Maven上传制品
1.配置nexus仓库认证
修改Maven settings.xml文件

2.创建nexus的sharelibrary及jenkins file调用
sharelibrary文件使用上一步,已经集成,需要注意的是Maven需要在全局工具中已经配置
jenkins file修改传参即可

3.验证