1、下载zip包
在浏览器上打开 https://github.com/unixhot/waf
下载zip包
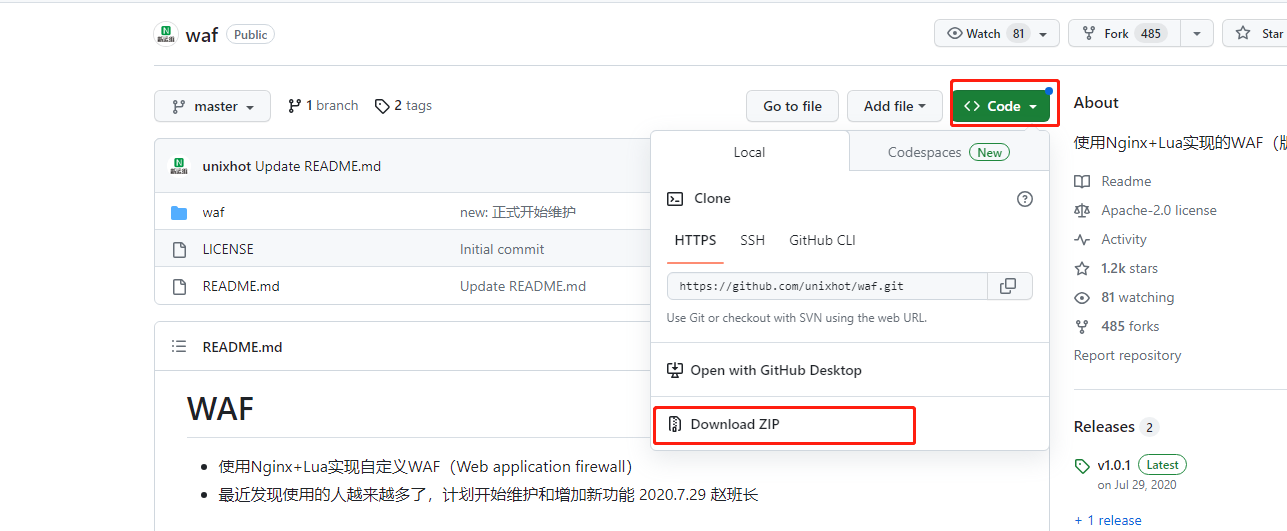
或者在服务器上输入git clone https://github.com/unixhot/waf.git
2、解压unzip waf-master.zip
解压后得到一个waf文件夹
3、将waf文件夹拷贝到openresty的nginx路径下
默认的openresty路径为 /usr/local/openresty下
cp -r waf-master/waf/ /usr/local/openresty/nginx/conf/
4、修改waf中的config.lua文件也就是lua防火墙规则
cd到waf路径下
cd /usr/local/openresty/nginx/conf/waf
编辑配置文件
vim config.lua
修改第6行的日志存储路径
config_log_dir = "/home/tmp/waf_logs"
修改32行的选择跳转网址
config_waf_redirect_url = "https://www.baidu.com"
修改41行的内容
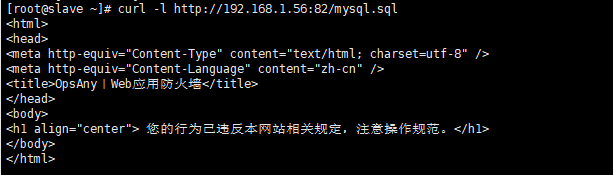
<h1 align="center"> 您的行为已违反本网站相关规定,注意操作规范。</h1>
4、编辑nginx.conf文件 添加以下配置
vim /usr/local/openresty/nginx/conf/nginx.conf
在http{}中增加以下内容:
lua_shared_dict limit 50m; #防cc使用字典,大小50M
lua_package_path "/usr/local/openresty/nginx/conf/waf/?.lua";
init_by_lua_file "/usr/local/openresty/nginx/conf/waf/init.lua";
access_by_lua_file "/usr/local/openresty/nginx/conf/waf/access.lua";
5、创建日志文件目录
mkdir -p /home/tmp/waf_logs
6、设置软连接
ln -s /usr/local/openresty/lualib/resty/ /usr/local/openresty/nginx/conf/waf/resty
7、重启openresty服务
systemctl restart openresty
8、模拟sql注入
访问openresty网站
在浏览器访问http://192.168.1.56:82/mysql.sql

或者在服务器上输入curl -l http://192.168.1.56:82/mysql.sql
然后cd /home/tmp/waf_logs
会看到以日期生成的一个waf.log文件
例如:

可以看到里面的一些信息为:
{"req_url":"\/msql.sql","req_data":"-","rule_tag":"\\.(bak|inc|old|mdb|sql|backup|java|class|tgz|gz|tar|zip)$","attack_method":"Deny_URL","client_ip":"192.168.1.56","local_time":"2023-08-08 14:20:01","user_agent":"curl\/7.29.0","server_name":"192.168.1.56"}

9、压力测试(可选)
安装ab工具
yum install httpd-tools -y
压力并发测试
ab -c 50 -n 1000 http://192.168.1.56:82/mysql.sql
输出信息:
This is ApacheBench, Version 2.3 <$Revision: 1430300 $>
Copyright 1996 Adam Twiss, Zeus Technology Ltd, http://www.zeustech.net/
Licensed to The Apache Software Foundation, http://www.apache.org/
Benchmarking 192.168.1.56 (be patient)
Completed 100 requests
Completed 200 requests
Completed 300 requests
Completed 400 requests
Completed 500 requests
Completed 600 requests
Completed 700 requests
Completed 800 requests
Completed 900 requests
Completed 1000 requests
Finished 1000 requests
Server Software: openresty/1.21.4.2
Server Hostname: 192.168.1.56
Server Port: 82
Document Path: /mysql.sql
Document Length: 306 bytes
Concurrency Level: 50
Time taken for tests: 0.150 seconds
Complete requests: 1000
Failed requests: 990
(Connect: 0, Receive: 0, Length: 990, Exceptions: 0)
Write errors: 0
Non-2xx responses: 1000
Total transferred: 316470 bytes
HTML transferred: 160470 bytes
Requests per second: 6682.17 [#/sec] (mean)
Time per request: 7.483 [ms] (mean)
Time per request: 0.150 [ms] (mean, across all concurrent requests)
Transfer rate: 2065.14 [Kbytes/sec] received
Connection Times (ms)
min mean[+/-sd] median max
Connect: 0 0 0.1 0 1
Processing: 0 7 0.8 7 8
Waiting: 0 7 0.8 7 8
Total: 2 7 0.7 7 9
Percentage of the requests served within a certain time (ms)
50% 7
66% 7
75% 8
80% 8
90% 8
95% 8
98% 8
99% 8
100% 9 (longest request)
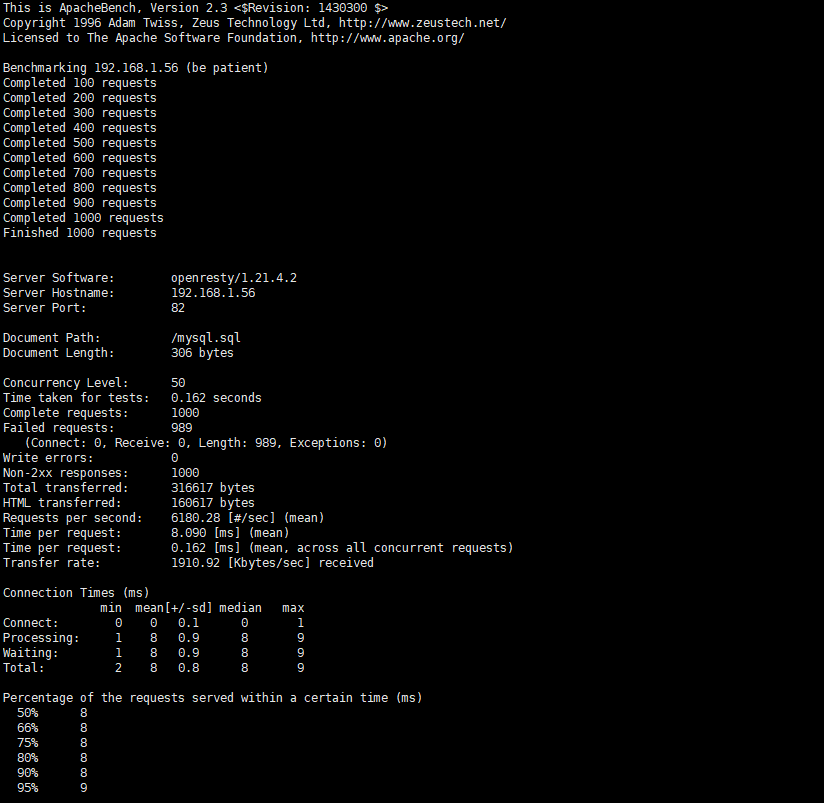
从上面可以看出失败了989次请求,这是由config.lua配置文件配置决定的
也就是/usr/local/openresty/nginx/conf/waf/config.lua配置文件
第26行配置
config_cc_rate = "10/60"
(允许一个ip60秒内只能访问10次)
10、添加IP黑名单或白名单(可选)
在/usr/local/openresty/nginx/conf/waf/rule-config路径下有

这些文件
可以设置 blackip.rule 黑名单IP whiteip.rule 白名单IP whiteurl.rule 白名单url规则
这里配置下blackip.rule 黑名单IP
vim /usr/local/openresty/nginx/conf/waf/rule-config/blackip.rule
192.168.1.119
保存退出
把IP为192.168.1.119添加为黑名单
重启服务
systemctl restart openresty
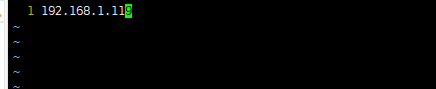
在浏览器访问http://192.168.1.56:82
会发现403

11、隐藏openresty版本号(可选)

编辑nginx.conf文件
vim /usr/local/openresty/nginx/conf/nginx.conf
在http{}中添加
server_tokens off;
例如:
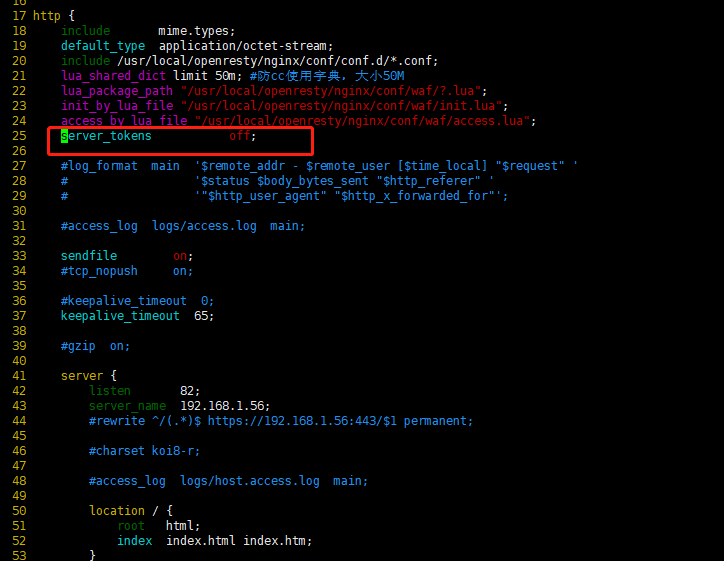
保存退出
重启openresty服务
systemctl restart openresty
再次访问,发现没有显示openresty版本号了

12、针对某个端口号禁止60秒内访问超过特定的次数后返回403
例如:
当访问8080端口时 60秒内超过10次访问返回403
而当访问8180端口时 60秒内超过10次访问不返回403 只有60秒超过6000次才返回403
这时候应该怎么配置?
12.1首先需要修改waf的config.lua配置文件
waf默认路径:/usr/local/openresty/nginx/conf/waf
然后去修改config.lua
vim /usr/local/openresty/nginx/conf/waf/config.lua
找到config_cc_rate去修改
原先配置为:
config_cc_rate = "10/60"
也就是60秒内超过10次访问返回403
修改后的配置为:
config_cc_rate = {
["8080"] = "10/60", -- 对于 8080 端口,60秒内访问超过10次,返回 403
["8180"] = "6000/60", -- 对于 8180 端口,60秒内访问超过6000次,返回 403
}
修改后的整体配置如下:
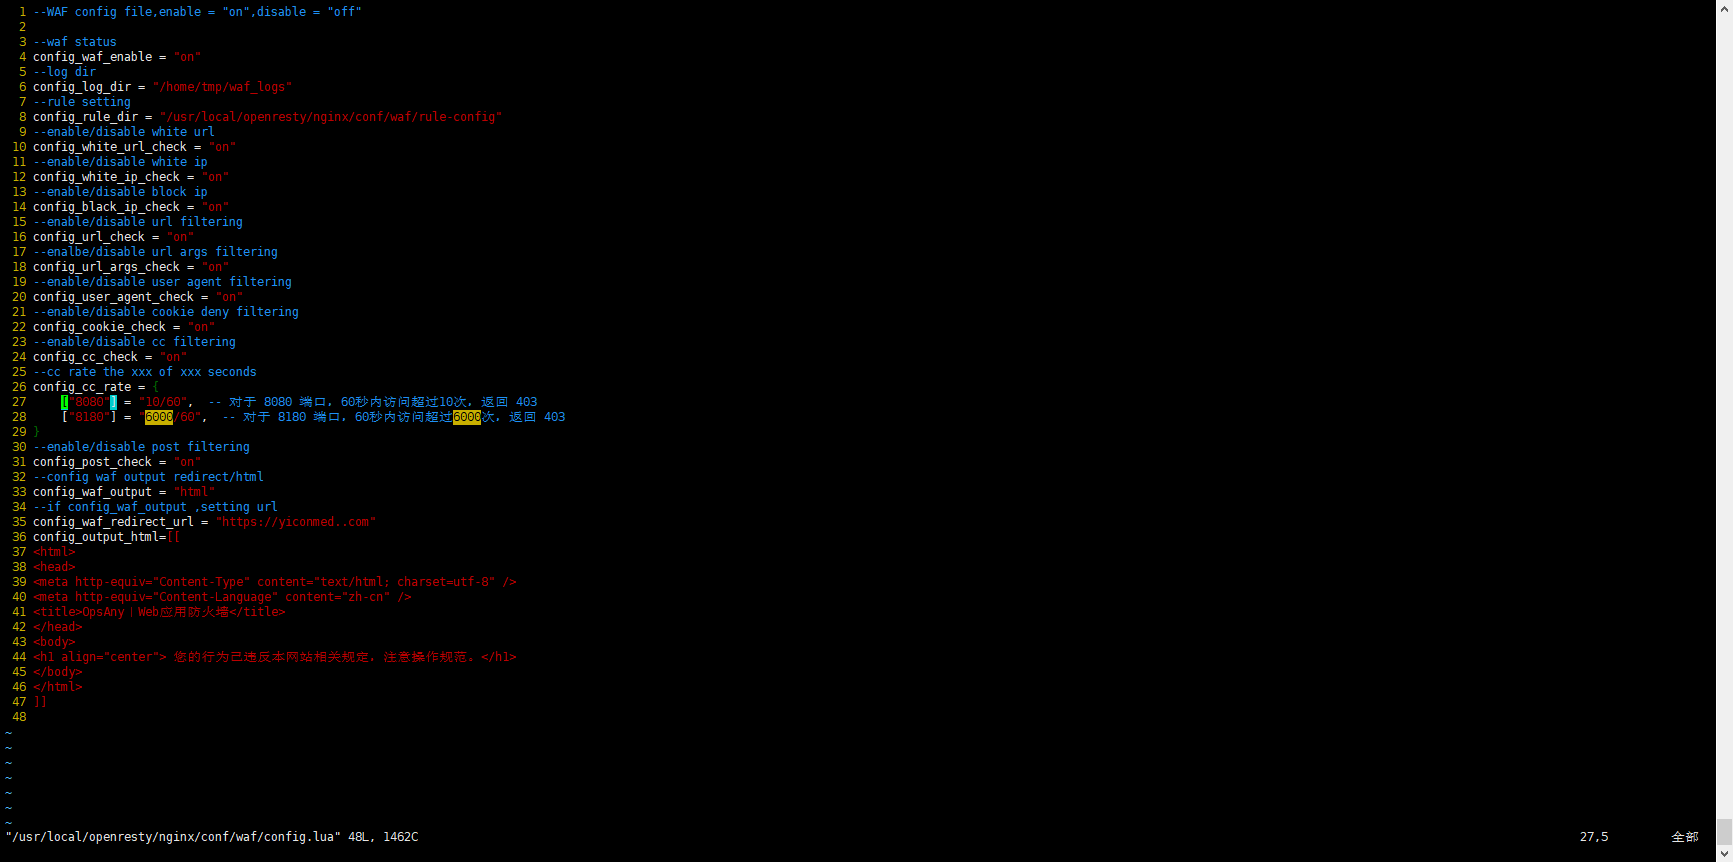
然后保存退出
12.2然后我们去修改waf的init.lua文件
vim /usr/local/openresty/nginx/conf/waf/init.lua
找到
--deny cc attack
原先的配置:
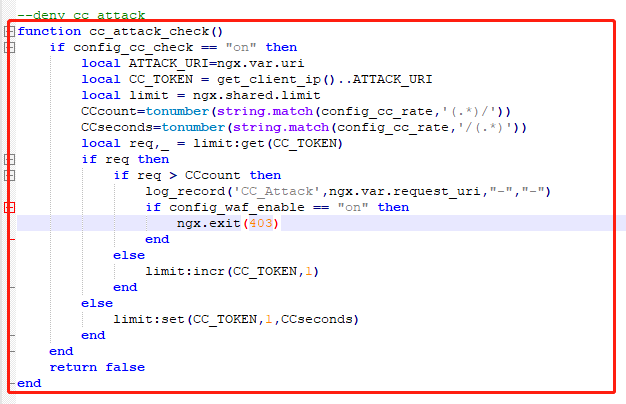
把这些都删除掉
修改成如下配置:
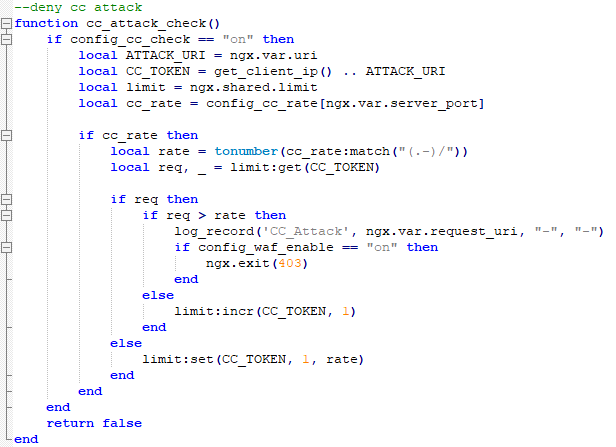
function cc_attack_check()
if config_cc_check == "on" then
local ATTACK_URI = ngx.var.uri
local CC_TOKEN = get_client_ip() .. ATTACK_URI
local limit = ngx.shared.limit
local cc_rate = config_cc_rate[ngx.var.server_port]
if cc_rate then
local rate = tonumber(cc_rate:match("(.-)/"))
local req, _ = limit:get(CC_TOKEN)
if req then
if req > rate then
log_record('CC_Attack', ngx.var.request_uri, "-", "-")
if config_waf_enable == "on" then
ngx.exit(403)
end
else
limit:incr(CC_TOKEN, 1)
end
else
limit:set(CC_TOKEN, 1, rate)
end
end
end
return false
end
如图所示:
修改完后,保存退出
12.3重启openresty服务
systemctl restart openresty
12.4访问测试效果
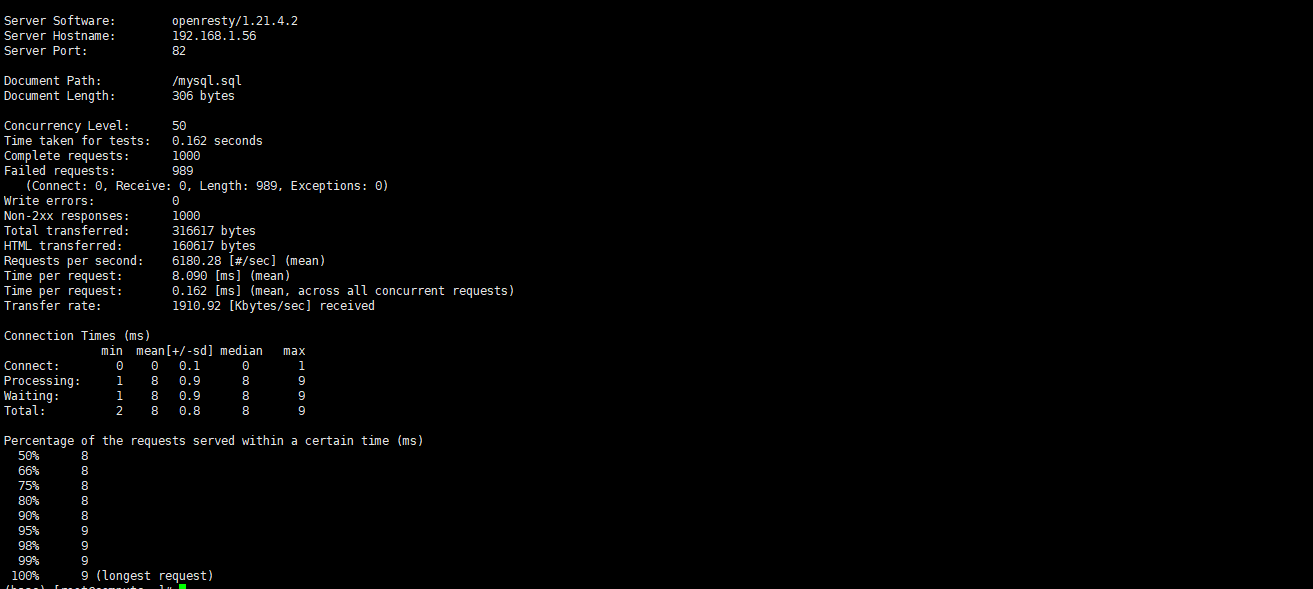
使用ab压力测试工具:
先访问8080端口
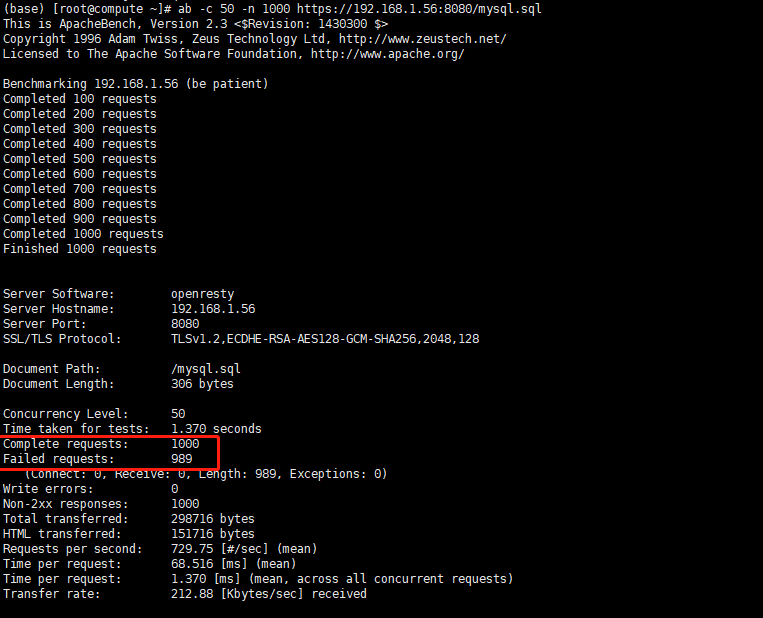
ab -c 50 -n 1000 https://192.168.1.56:8080/mysql.sql
注意:我这里是https访问的,如果你是http,则需修改下
发现访问8080端口1000次,发现失败了989次
再访问8180端口
ab -c 50 -n 10000 https://192.168.1.56:8180/mysql.sql
注意:我这里是https访问的,如果你是http,则需修改下
发现访问8180端口10000次,发现失败了4999次
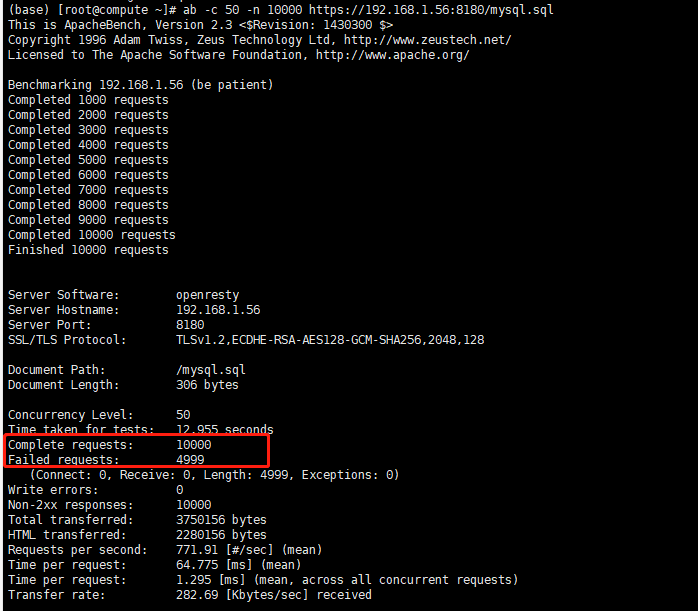
证明配置成功
13.不同端口访问 记录访问日志
因为通过openresty启动了很多不同端口号的http服务
而默认路径又是在/usr/local/openresty/nginx/logs下
不好区分不同端口之间的访问日志
这时候 可以自定义设置端口的记录访问日志
只需修改对应的***.conf文件即可
13.1例如:
vim /usr/local/openresty/nginx/conf/conf.d/1.conf
注意这里conf.d的话是因为在nginx.conf文件的http{}中指定了路径
include /usr/local/openresty/nginx/conf/conf.d/*.conf;
如图所示:

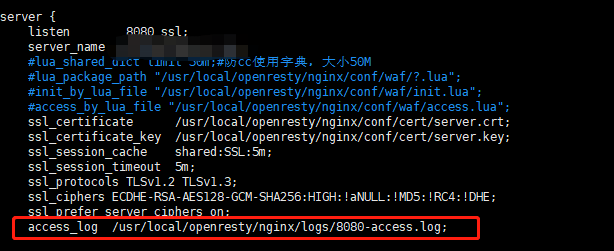
我们再回到1.conf配置文件中
在server中添加以下配置
access_log /usr/local/openresty/nginx/logs/8080-access.log;
8080-access.log可以替换成自定义的名字
如图所示:
保存退出
13.2然后我们去访问下8080端口
curl -l https://lcoalhost:8080
注意这里我是配置了https,如果你没有配置的话则是http访问
然后cd到日志目录中
cd /usr/local/openresty/nginx/logs
会看到一个8080-access.log文件
如图所示:

证明配置成功