云函数
首先创建一个uniapp项目,创建项目时选择启用uniCloud云开发。
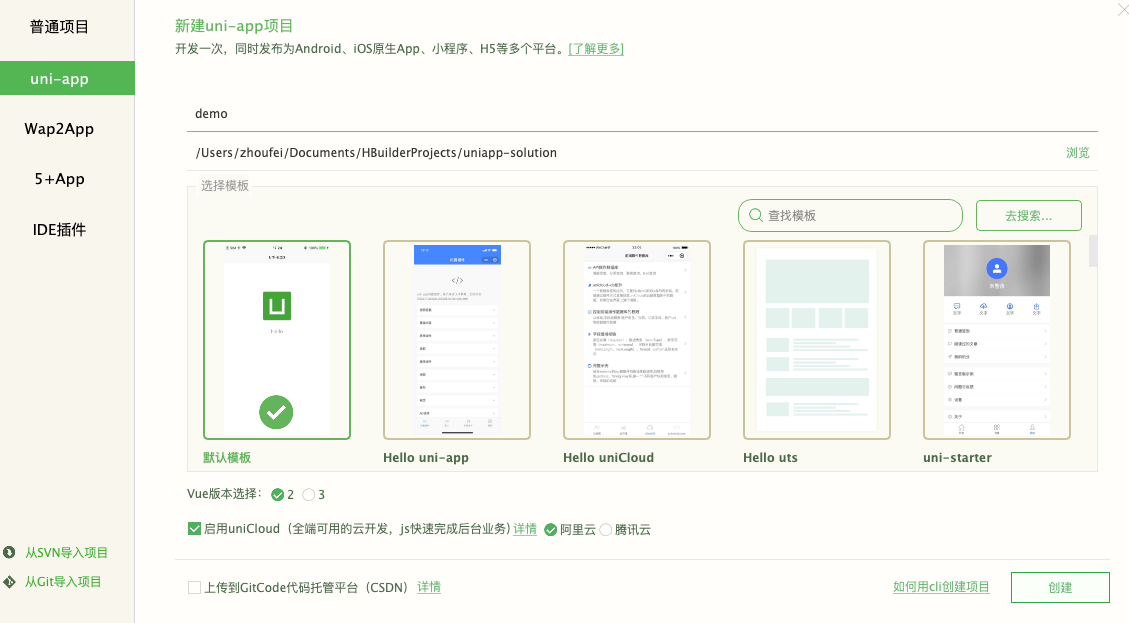
创建项目成功后,按照下面的步骤进行开发。
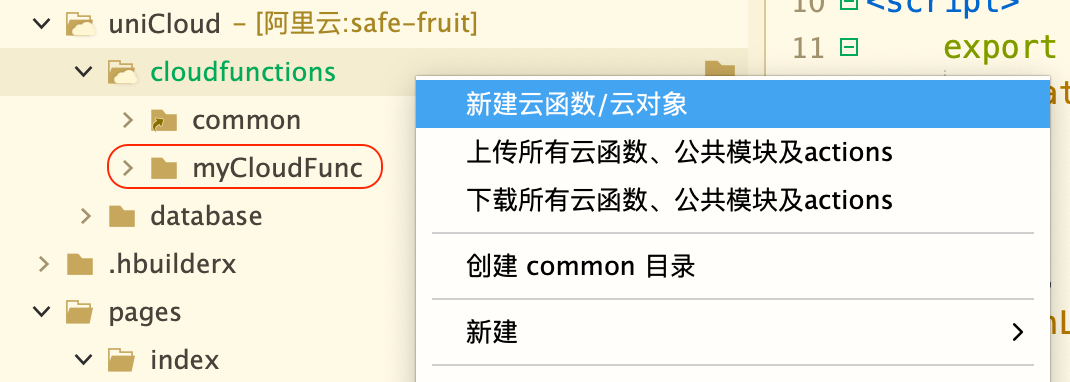
创建云函数
1.关联云服务器
2.创建云函数
一个云函数可以看成是一个后台接口
云函数实现
'use strict';
exports.main = async (event, context) => {
    //event为客户端上传的参数
    console.log('event : ', event)

    //返回数据给客户端
    return "Hello Cloud Func"
};
onLoad() {
    uniCloud.callFunction({
        name:'myCloudFunc'
        }).then((res)=>{
            console.log(res)
        })
},

本地云函数与远端云函数调试的区别
云函数:一个后台接口与接口的实现。
本地云函数调试是使用本地的接口查询逻辑,此时本地元函数逻辑与远端元函数可能不一样,可以理解远端元函数是发布的版本,本地云函数是开发的版本。本地版本调试没有问题了就上传到远端。
当新建一个云项目时,可以直接将远端云函数下载到本地,进行本地云函数的调试。
云数据库
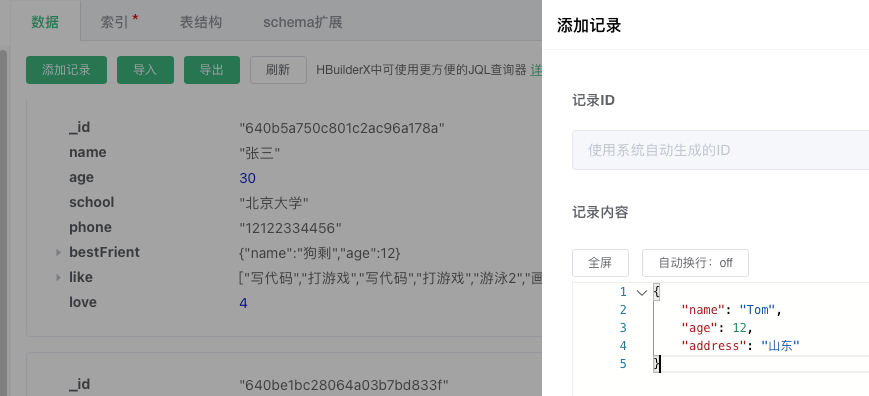
1.在云后台创建表User
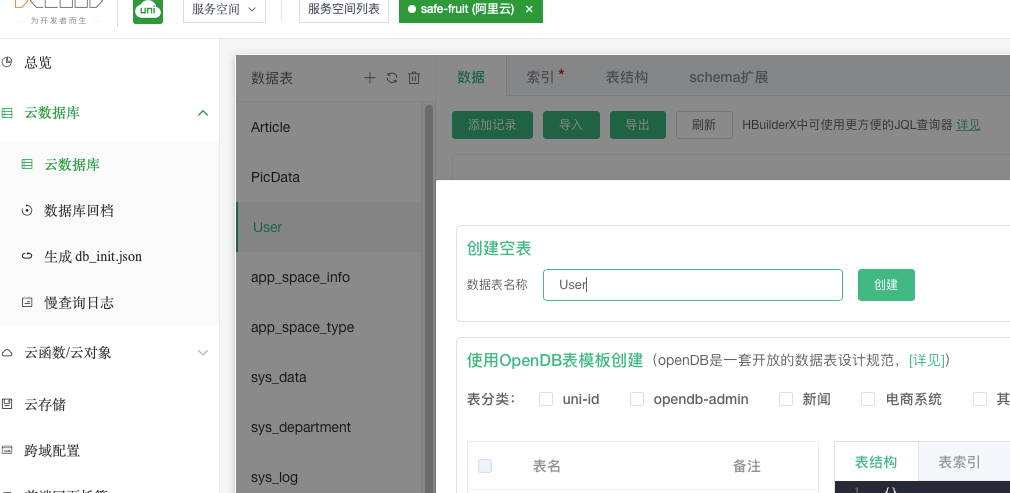
2.添加表数据
3.创建一个云函数,连接数据库,查询数据库
uniCloud的数据库是nosql非关系性数据库
'use strict';

const db = uniCloud.database();

exports.main = async (event, context) => {
    //event为客户端上传的参数
    console.log('event : ', event)

    const collection = await db.collection('User').get()

    //返回数据给客户端
    return collection
};
onLoad() {
    uniCloud.callFunction({
        name:'myCloudDB',
        success: (res) => {
            console.log(res);
        }
    })
},
提交表单,存储数据到云数据库
<template>
    <view class="content">
        <form @submit="submitData">
            <input type="text" name="name">
            <input type="tel" name="phone">
            <button form-type="submit">提交表单</button>
        </form>
    </view>
</template>

<script>
    export default {
        methods: {
            async submitData(v) {
                console.log(v)
                let {name,phone} = v.detail.value
                 let res = await uniCloud.callFunction({
                    name:'myCloudDB',
                    data:{
                        name,
                        phone
                    }
                })
                console.log(res)
            }
        }
    }
</script>
云数据库条件查询
定义云函数

'use strict';

const db = uniCloud.database()
const dbCmd = db.command

exports.main = async (event, context) => {
    //event为客户端上传的参数
    console.log('event : ', event)

    // doc: 根据id查询
    // let res = await db.collection('User').doc('640b5a9228064a03b7aa1ac7').get()
    // 限制条数
    // let res = await db.collection('User').limit(5).get()
    // // skip:跳过的条数,分页的话数字是页数*每页条数
    // let res = await db.collection('User').limit(5).skip(5).get()

    // field:只返回声明的字段,_id默认返回
    // let res = await db.collection('User').field({name: true}).get()
    // orderBy: 排序字段+升序/降序类型
    // let res = await db.collection('User').orderBy('age','desc').get()

/*
1.简单的值等于查询,如name: 'Tom'
2.逻辑指令单条件查询,如age: dbCmd.gt(15)
3.逻辑指令多条件查询,如dbCmd.or(dbCmd.lt(15), dbCmd.gt(20))
4.正则匹配
使用//简单正则匹配,中间写要匹配的内容,如/^梅/ig(i忽略大小写,g全局)
使用RegExp对象匹配,如new RegExp('梅','ig')
    */
    let res = await db.collection('User').where({
        // age: dbCmd.gt(15)
        // age: dbCmd.or(dbCmd.lt(15), dbCmd.gt(20))
        // name: /梅/ig
         // name: new RegExp('梅','ig')
        }).get()

    //返回数据给客户端
    return res
};


vue组件调用
<script>
    export default {
        onReady() {
            uniCloud.callFunction({
                name:'myCloudGet',
                success: (res) => {
                    console.log(res)
                    this.list = res.result.data
                }
            })
        },
    }
</script>
云数据库更新
'use strict';

const { link } = require("fs");

const db = uniCloud.database()
const dbCmd = db.command

exports.main = async (event, context) => {
    //event为客户端上传的参数
    console.log('event : ', event)

    // 单条记录更新
    // const res = await db.collection('User').doc('640bf773e766bb2975957423').update({
    //     phone: '88889999'
    // })

    // 多条记录更新
    // const res = await db.collection('User').where({
    //     _id: dbCmd.in(['640bf773e766bb2975957423','640be1bc28064a03b7bd833f'])
    // }).update({
    //     phone: '88889999000'
    // })

    // const res = await db.collection('User').where({
    //     name: /梅/ig
    // }).update({
    //     address: '冬梅大桥旁,33号'
    // })

    // 更新对象和数组
    // const res = await db.collection('User').where({
    //     name: "张三"
    // }).update({
    //     like:{
    //         0: "游泳2"
    //     },
    //     bestFrient:{
    //         name:"jack"
    //     }
    // })


    // set: 覆盖一个对象, update:更新局部字段
    const res = await db.collection('User').where({
        name: "张三"
    }).update({
        // dbCmd.inc(1):自增加一
        love: dbCmd.inc(1),
        // dbCmd.unshift(["写代码","打游戏"]): 数组头部添加数据
        like: dbCmd.unshift(["写代码","打游戏"]),
        // dbCmd.set({}) 更新一个对象,参数为传入的一个对象
        bestFrient: dbCmd.set({
            name: '狗剩',
            age: 12
        })
    })

    //返回数据给客户端
    return res
};
删除云数据库
'use strict';

const db = uniCloud.database()
const dbCmd = db.command

exports.main = async (event, context) => {
    //event为客户端上传的参数
    console.log('event : ', event)

    // 全部删除
    const res = db.collection('User').where({
        _id: dbCmd.neq(-1)
    }).remove()

    //返回数据给客户端
    return res
};
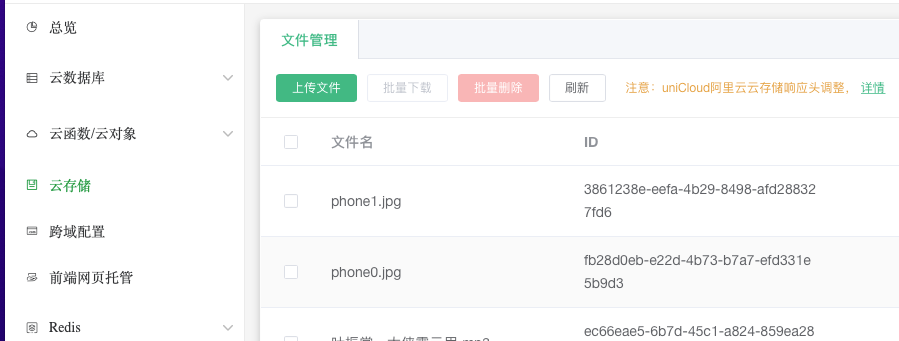
云存储
点击云存储后台,点击上传文件,直接上传,应用中可以直接使用这个链接地址访问。
使用扩展组件uni-file-picker自动上传图片到云存储
<template>
    <view class="content">
        <uni-file-picker
            v-model="imageValue"
            fileMediatype="image"
                        limit="3"
            mode="grid"
            @select="select"
            @progress="progress"
            @success="success"
            @fail="fail"
        />
    </view>
</template>

<script>
    export default {
        data() {
            return {
                imageValue: []
            }
        }
    }
</script>
手动上传云存储
通过this.$refs.files.update()调用,进行手动上传。
<template>
    <view class="content">
        <uni-file-picker
            v-model="imageValue"
            fileMediatype="image"
            mode="grid"
            :auto-upload="false"
            @select="select"
            @progress="progress"
            @success="success"
            @fail="fail"
            ref="files"
        />
        <button @click="upload">开始上传</button>
    </view>
</template>

<script>
    export default {
        data() {
            return {
                imageValue: []
            }
        },
        onLoad() {

        },
        methods:{
            upload() {
                this.$refs.files.upload()
            }
        }
    }
</script>
<template>
    <view class="content">
        <input type="text" v-model="title"/>
        <uni-file-picker
            v-model="imageValue"
            fileMediatype="image"
            mode="grid"
            :auto-upload="false"
            @select="select"
            @progress="progress"
            @success="success"
            @fail="fail"
            ref="files"
        />
        <button @click="upload">开始上传</button>
    </view>
</template>

<script>
    export default {
        data() {
            return {
                imageValue: [],
                imageUrls: [],
                title: ''
            }
        },
        onLoad() {

        },
        methods:{

            // 上传成功
            success(e){
                console.log('上传成功',e)
                this.imageUrls = e.tempFilePaths

                uniCloud.callFunction({
                    name:'add_pic_data_one',
                    data:{
                        title: this.title,
                        imageUrls: this.imageUrls
                    }
                }).then(res => {
                    console.log(res)
                })
            },

            upload() {
                this.$refs.files.upload()
            }
        }
    }
</script>
云数据库
'use strict';

const db = uniCloud.database()

exports.main = async (event, context) => {
    //event为客户端上传的参数
    console.log('event : ', event)

    let {title, imageUrls} = event

    const res = await db.collection('PicData').add({
        title,
        imageUrls
    })

    //返回数据给客户端
    return res
};
发布
H5打包
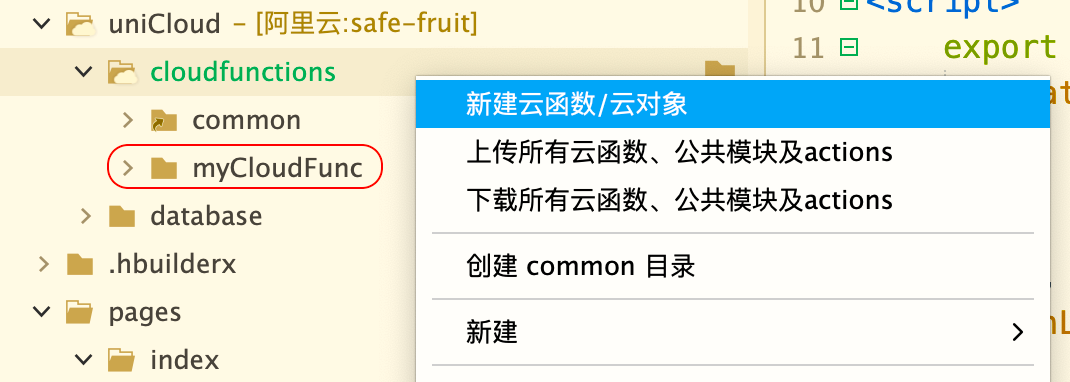
第一步,上传云函数到后台
一般本地开发时,用的都是本地调试,此时后台是没有这些云函数的,所以要对着
cloudfunctions右击,点击上传所有云函数
第二步
设置页面标题:文章管理系统
设置路由模式:hash
设置运行的基本路径:./
第三步
发行 - H5
设置网站标题
网站域名可暂时不写
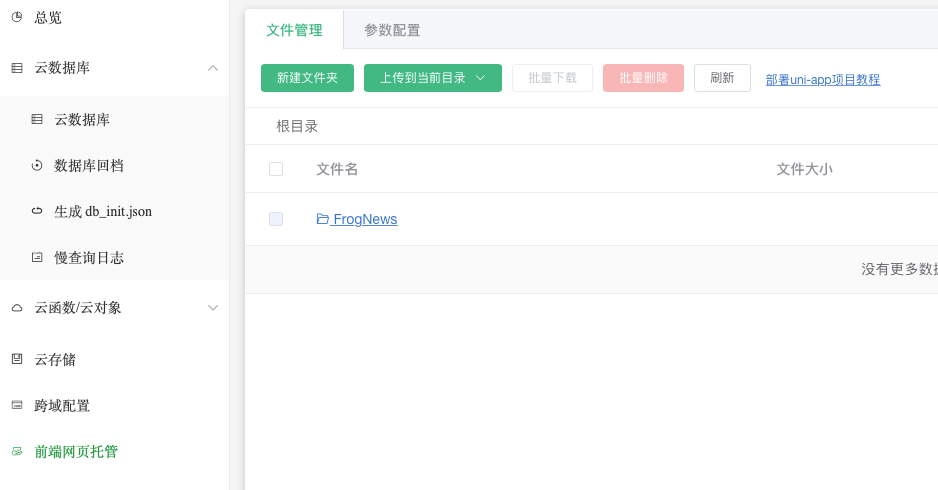
打包完成后,给网站的根路径取一个名字,然后上传到uniCloud的前端网页托管,提供了默认默认域名供使用。
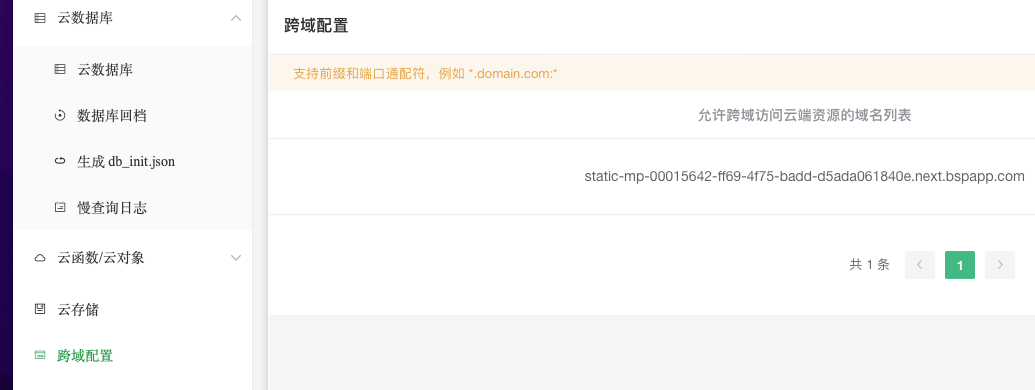
在uniCloud下的跨域设置项,配置跨域设置,让自己的部署域名也能访问到云数据库。
设置跨域配置
uniClound提供的域名过长,不好记忆问题如何解决?
1.通过草料二维码,直接把网址生成二维码,让别人扫描。
2.自己买域名,在阿里云上自己买域名,然后在uniCloud上对应配置网站域名。
微信小程序发布
第一步
进入manifest.json,添加微信小程序的AppId。
第二步
点击发行 发行 -> 微信小程序。
第三步
编译完成后,自动打开微信开发工具,修改本地设置,“不校验合法域名”去掉,查看报错信息,把要添加的页面添加到微信开发者中心下的开发设置-服务器域名
上传要单独配置上传服务器域名。
App打包
第一步
进入manifest.json,选择自动生成图标->生成所有图标。
第二步
发布-打原生APP-云打包。