业务需求:上传头像,上传完毕后拿到头像的url,把头像展示在页面中,最终把头像url和其他用户信息一起发送给服务器
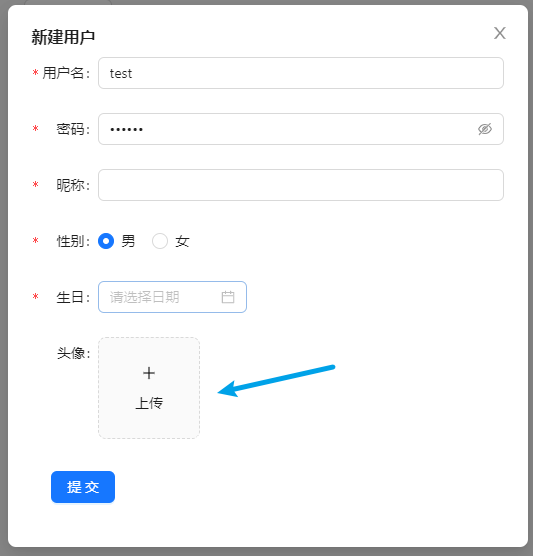
上传头像流程

导入 Upload 组件和图标(一个加号,一个加载中)
import { Upload } from 'antd';
import { PlusOutlined, LoadingOutlined } from '@ant-design/icons';
定义状态
const index = memo(() => {
  // 用于上传前和上传时切换
  const [loading, setLoading] = useState(false);

  // 用于保存服务端返回的头像url
  const [imageUrl, setImageUrl] = useState();
}
定义一个上传状态组件,上传前显示 + 号,上传时显示loading
const index = memo(() => {
  const uploadButton = (
    <div>
      {loading ? <LoadingOutlined /> : <PlusOutlined />}
      <div
        style={{
          marginTop: 8,
        }}
      >
        上传
      </div>
    </div>
  );
}
组件代码(省略其他...)
const index = memo(() => {
  return (
    <Upload
      listType="picture-card" // 上传列表的内建样式
      showUploadList={false} // 是否展示文件列表
      action="" // 这里填写上传的地址
      beforeUpload={beforeUpload} // 上传前执行的操作
      onChange={handleChange} // 上传中、完成、失败都会调用这个函数。
      name='avatar' // 传递给后端的字段
    >
      {imageUrl ? (
        <img
          src={imageUrl}
          alt="avatar"
          style={{
            width: '100%',
          }}
        />
      ) :  (uploadButton)}
    </Upload>
  )
})
定义头像上传前执行的钩子函数
const index = memo(() => {
  // 该函数会在上传前执行,会把file对象传过来,可以对上传的文件类型判断,限制大小等
  const beforeUpload = (file) => {
    const isJpgOrPng = file.type === 'image/jpeg' || file.type === 'image/png';
    if (!isJpgOrPng) {
      message.error('只能上传 JPG/PNG 文件!');
    }
    const isLt1M = file.size / 1024 / 1024 < 1;
    if (!isLt1M) {
      message.error('图片不能超过1MB!');
    }
    return isJpgOrPng && isLt1M;
  };
})
定义头像上传后执行的钩子函数
const index = memo(() => {
  const handleChange = (info) => {
      if (info.file.status === 'uploading') {
        setLoading(true);
        return;
      }
      // 当上传完毕
      if (info.file.status === 'done') {
          setLoading(false);
        // 判断是否上传成功
        if (info.file.response.code === 200) {
          // 把返回的图像地址设置给 imageUrl
          setImageUrl(info.file.response.data.imageUrl) // 取决于服务端返回的字段名
        }
      }
    };
})
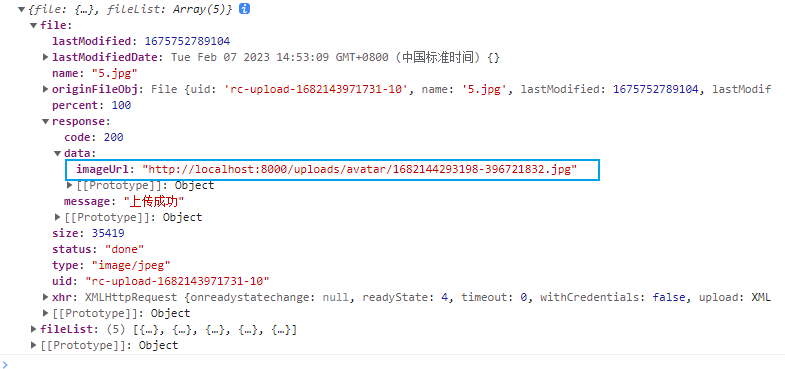
以下是在控制台输出 info 对象
完整demo
import React, { memo, useState } from 'react'
import { UserWrapper } from './style'

import { Upload } from 'antd';
import { PlusOutlined, LoadingOutlined } from '@ant-design/icons';

const index = memo(() => {

  const [loading, setLoading] = useState(false);
  const [imageUrl, setImageUrl] = useState();

  const beforeUpload = (file) => {
    const isJpgOrPng = file.type === 'image/jpeg' || file.type === 'image/png';
    if (!isJpgOrPng) {
      message.error('只能上传 JPG/PNG 文件!');
    }
    const isLt1M = file.size / 1024 / 1024 < 1;
    if (!isLt1M) {
      message.error('图片不能超过1MB!');
    }
    return isJpgOrPng && isLt1M;
  };

  const handleChange = (info) => {
    if (info.file.status === 'uploading') {
      setLoading(true);
      return;
    }
    if (info.file.status === 'done') {
      if (info.file.response.code === 200) {
        setLoading(false);
        setImageUrl(info.file.response.data.imageUrl)
      }
    }
  };

  const uploadButton = (
    <div>
      {loading ? <LoadingOutlined /> : <PlusOutlined />}
      <div
        style={{
          marginTop: 8,
        }}
      >
        上传
      </div>
    </div>
  );

  return (
    <Upload
      listType="picture-card"
      className="avatar-uploader"
      showUploadList={false}
      action="上传的地址"
      beforeUpload={beforeUpload}
      onChange={handleChange}
      name='avatar'
    >
      {imageUrl ? (
        <img
          src={imageUrl}
          alt="avatar"
          style={{
            width: '100%',
          }}
        />
      ) : (
        uploadButton
      )}
    </Upload>
  )
})

export default index