一、简介
MyBatis-Plus(简称 MP)是一个 MyBatis 的增强工具,在 MyBatis 的基础上只做增强不做改变,为简化开发、提高效率而生。
⏬特性:
-
无侵入:只做增强不做改变,引入它不会对现有工程产生影响,如丝般顺滑
-
损耗小:启动即会自动注入基本 CURD,性能基本无损耗,直接面向对象操作
-
强大的 CRUD 操作:内置通用 Mapper、通用 Service,仅仅通过少量配置即可实现单表大部分 CRUD 操作,更有强大的条件构造器,满足各类使用需求
-
支持 Lambda 形式调用:通过 Lambda 表达式,方便的编写各类查询条件,无需再担心字段写错
-
支持主键自动生成:支持多达 4 种主键策略(内含分布式唯一 ID 生成器 - Sequence),可自由配置,完美解决主键问题
-
支持 ActiveRecord 模式:支持 ActiveRecord 形式调用,实体类只需继承 Model 类即可进行强大的 CRUD 操作
-
支持自定义全局通用操作:支持全局通用方法注入( Write once, use anywhere )
-
内置代码生成器:采用代码或者 Maven 插件可快速生成 Mapper 、 Model 、 Service 、 Controller 层代码,支持模板引擎,更有超多自定义配置等您来使用
-
内置分页插件:基于 MyBatis 物理分页,开发者无需关心具体操作,配置好插件之后,写分页等同于普通 List 查询
-
分页插件支持多种数据库:支持 MySQL、MariaDB、Oracle、DB2、H2、HSQL、SQLite、Postgre、SQLServer 等多种数据库
-
内置性能分析插件:可输出 SQL 语句以及其执行时间,建议开发测试时启用该功能,能快速揪出慢查询
-
内置全局拦截插件:提供全表 delete 、 update 操作智能分析阻断,也可自定义拦截规则,预防误操作
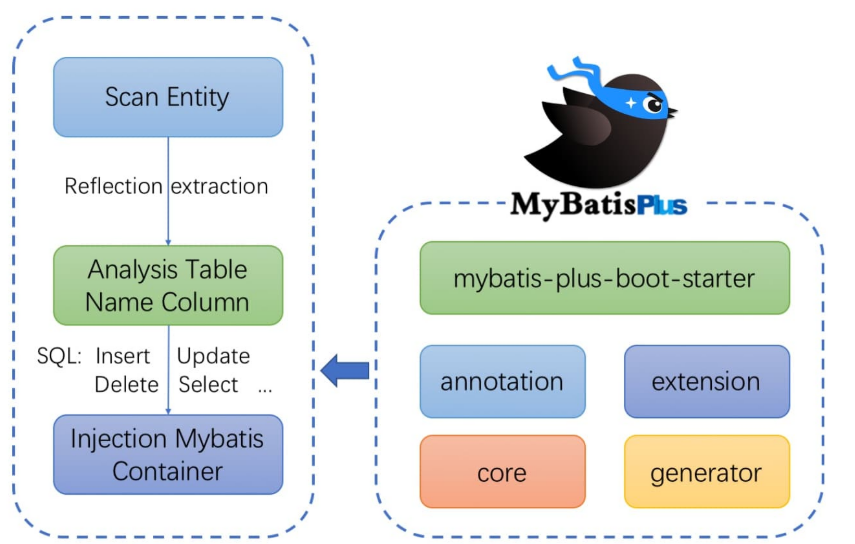
⏬框架结构:
二、快速上手
官网的案例
DROP TABLE IF EXISTS user;
CREATE TABLE user
(
    id BIGINT(20) NOT NULL COMMENT '主键ID',
    name VARCHAR(30) NULL DEFAULT NULL COMMENT '姓名',
    age INT(11) NULL DEFAULT NULL COMMENT '年龄',
    email VARCHAR(50) NULL DEFAULT NULL COMMENT '邮箱',
    PRIMARY KEY (id)
);
DELETE FROM user;
INSERT INTO user (id, name, age, email) VALUES
(1, 'Jone', 18, 'test1@baomidou.com'),
(2, 'Jack', 20, 'test2@baomidou.com'),
(3, 'Tom', 28, 'test3@baomidou.com'),
(4, 'Sandy', 21, 'test4@baomidou.com'),
(5, 'Billie', 24, 'test5@baomidou.com');
直接在 IDEA 中创建了 SpringInitializr ,IDEA 会自动把这个工程继承 spring-boot-stater,随后添加相关的依赖
    <dependencies>
        <dependency>
            <groupId>org.springframework.boot</groupId>
            <artifactId>spring-boot-starter-web</artifactId>
        </dependency>
        <dependency>
            <groupId>org.projectlombok</groupId>
            <artifactId>lombok</artifactId>
            <optional>true</optional>
        </dependency>
        <dependency>
            <groupId>org.springframework.boot</groupId>
            <artifactId>spring-boot-starter-test</artifactId>
            <scope>test</scope>
        </dependency>
        <dependency>
            <groupId>org.springframework.boot</groupId>
            <artifactId>spring-boot-starter</artifactId>
        </dependency>
        <dependency>
            <groupId>org.springframework.boot</groupId>
            <artifactId>spring-boot-starter-test</artifactId>
            <scope>test</scope>
        </dependency>
        <dependency>
            <groupId>com.baomidou</groupId>
            <artifactId>mybatis-plus-boot-starter</artifactId>
            <version>3.2.0</version>
        </dependency>
        <!--这里官网上是用的 h2-->
        <dependency>
            <groupId>mysql</groupId>
            <artifactId>mysql-connector-java</artifactId>
            <version>8.0.31</version>
        </dependency>
    </dependencies>
配置 SpringBoot 的核心配置文件,包括数据源等。
server:
  port: 8080
  servlet:
    context-path: /plus
#连接数据库
spring:
  datasource:
    url: jdbc:mysql://127.0.0.1:3306/mybatis?characterEncoding=UTF-8&useSSL=false&useUnicode=true&serverTimezone=UTC&allowPublicKeyRetrieval=true
    username: root
    password: a.miracle
    driver-class-name: com.mysql.cj.jdbc.Driver
mybatis:
  #config-location:
  #mapper-locations: classpath:mybatis/*Mapper.xml
  #设置字段对应
  configuration:
    map-underscore-to-camel-case: true
为启动类添加 @MapperScan 注解,你只要建的规范,他自动扫描就没问题,你就可以不写。
@SpringBootApplication
@MapperScan("com.purearc.plus.mapper")
public class MybatisplusApplication {
    public static void main(String[] args) {
        SpringApplication.run(MybatisplusApplication.class, args);
    }
}
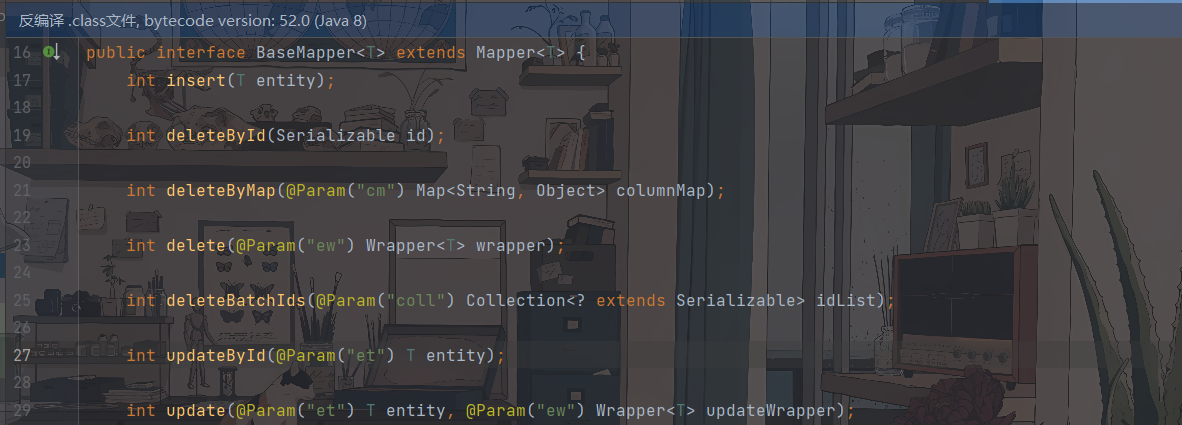
编写数据库对应的实体类和 Mapper 接口,Mybatis-Puls 提供了 BaseMapper 接口,内置了 CRUD 的基本方法,让自定义 Mapper 继承 BaseMapper 即可获得这些通用方法,而不需要手动编写 mapper.xml 文件。
⏬BaseMapper 内置了 CRUD 方法
package com.purearc.plus.pojo;
import lombok.Data;
import lombok.experimental.Accessors;
@Data
@Accessors(chain = true)
public class User {
    private Long id;
    private String name;
    private Integer age;
    private String email;
}

package com.purearc.plus.mapper;
import com.baomidou.mybatisplus.core.mapper.BaseMapper;
import com.purearc.plus.pojo.User;
public interface UserMapper extends BaseMapper<User> {
}
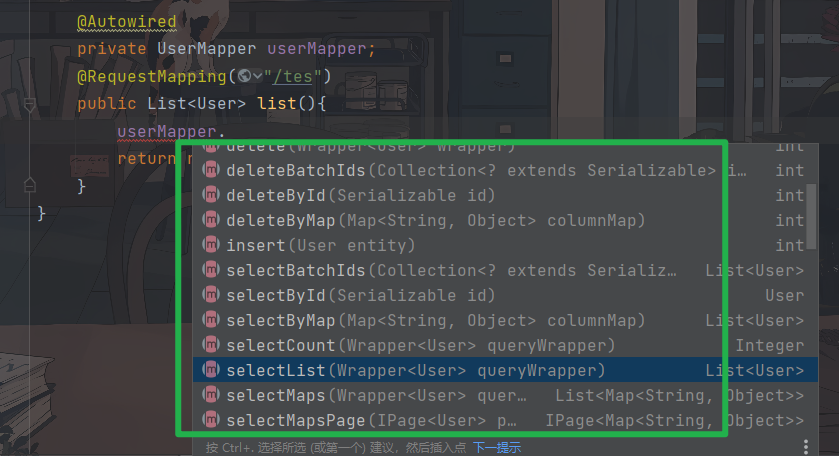
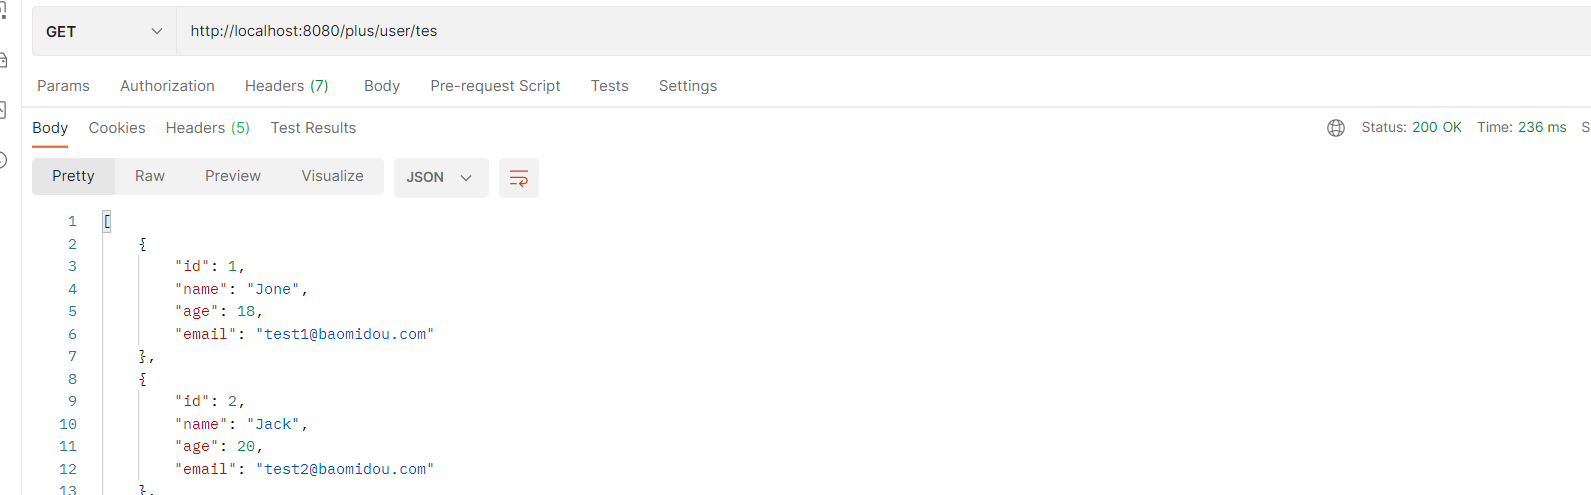
在这里直接把 userMapper 注入(为了方便就不写 Service了),我们使用 OGNL 的时候可以看到出来一堆方法,但是我们在自己的 UserMapper 中根本就什么都没写,最后我们模拟访问的时候也都把数据给查出来了。
package com.purearc.plus.controller;
@RestController
@RequestMapping("/user")
public class UserController {
    @Autowired
    private UserMapper userMapper;
    @RequestMapping("/tes")
    public List<User> list(){
        return userMapper.selectList(null);
    }
}
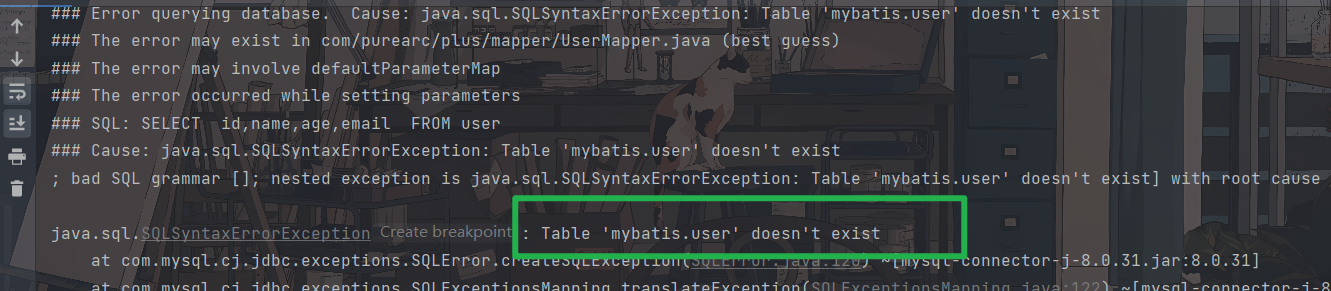
要是按照传统功夫点到为止,那自然是改写 SQL 语句指定在哪个表里面取出 / 操作哪些数据,现在把 user 这个数据表改成 t_user 重启一下。
那自然是直接把 mybatis-plus 淦蒙了,本来它可以根据你的实体类对应到数据库中的 Table ,这一改就找不到了,所以 mybatis -plus 为了防止这种数据表有前后缀和 POJO 对应不起来的情况,提供了 @Table 的系列注解,想想不难得出这玩意是加在 POJO 上的。
@Data
@Accessors(chain = true)
@TableName("t_user")
public class User {
    private Long id;
    private String name;
    private Integer age;
    private String email;
}
三、Mybatis-Plus CRUD
查询
上面说了,加上个 Service 就行了,懒得写
添加
玛德,这有什么好说的,连 Mapper 里面都不用写东西
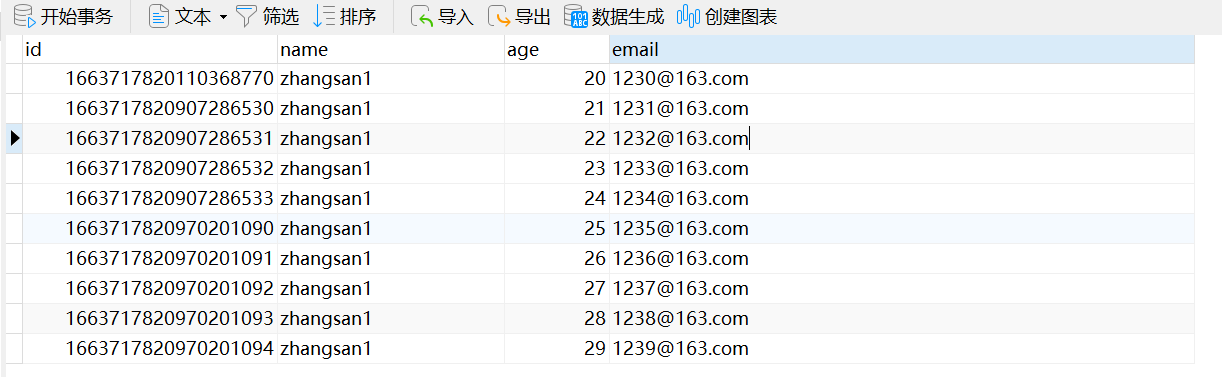
    @RequestMapping("/save")
    public Map batchSave(){
        ArrayList<User> users = new ArrayList<>();
        for (int i = 0; i < 10; i++) {
            users.add(new User().setName("zhangsan"+1).setAge(20+i).setEmail("123"+i+"@163.com"));
        }
        userService.batchSave(users);
        return (Map) new HashMap().put("200","OK");
    }
    package com.purearc.plus.service;
    /**
     * 批量插入
     * @param users
     */
    void batchSave(ArrayList<User> users);

    package com.purearc.plus.service.impl;
    @Override
    public void batchSave(ArrayList<User> users) {
        for (User user : users) {
            userMapper.insert(user);
        }
    }
BaseMapper 里面的 insert 只能放一个?那我只能循环放进去辣。
int insert(T entity);
删除
@RequestMapping("/delete")
public Map delete(){
    List<Long> ids = Arrays.asList(1L,2L,3L,4L,5L);
    userService.batchDelete(ids);

    return (Map) new HashMap().put("200","OK");
}
BaseMapper 里面的 BatchDelete 参数可以传入一个集合。
package com.purearc.plus.service;
/**
 * 批量删除
 * @param ids
 */
void batchDelete(List<Long> ids);

package com.purearc.plus.service.impl;
@Override
public void batchDelete(List<Long> ids) {
    userMapper.deleteBatchIds(ids);
}
更新
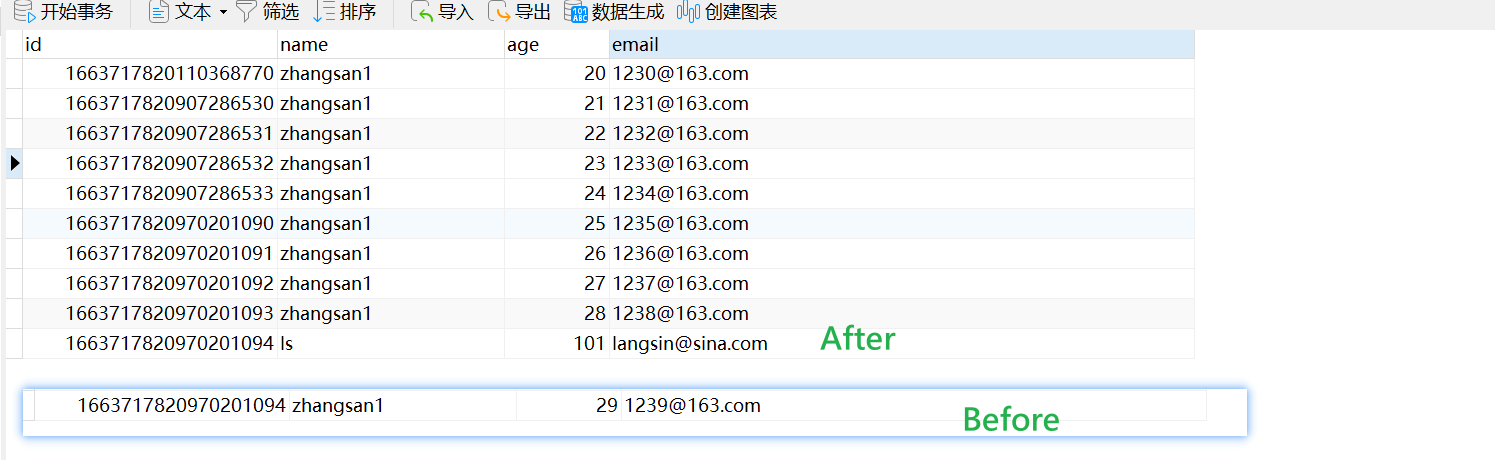
直接把数据表中的一个 ID 拿出来,这何尝不是一种 updateById 呢
    @RequestMapping("/update")
    public Map update(){
        List<User> userList = new ArrayList<>();
        User user = new User().setAge(101).setEmail("langsin@sina.com").setName("ls").setId(1663717820970201094L);
        userService.update(user);
        return new HashMap();
    }
     package com.purearc.plus.service;
   /**
     * 更新
     * @param user
     */
    void update(User user);、
  package com.purearc.plus.service.impl;
    @Override
    public void update(User user) {
        userMapper.updateById(user);
    }
四、Mybatis-Plus 注解
@TableFiled
由于数据表字段和 POJO 字段的命名规则不同,在 mybatis 中配置文件需要手动开启字段对应,而在 mybatis-plus 中 map-underscore 的值被默认设置为 true,但是仍然会有很多情况可能让命名规则无法对应,程序员运行肯定就会报错 Unknown column 'XX' in 'field list'。
使用 @TableFiled(value = "name")就可以手动设置这个属性要对应的数据表字段的名字。
    @TableField(value = "t_name")
    private String name;

如果在 POJO 中有属性不是数据库的字段,但在项目中必须使用,使用注解 @TableField(exist = false) 可以用来把一个数据表当作一个字段来输出,用来实现表中表数据输出。这样设置在新增等使用bean的时候,mybatis-plus 就会忽略这个,不会报错。

    @TableField(exist = false)
    private Integer isDelete;
@TableLogic
举个栗子,当年楼主因为自己的百度账号别人改了个纱暖名字,楼主一气之下就把百度账号给销号了,但是毮比百度会让你一个月不能登录这个号,也就是说你即使销号跑路了,你的信息也会给你存着,就像是回收站能够还原文件一样(当然在我销号的一个半月后百度就支持改用户名了,密码吗的纱暖)。为了达到这种 逻辑删除物理保存 的目的,可以在数据表中增加一个是否删除的字段,标记为 删除 就不查询出来即可。
mybatis-plus 提供了更方便的解决方案,@TableLogic("未删除的值 default 0","删除后的值 default 1")。
早就看这个 101 岁的老东西不顺眼了,今天把他宰了给大家爆金币 ?
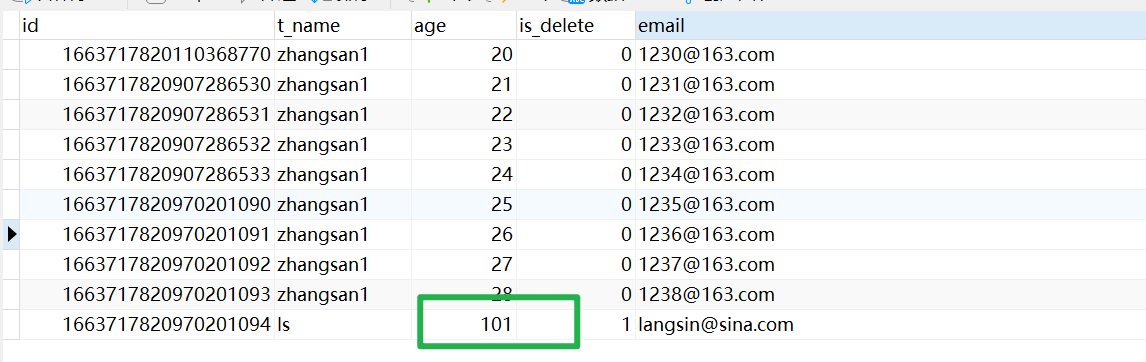
确实可以看到这个老东西已经查询不出来了。

@TableId
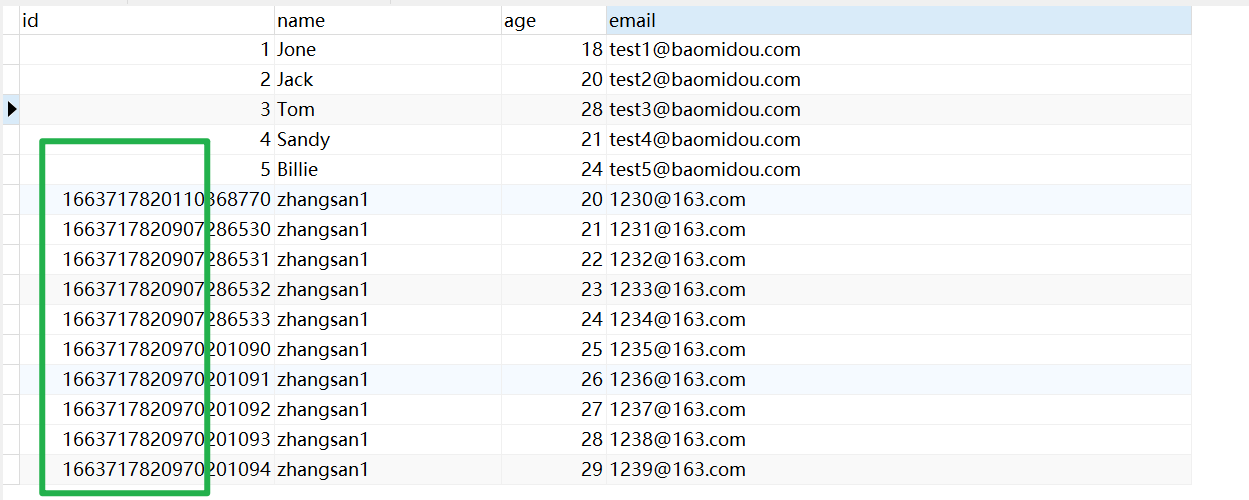
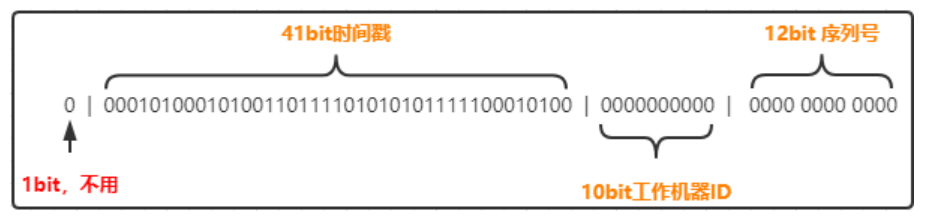
在上文的 insert 方法中,对于 new 出的 10 个 User 我们并没有指定其 id 值,在 mysql 的创建时也没有指定主键自增,生成的 id 是由 mybatis-plus 的默认方案 雪花算法 生成,另外,mybatis-plus 提供了其他方案如主键自增、UUID 等。
对于 @TableId 注解里面也有 Value 这一个属性,默认情况下 mybatis-plus 会自动寻找 id 标记为 key,你如果想把别的标记为主键的话让 Value = "name" 就可以了。
主要使用到的是 @TableId(type = "name") 指定生成主键的策略,在 IdType 枚举类中提供了一下五种值。
| 值 | 描述 |
|---|---|
| AUTO | 数据库 ID自增,这种情况下将表中主键设置为自增,否则,没有设置主动设置id值进行插入时会报错 |
| NONE | 无状态,该类型为未设置主键类型(注解里等于跟随全局,全局里默认 ASSIGN_ID),注意这里官网文档有误 |
| INPUT | insert 前自行 set 主键值,在采用IKeyGenerator类型的ID生成器时必须为INPUT |
| ASSIGN_ID | 分配 ID(主键类型为 Number(Long 和 Integer)或 String)(since 3.3.0),使用接口IdentifierGenerator的方法nextId(默认实现类为DefaultIdentifierGenerator雪花算法) |
| ASSIGN_UUID | 分配 UUID,主键类型为 String(since 3.3.0),使用接口IdentifierGenerator的方法nextUUID(默认 default 方法) |
在这里更改了主键类型为 AUTO 插入后可以看见从上面雪花算法生成 zhangsan1 的 id 后面就是主键加一了。切记使用 AUTO 要在数据库表的设计中点击主键自增,否则就会:Field 'id' doesn't have a default value; nested exception is java.sql.SQLException: Field 'id' doesn't have a default value] with root cause。
	@TableId(type = IdType.AUTO)
    private Long id;

如果有多个 POJO 的 id 生成策略一样可以在 yml 的全局配置中指定,也能获得相同的效果。
mybatis-plus:
  global-config:
    db-config:
      id-type: auto
  mapper-locations: classpath:mybatis/*Mapper.xml
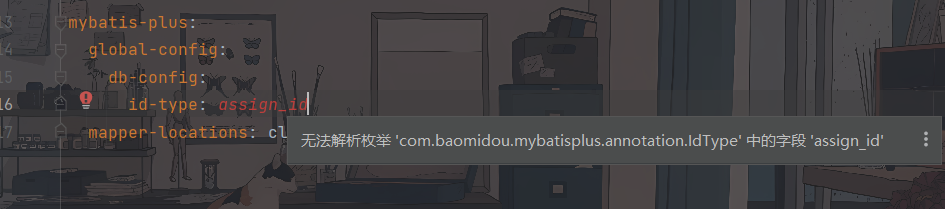
枚举类报错
如果出现下面的这种情况把 mybatis-plus 切换到 3.3.0 版本即可,实测 3.2.0 会报错。
无法解析枚举 'com.baomidou.mybatisplus.annotation.IdType' 中的字段 'ASSIGN_ID'