方式一(直接在HttpUser中定义任务)
from locust import HttpUser, task, constant, between
from config.env import device, depth, get_data, set_data, delete_data, add_data
from common.yaml_config import GetConf


class MyUser(HttpUser):
    # host = "http://10.70.2.21:8282/"
    port = GetConf().get_mqtt_port()
    host = GetConf().get_mqtt_host()
    wait_time = constant(2)
 #wait_time=between(1,5)

    @task
    def test_get_parameter(self):
        url = f"/usp/api/v1.2/get/{device}/{depth}"
        data = get_data
        headers = {"Content-Type": "application/json"}
        res = self.client.request(
            method="POST", url=url, json=data, headers=headers, name="Get Parameter"
        )
        print("Get Response:", res.text)

注释:
HttpUser:控制用户发请求的频率、用户的思考时间、设置主机的IP地址、也可以定义任务
@task:@task用来标记哪个方法是任务,什么任务,我要做性能测试执行哪个接口
host:被测系统,你要发送请求到哪个服务器
wait_time:每次请求的间隔、停顿时间、思考时间
constant:为固定的思考时间,这里可以简单理解为固定定时器。
between: 是在这个区间的思考时间,可以理解为random定时器。
描述:
创建一个User类MyUser, 继承HttpUser,然后定义主机IP地址、思考时间;
在类下面编写一个测试接口,跟我们使用request类似,有个别区别;
用@task的方式进行定义任务
接口方法内需要注意的点:
url只需要写路径即可,请求时自动拼接host;
发送请求的时候要用self.client.request去请求,并且增加method,和name两个入参,method就是请求方法、name就是接口名称;
self.client.request 它的发送请求跟我们常用的接口测试的request库非常类似,因为底层封装的就是request库;
2.方式二(写在模块内)
from config.env import device, depth, get_data, set_data, delete_data, add_data, HOST
from locust import HttpUser, task, constant, TaskSet, SequentialTaskSet

@task(5)
def test_get_parameter(user):
    url = f"/usp/api/v1.2/get/{device}/{depth}"
    data = get_data
    headers = {"Content-Type": "application/json"}
    res = user.client.request(
        method="POST", url=url, json=data, headers=headers, name="Get Parameter"
    )
    print("Get Response:", res.text)


@task(1)
def test_set_parameter(user):
    url = f"/usp/api/v1.2/set/{device}"
    data = set_data
    headers = {"Content-Type": "application/json"}
    res = user.client.request(
        method="POST", url=url, json=data, headers=headers, name="Set Parameter"
    )
    print("Set Response:", res.text)


class MyUser(HttpUser):
    host = "http://10.70.2.21:8282"  # 被测系统的地址
    wait_time = constant(30)  # 每次请求的间隔、停顿时间、LR里面叫做思考时间(constant为固定的思考时间)
    tasks = [
        test_get_parameter,
        test_set_parameter,
    ]  # tasks 里填写每个方法名
3.方式三(把任务写在任务集里面)
class TaskApi(SequentialTaskSet):  # SequentialTaskSet:如果需要有序的,我们可以继承该方法来进行创建任务
    @task(1)
    def test_get_parameter(self):
        url = f"/usp/api/v1.2/get/{device}/{depth}"
        data = get_data
        headers = {"Content-Type": "application/json"}
        res = self.client.request(
            method="POST", url=url, json=data, headers=headers, name="Get Parameter"
        )
        print("Get Response:", res.text)

    @task(1)
    def test_set_parameter(self):
        url = f"/usp/api/v1.2/set/{device}"
        data = set_data
        headers = {"Content-Type": "application/json"}
        res = self.client.request(
            method="POST", url=url, json=data, headers=headers, name="Set Parameter"
        )
        print("Set Response:", res.text)


class MyUser(FastHttpUser):
    host = "http://10.70.2.21:8282"  # 被测系统的地址
    wait_time = constant(30)  # 每次请求的间隔、停顿时间、LR里面叫做思考时间(constant为固定的思考时间)
    tasks = [TaskApi]  # tasks 里填写这个类名
运行刚刚写好的脚本:
打开你的Terminal,然后cd到你写的测试文件目录下,.py的文件;
运行命令:locust -f 测试文件.py;
回车运行,之后如果出现第一张图显示的那样,就证明运行成功了;
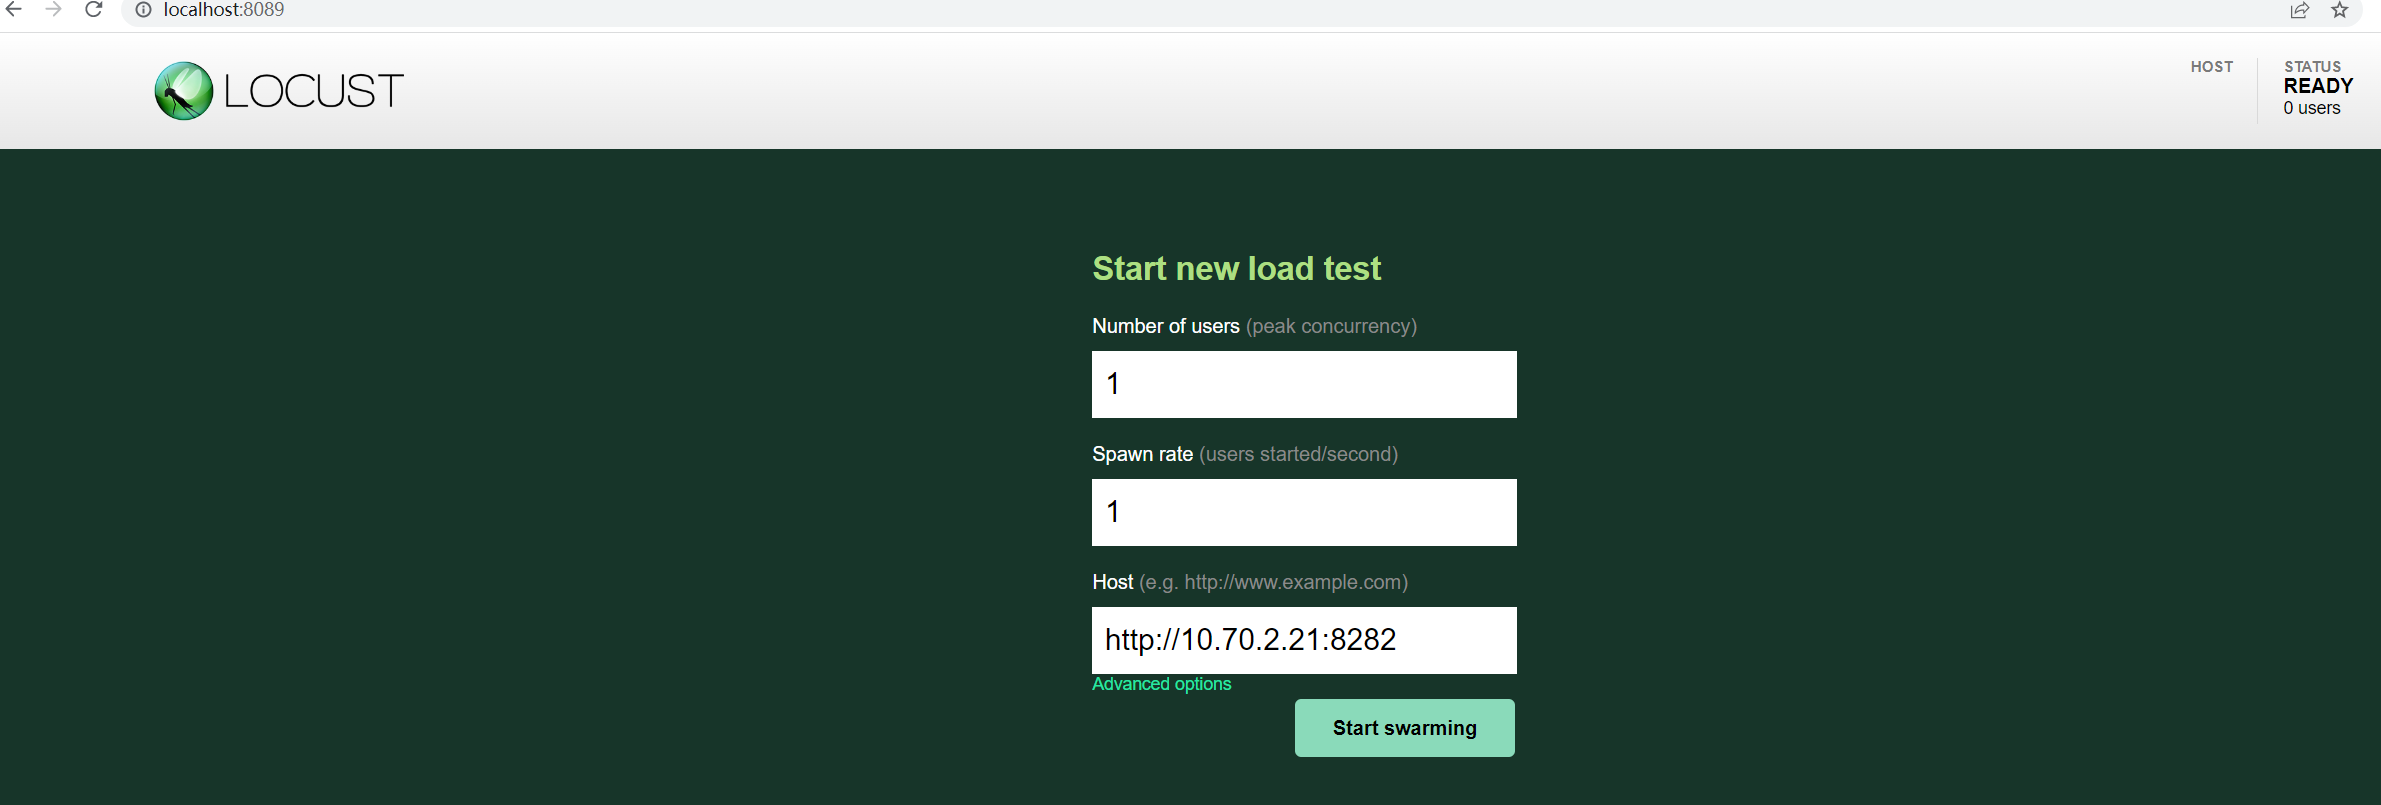
打开你的浏览器输入http://localhost:8089,回车就会打开第二张图显示的GUI的locust页面;
locust页面字段解释:
Number of users to simulate:设置模拟的用户总数;
Hatch rate (users spawned/second):每秒启动的虚拟用户数;
host:就是你脚本内写的被测系统地址,打开页面后自动填入的;
Start swarming:开始运行性能测试;
输入模拟的用户总数、输入每秒启动的虚拟用户数,点击Start swarming即可运行