系统环境
阿里云ubuntu
Java: openjdk version "1.8.0_382"
Seata:seata-server-1.8.0
下载Seata-server
github下载地址:https://github.com/seata/seata/releases
官网下载地址:https://seata.io/zh-cn/blog/download.html
部署
安装
将下载好的Seata-server存放到指定的工作目录,本文工作目录为/opt,执行命令如下:
mv seata-server-1.8.0.tar.gz /opt
进入工作目录,并解压安装Seata-server,命令如下:
#进入安装目录
cd /opt
#解压安装包
tar -zxvf seata-server-1.8.0.tar.gz
配置
进入Seata的配置目录
cd /opt/seata/conf
配置文件结构
Seata-server是一个基于spring-boot开发的项目,启动配置文件为application.yml,核心配置部分包含seata.config、seata.registry、seata.store三个部分(1.5.x版本之后使用了spring-boot,建议在application.yml中集中配置)。
- seata.config:指定配置中心,提供全局配置,包含seata-server和全局store的相关配置;默认为file,指定读取同配置目录下的file.conf文件。
- seata.registry:指定seata-server服务端的注册中心,1.5.0版本之后seata-server调整为spring-boot,不再读取registry.conf文件
- seata.store:指定事务数据的存储模式。该模块的配置内容与seata.config中store的配置部分重叠;seata.config用于指定全局的事务日志存储配置,seata.store指定当前seata端使用的事务日志存储配置,seata.store配置的优先级高于seata.config。
【application.yml】文件
server:
  port: 7091
spring:
  application:
    name: seata-server
logging:
  config: classpath:logback-spring.xml
  file:
    path: ${log.home:${user.home}/logs/seata}
  extend:
    logstash-appender:
      destination: 127.0.0.1:4560
    kafka-appender:
      bootstrap-servers: 127.0.0.1:9092
      topic: logback_to_logstash
console:
  user:
    username: seata
    password: seata
seata:
  config:
    # support: nacos, consul, apollo, zk, etcd3
    type: file
  registry:
    # support: nacos 、 eureka 、 redis 、 zk  、 consul 、 etcd3 、 sofa
    type: eureka
    eureka:
      service-url: http://112.124.36.250:8080/eureka
      application: ${spring.application.name}
      weight: 1
  #store:
    # support: file 、 db 、 redis
  #  mode: file
#  server:
#    service-port: 8091 #If not configured, the default is '${server.port} + 1000'
  security:
    secretKey: SeataSecretKey0c382ef121d778043159209298fd40bf3850a017
    tokenValidityInMilliseconds: 1800000
    ignore:
      urls: /,/**/*.css,/**/*.js,/**/*.html,/**/*.map,/**/*.svg,/**/*.png,/**/*.jpeg,/**/*.ico,/api/v1/auth/login
补充说明:console部分在1.5.x版本后添加,security部分在1.6.x版本之后添加,使用新版本的seata时需要添加这两个部分的配置,否则启动seata会出现读取不到配置的异常。
【file.conf】文件
server {
    service-port = 8091 #If not configured, the default is '${server.port} + 1000'
    max-commit-retry-timeout = -1
    max-rollback-retry-timeout = -1
    rollback-retry-timeout-unlock-enable = false
    enable-check-auth = true
    enable-parallel-request-handle = true
    retry-dead-threshold = 130000
    xaer-nota-retry-timeout = 60000
    enableParallelRequestHandle = true
    recovery {
      committing-retry-period = 1000
      async-committing-retry-period = 1000
      rollbacking-retry-period = 1000
      timeout-retry-period = 1000
    }
    undo {
      log-save-days = 7
      log-delete-period = 86400000
    }
    session {
      branch-async-queue-size = 5000 #branch async remove queue size
      enable-branch-async-remove = false #enable to asynchronous remove branchSession
    }
}
store {
    # support: file 、 db 、 redis
    mode = db
    session {
        mode = db
    }
    lock {
        mode = db
    }
    db {
        datasource = druid
        db-type = mysql
        driver-class-name = com.mysql.jdbc.Driver
        url = "jdbc:mysql://127.0.0.1:3306/seata?rewriteBatchedStatements=true"
        user = admin
        password = "!QAZ2wsx"
        min-conn = 10
        max-conn = 100
        global-table = global_table
        branch-table = branch_table
        lock-table = lock_table
        distributed-lock-table = distributed_lock
        query-limit = 1000
        max-wait = 5000
    }
}
metrics {
    enabled = false
    registry-type = compact
    exporter-list = prometheus
    exporter-prometheus-port = 9898
}
transport {
    rpc-tc-request-timeout = 15000
    enable-tc-server-batch-send-response = false
    shutdown {
      wait = 3
    }
    thread-factory {
      boss-thread-prefix = NettyBoss
      worker-thread-prefix = NettyServerNIOWorker
      boss-thread-size = 1
    }
}
启动
进入Seata的启动目录
cd /opt/seata/bin
执行启动脚本
sh seata-server.sh
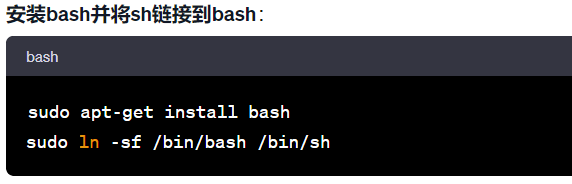
补充说明:我在ubuntu环境下使用sh命令执行脚本会出现语法错误,但是可以使用bash命令执行,解决方案是将sh命令链接到bash
参考文献
seata-server的相关配置可以参考官网,不同版本之前配置上存在差异,参考时需要对应到指定版本的配置。