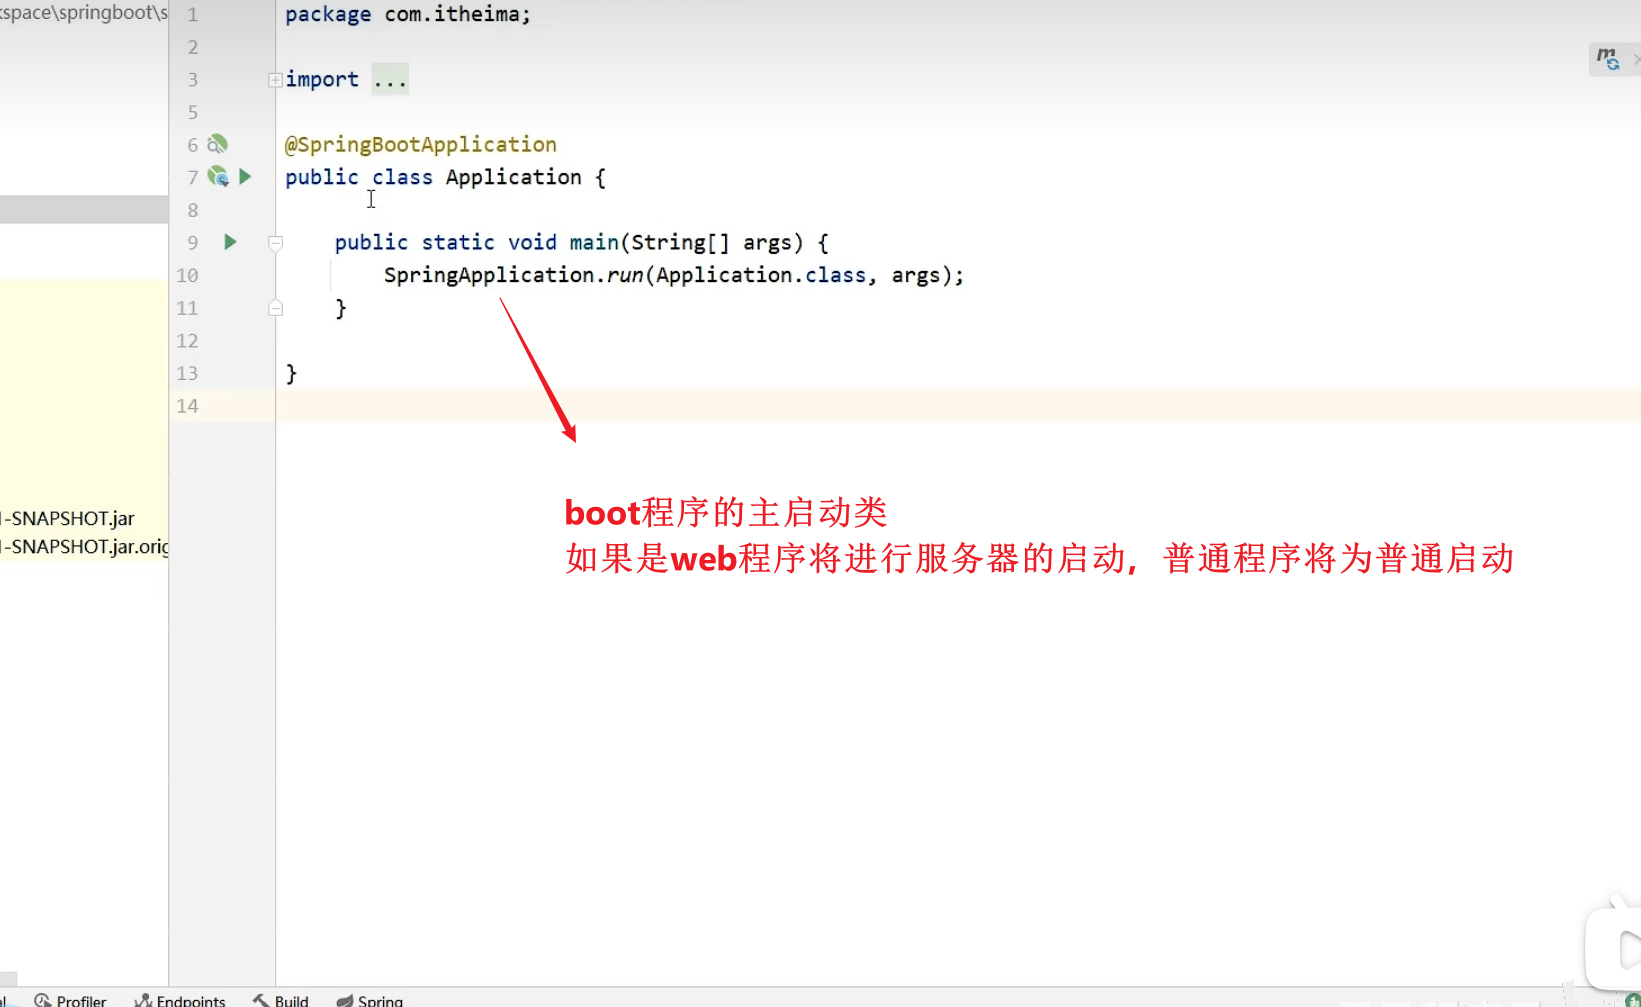
springboot入门案例开发步骤


那他这么强,是怎样做到的呢?


对于jdk的使用版本,我们可以先将模块创建出来,然后在项目结构中修改
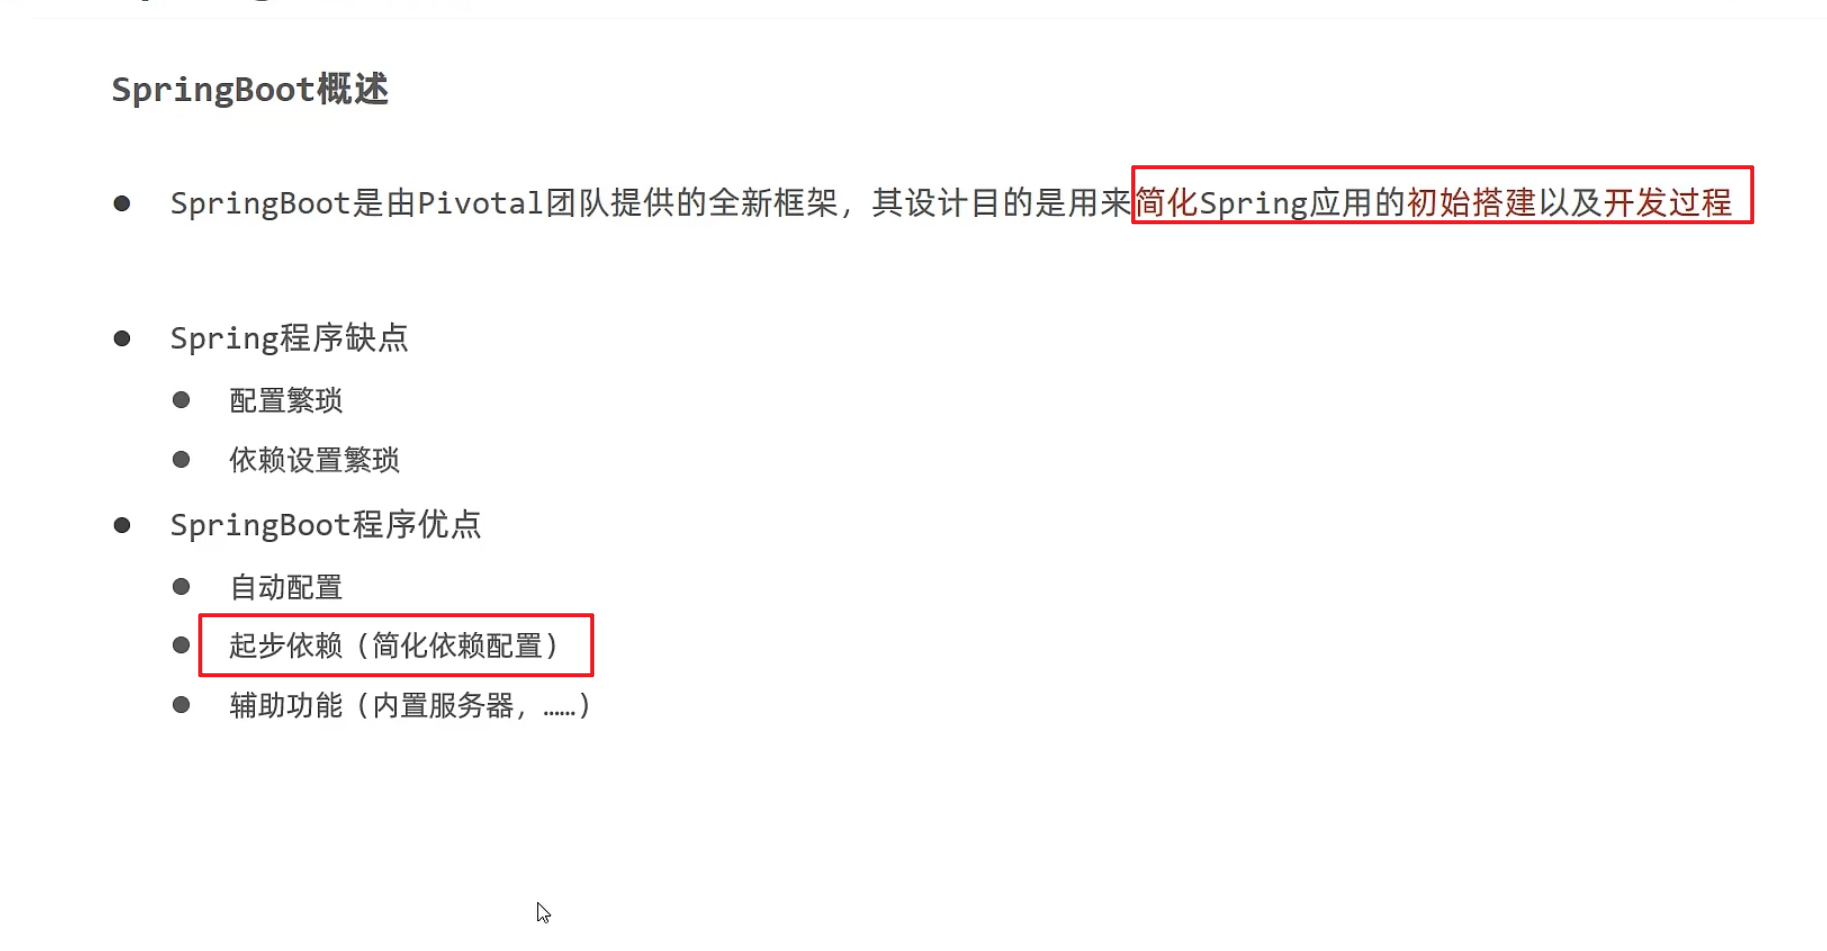
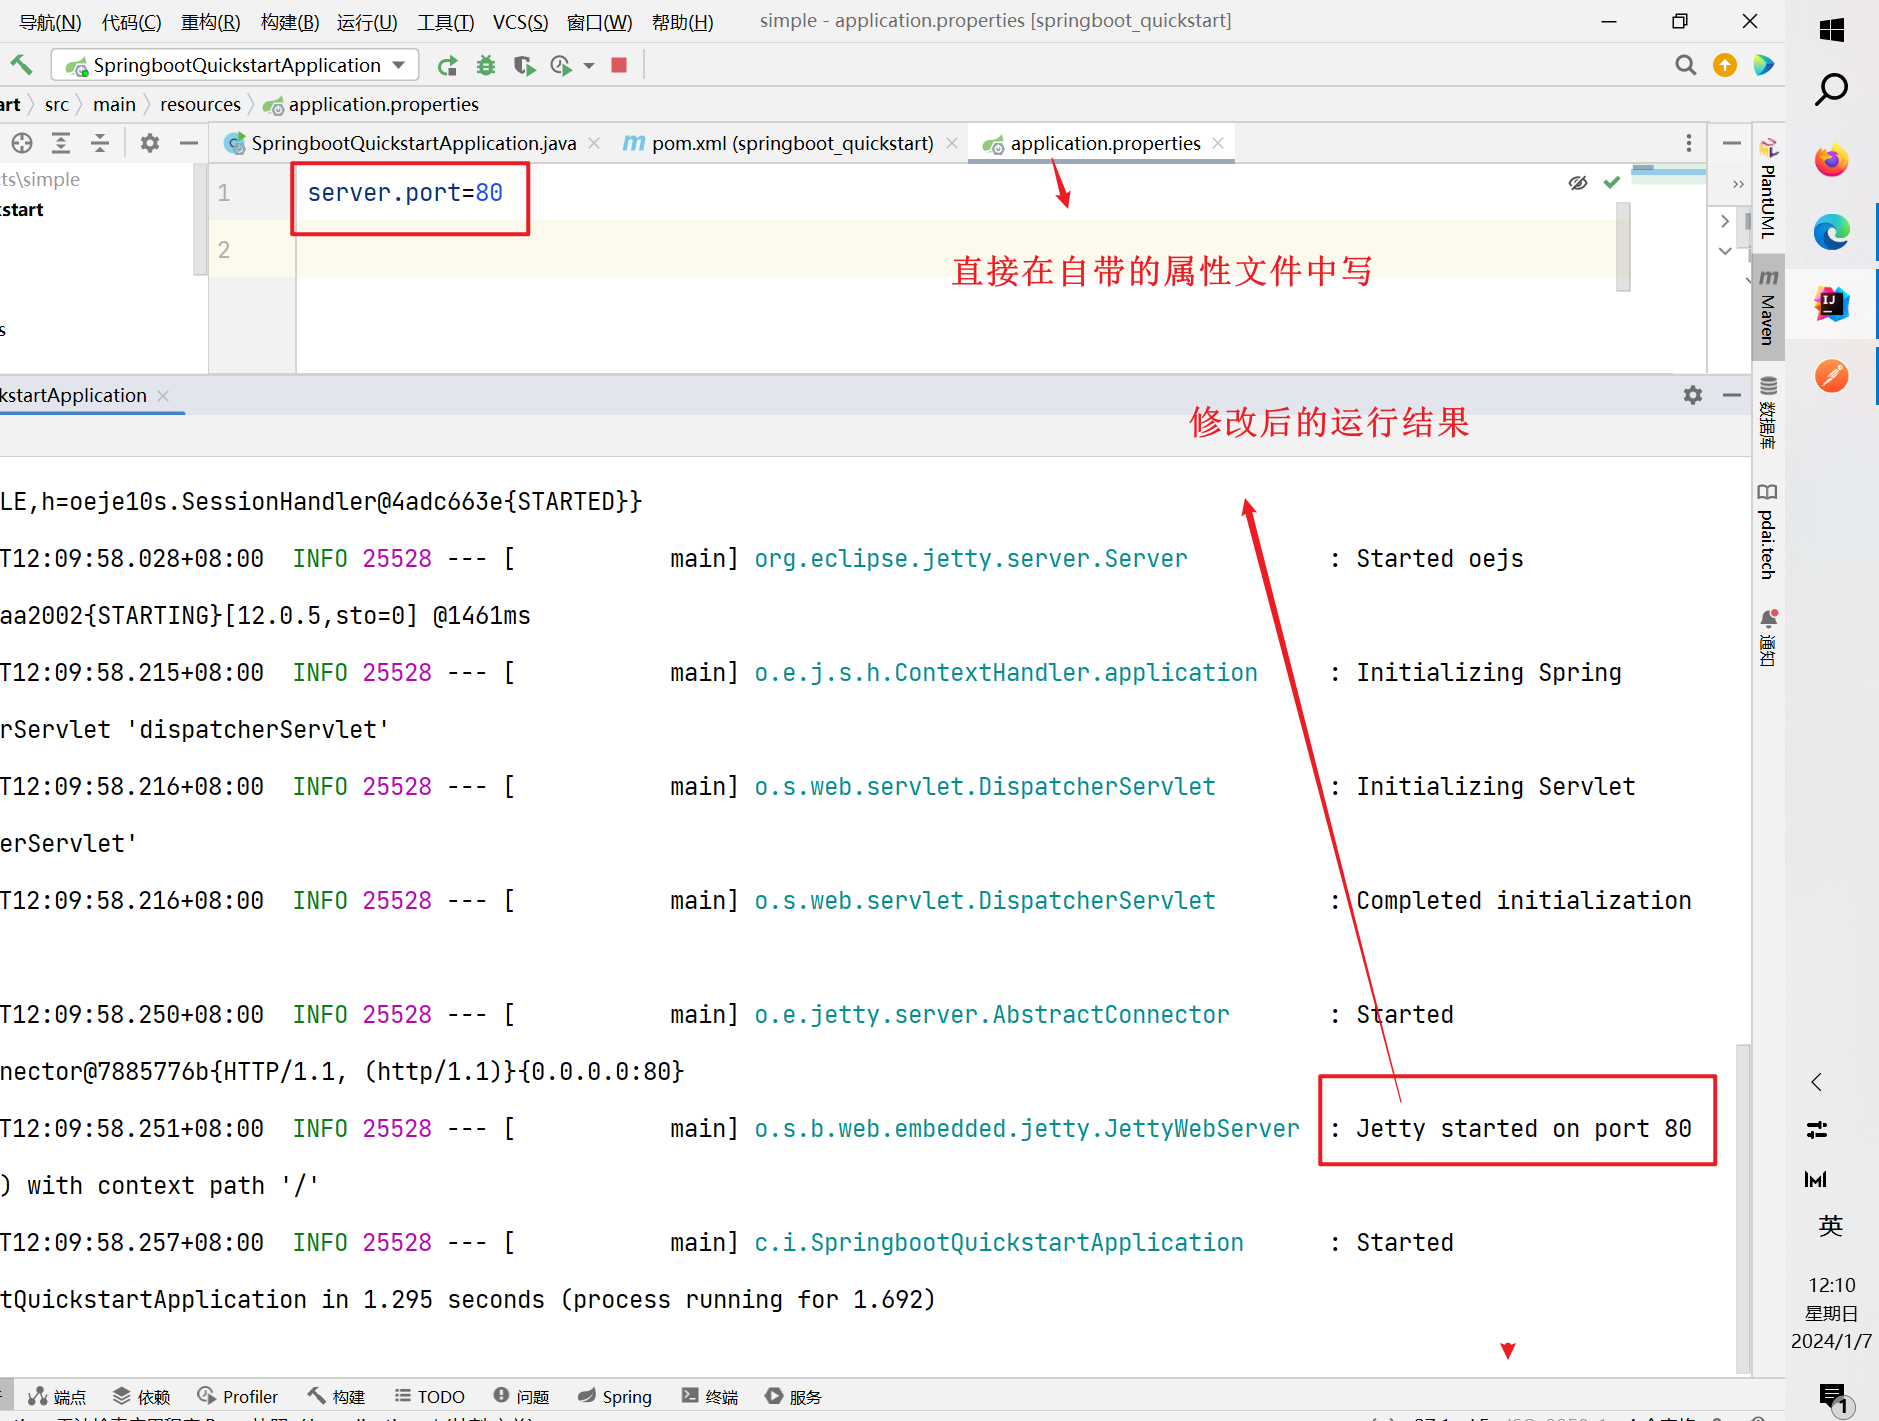
在springboot中,对于前面springmvc和spring的一些配置信息我们可以完全省略
springboot工程官网创建方式

演示了我们在spring官网上创建boot工程,然后我们导入到idea中依然可以使用,说明了我们在idea中创建boot工程,其实后面还是会使用官网的那种方式创建,所以表示是springboot工程创建需要联网
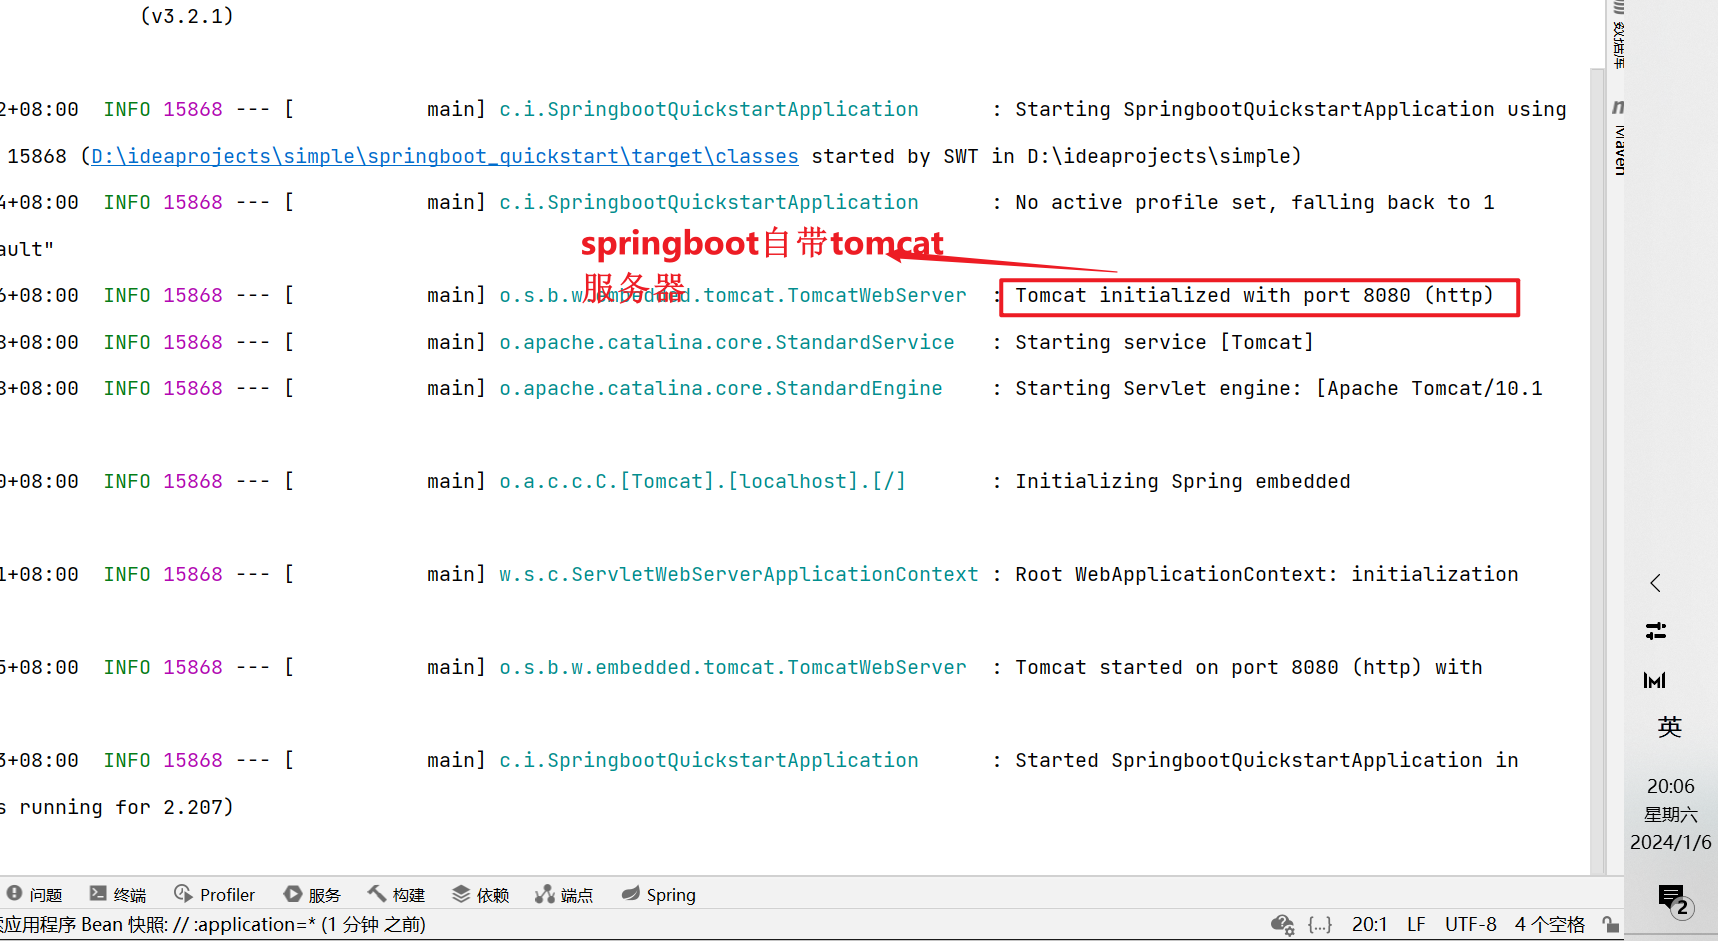
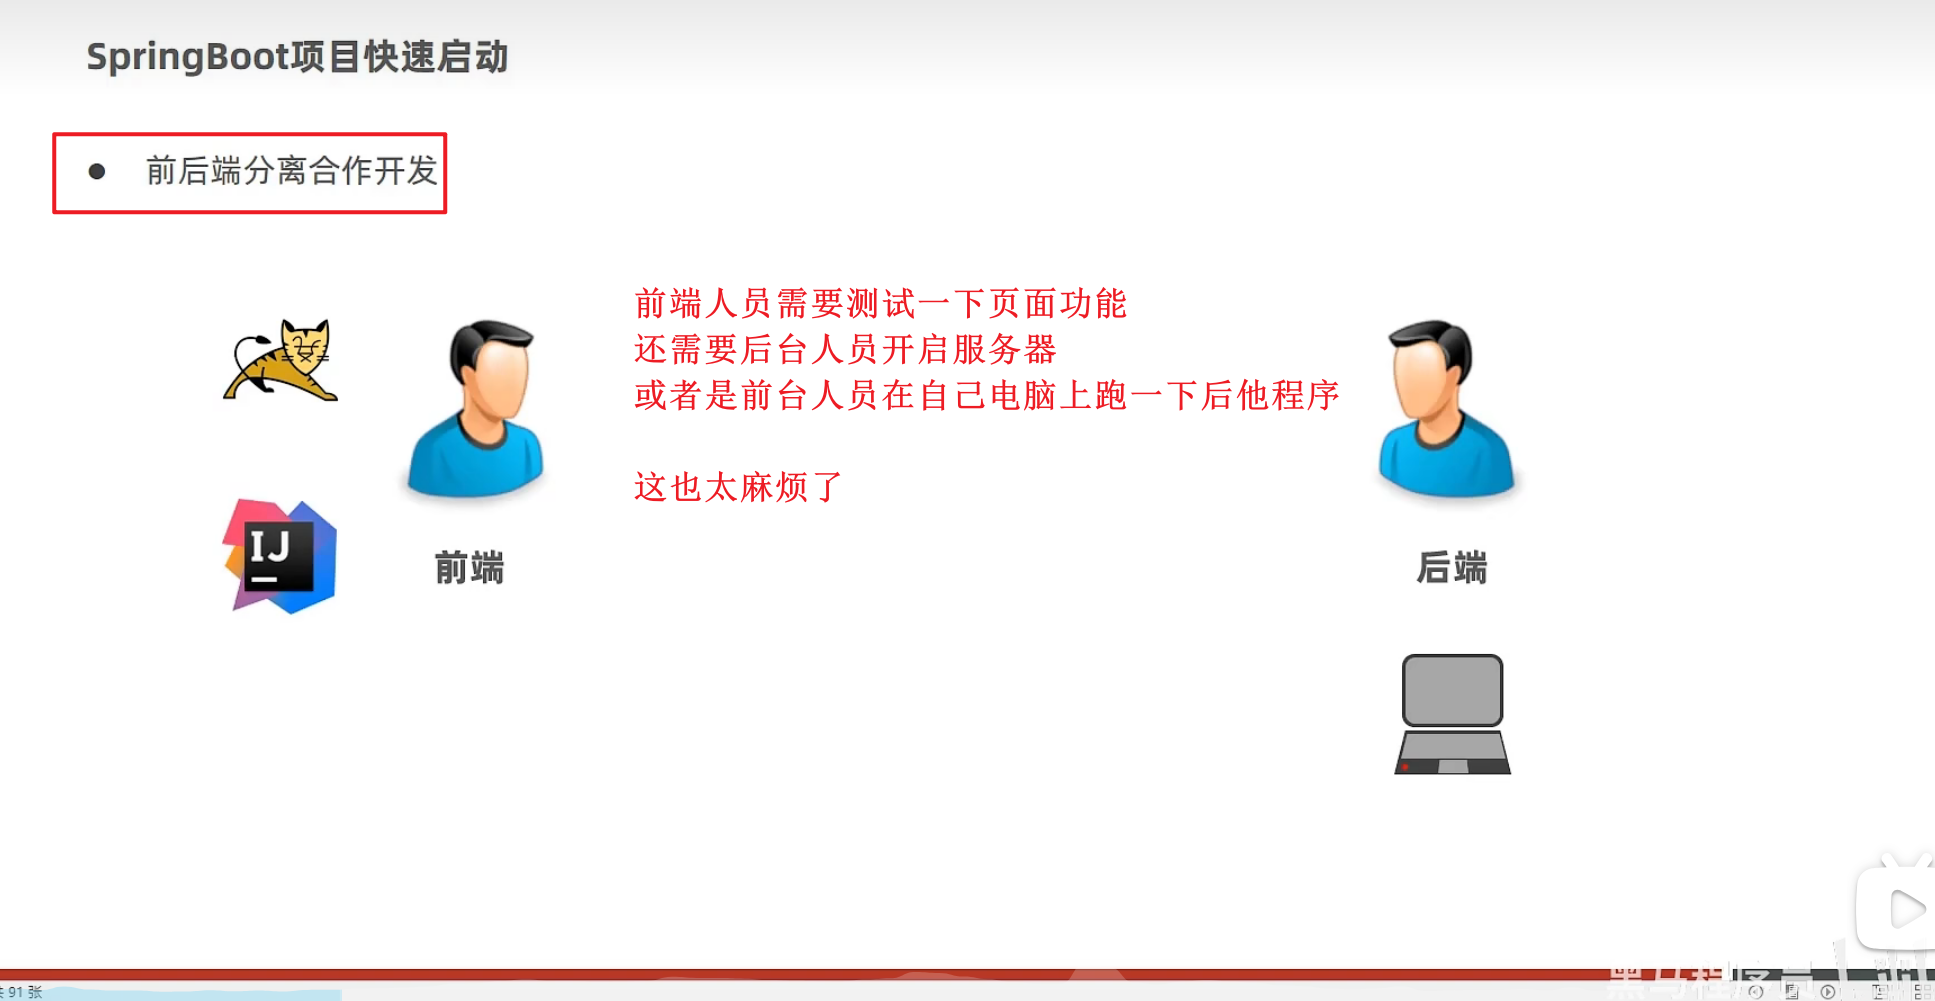
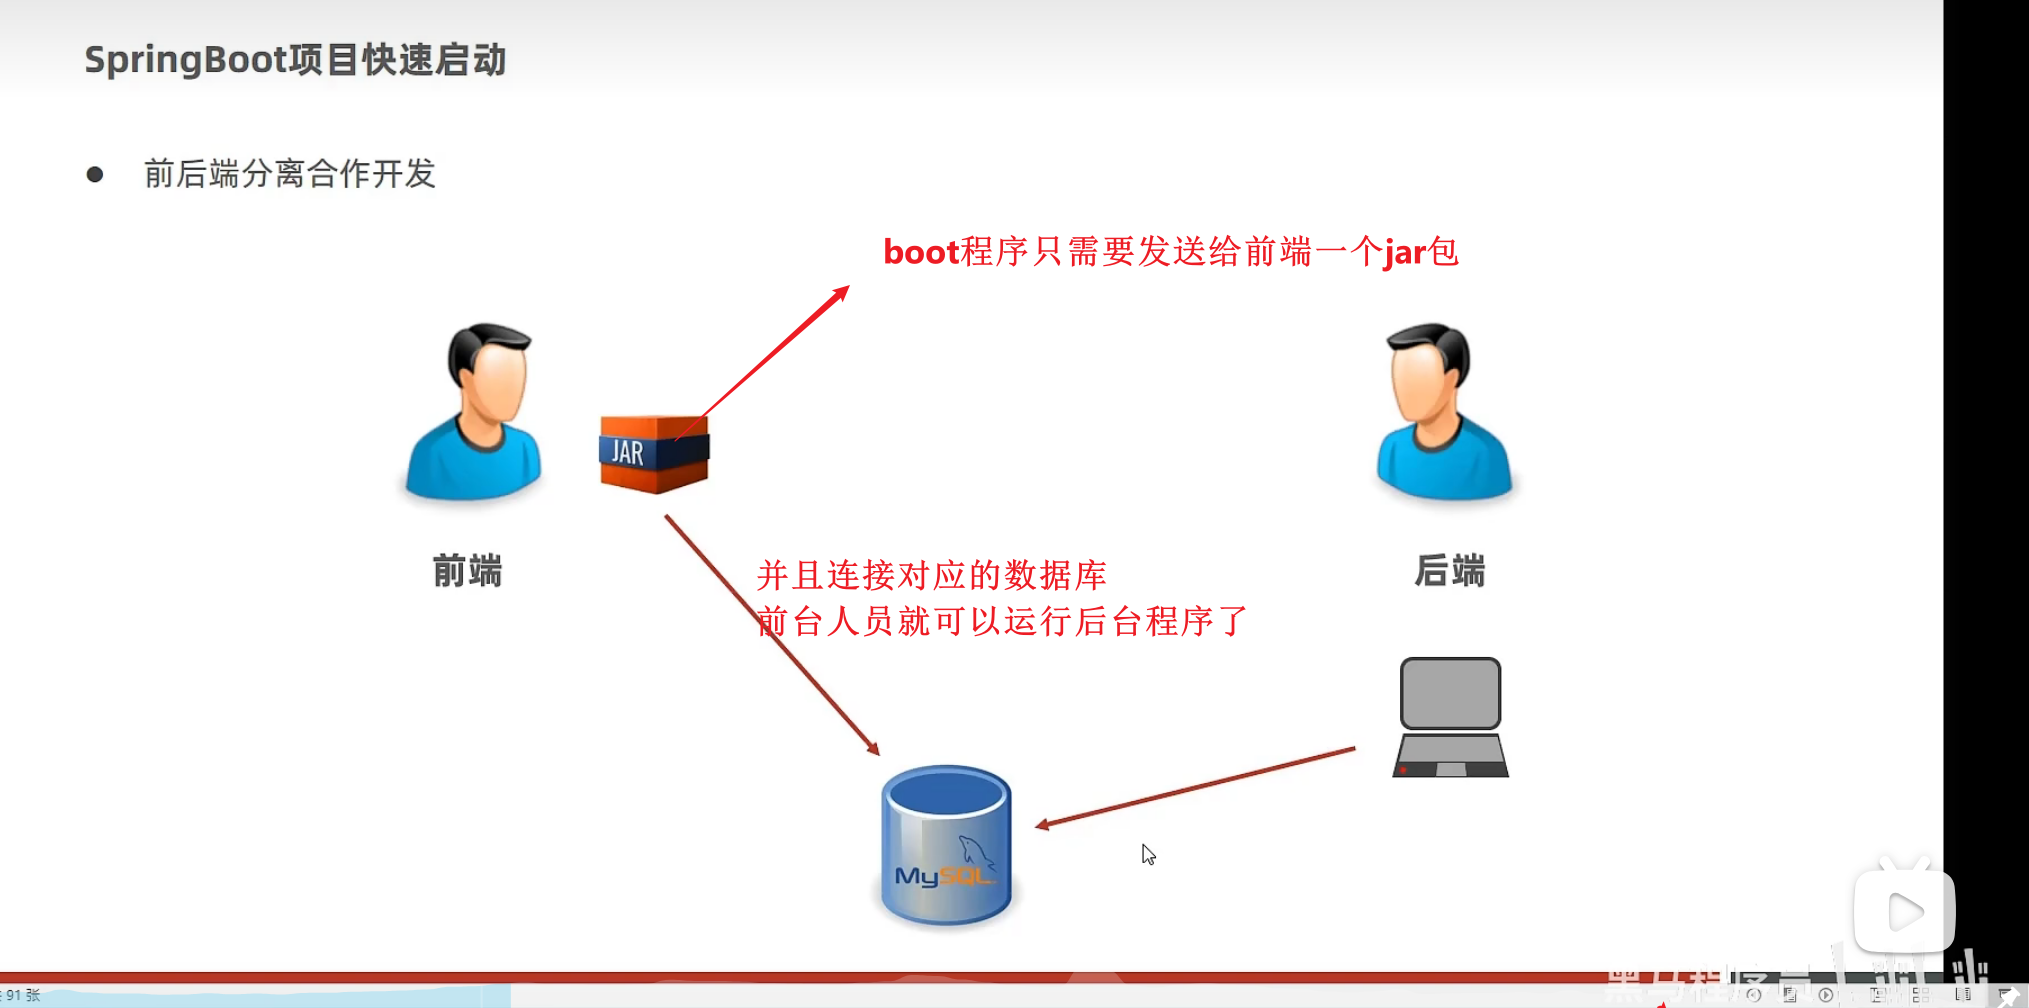
springboot程序快速启动
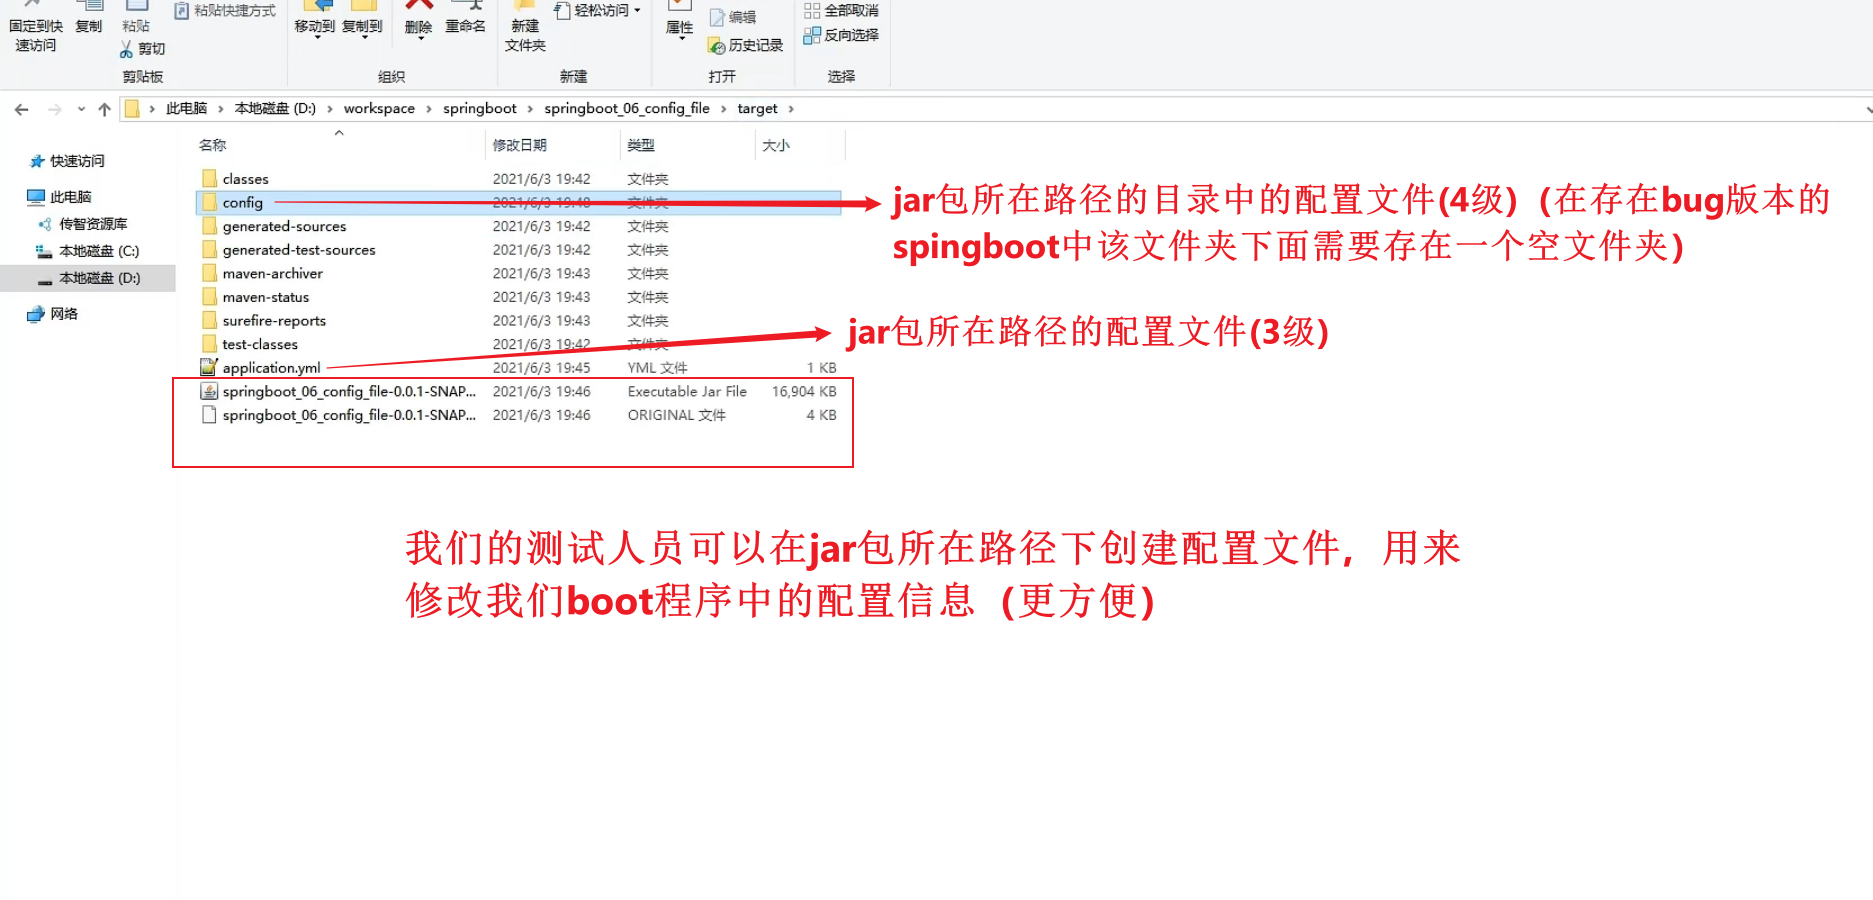
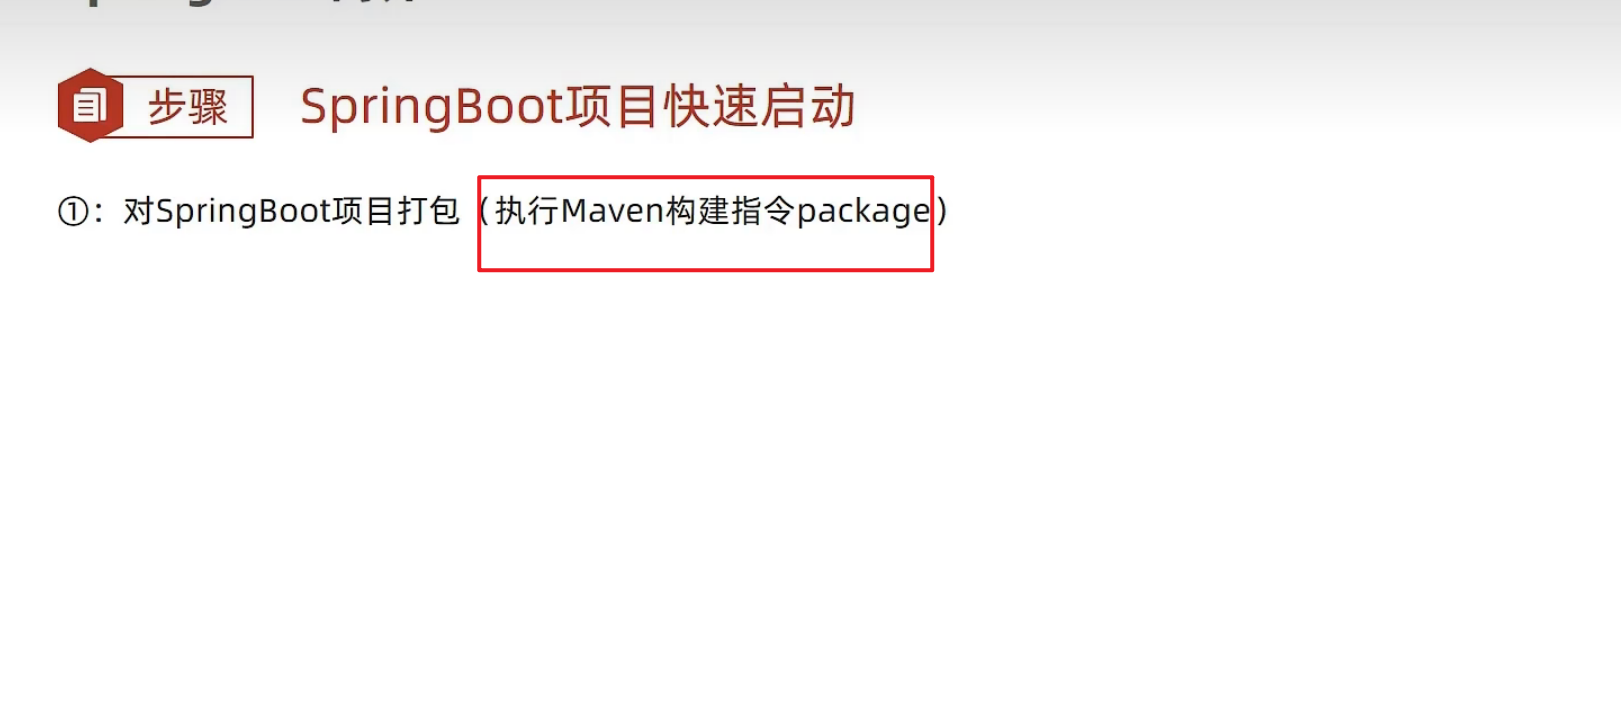
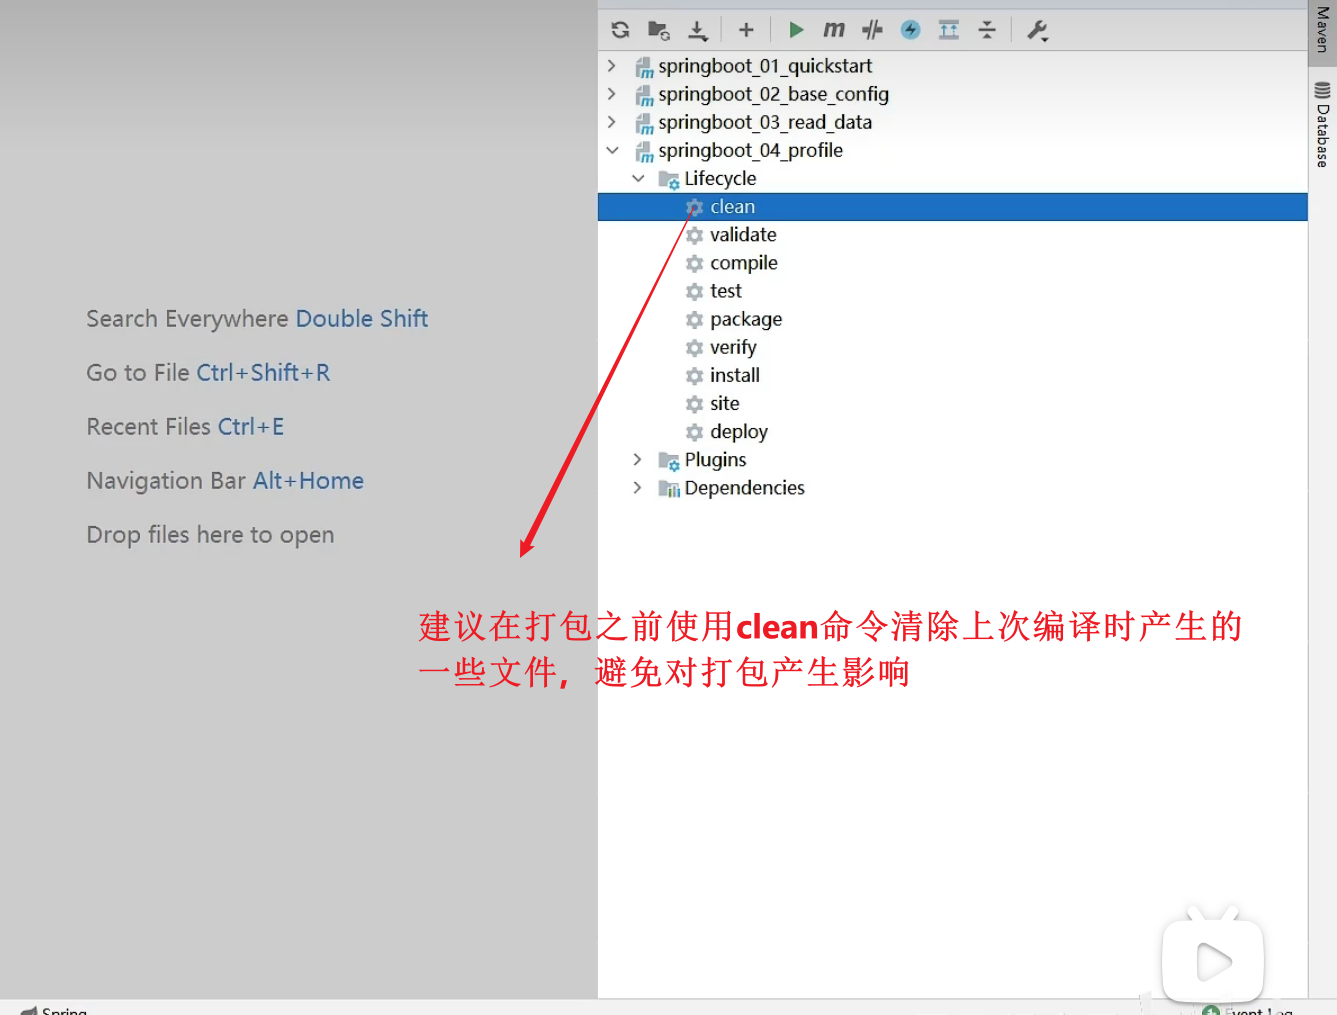
我们在执行install目录时也会执行packing打包操作,并将打包生成的jar,war包存放到项目目录中
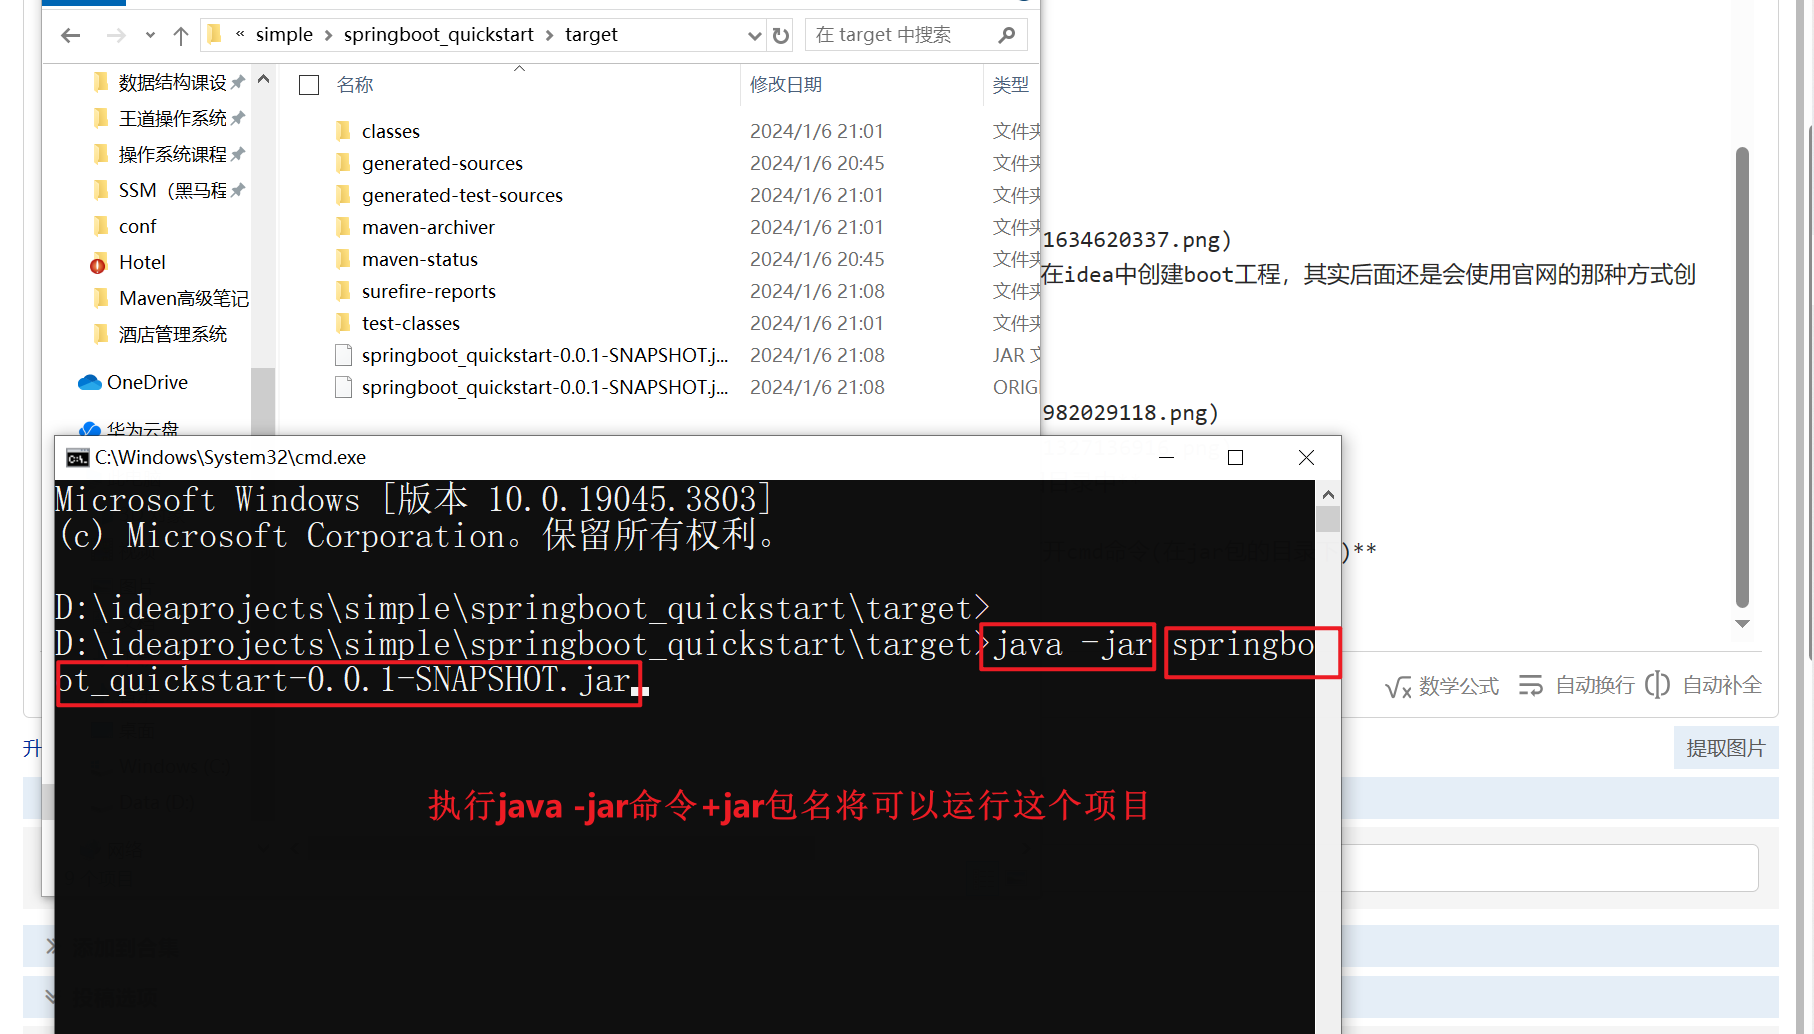
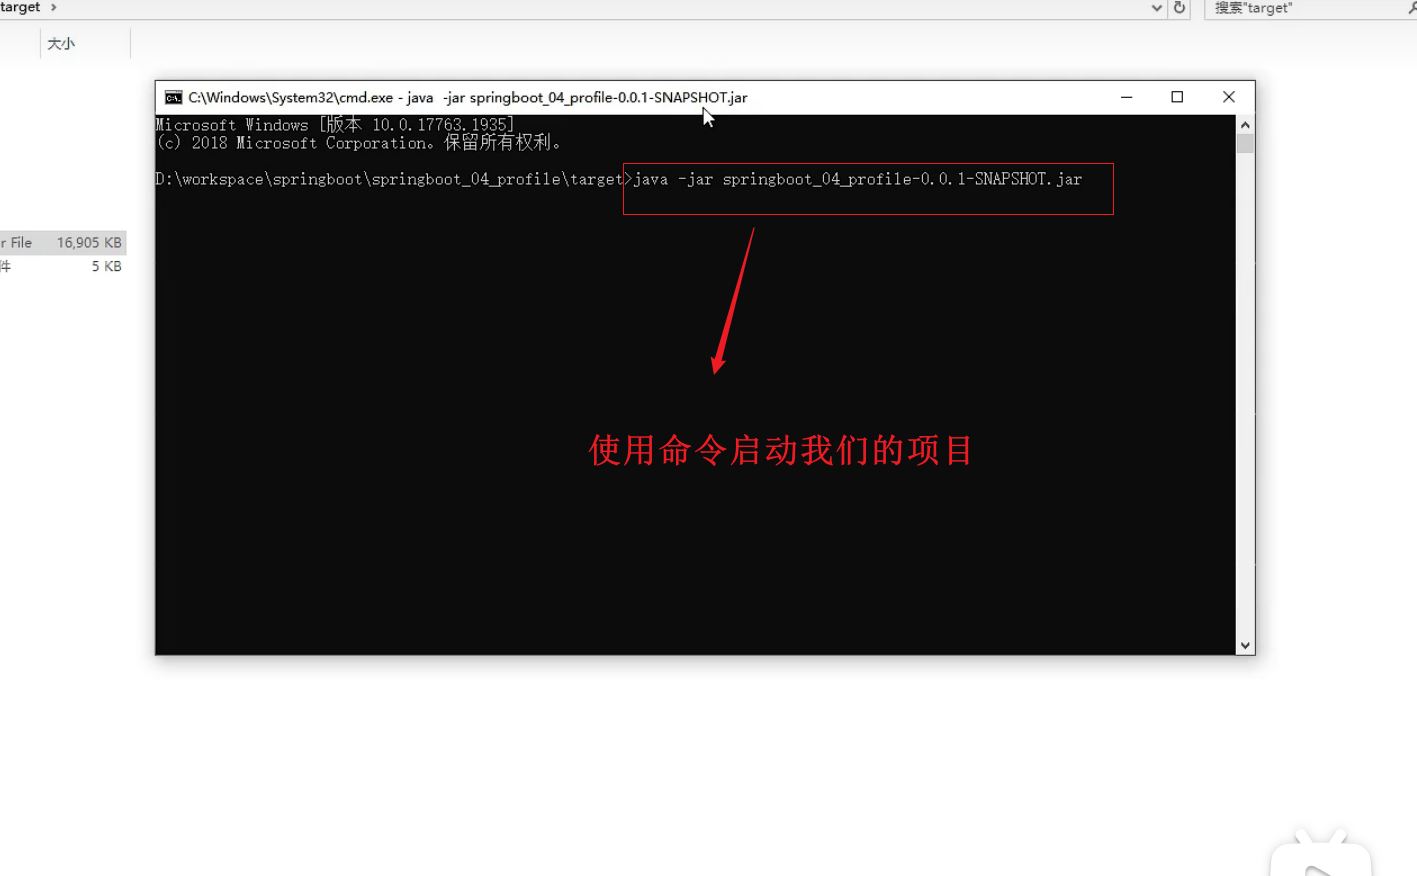
我们使用packing命令将项目打包,然后到项目目录的target目录下面找到对应的jar包,并打开cmd命令(在jar包的目录下)
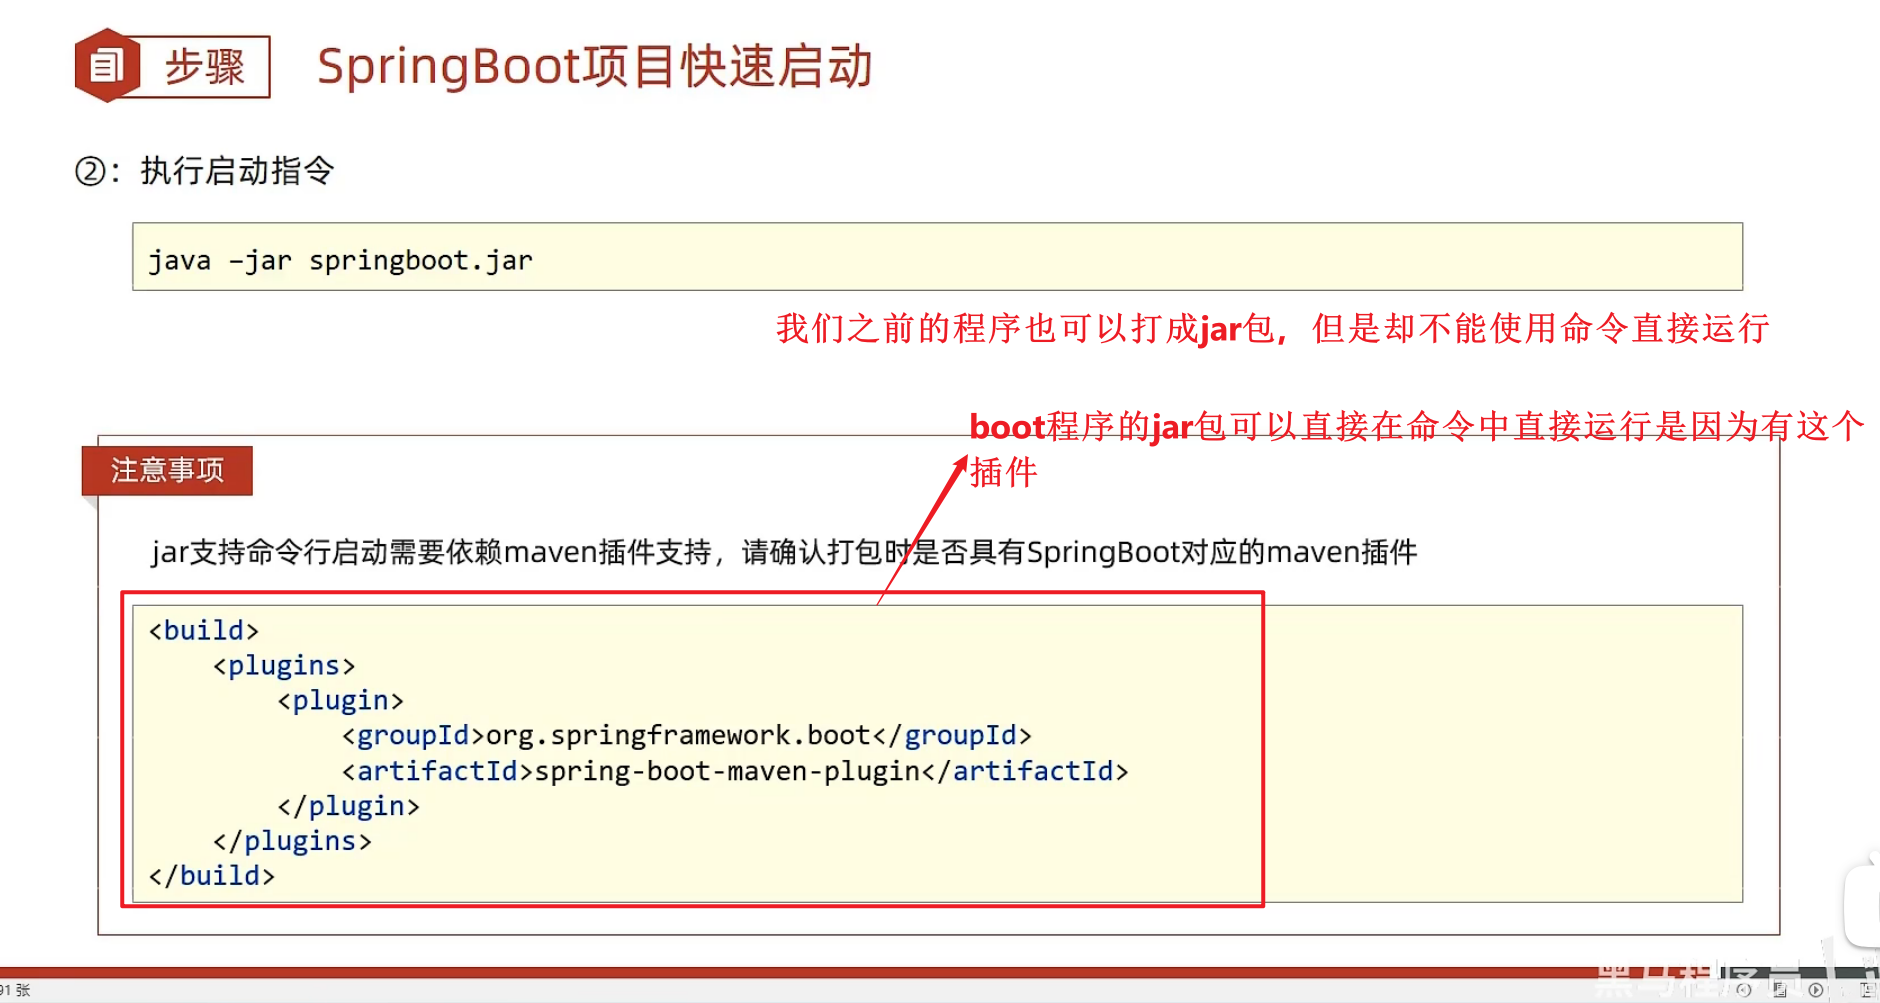
将程序打成jar包,maven就可以完成,但是要打成可以运行的jar包就需要这个插件了
好像如果我们想打成可执行的jar包,必须有spring-boot-maven-plugin插件
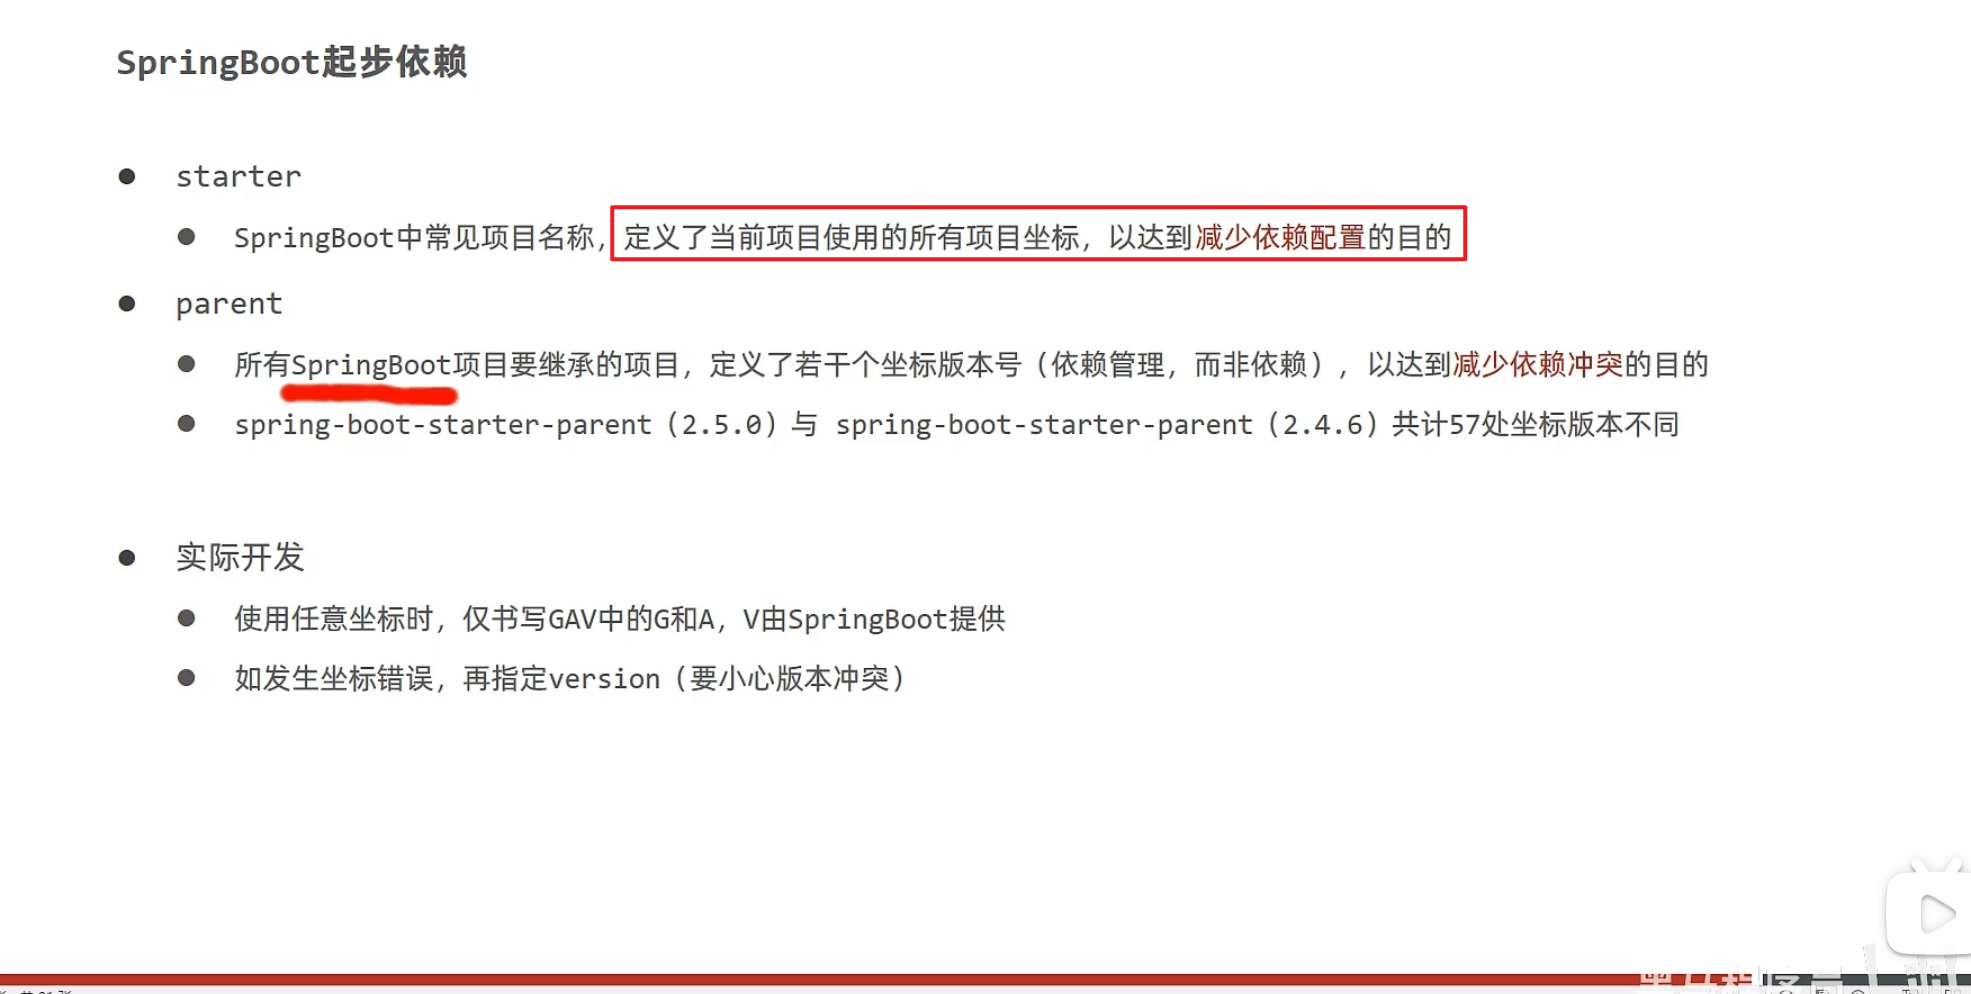
spingboot简介(起步依赖)
springboot的一个版本对应着开发可能要用到依赖的对应的版本,相对应的版本在一起工作是开发的最佳实践。所以springboot的每一个版本都有一些依赖对应的版本
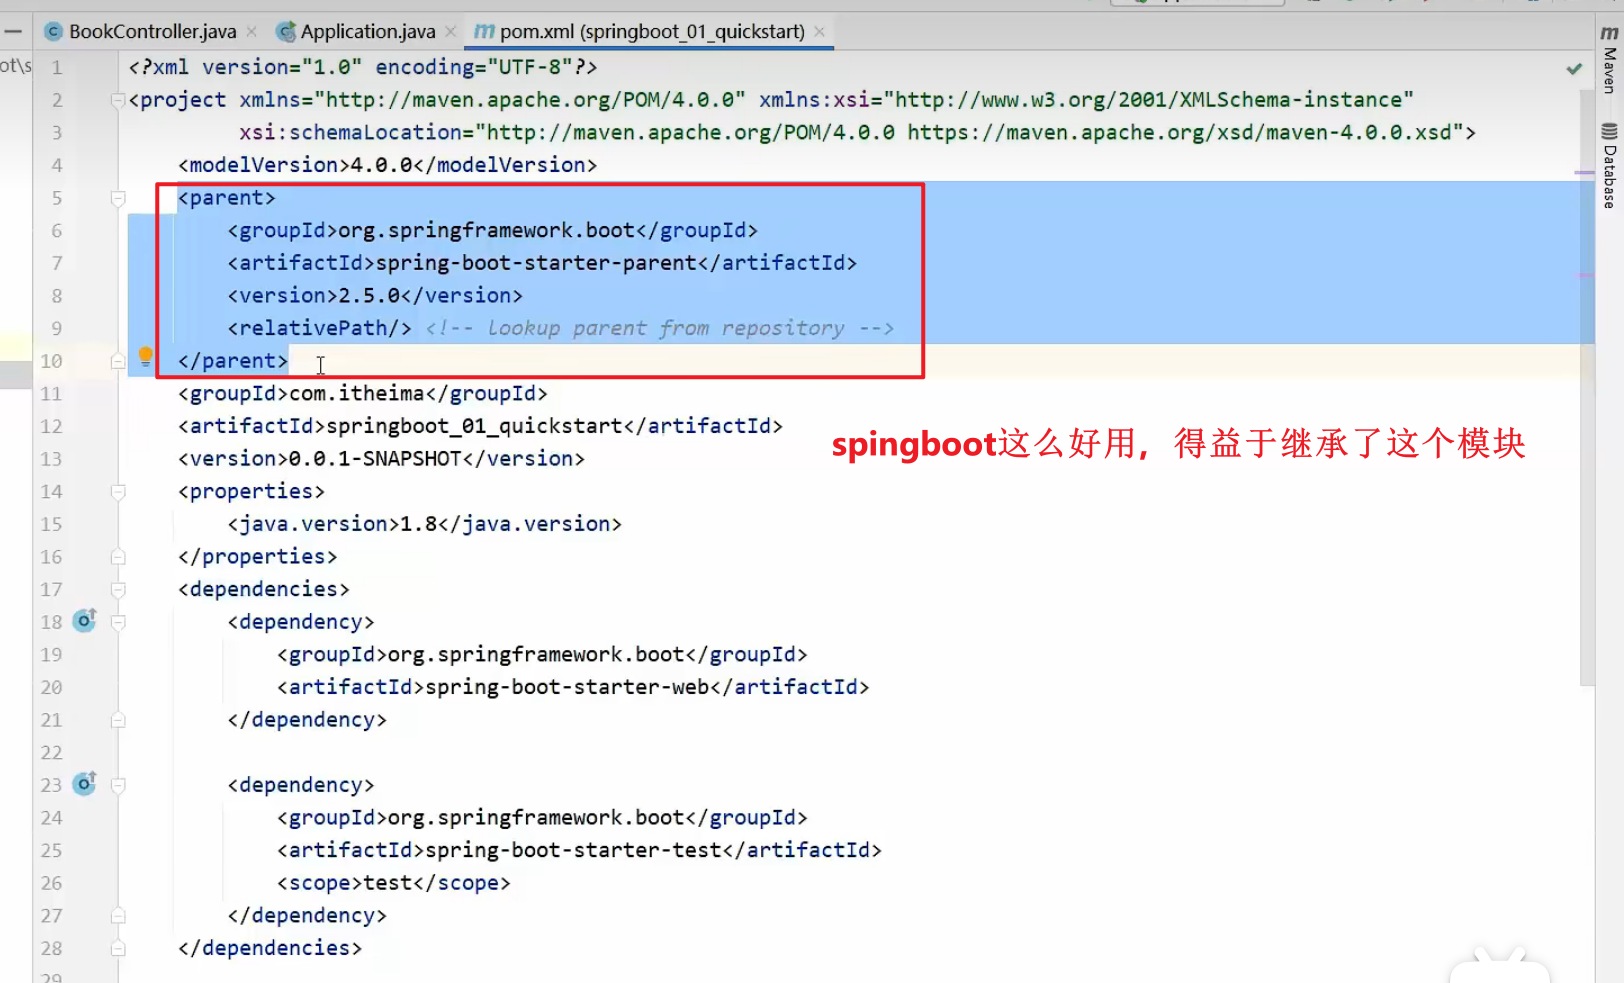
我们的springbot程序都继承了spring-boot-dependencies依赖,在该依赖中主要进行依赖管理和版本管理,将boot程序可能要用到的依赖和对应的版本都定义到这个依赖中,当我们的程序需要用到这个依赖直接引用(不需要指定版本)就可以了
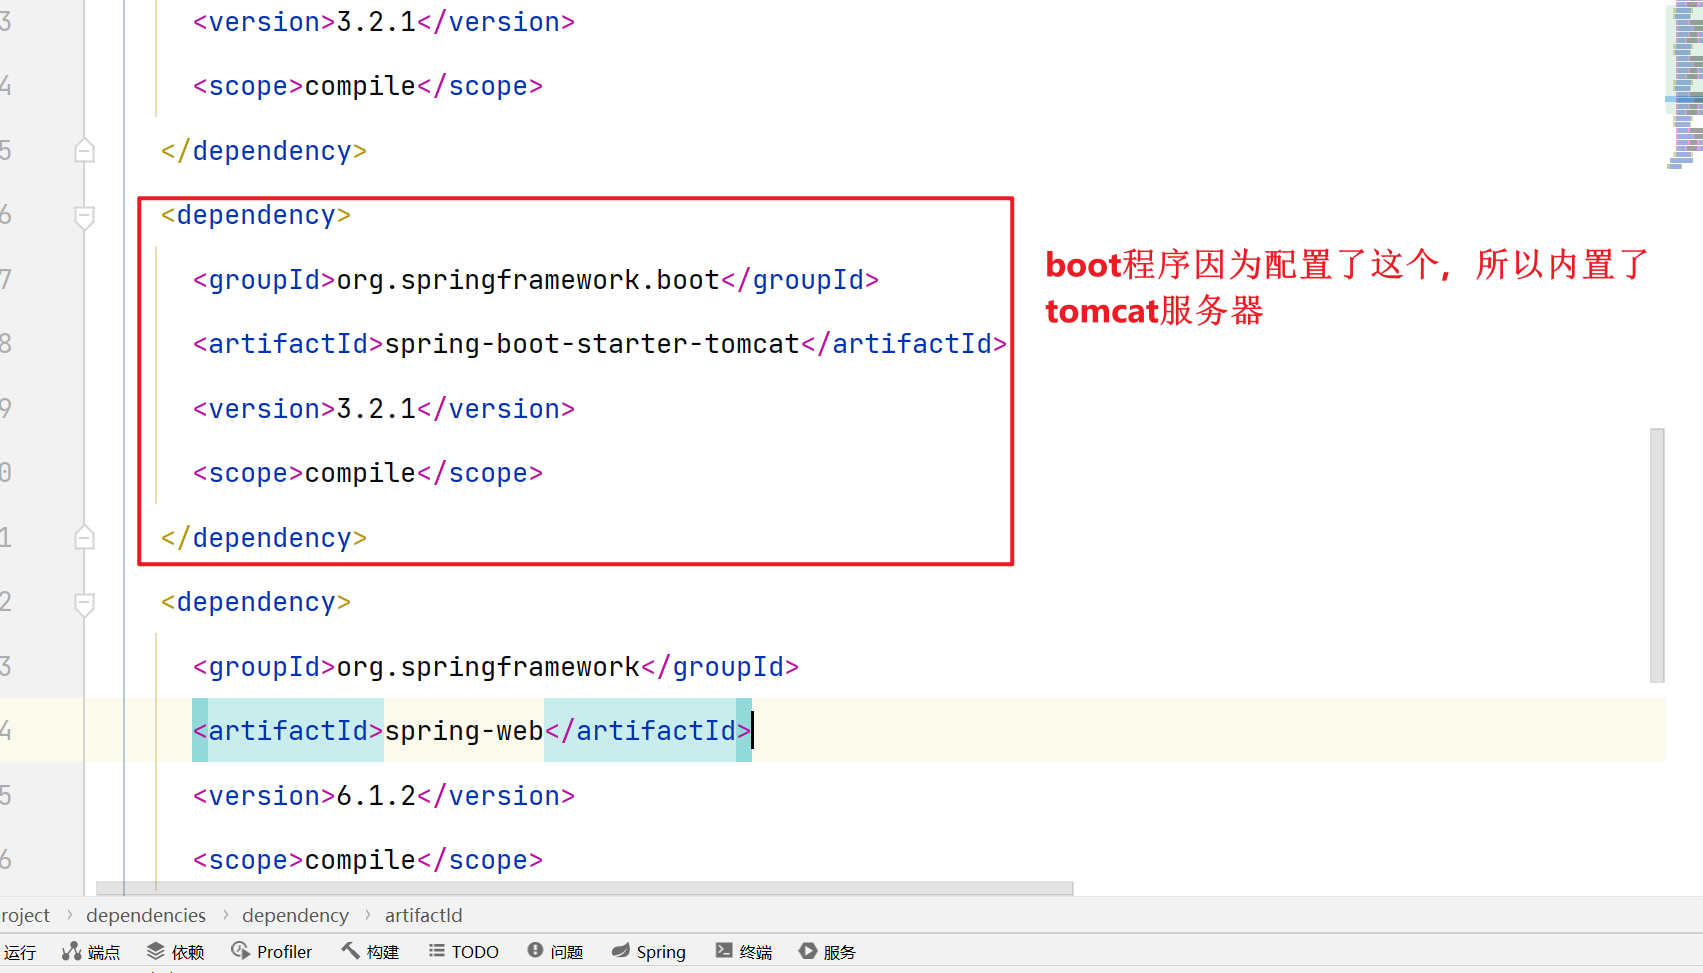
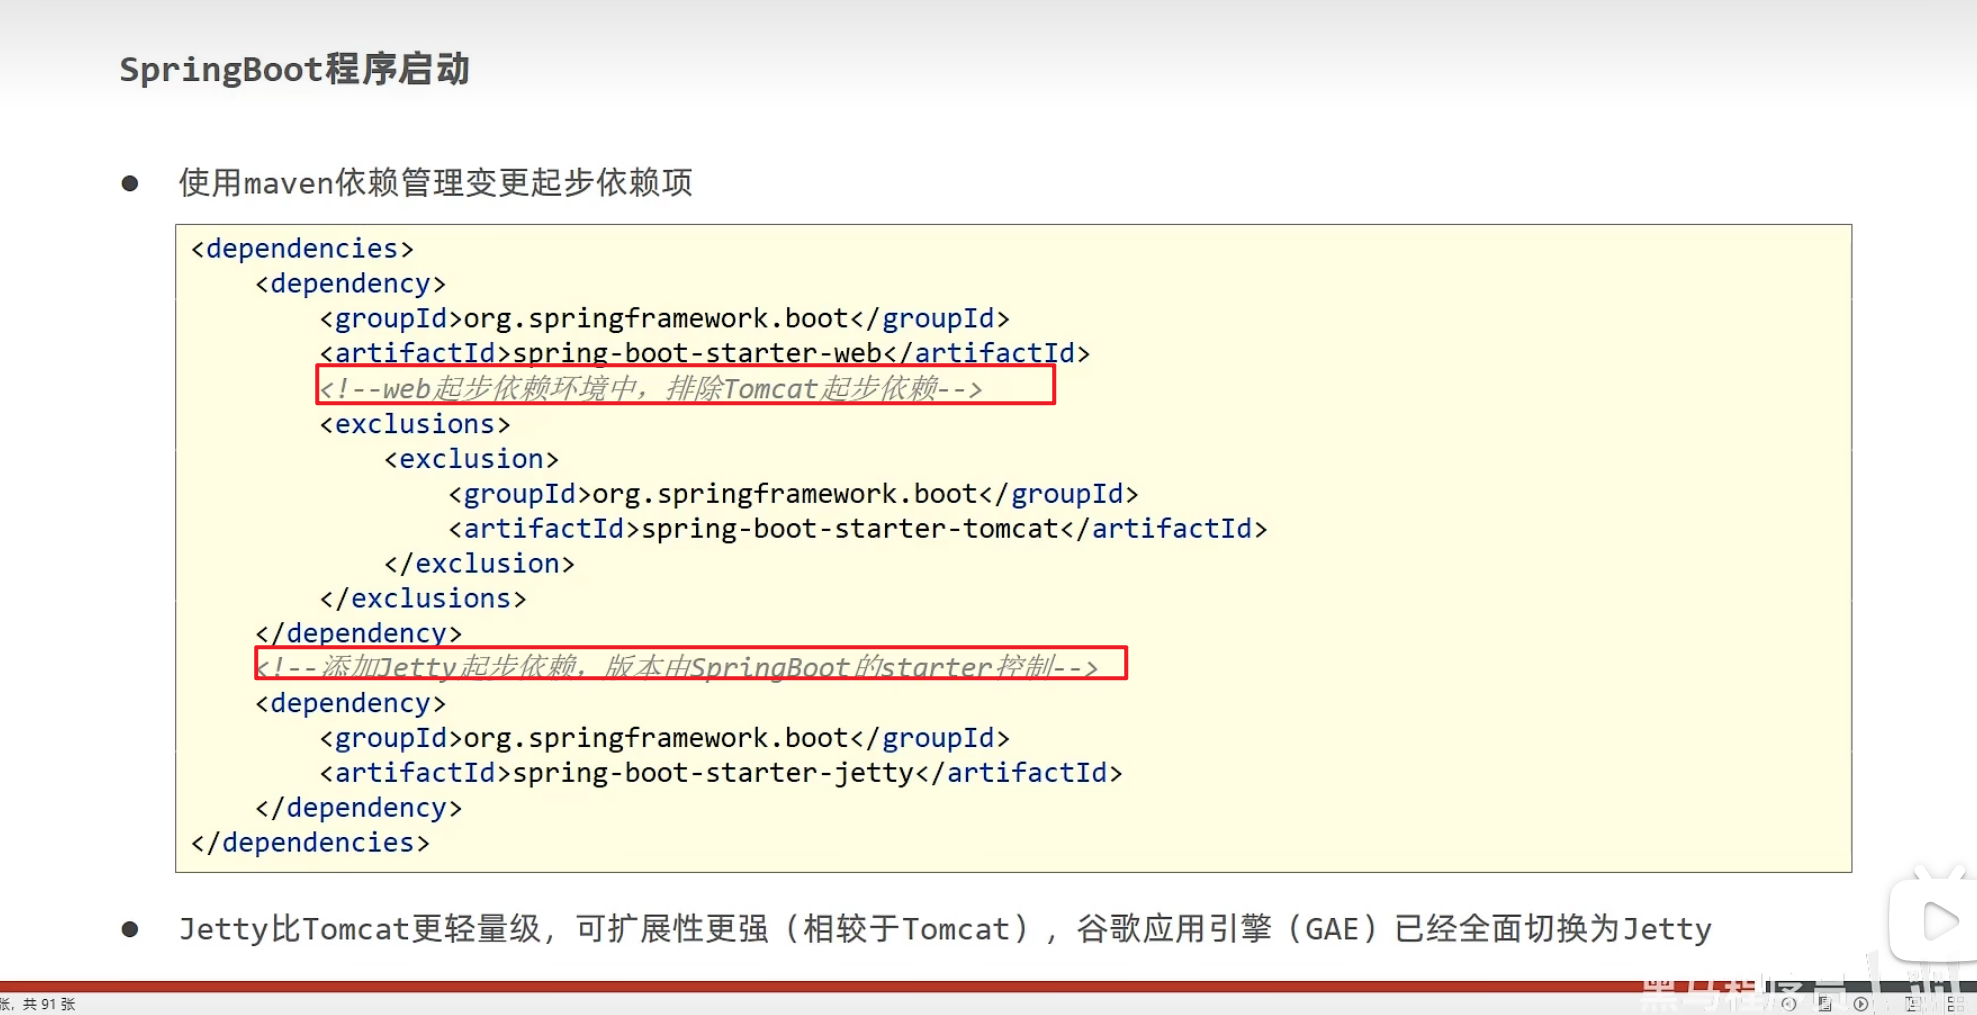
spring-boot-starter-web依赖主要是使得我们可以进行web开发,它里面已经导入了该版本boot所对应的进行web开发的一些依赖,包含spring,springmvc等等,并且在该依赖中还配置了tomcat服务器
spingboot简介(辅助功能之切换web服务器)
可选依赖和排除依赖的使用位置:可选依赖是提供依赖方配置的,排除依赖是使用依赖方配置的
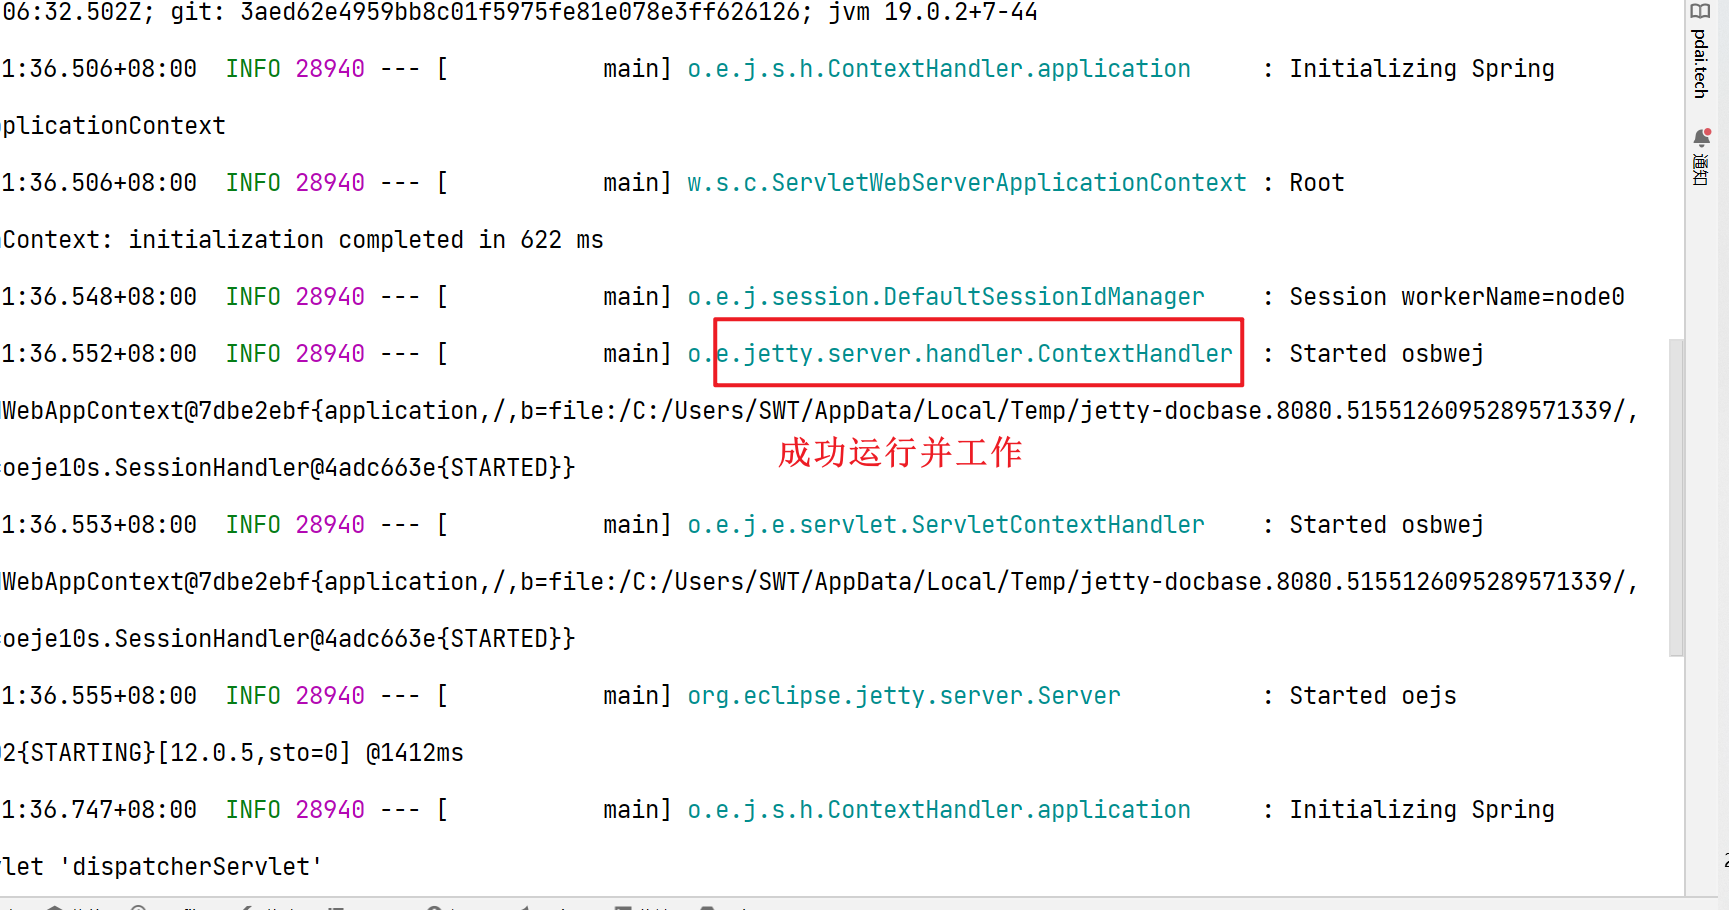
- 我们切换之前maven的jetty服务器


第二部分:基础配置
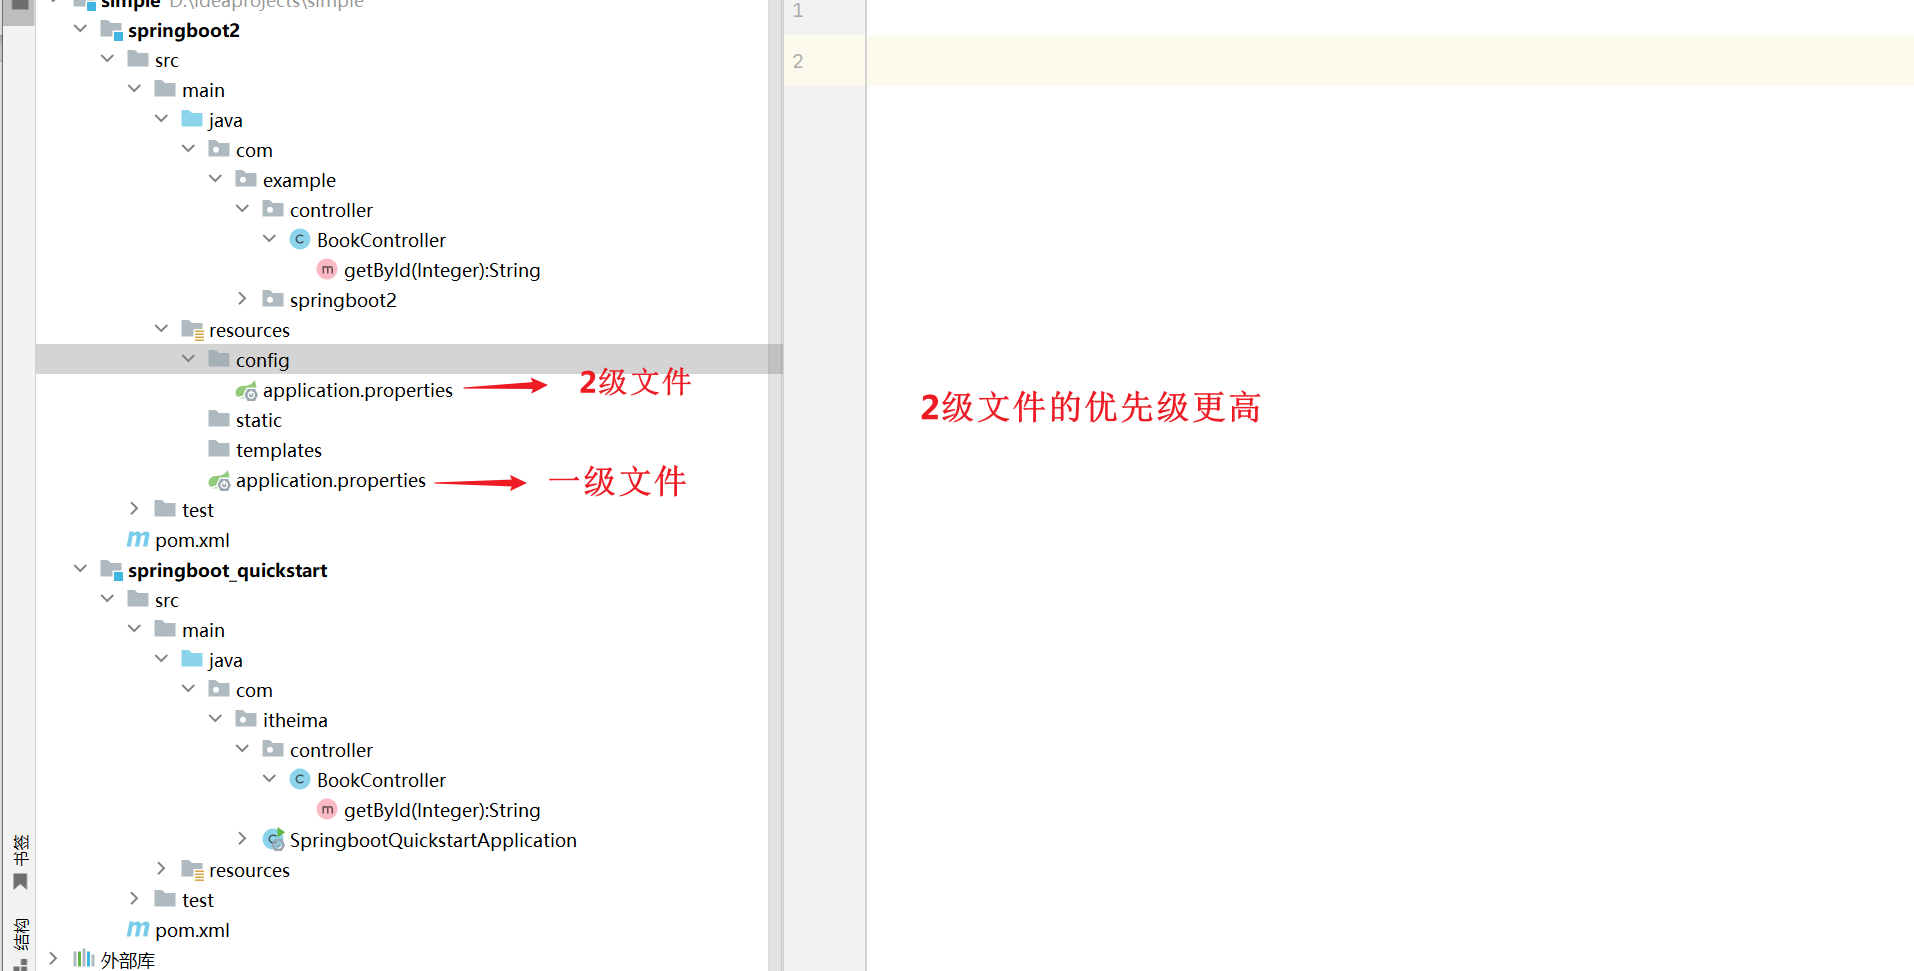
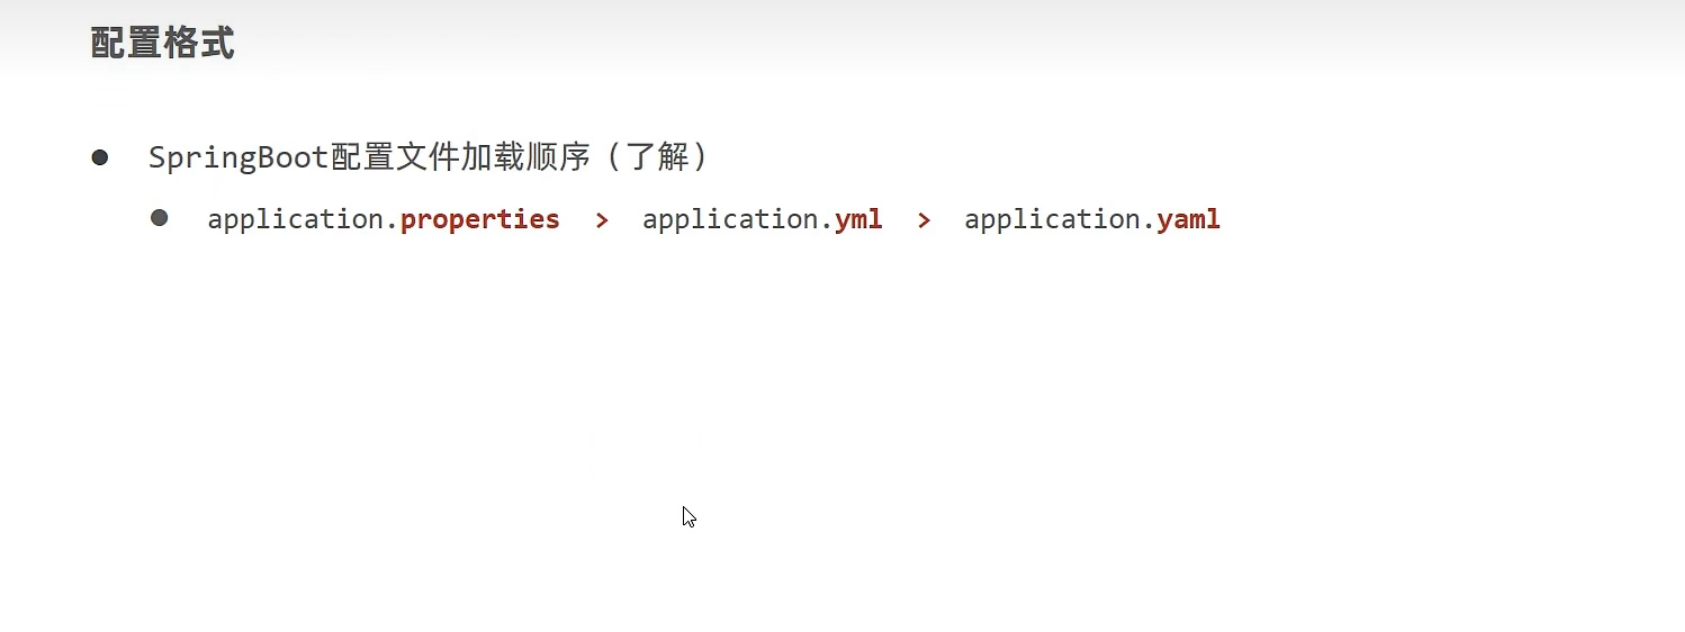
配置文件格式(3种)

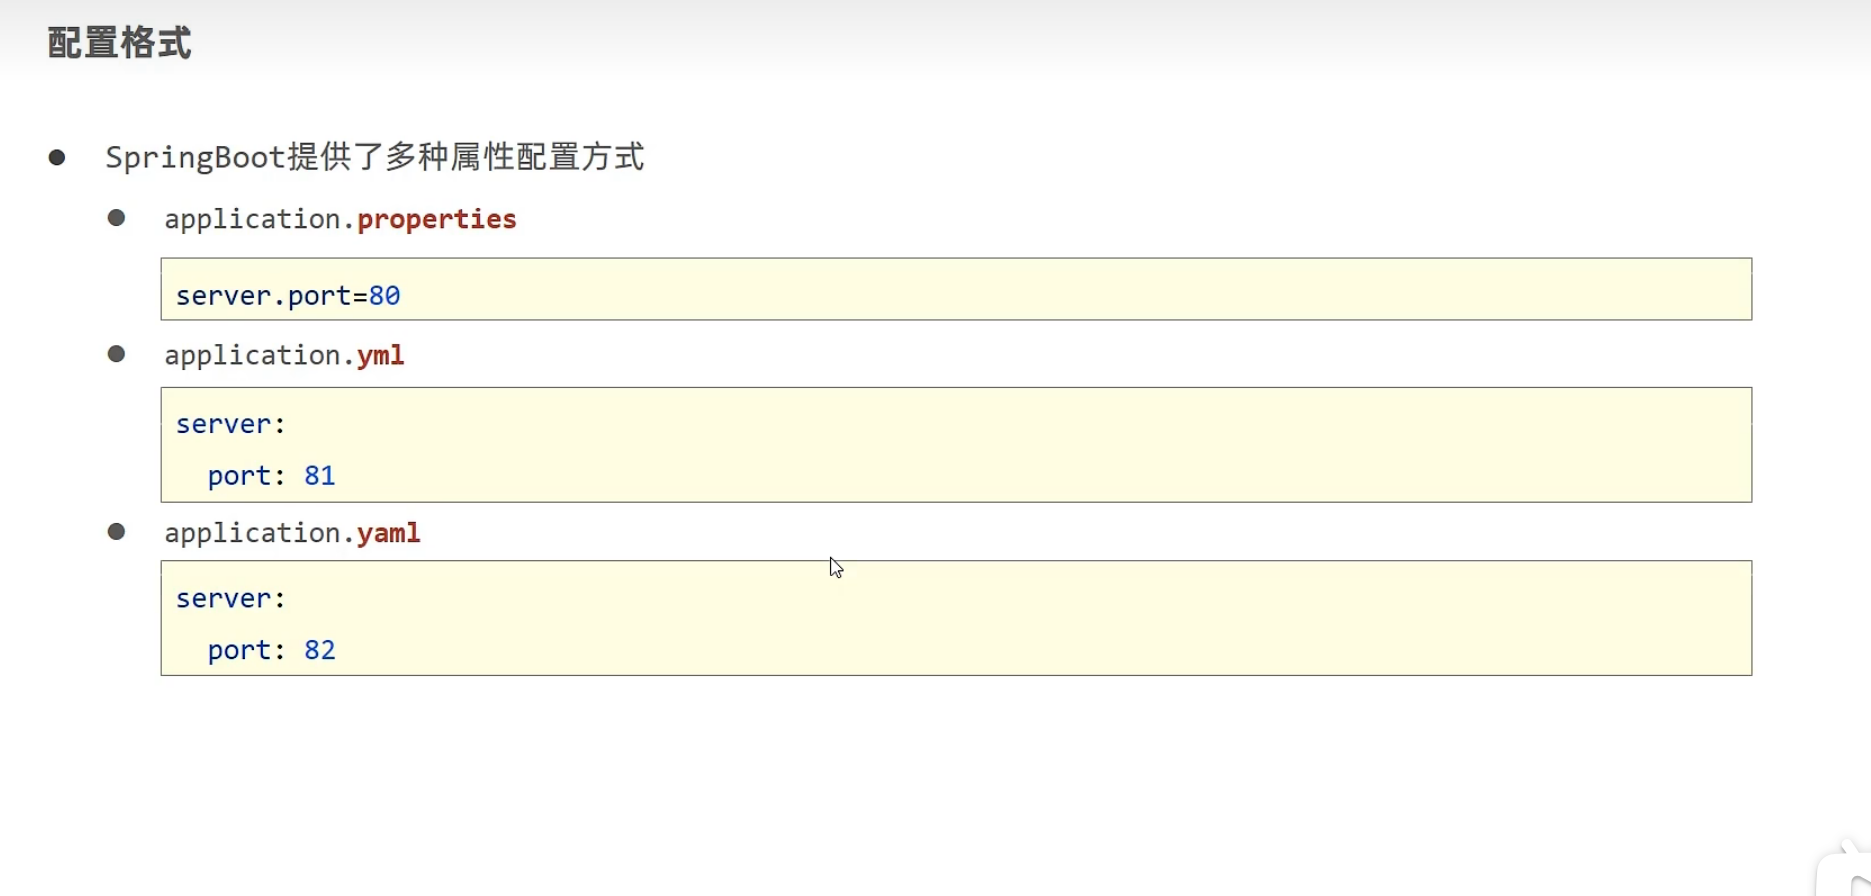
- 1.第一种配置文件
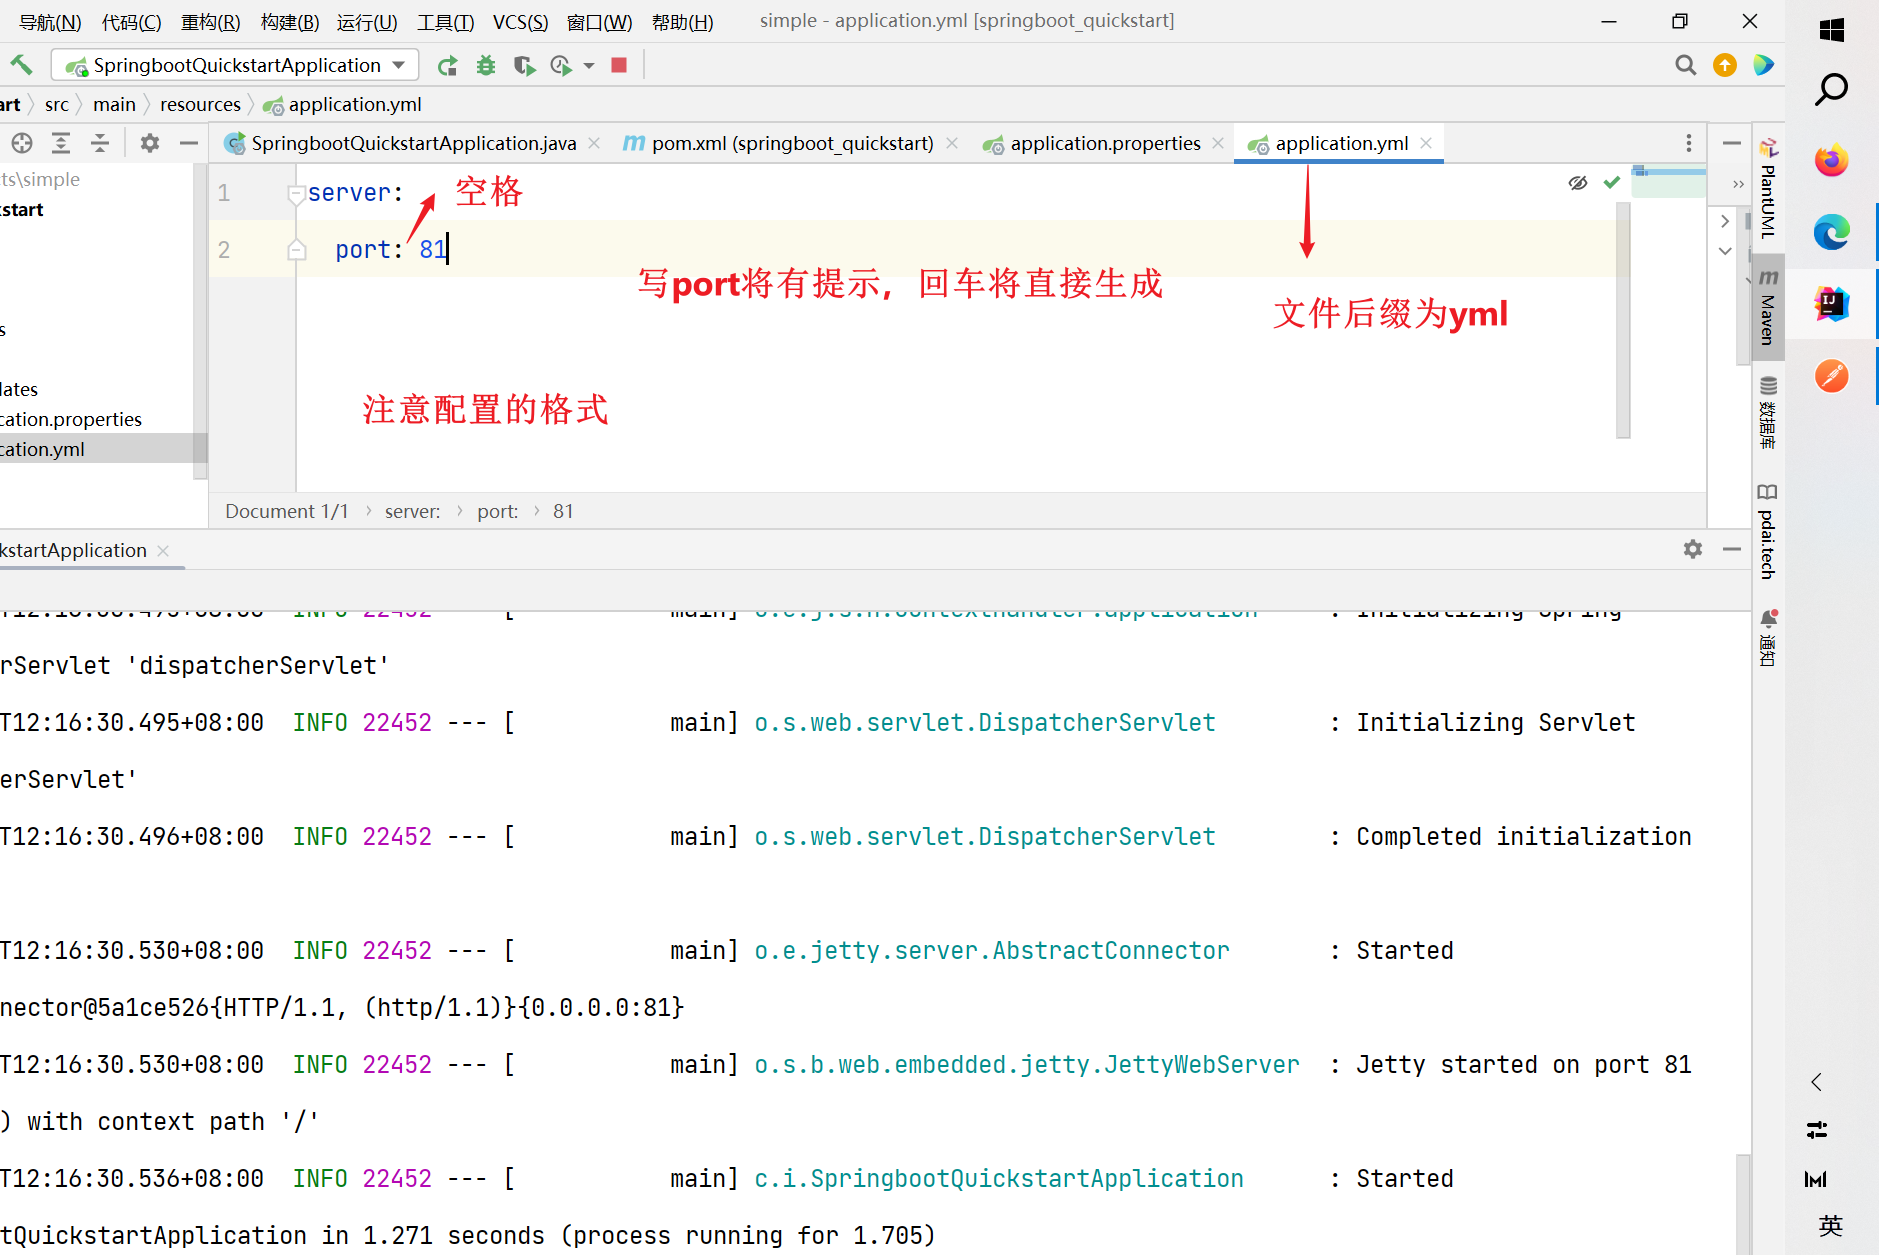
- 2.第二种配置文件
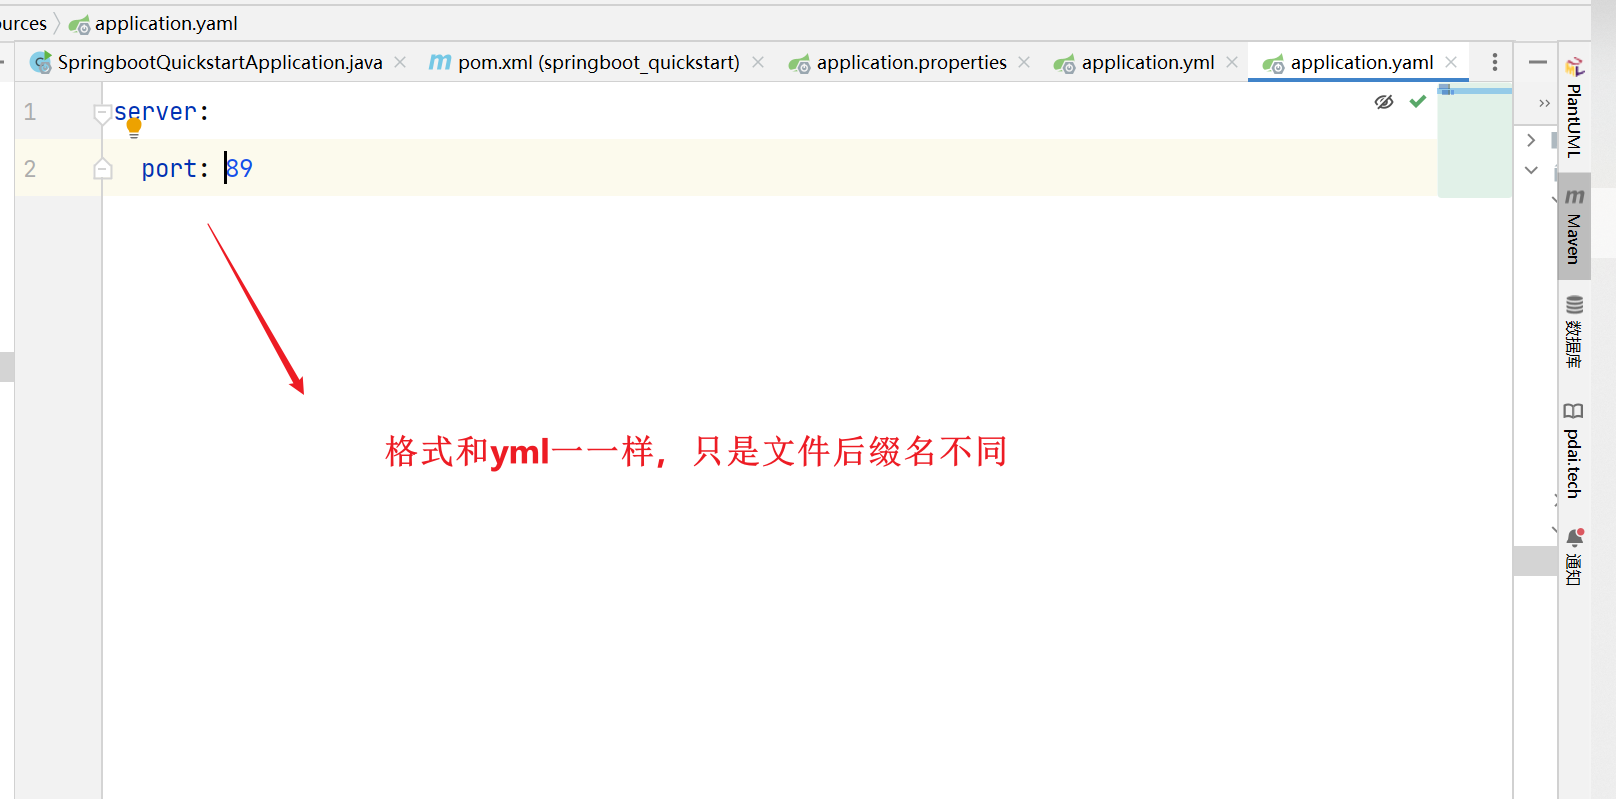
- 3.第三种配置文件
对于可能出现的yml或yaml文件配置时没有提示的看视频即可
1.这3个文件建议优先使用yml文件
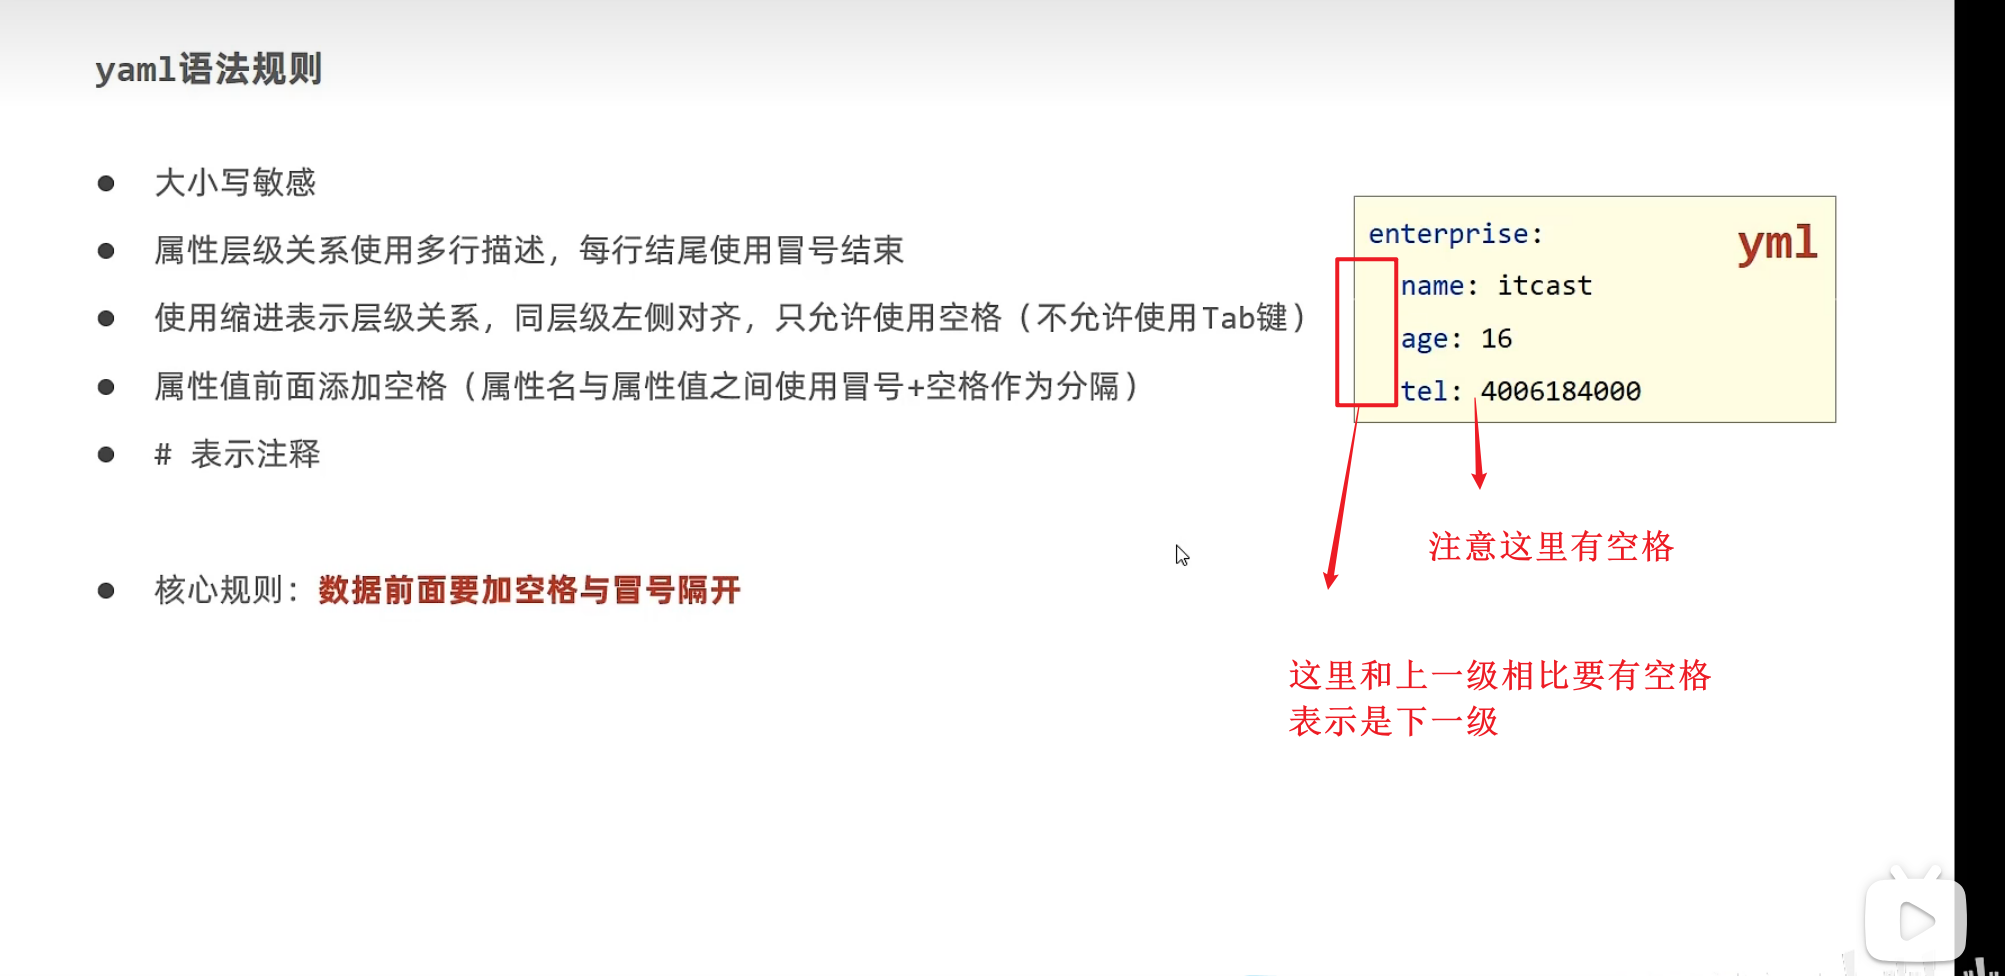
yaml格式

空格的数量不限,只要比上一级的空格多就表示是下一级
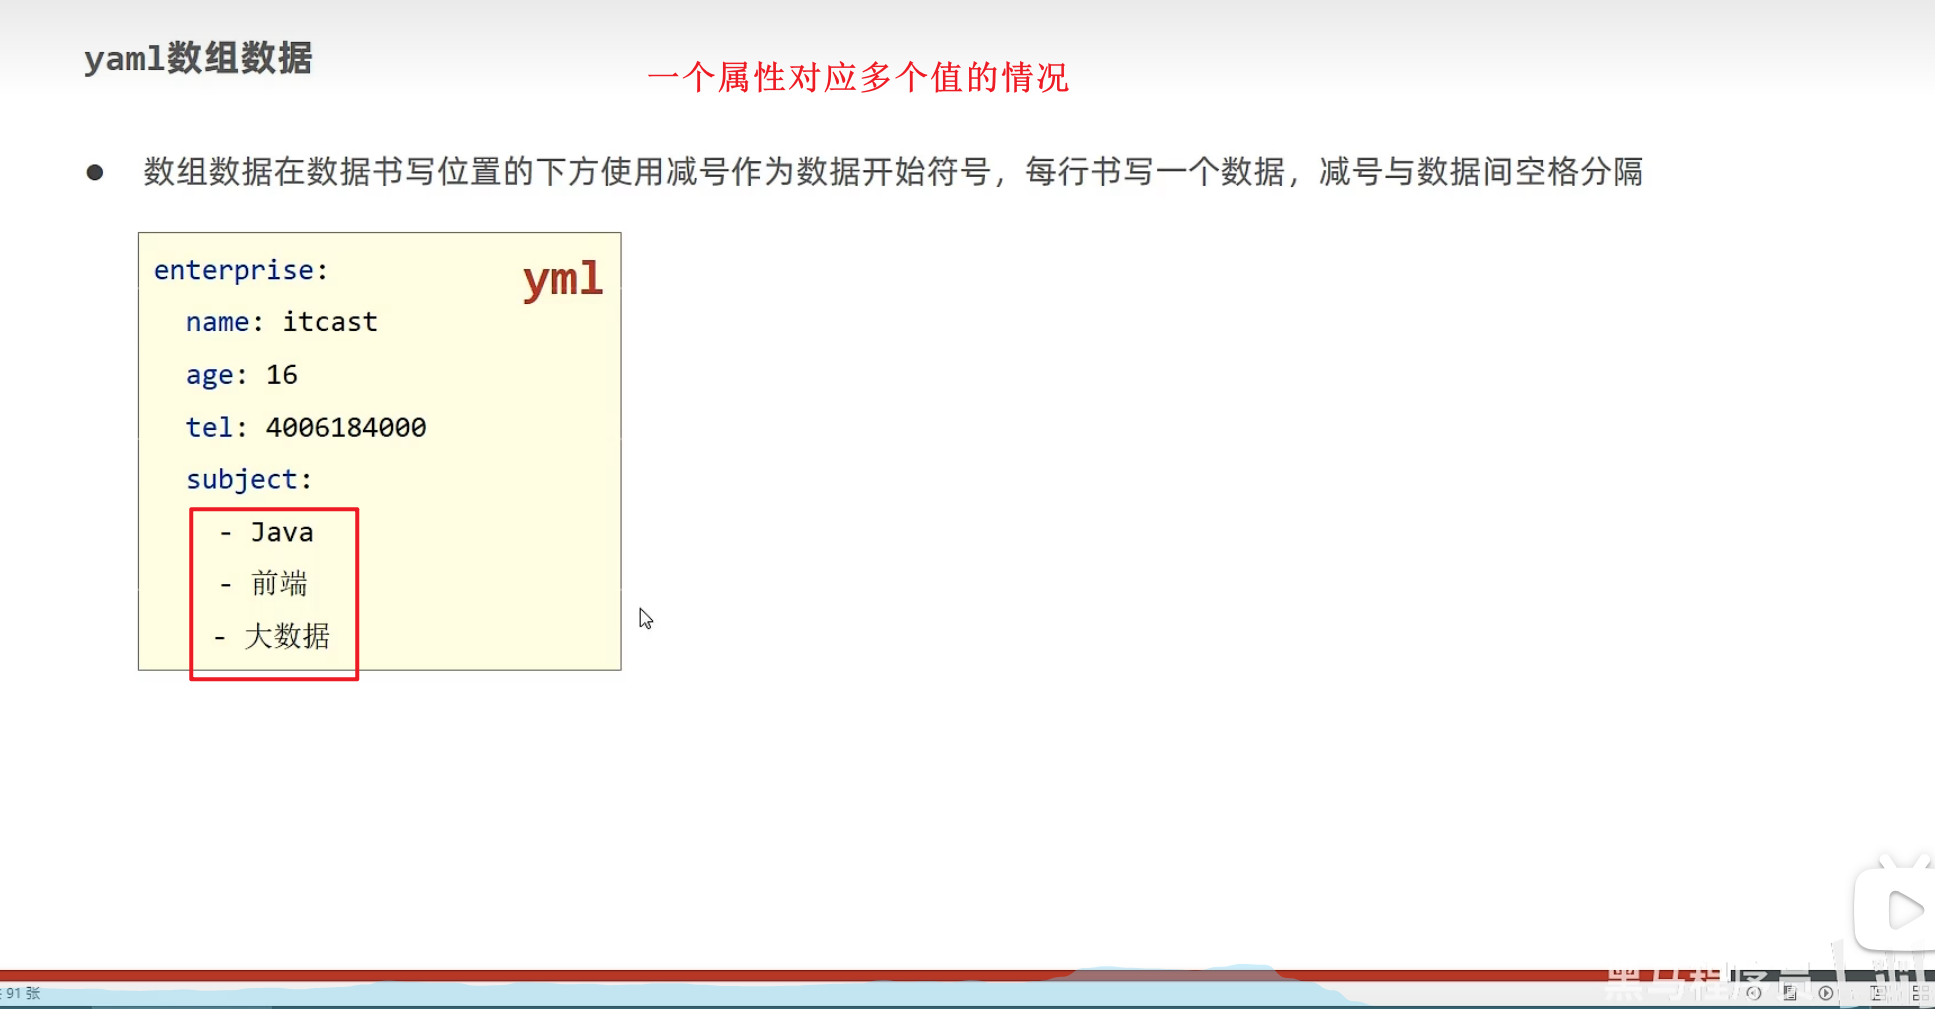
yaml数据读取方式(3种)
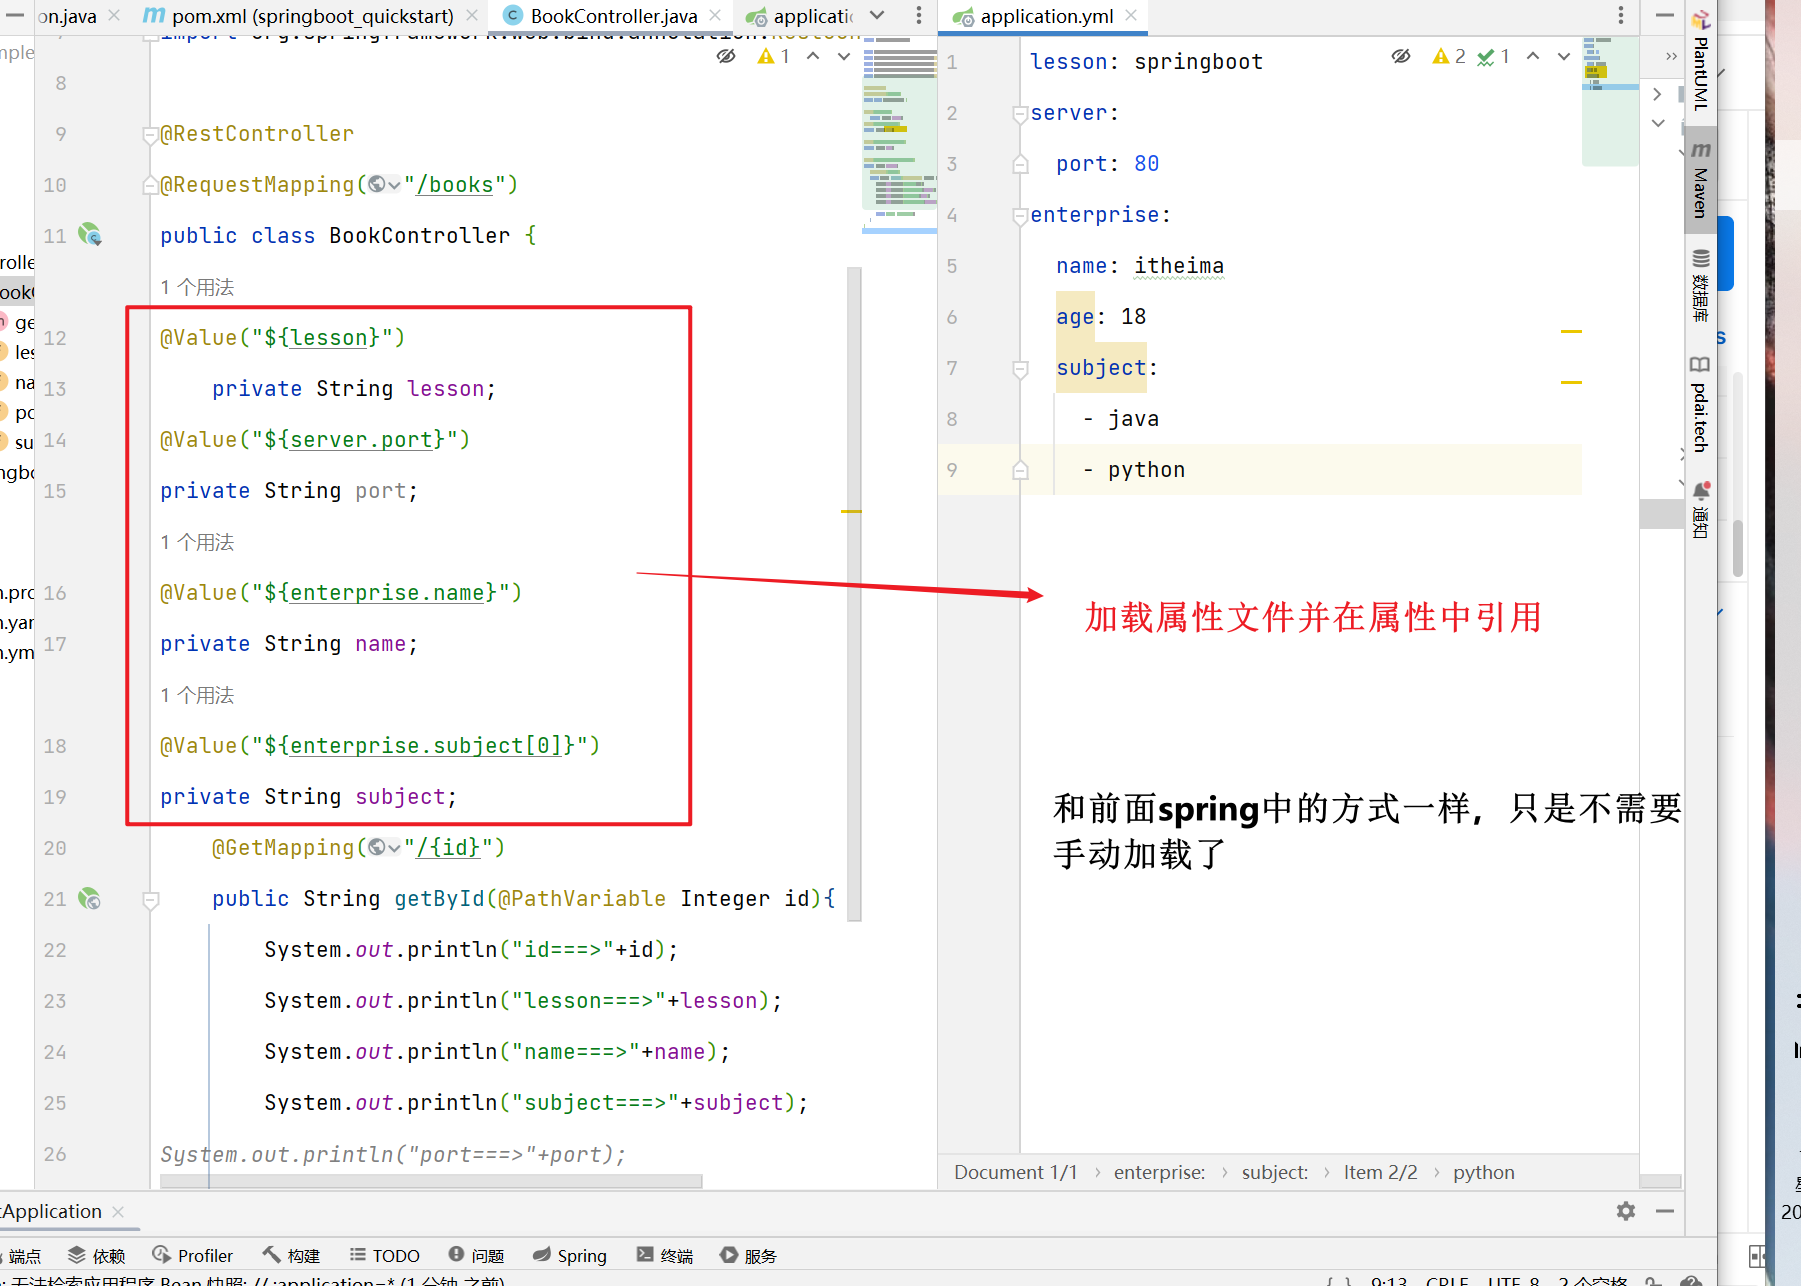
第一种方式
但是上面的方式太麻烦了,如果想读取文件中的信息,就需要定义无数个变量
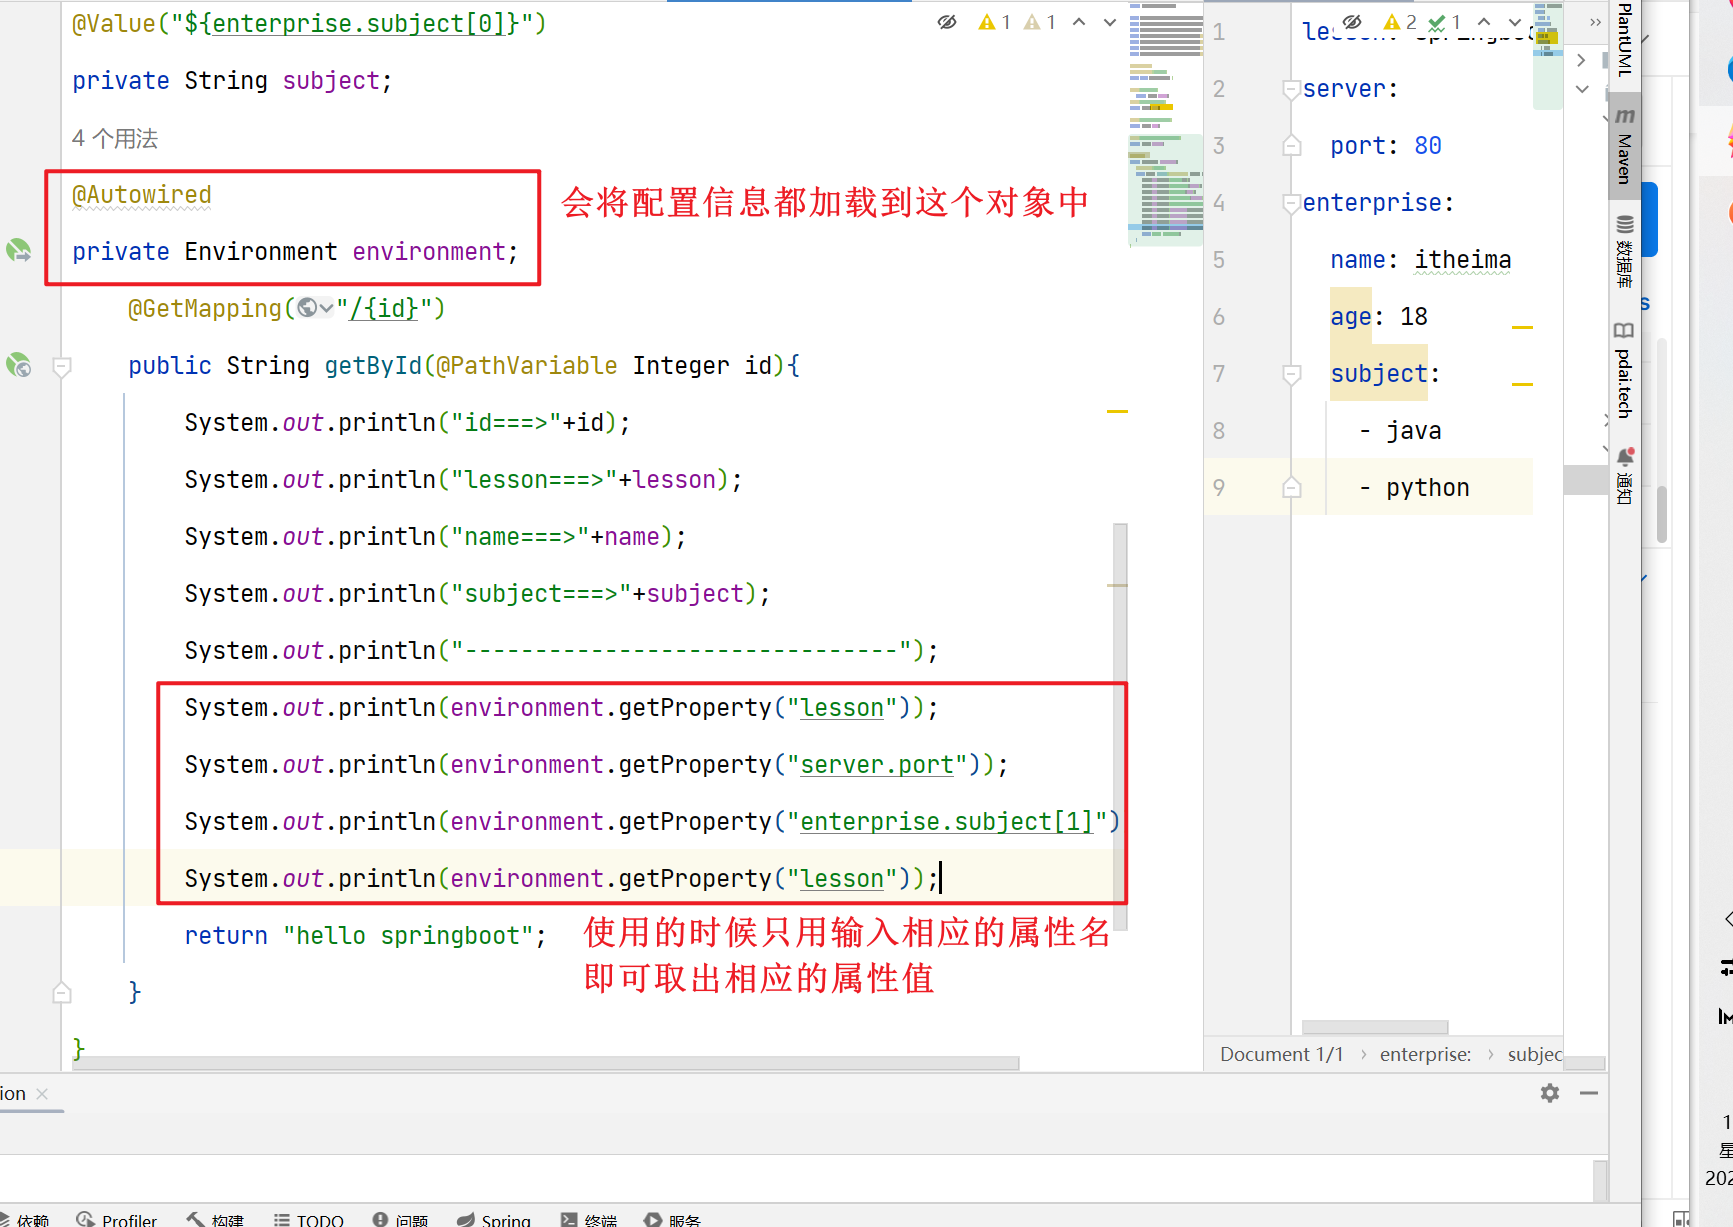
第二种方式
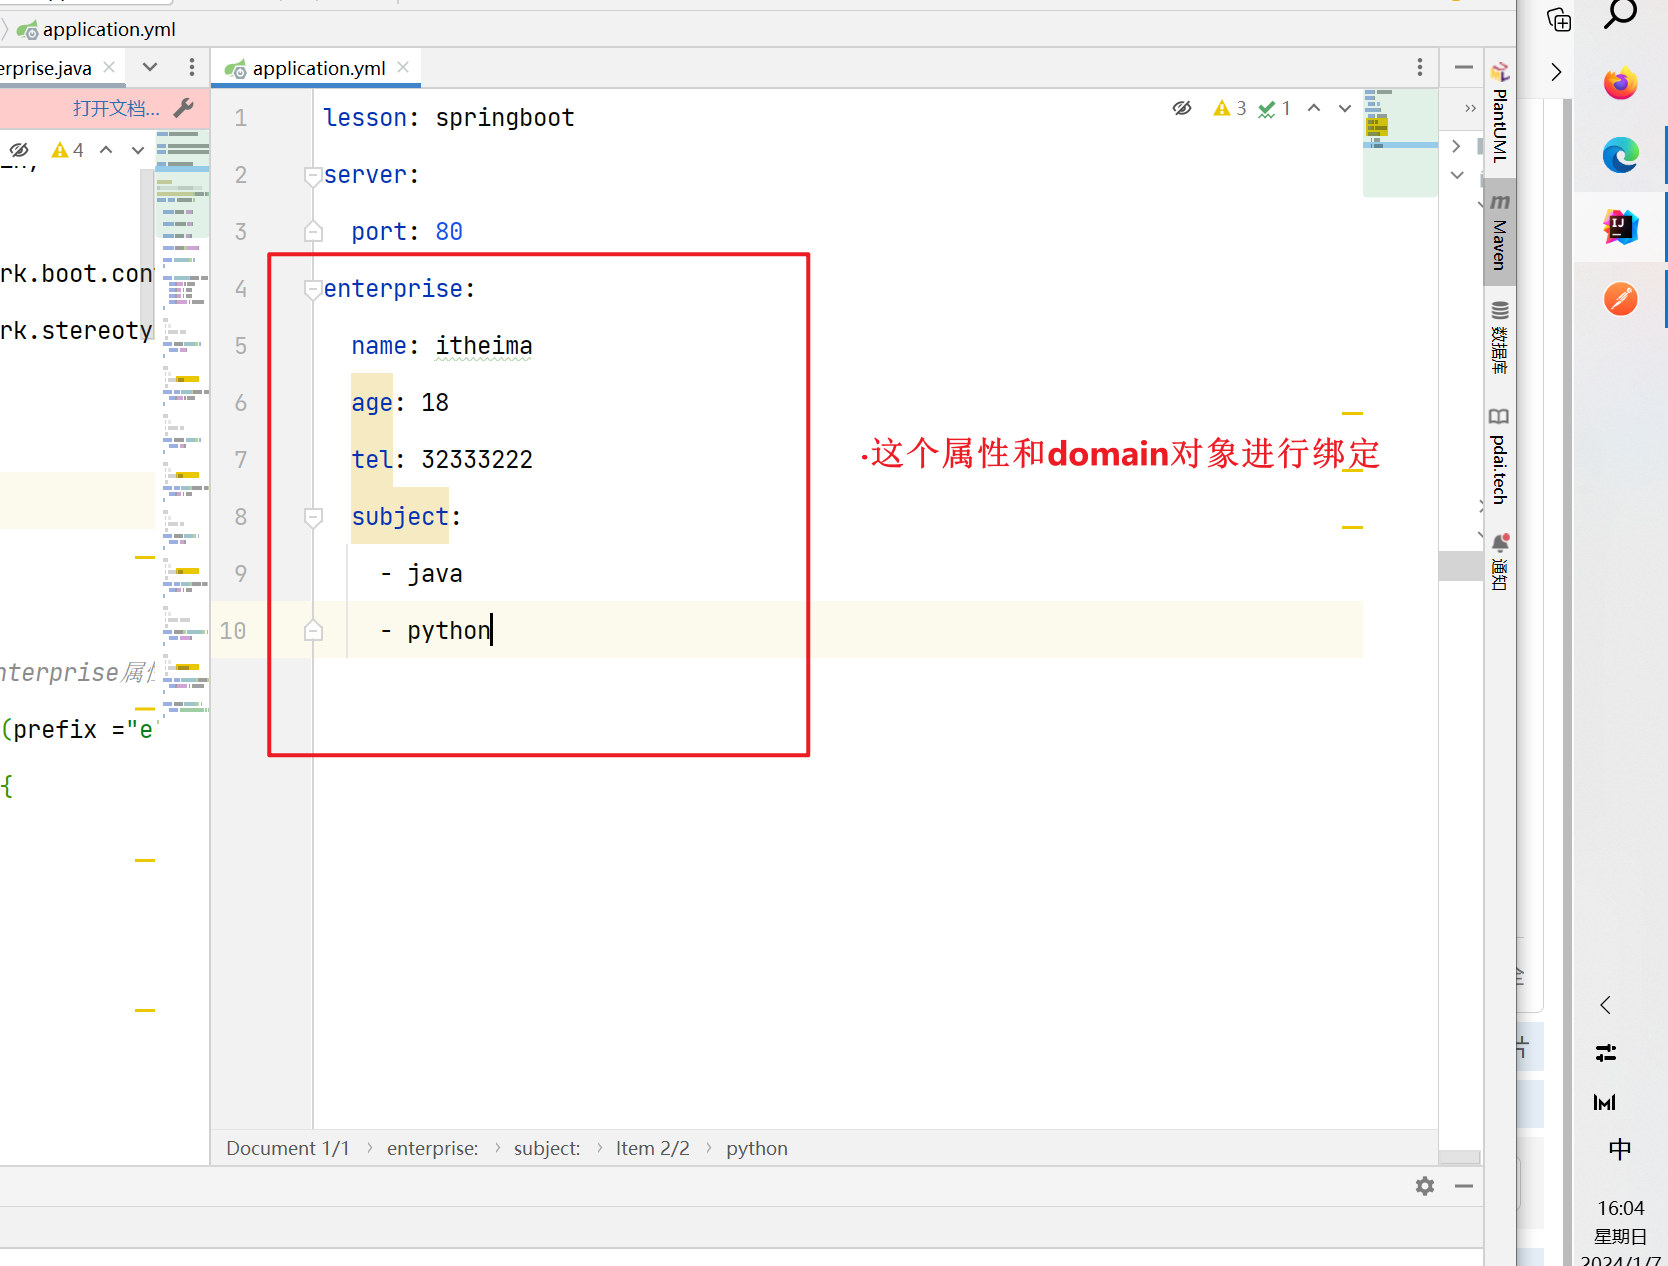
第三种方式(将配置转成domain对象)
- domain
package com.itheima.domain;

import org.springframework.boot.context.properties.ConfigurationProperties;
import org.springframework.stereotype.Component;

import java.util.Arrays;

@Component
//将类中的属性和配置文件中enterprise属性进行绑定
@ConfigurationProperties(prefix ="enterprise" )
public class Enterprise {
    private String name;
    private Integer age;
    private String tel;
    private String[]subject;

    public Enterprise() {
    }

    public Enterprise(String name, Integer age, String tel, String[] subject) {
        this.name = name;
        this.age = age;
        this.tel = tel;
        this.subject = subject;
    }

    /**
     * 获取
     * @return name
     */
    public String getName() {
        return name;
    }

    /**
     * 设置
     * @param name
     */
    public void setName(String name) {
        this.name = name;
    }

    /**
     * 获取
     * @return age
     */
    public Integer getAge() {
        return age;
    }

    /**
     * 设置
     * @param age
     */
    public void setAge(Integer age) {
        this.age = age;
    }

    /**
     * 获取
     * @return tel
     */
    public String getTel() {
        return tel;
    }

    /**
     * 设置
     * @param tel
     */
    public void setTel(String tel) {
        this.tel = tel;
    }

    /**
     * 获取
     * @return subject
     */
    public String[] getSubject() {
        return subject;
    }

    /**
     * 设置
     * @param subject
     */
    public void setSubject(String[] subject) {
        this.subject = subject;
    }

    public String toString() {
        return "Enterprise{name = " + name + ", age = " + age + ", tel = " + tel + ", subject = " + Arrays.toString(subject) + "}";
    }
}

比如我们mybatis是配置信息可以通过这种方式加载
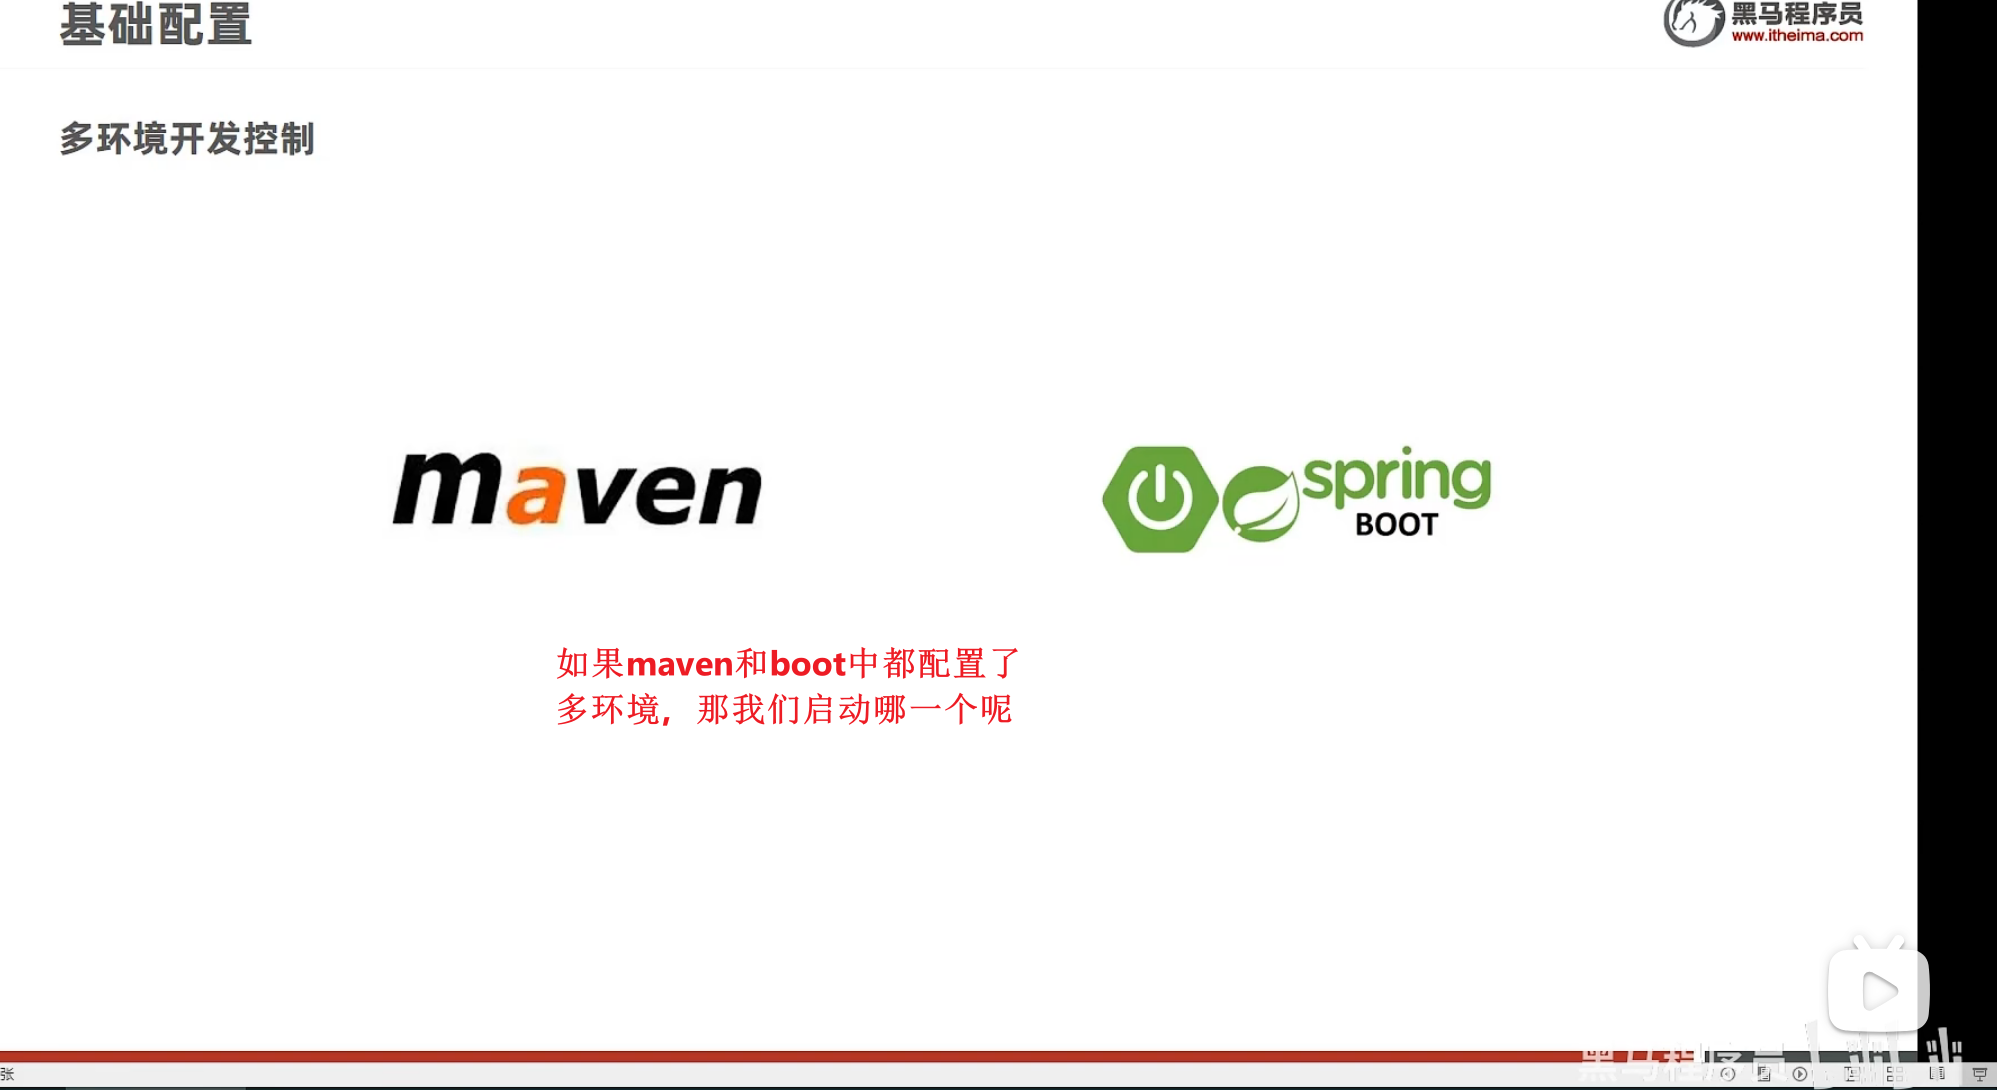
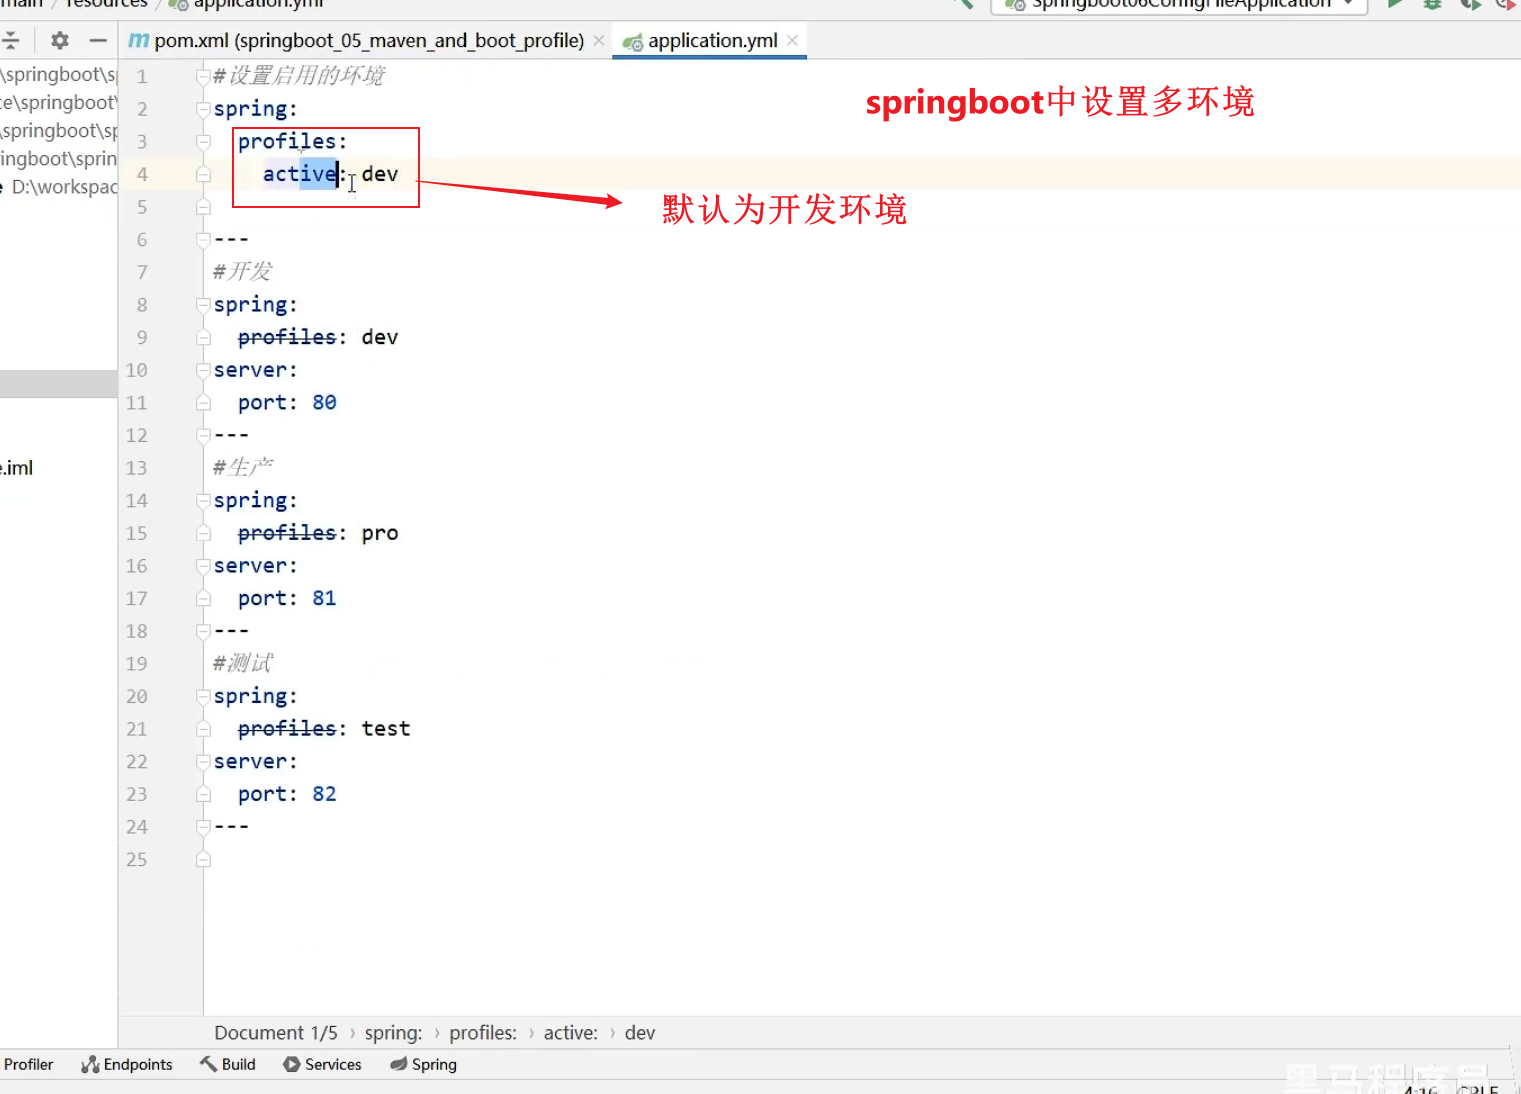
多环境开发配置

yaml文件配置
定义使用的环境
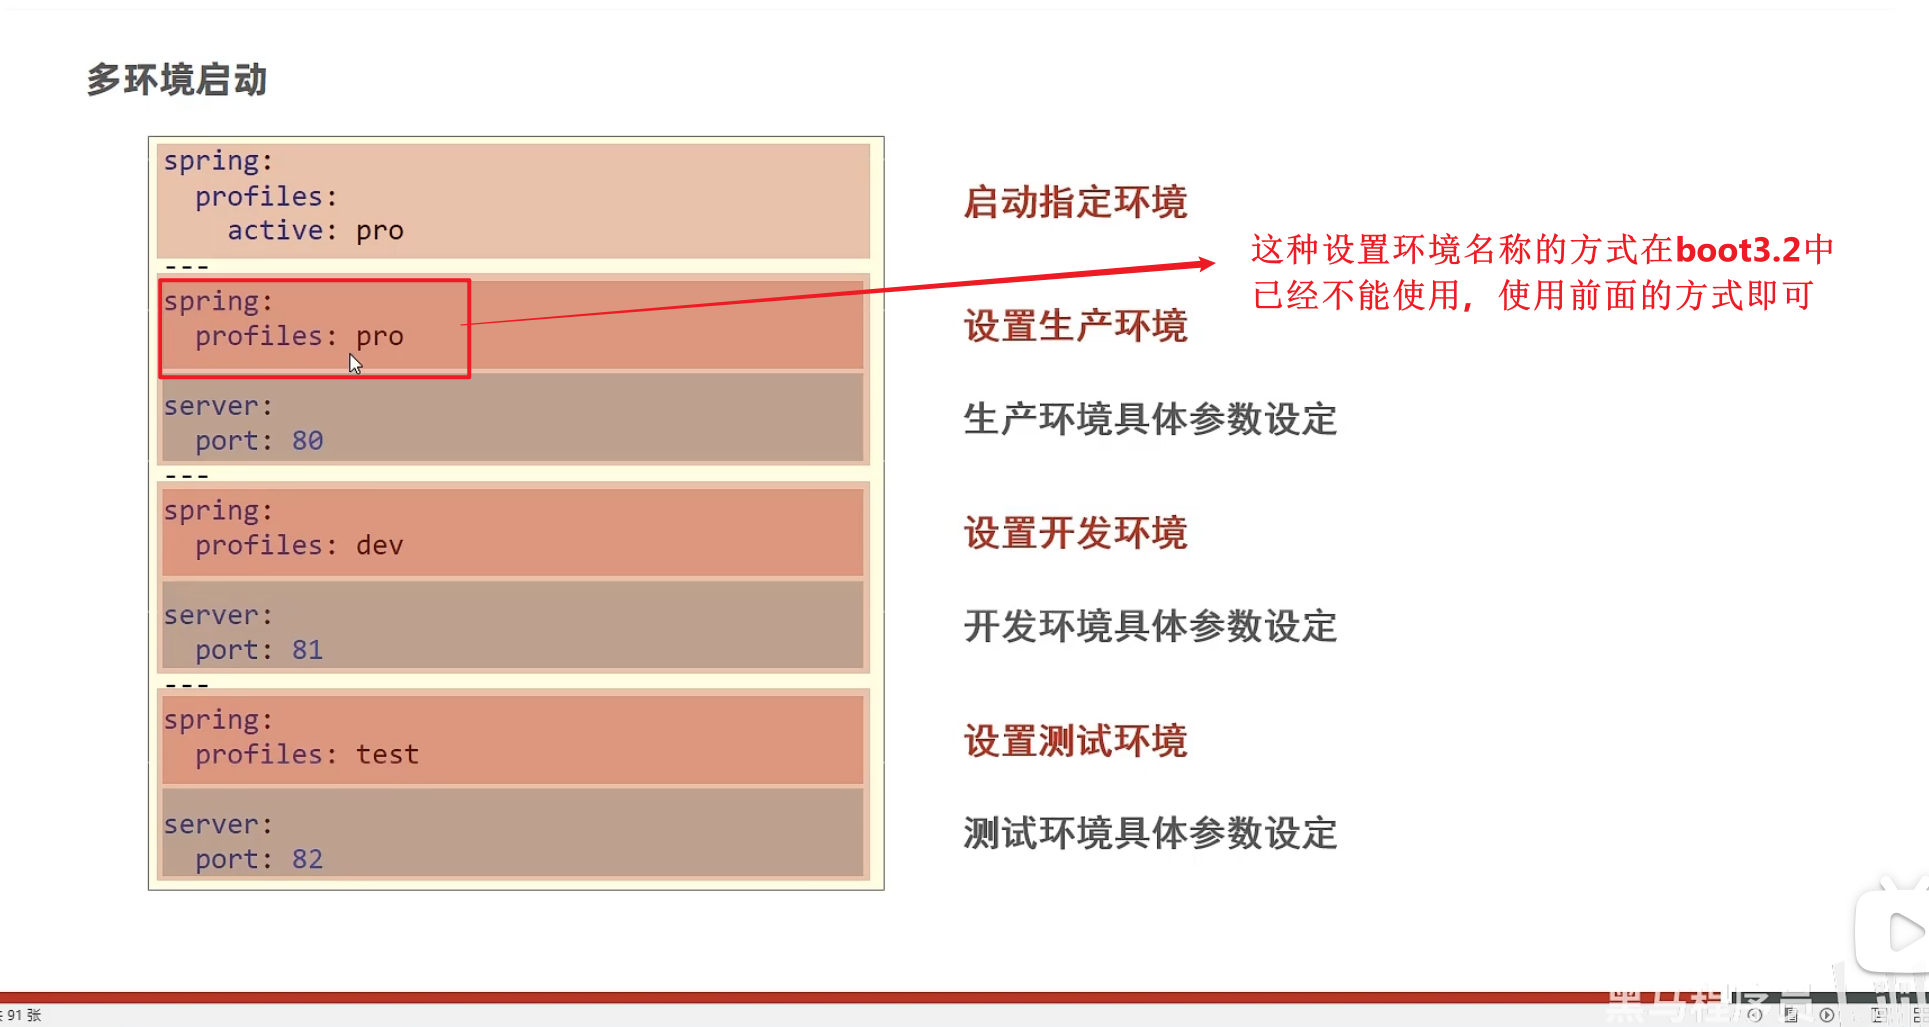
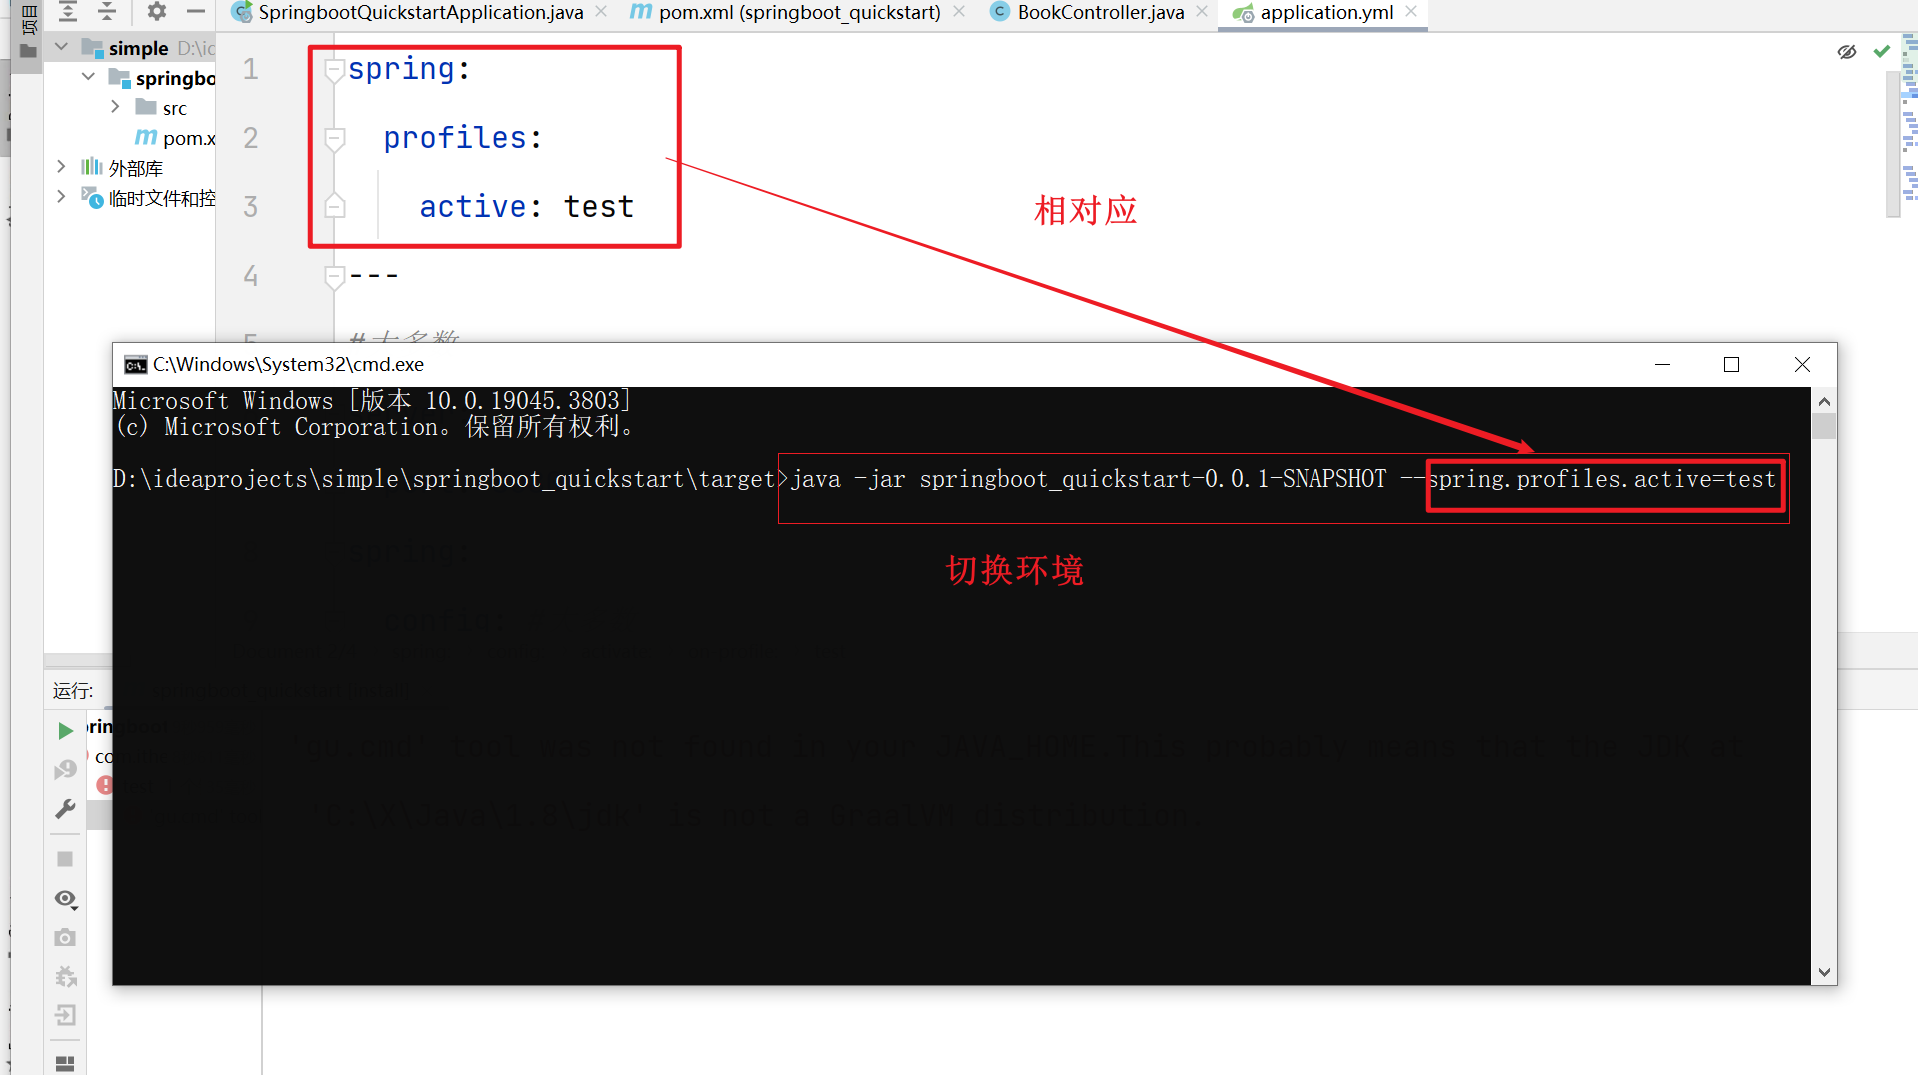
spring:
profiles:
active: test
---
server:
port: 8080
环境名
spring:
config:
activate:
on-profile: test
---
spring:
config:
activate:
on-profile: dev
server:
port: 8081
---
spring:
config:
activate:
on-profile: pro
server:
port: 8082
配置文件中多环境的配置见笔记
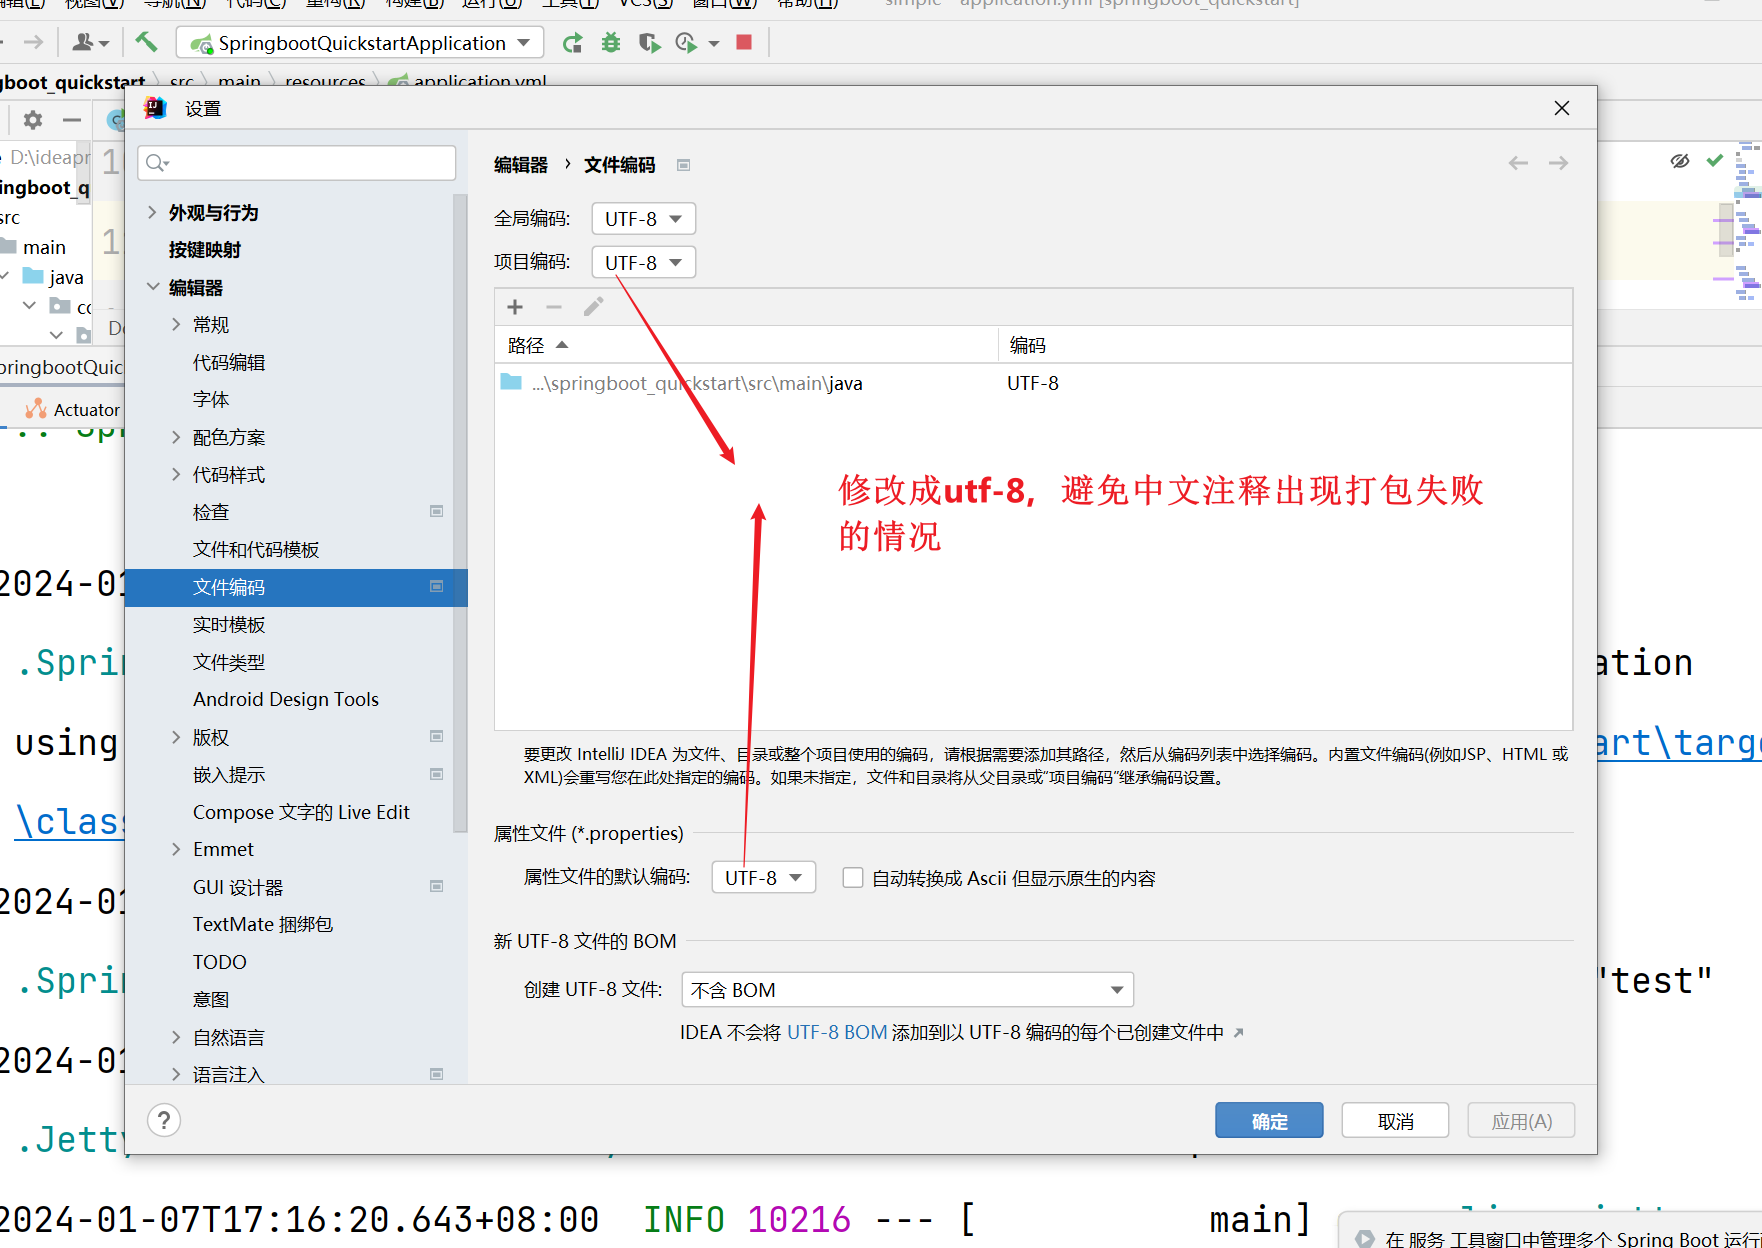
这里出现了一个文件,在yemal文件中,如果我们的注释出现中文将会出现异常
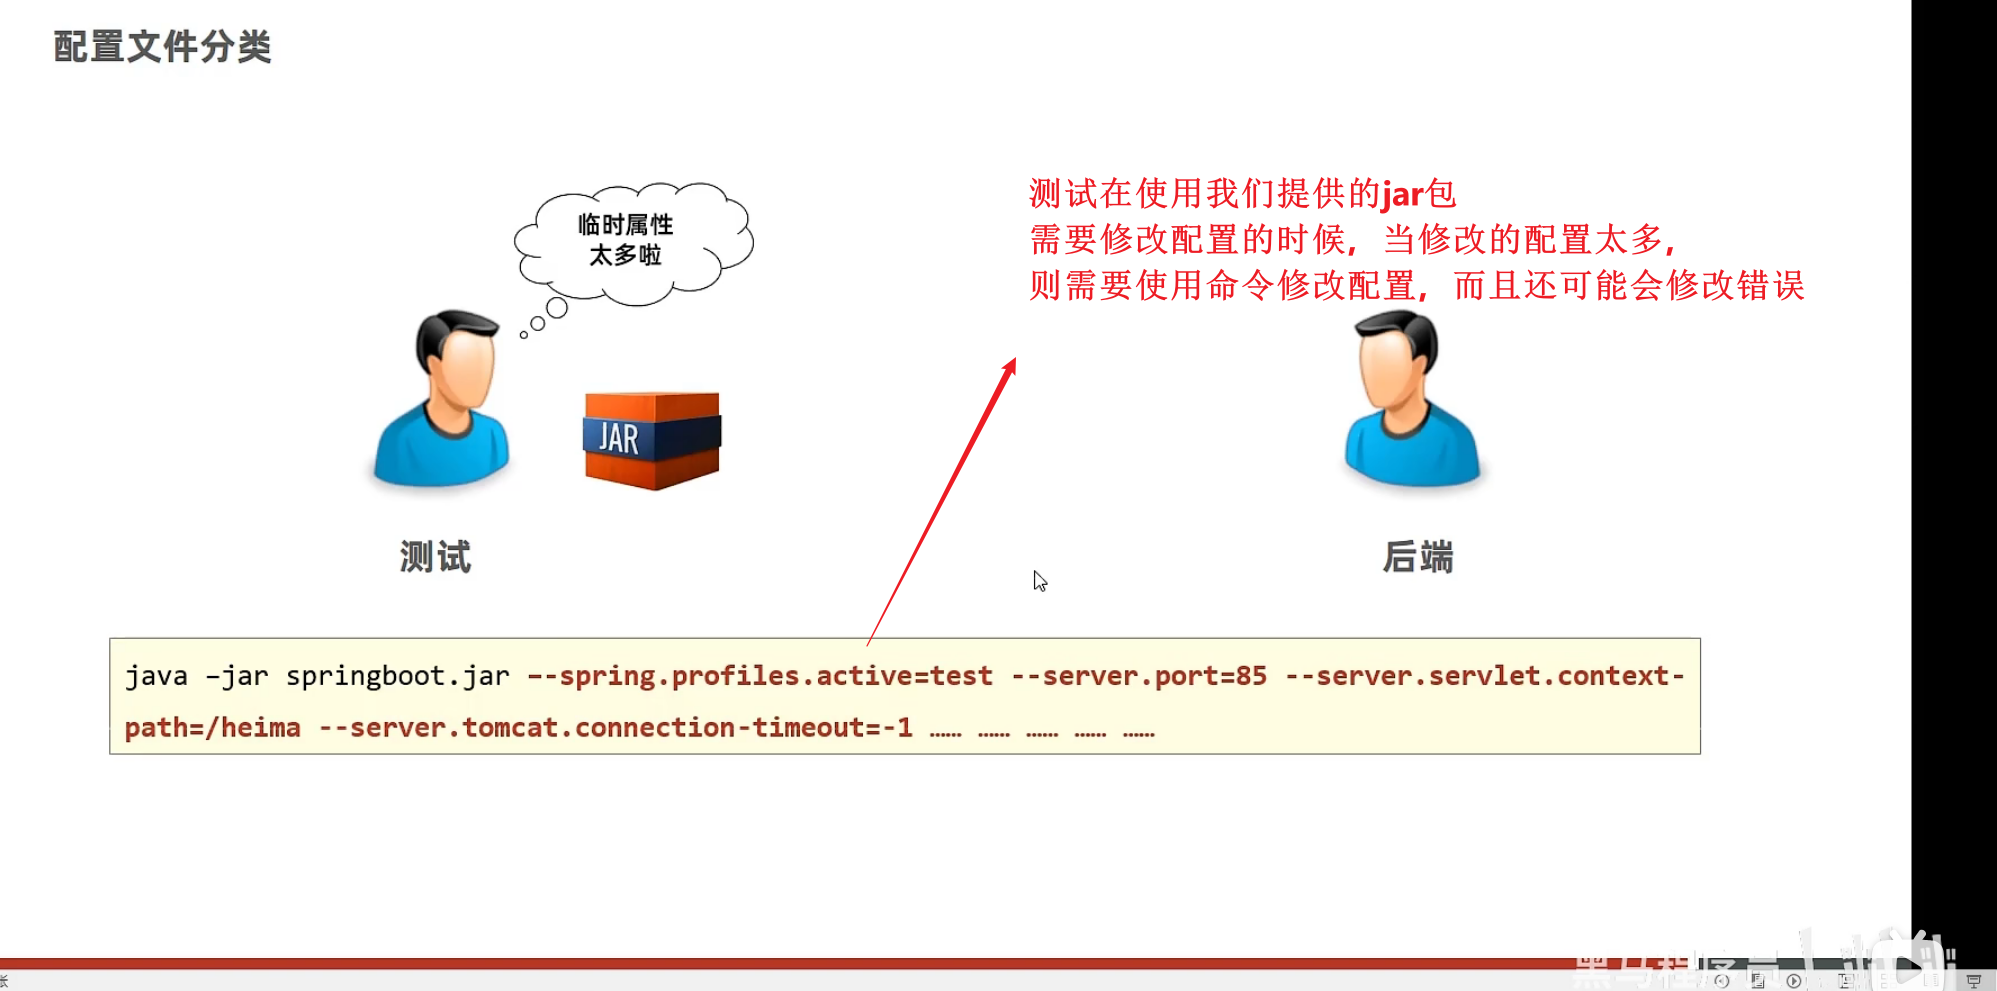
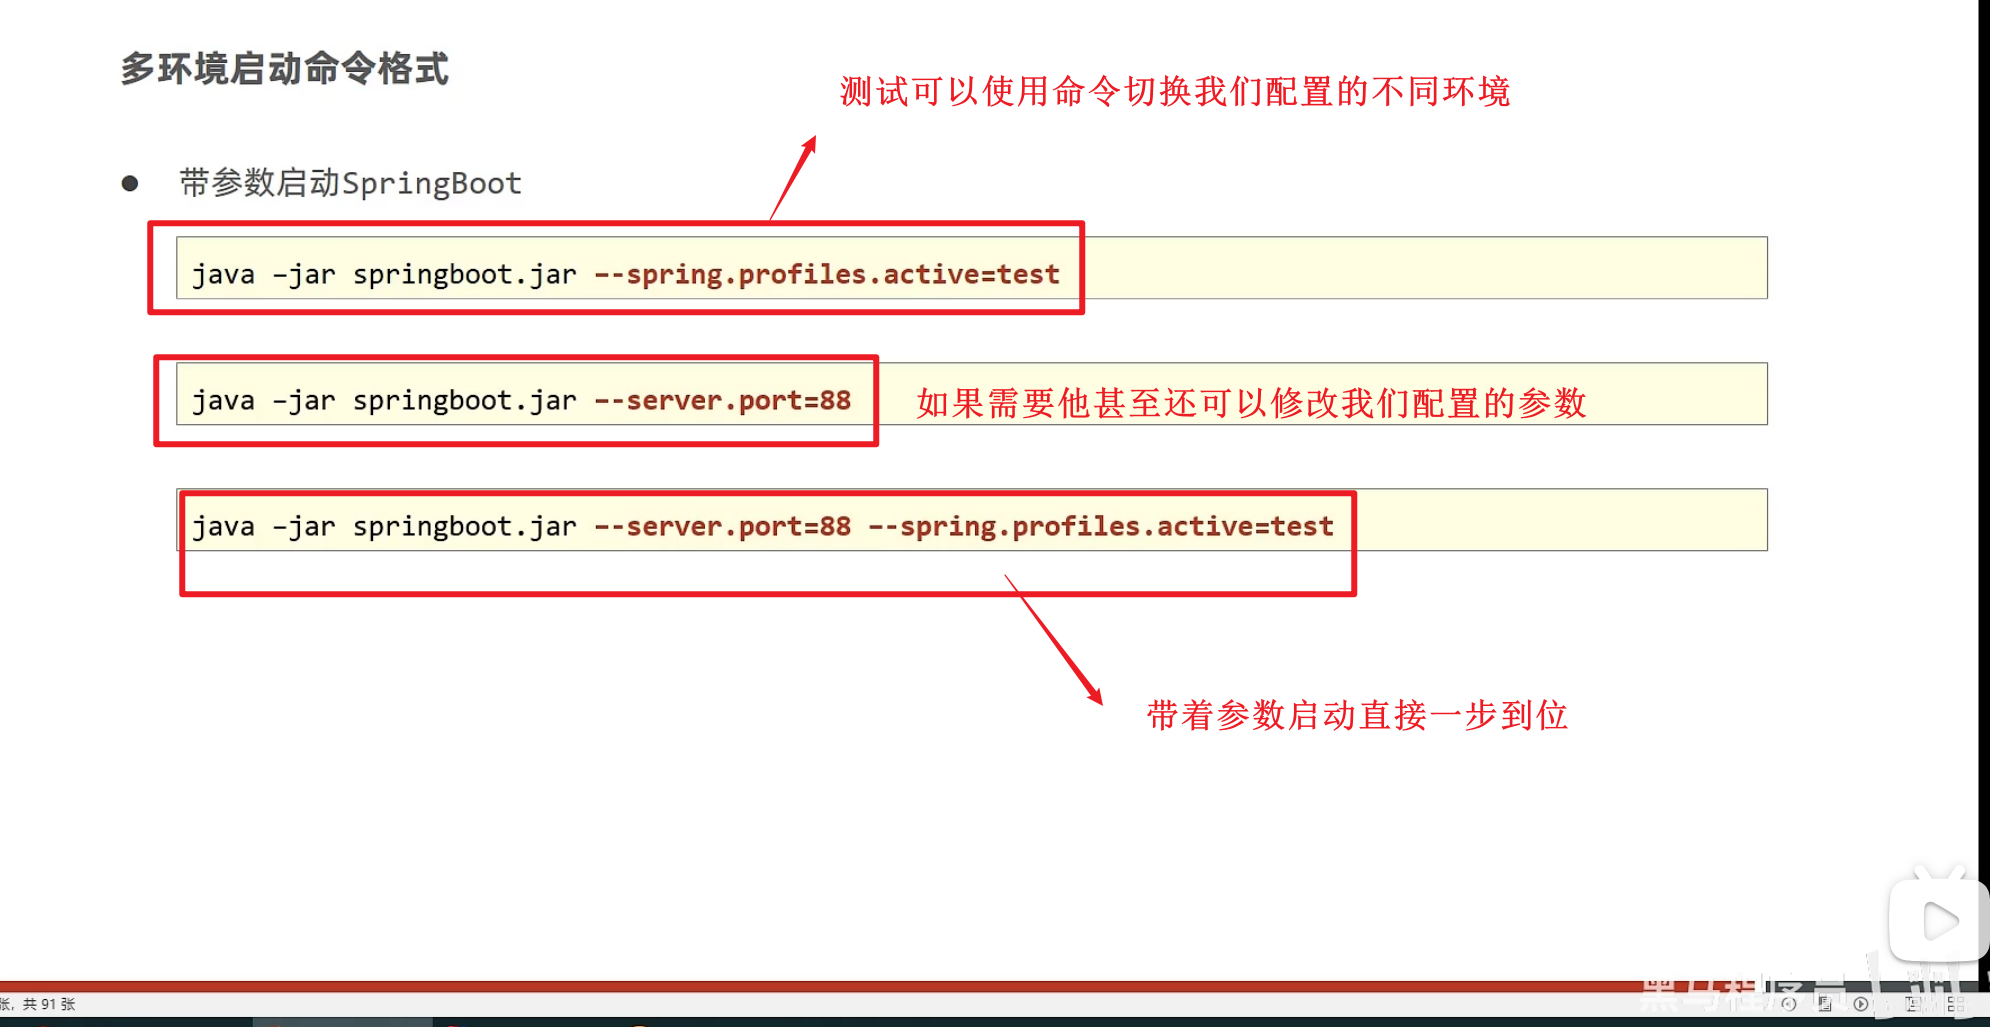
多环境命令行启动参数设置

- 解决了中文注释异常的问题
-我们使用packing打包s
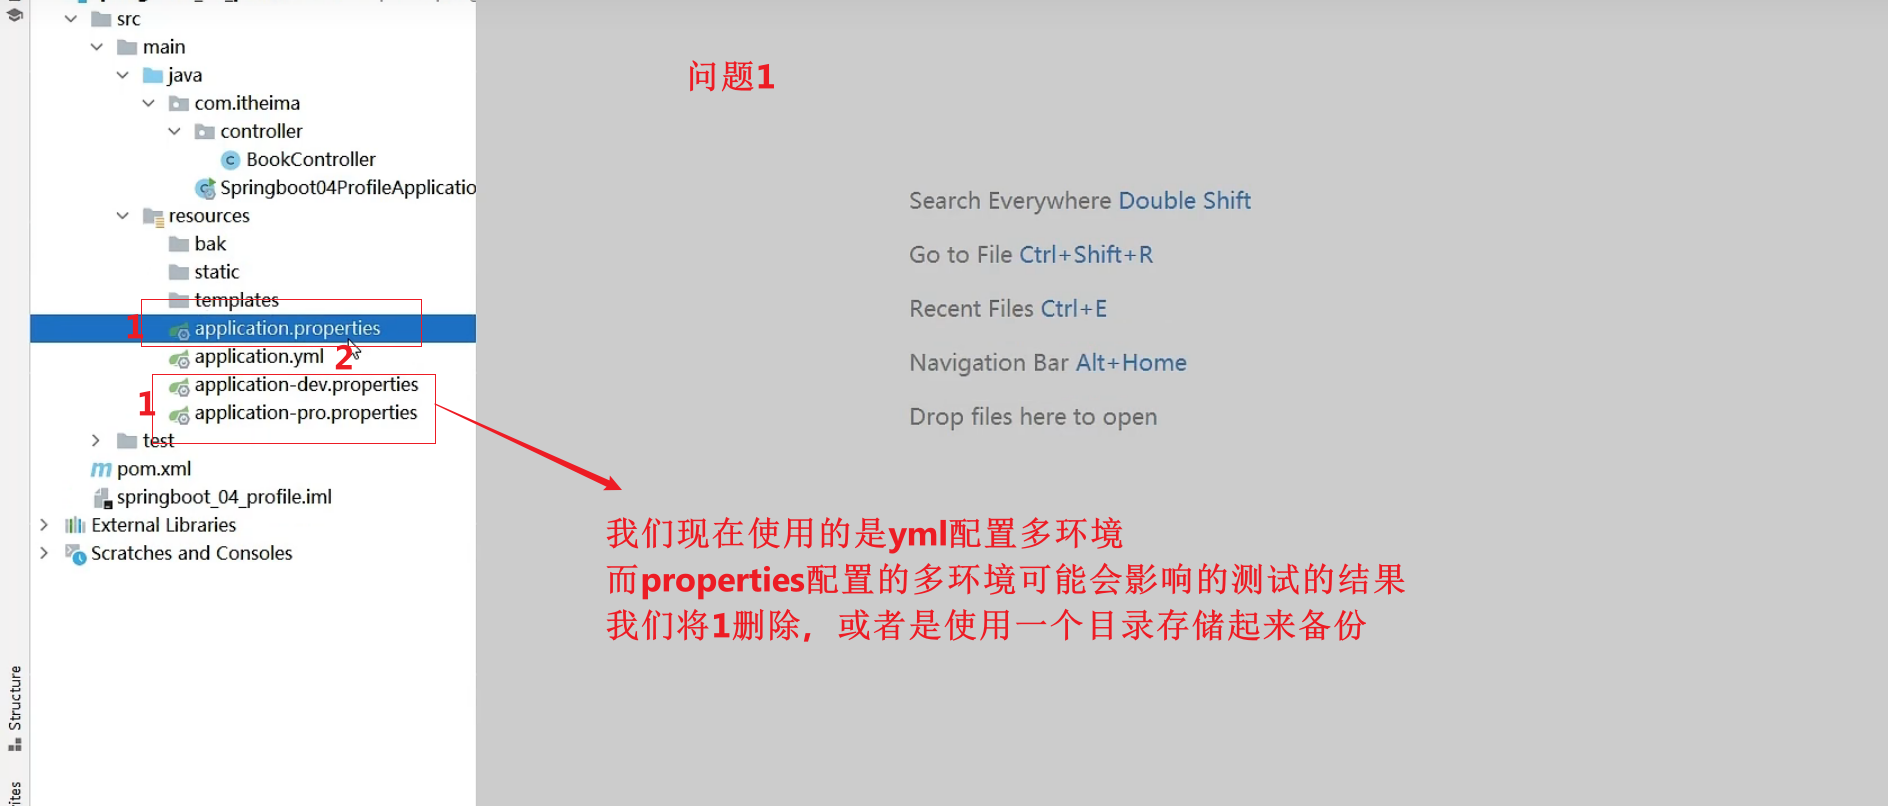
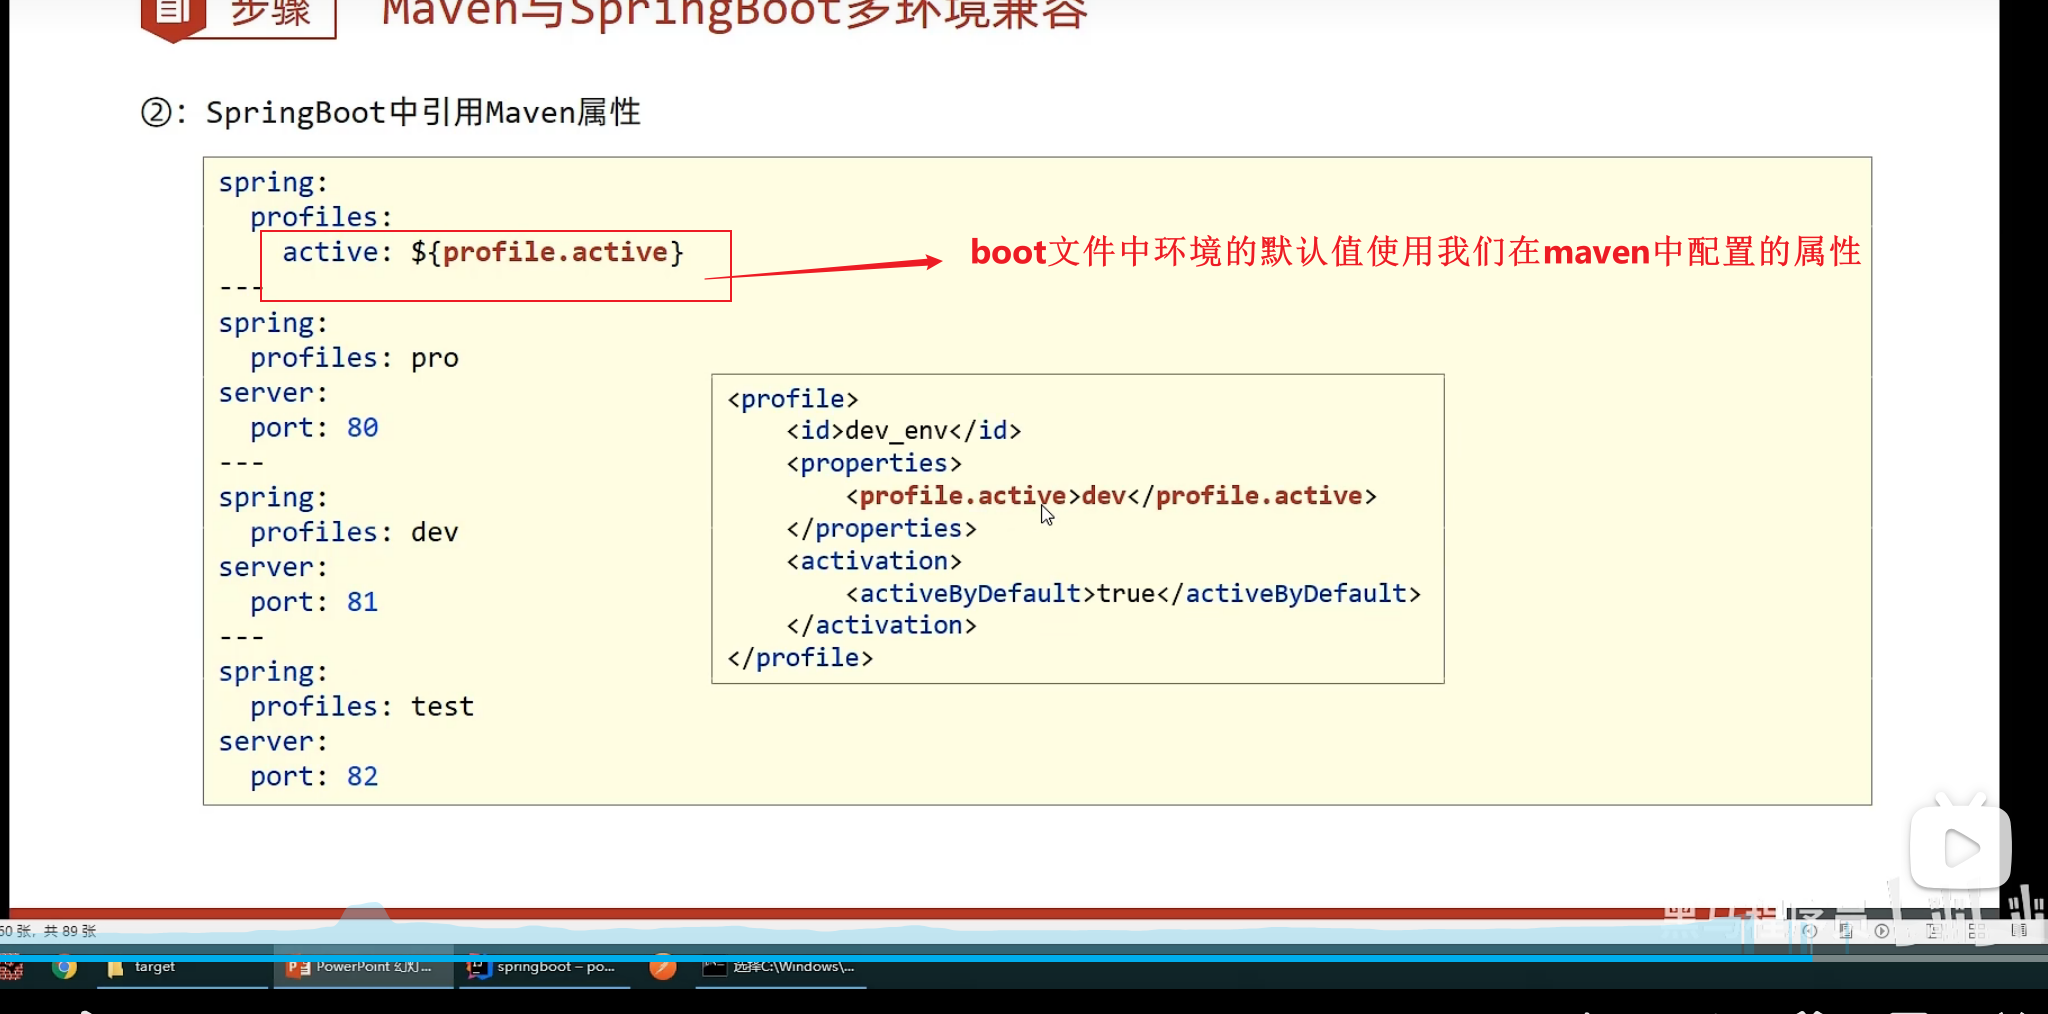
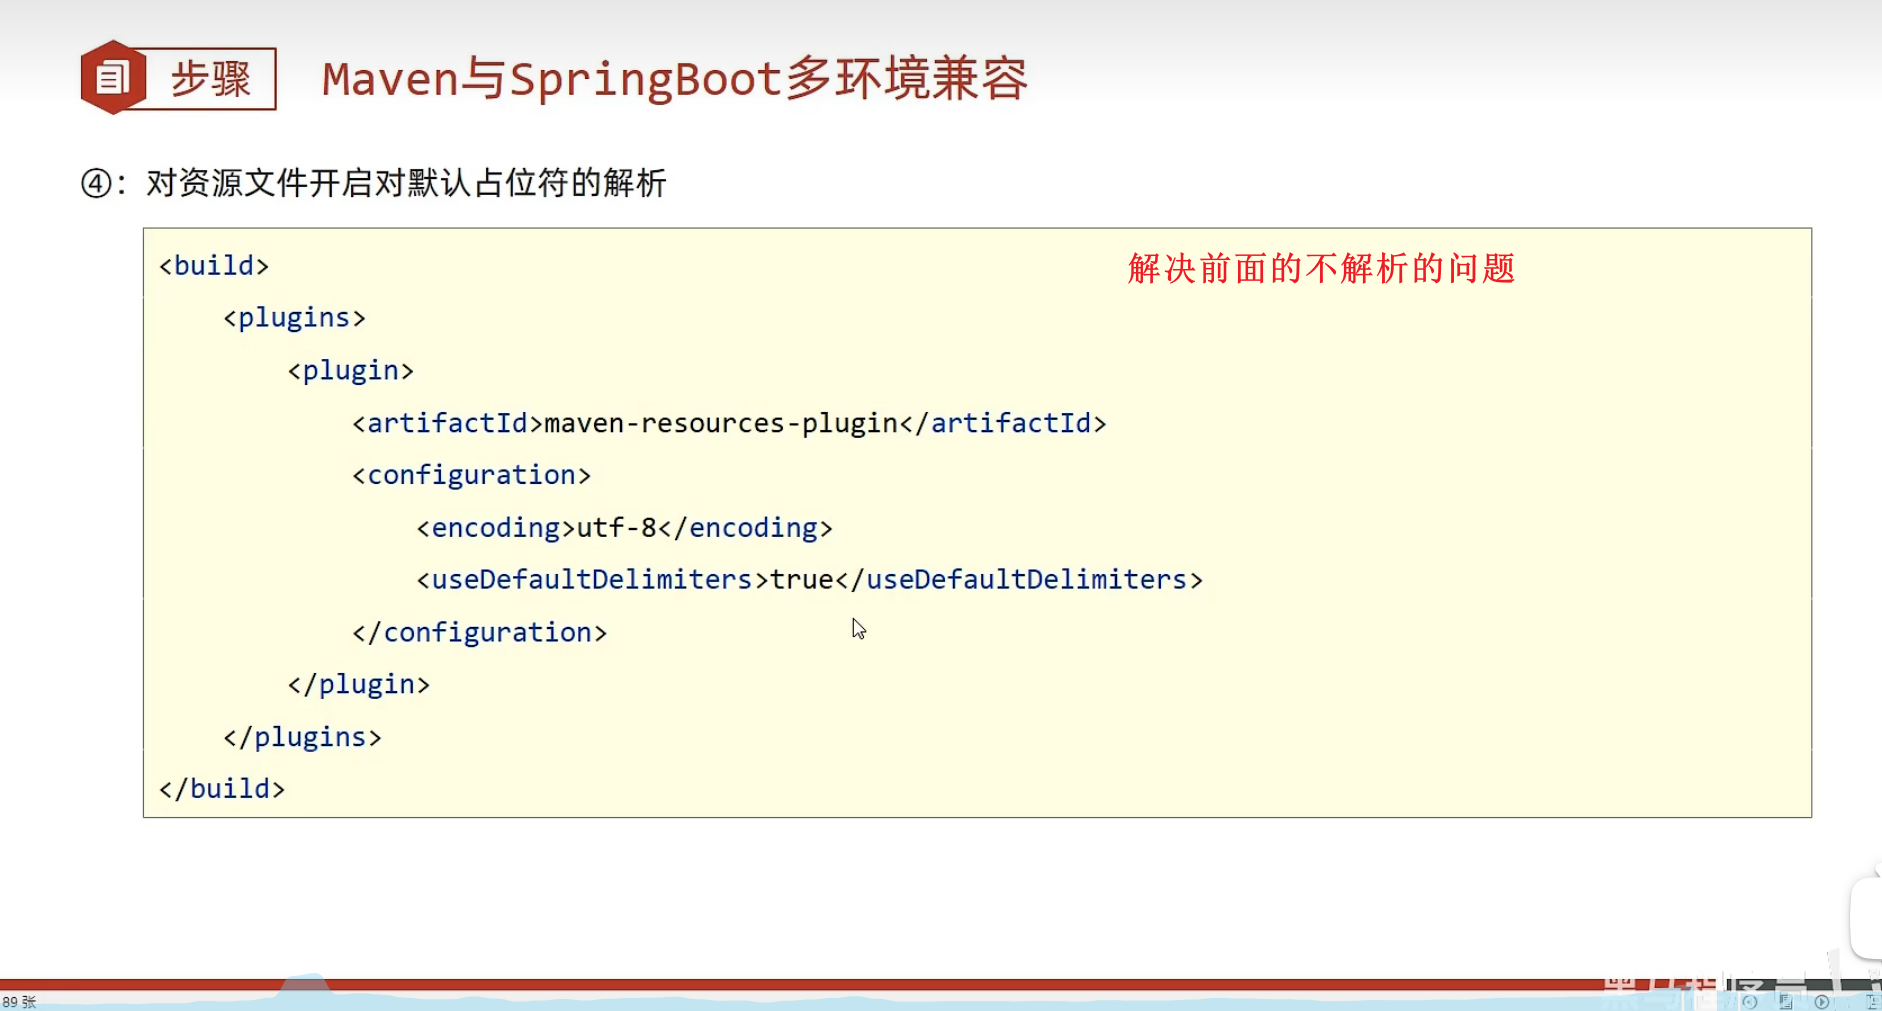
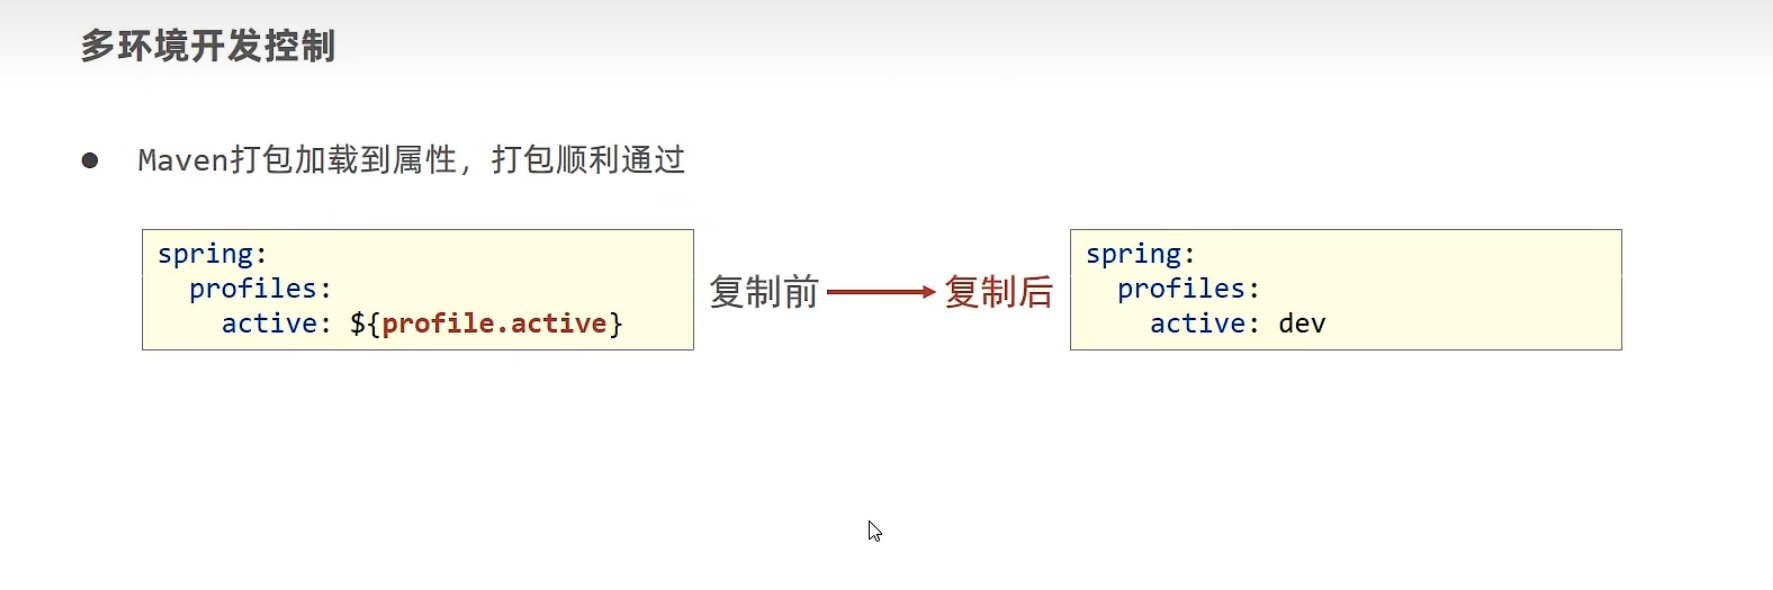
多环境开发兼容问题(maven与boot)(这个好像官方没有写笔记)


我们需要让application.yaml读取我们maven中配置的属性(默认的环境),然后统一使用的环境


多环境开发maven+配置文件
配置文件中的环境受到maven控制,在配置文件中配置具体的环境,但是配置文件中的默认环境名由maven中的pom.xml中得到
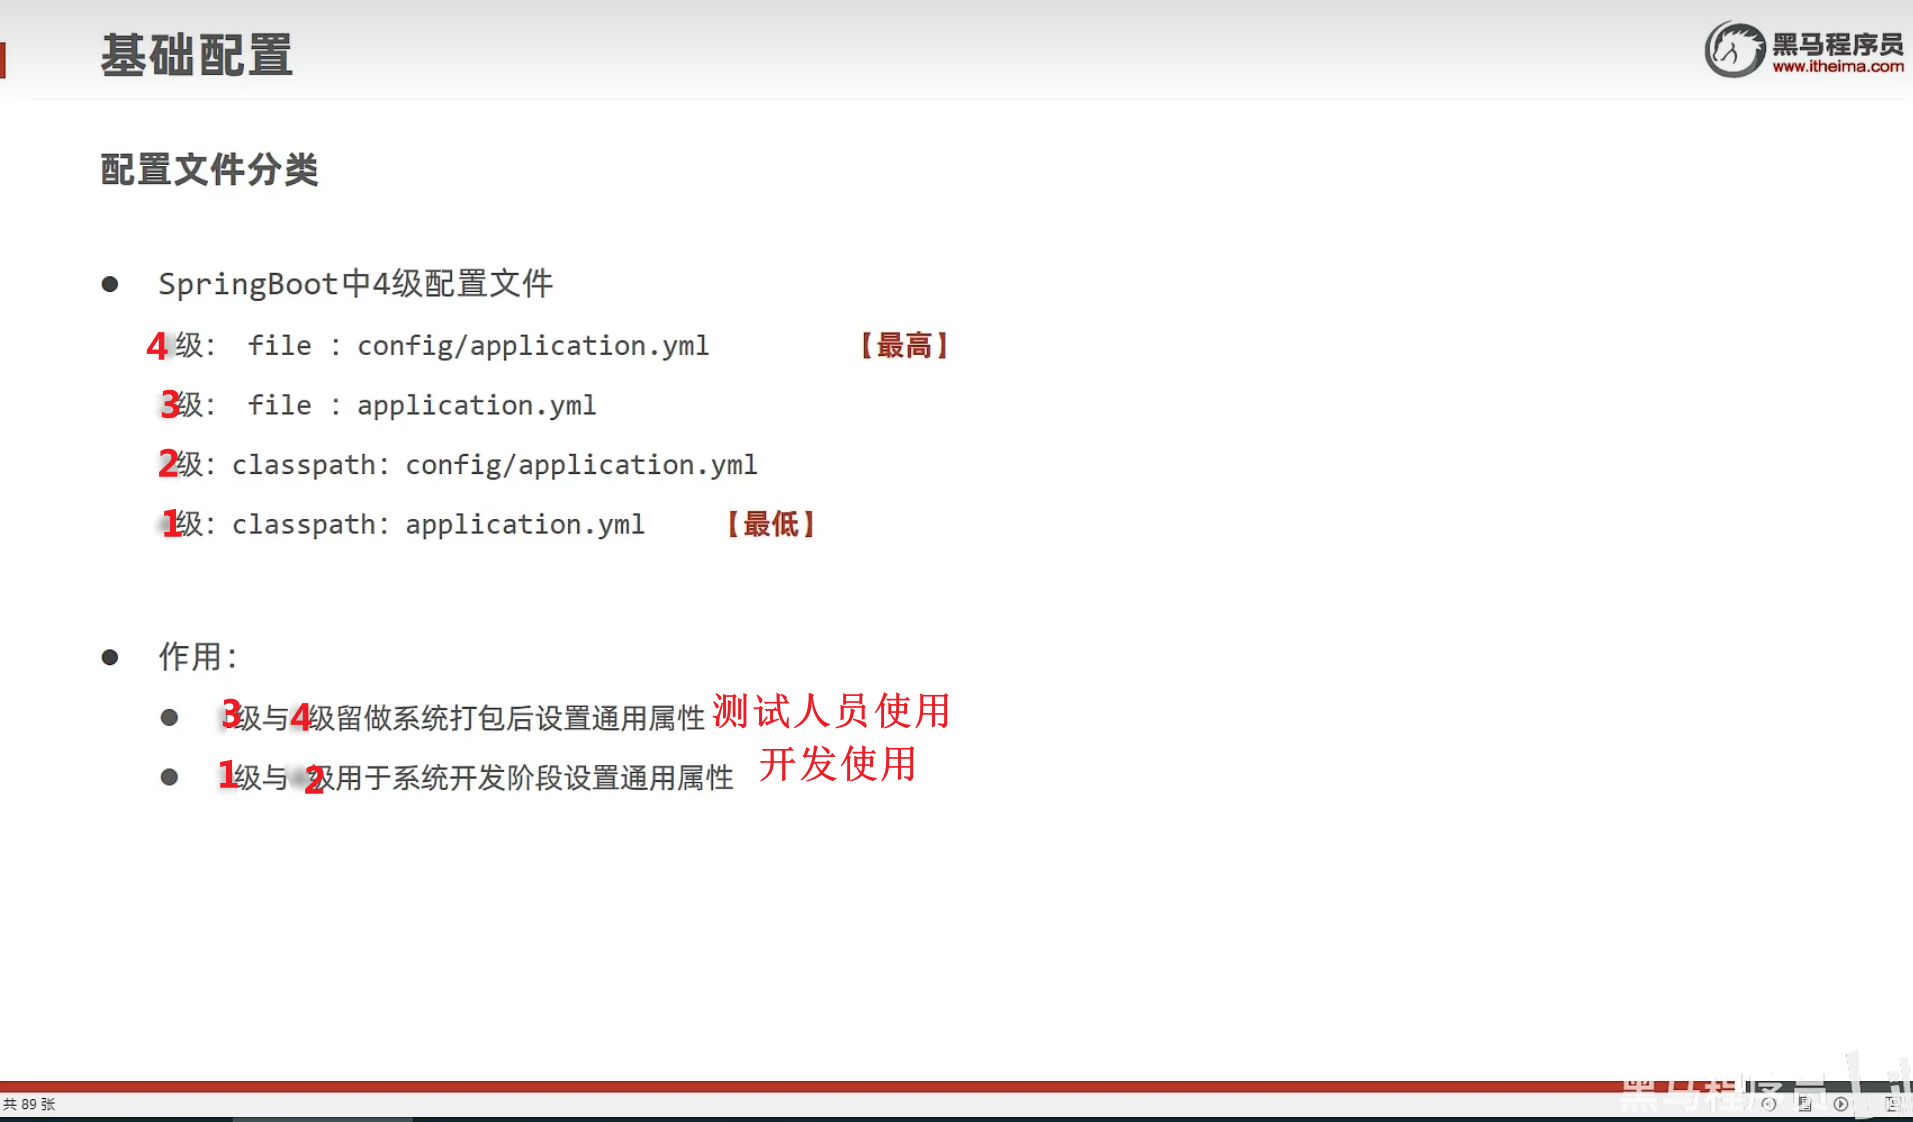
配置文件分类