没有太多多余的代码,记录下来主要是为了以后写starter的时候有个模板可以直接拖下来参考。
github项目地址:rain-spring-boot-starter
操作步骤
starter项目
(1) 新建一个maven项目,项目名推荐命名为:xxxx-spring-boot-starter,为了和官方starter的命名[spring-boot-starter-xxxx]区分开来。
(2) 在pom.xml中引入springboot的依赖。(这里的lombok纯属是为了方便写类引入的工具,不是必须的)
    <parent>
        <groupId>org.springframework.boot</groupId>
        <artifactId>spring-boot-starter-parent</artifactId>
        <version>2.6.5</version>
        <relativePath/> <!-- lookup parent from repository -->
    </parent>

    <dependencies>
        <dependency>
            <groupId>org.springframework.boot</groupId>
            <artifactId>spring-boot-starter-web</artifactId>
        </dependency>
        <dependency>
            <groupId>org.projectlombok</groupId>
            <artifactId>lombok</artifactId>
        </dependency>
    </dependencies>
(3)创建 对外的业务服务类、属性实体类、自动配置类。
包结构如下:
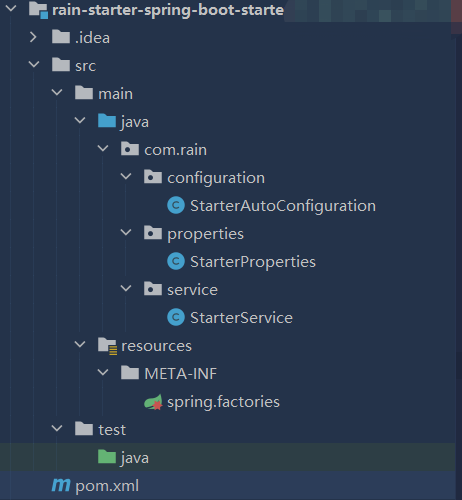
请注意:starter项目是不需要写springboot主程序的。
业务服务类:对外提供的服务,里面写具体的业务。
package com.rain.service;

import lombok.Data;

/**
 *  业务服务类(提供给外部调用)
 * @author Rain
 */
@Data
public class StarterService {

    private String rainName;

    public void print(){
        System.out.println("我被调用啦!");
    }
}
属性实体类:该类从引入starter的项目的配置文件中读取配置。
package com.rain.properties;

import lombok.Data;
import org.springframework.boot.context.properties.ConfigurationProperties;
import org.springframework.stereotype.Component;

/**
 *  属性实体类:从配置中获取属性值
 * @author Rain
 */
@Data
@Component
@ConfigurationProperties(prefix = "rain.starter")
public class StarterProperties {

    private String rainProperty;

}
自动配置类:该类为service注入properties读取到的属性,并且将一个service加载到IOC容器中。
package com.rain.configuration;


import com.rain.properties.StarterProperties;
import com.rain.service.StarterService;
import org.springframework.beans.factory.annotation.Autowired;
import org.springframework.boot.autoconfigure.condition.ConditionalOnMissingBean;
import org.springframework.boot.autoconfigure.condition.ConditionalOnProperty;
import org.springframework.boot.context.properties.EnableConfigurationProperties;
import org.springframework.context.annotation.Bean;
import org.springframework.context.annotation.Configuration;

/**
 * @Configuration 修饰配置类
 * proxyBeanMethods,默认值为true.
 * true时,为Full模式,表示当前组件(这个配置类)交给Spring容器代理,可以解决组件依赖的问题:
 *        调用组件的时候先检查组件是否在容器中存在,如果不存在就创建一个新的,如果存在则直接调用。
 * false时,为lite模式,表示当前组件(这个配置类)不交给Spring容器代理,每次调用组件时,
 *         直接创建,无须检查该组件是否存在于容器中。
 * 二者的使用,取决于是否有组件依赖。
 */
@Configuration(proxyBeanMethods = true)

/**
 * 导入我们自定义的配置类
 */
@EnableConfigurationProperties(StarterProperties.class)

/**
 *  配置生效条件:rain.starter.type=rain,如果属性不存在就略过这个条件,正常加载
 */
@ConditionalOnProperty(prefix="rain.starter",name="type",havingValue = "rain",matchIfMissing = true)

/**
 * 自动配置类
 * @author Rain
 */
public class StarterAutoConfiguration {

    /**
     *  自动注入一个配置实体类
     */
    @Autowired
    StarterProperties starterProperties;

    /**
     * @Bean:只能存在于配置类中,当配置类中的方法存在这个注解时,方法的返回值会被放入IOC容器中
     * @ConditionalOnMissingBean:只有当前容器没有这个bean的时候才会创建bean,保证单例
     * @return StarterService
     */
    @Bean
    @ConditionalOnMissingBean
    public StarterService createStarterService(){
        StarterService starterService = new StarterService();
        starterService.setRainName(starterProperties.getRainProperty());
        return starterService;
    }

}
(4) 在resources下手动创建/META-INF/spring.factories
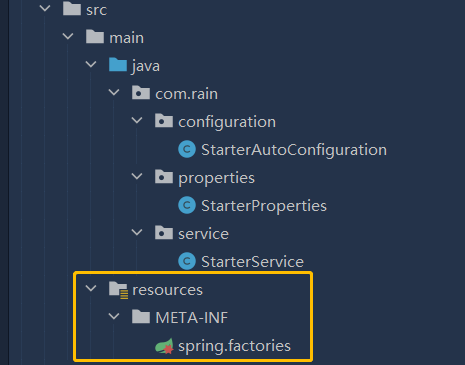
添加配置:
org.springframework.boot.autoconfigure.EnableAutoConfiguration = com.rain.configuration.StarterAutoConfiguration
后面的是自动配置类的路径。
(5) starter项目在maven里面clean 再install一下
如果需要改配置,在pom.xml里面改包路径和版本号。
    <groupId>org.rain</groupId>
    <artifactId>rain-starter-spring-boot-starter</artifactId>
    <version>1.0-SNAPSHOT</version>
mvn clean install一下。
注意:由于配置的原因,这一步如果在控制台操作,生成的路径可能和在Idea里面操作不一样,但是也没关系,因为:
无论在那里执行clean install,看控制台,会写地址:
[INFO] Installing D:\...\rain-starter-spring-boot-starter\target\rain-starter-spring-boot-starter-1.0-SNAPSHOT.jar to D:\...\repository\com\rain\rain-starter-spring-boot-starter\1.0-SNAPSHOT\rain-starter-spring-boot-starter-1.0-SNAPSHOT.jar
[INFO] Installing D:\...\rain-starter-spring-boot-starter\pom.xml to D:\...\repository\com\rain\rain-starter-spring-boot-starter\1.0-SNAPSHOT\rain-starter-spring-boot-starter-1.0-SNAPSHOT.pom
[INFO] ------------------------------------------------------------------------
[INFO] BUILD SUCCESS
[INFO] ------------------------------------------------------------------------
[INFO] Total time:  4.191 s
[INFO] Finished at: 2023-03-30T10:42:40+08:00
[INFO] ------------------------------------------------------------------------

Process finished with exit code 0
这时候打开maven的repository目录,可以看到我们的starter生成的文件。

(6)新建一个测试用的maven项目,或者用现成的项目也可以。
注意:引入依赖之前,打开idea-->file-->setting
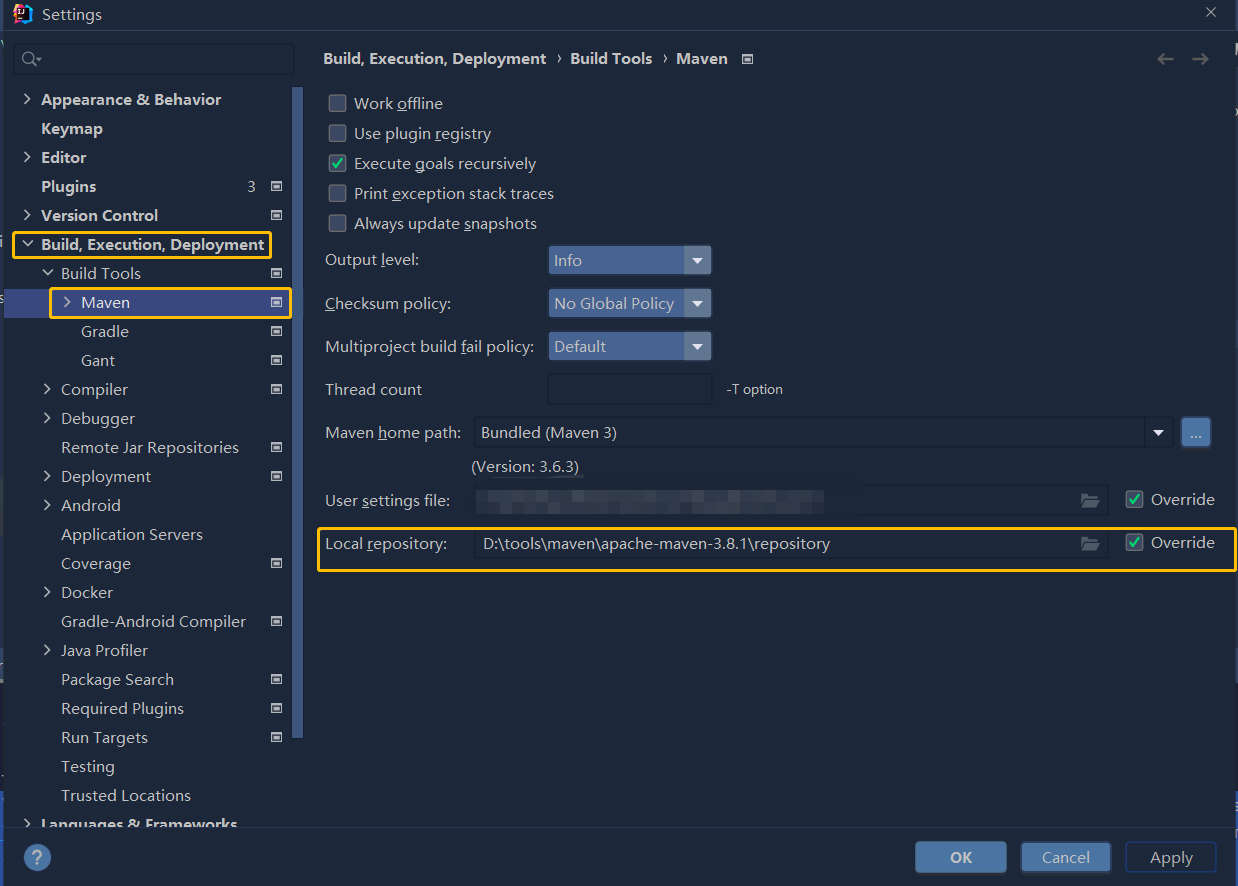
一定要看一下测试项目和starter项目生成文件的maven仓库是不是同一个嗷。
一般来说大家开发环境都只有一个maven本地库,但是有的朋友一个开发环境好几个maven库自己都不记得哪个项目用哪个库。(比如我自己)
不是同一个库拉不到依赖的嗷。
添加依赖:
        <dependency>
            <groupId>com.rain</groupId>
            <artifactId>rain-starter-spring-boot-starter</artifactId>
            <version>1.0-SNAPSHOT</version>
        </dependency>
install一下,看看依赖拉没拉下来。
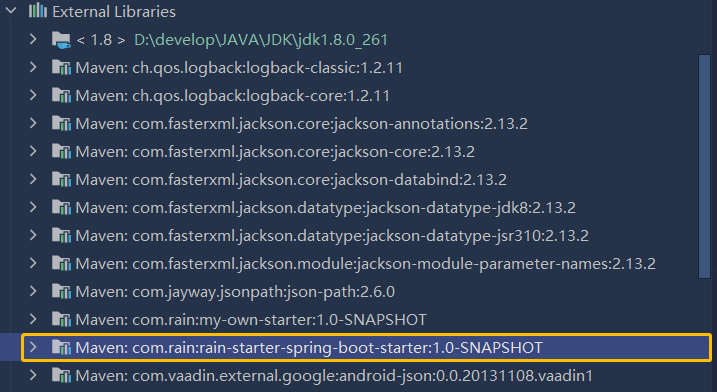
拉到了噢。
(7) 测试使用
测试项目中添加配置:
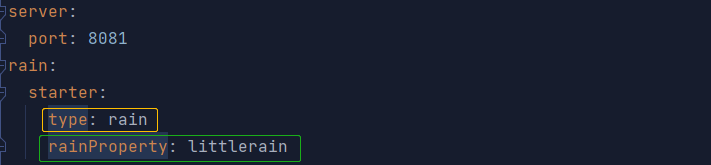
添加rainProperty配置是因为这个配置是写在starter的properties类里面的。
添加type配置是因为在starter项目里用注解进行了过滤:
/**
 *  配置生效条件:rain.starter.type=rain,如果属性不存在就略过这个条件,正常加载
 */
@ConditionalOnProperty(prefix="rain.starter",name="type",havingValue = "rain",matchIfMissing = true)
ok,现在测试一下,测试方法就八仙过海各显神通吧,我直接写在controller里面了。
package com.test.controller;

import com.rain.service.StarterService;
import org.springframework.beans.factory.annotation.Autowired;
import org.springframework.web.bind.annotation.PostMapping;
import org.springframework.web.bind.annotation.RestController;

@RestController
public class testController {

    @Autowired
    StarterService starterService;

    @PostMapping("/sayHello")
    public String Hello(){
        String name = starterService.getRainName();
        starterService.print();
        return name;
    }
}
测试项目跑起来,postman调用一下接口:
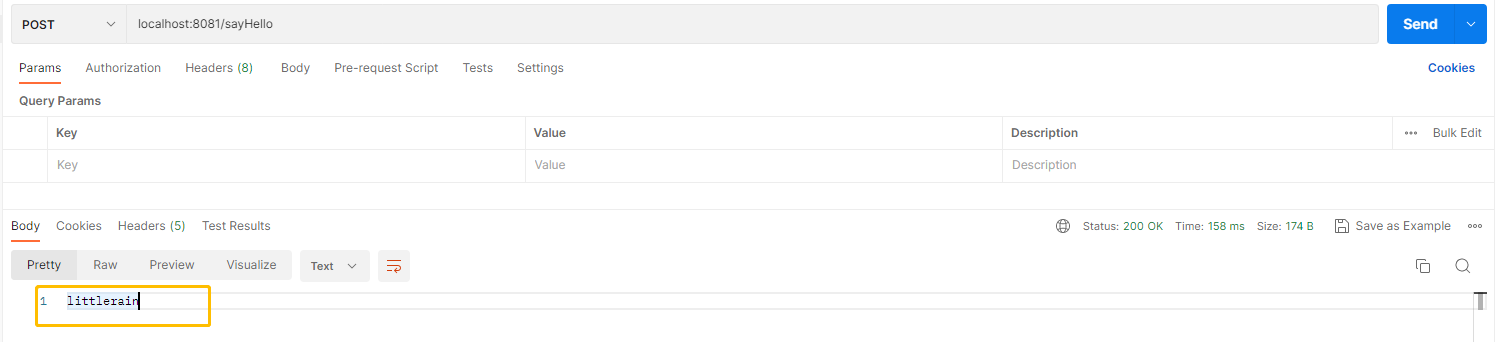
调到了,返回了我们配置的属性。
控制台也有方法的打印:

测试完成。
到这里,一个starter就创建成功啦!
- starter spring-boot-starter SpringBoot 常见 错误starter spring-boot-starter springboot常见 starter进阶教程spring-boot-starter springboot spring-boot-starter spring-boot-starter starter spring boot spring-boot-starter starter笔记spring spring-boot-starter权限starter spring springboot starter springboot-starter springboot-parent-starter springboot-starter springboot starter