一、Ingress Nginx 灰度(金丝雀)发布
回忆:应用无损发布
- 滚动更新
- 蓝绿发布
- 灰度发布(金丝雀发布)
1、Ingress-Nginx Canary 介绍
Nginx Ingress Controller(GitHub - kubernetes/ingress-nginx: Ingress-NGINX Controller for Kubernetes) 作为项目对外流量入口和项目中各个服务的方向代理。官方文档:Annotations - Ingress-Nginx Controller (kubernetes.github.io) 的几种Canary规则
| Annotation | 说明 |
| nginx.ingress.kubernetes.io/canary | 必须设置该Annotation值为true ,否则其它规 则将不会生效。 取值: true :启用canary 功能。 false :不启用canary 功能。 |
| nginx.ingress.kubernetes.io/canaryby-header | 表示基于请求头的名称进行灰度发布。 请求头名称的特殊取值: always :无论什么情况下,流量均会进入灰度服务。 never :无论什么情况下,流量均不会进入灰度服务。 若没有指定请求头名称的值,则只要该头存在,都会进行流量转发。 |
| nginx.ingress.kubernetes.io/canaryby-header-value | 表示基于请求头的值进行灰度发布。 需要与canary-by-header 头配合使用。 |
| nginx.ingress.kubernetes.io/canaryby-header-pattern | 表示基于请求头的值进行灰度发布,并对请求头的值进行正则匹配。 需要与canary-by-header 头配合使用。 取值为用于匹配请求头的值的正则表达式。 |
| nginx.ingress.kubernetes.io/canaryby-cookie | 表示基于Cookie进行灰度发布。例如,nginx.ingress.kubernetes.io/canary-bycookie:foo 。 Cookie内容的取值: always :当foo=always ,流量会进入灰度服务。 never :当foo=never ,流量不会进入灰度服务。 只有当Cookie存在,且值为always 时,才会进行流量转发。 |
| nginx.ingress.kubernetes.io/canaryweight | 表示基于权重进行灰度发布。 取值范围:0~权重总值。 若未设定总值,默认总值为100。 |
| nginx.ingress.kubernetes.io/canaryweight-total | 表示设定的权重总值。 若未设定总值,默认总值为100。 |
注意:不同恢复方式的优先级由高到低为:
canary-by-header --> canary-by-cookie --> canary-weight二、Ingress-nginx Canary实现
2.1 基于客户端请求的流量切分场景
需求:
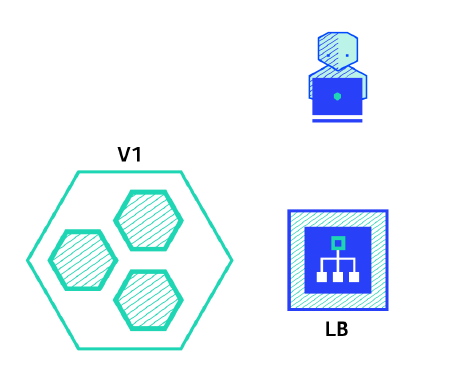
假设当前线上环境,您已经有一套服务Service V1对外提供7层服务,此时上线了一些新的特性,需要发布上线一个新的版本Service V2。
希望将请求头中包含foo=bar 或者Cookie中包含foo=bar 的客户端请求转发到ServiceV2服务中。
待运行一段时间稳定后,可将所有的流量从Service V1切换到Service V2服务中,再平滑地将Service V1服务下线。
通过上面的annotation来实现灰度发布,其 思路如下:
- 在集群中部署两套系统,一套是stable版本(old-nginx),一套是canary版本(newnginx),两个版本都有自己的service;
- 定义两个ingress配置,一个正常提供服务,一个增加canary的annotation;
- 待canary版本无误后,将其切换成stable版本,并且将旧的版本下线,流量全部接入新的stable版本
old-nginx 创建Deployment、Service、Ingress。
apiVersion: apps/v1
kind: Deployment
metadata:
  name: old-nginx
spec:
  replicas: 2
  selector:
    matchLabels:
      run: old-nginx
  template:
    metadata:
      labels:
        run: old-nginx
    spec:
      containers:
      - image: registry.cn-hangzhou.aliyuncs.com/acs-sample/old-nginx
        imagePullPolicy: Always
        name: old-nginx
        ports:
        - containerPort: 80
          protocol: TCP
      restartPolicy: Always
---
apiVersion: v1
kind: Service
metadata:
  name: old-nginx
spec:
  ports:
  - port: 80
    protocol: TCP
    targetPort: 80
  selector:
    run: old-nginx
  sessionAffinity: None
  type: ClusterIP
---
apiVersion: networking.k8s.io/v1
kind: Ingress
metadata:
  name: nginx-ingress
  namespace: default
spec:
  ingressClassName: nginx
  rules:
    - host: nginx.ikubernetes.cloud
      http:
        paths:
          - pathType: Prefix
            backend:
              service:
                name: old-nginx
                port:
                  number: 80
            path: /
测试验证:(预期输出:old)
curl -H "Host: nginx.ikubernetes.cloud" http://nginx.ikubernetes.cloud灰度发布新版本服务:
new-nginx 创建Deployment、Service
apiVersion: apps/v1
kind: Deployment
metadata:
  name: new-nginx
spec:
  replicas: 1
  selector:
    matchLabels:
      run: new-nginx
  template:
    metadata:
      labels:
        run: new-nginx
    spec:
      containers:
      - image: registry.cn-hangzhou.aliyuncs.com/acs-sample/new-nginx
        imagePullPolicy: Always
        name: new-nginx
        ports:
        - containerPort: 80
          protocol: TCP
      restartPolicy: Always
---
apiVersion: v1
kind: Service
metadata:
  name: new-nginx
spec:
  ports:
  - port: 80
    protocol: TCP
    targetPort: 80
  selector:
    run: new-nginx
  sessionAffinity: None
  type: ClusterIP
设置访问新版本的路由规则
设置满足特定规则的客户端才能访问新版本服务。以下示例仅请求头中满足foo=bar 的客户端请求才能路由到新版本服务。
apiVersion: networking.k8s.io/v1
kind: Ingress
metadata:
  # 修改名称
  name: new-nginx-ingress
  namespace: default
  annotations:
    # 开启Canary。
    nginx.ingress.kubernetes.io/canary: "true"
    # 请求头为foo。
    nginx.ingress.kubernetes.io/canary-by-header: "foo"
    # 请求头foo的值为bar时,请求才会被路由到新版本服务new-nginx中。
    nginx.ingress.kubernetes.io/canary-by-header-value: "bar"
spec:
  ingressClassName: nginx
  rules:
    - host: nginx.ikubernetes.cloud
      http:
        paths:
          - pathType: Prefix
            backend:
              service:
                # 选择新pod的svc
                name: new-nginx
                port:
                  number: 80
            path: /
按header信息转发流量:
# 正常访问:
$ curl -H "Host: nginx.ikubernetes.cloud" http://nginx.ikubernetes.cloud

访问新的服务:
$ curl -H "Host: nginx.ikubernetes.cloud" -H "foo: bar" http://nginx.ikubernetes.cloud
可以看到,仅请求头中满足foo=bar 的客户端请求才能路由到新版本服务。
需求:请求头中满足foo=bar 的客户端请求,若不包含该请求头,再将50%的流量路由到新版本服务中
apiVersion: networking.k8s.io/v1
kind: Ingress
metadata:
  name: new-nginx-ingress
  namespace: default
  annotations:
    # 开启Canary。
    nginx.ingress.kubernetes.io/canary: "true"
    # 请求头为foo。
    nginx.ingress.kubernetes.io/canary-by-header: "foo"
    # 请求头foo的值为bar时,请求才会被路由到新版本服务new-nginx中。
    nginx.ingress.kubernetes.io/canary-by-header-value: "bar"
    # 在满足上述匹配规则的基础上仅允许50%的流量会被路由到新版本服务new-nginx中。
    nginx.ingress.kubernetes.io/canary-weight: "50"
spec:
  ingressClassName: nginx
  rules:
    - host: nginx.ikubernetes.cloud
      http:
        paths:
          - pathType: Prefix
            backend:
              service:
                name: new-nginx
                port:
                  number: 80
            path: /
测试验证:(几乎可以达到50%请求分布)
curl -H "Host: nginx.ikubernetes.cloud" http://nginx.ikubernetes.cloud系统运行一段时间后,当新版本服务已经稳定并且符合预期后,需要下线老版本的服务,仅保留新版本服务在线上运行。
为了达到该目标,需要将旧版本的Service指向新版本服务的Deployment,并且删除旧版本的Deployment和新版本的Service。
apiVersion: networking.k8s.io/v1
kind: Ingress
metadata:
  name: new-nginx-ingress
  namespace: default
  annotations:
    nginx.ingress.kubernetes.io/configuration-snippet: |
      if ($http_name ~ "^.*foo$|^.*new$") {
         proxy_pass http://new-nginx.default:80;
         break;
      }
spec:
  ingressClassName: nginx
  rules:
    - host: nginx.ikubernetes.cloud
      http:
        paths:
        - path: /
          backend:
            service:
              name: old-nginx
              port:
                number: 80
          pathType: Prefix
        - path: /
          backend:
            service:
              name: new-nginx
              port:
                number: 80
          pathType: Prefix
验证结果:
curl -H "Host: nginx.ikubernetes.cloud" http://nginx.ikubernetes.cloud2、金丝雀发布的高级功能
如上只简单介绍了一些ingress开源默认支持的Annotation。
日常工作中基于开源ingress-nginx实线的高级功能:
通过修改nginx.ingress.kubernetes.io/configuration-snippet 配置,并且配置
正则实现:
- 当header头中有关键字(foo 或 new)字段的时候,自动将流量转发至newnginx;
- nginx.ingress.kubernetes.io/configuration-snippet (用于插入 location块代码段);
- nginx.ingress.kubernetes.io/server-snippet (用于插入 server 块中的代码段);
apiVersion: networking.k8s.io/v1
kind: Ingress
metadata:
  name: new-nginx-ingress
  namespace: default
  annotations:
    nginx.ingress.kubernetes.io/configuration-snippet: |
      if ($http_name ~ "^.*foo$|^.*new$") {
         proxy_pass http://new-nginx.default:80;
         break;
      }
spec:
  ingressClassName: nginx
  rules:
    - host: nginx.kubernets.cn
      http:
        paths:
        - path: /
          backend:
            service:
              name: old-nginx
              port:
                number: 80
          pathType: Prefix
        - path: /
          backend:
            service:
              name: new-nginx
              port:
                number: 80
          pathType: Prefix
测试验证:
# curl -H "name: new" http://nginx.ikubernetes.cloud

# curl -H "name: foo" http://nginx.ikubernetes.cloud

# curl -H "Host: nginx.ikubernetes.cloud" http://nginx.ikubernetes.cloud
4、 阿里开源ingress-nginx 实现
4.1 基础理论
Nginx Ingress Controller通过Annotation来支持应用服务的灰度发布机制。
nginx.ingress.kubernetes.io/service-match :该注解用来配置新版本服务的路由匹配规则。
nginx.ingress.kubernetes.io/service-match: |
  <service-name>: <match-rule>
# 参数说明:
# service-name:服务名称,满足match-rule的请求会被路由到该服务中。
# match-rule:路由匹配规则
#
# 路由匹配规则:
# 1. 支持的匹配类型
# - header:基于请求头,支持正则匹配和完整匹配。
# - cookie:基于cookie,支持正则匹配和完整匹配。
# - query:基于请求参数,支持正则匹配和完整匹配。
#
# 2. 匹配方式
# - 正则匹配格式:/{regular expression}/,//表明采用正则方式匹配。
# - 完整匹配格式:"{exact expression}",""表明采用完整方式匹配。
路由匹配规则配置示例:
# 请求头中满足foo正则匹配^bar$的请求被转发到新版本服务new-nginx中。
new-nginx: header("foo", /^bar$/)
# 请求头中满足foo完整匹配bar的请求被转发到新版本服务new-nginx中。
new-nginx: header("foo", "bar")
# cookie中满足foo正则匹配^sticky-.+$的请求被转发到新版本服务new-nginx中。
new-nginx: cookie("foo", /^sticky-.+$/)
# query param中满足foo完整匹配bar的请求被转发到新版本服务new-nginx中。
new-nginx: query("foo", "bar")
nginx.ingress.kubernetes.io/service-weight :该注解用来配置新旧版本服务的流量权重。
nginx.ingress.kubernetes.io/service-weight: |
<new-svc-name>:<new-svc-weight>, <old-svc-name>:<old-svc-weight>
参数说明:
new-svc-name:新版本服务名称
new-svc-weight:新版本服务权重
old-svc-name:旧版本服务名称
old-svc-weight:旧版本服务权重
配置示例:
nginx.ingress.kubernetes.io/service-weight: |
new-nginx: 20, old-nginx: 60
4.2 案例
创建拉服务的 Deployment、Service
apiVersion: apps/v1
kind: Deployment
metadata:
  name: old-nginx
spec:
  replicas: 2
  selector:
    matchLabels:
      run: old-nginx
  template:
    metadata:
      labels:
        run: old-nginx
    spec:
      containers:
      - image: registry.cn-hangzhou.aliyuncs.com/acs-sample/old-nginx
        imagePullPolicy: Always
        name: old-nginx
        ports:
        - containerPort: 80
          protocol: TCP
      restartPolicy: Always
---
apiVersion: v1
kind: Service
metadata:
  name: old-nginx
spec:
  ports:
  - port: 80
    protocol: TCP
    targetPort: 80
  selector:
    run: old-nginx
  sessionAffinity: None
  type: ClusterIP
---
apiVersion: networking.k8s.io/v1
kind: Ingress
metadata:
  name: nginx-ingress
  namespace: default
spec:
  ingressClassName: nginx
  rules:
    - host: nginx.ikubernetes.cloud
      http:
        paths:
          - pathType: Prefix
            backend:
              service:
                name: old-nginx
                port:
                  number: 80
            path: /
Ingress 资源创建
apiVersion: v1
kind: Service
metadata:
  name: old-nginx
spec:
  ports:
  - port: 80
    protocol: TCP
    targetPort: 80
  selector:
    # 指向新版本服务。
    run: new-nginx
  sessionAffinity: None
  type: ClusterIP
灰度发布新版本服务
发布一个新版本的Nginx服务并配置路由规则。
apiVersion: apps/v1
kind: Deployment
metadata:
  name: new-nginx
spec:
  replicas: 1
  selector:
    matchLabels:
      run: new-nginx
  template:
    metadata:
      labels:
        run: new-nginx
    spec:
      containers:
      - image: registry.cn-hangzhou.aliyuncs.com/acs-sample/new-nginx
        imagePullPolicy: Always
        name: new-nginx
        ports:
        - containerPort: 80
          protocol: TCP
      restartPolicy: Always
---
apiVersion: v1
kind: Service
metadata:
  name: new-nginx
spec:
  ports:
  - port: 80
    protocol: TCP
    targetPort: 80
  selector:
    run: new-nginx
  sessionAffinity: None
  type: ClusterIP
设置满足特定规则的客户端才能访问新版本服务。以下示例仅请求头中满足foo=bar 的
客户端请求才能路由到新版本服务。
修改如上步骤创建的Ingress。
apiVersion: networking.k8s.io/v1
kind: Ingress
metadata:
  name: gray-release
  namespace: default
  annotations:
    # 请求头中满足正则匹配foo=bar的请求才会被路由到新版本服务new-nginx中。
    nginx.ingress.kubernetes.io/service-match: |
      new-nginx: header("foo", /^bar$/)
spec:
  ingressClassName: nginx
  rules:
    - host: nginx.ikubernetes.cloud
      http:
        paths:
        # 老版本服务
        - path: /
          backend:
            service:
              name: old-nginx
              port:
                number: 80
          pathType: ImplementationSpecific
        # 新版本服务
        - path: /
          backend:
            service:
              name: new-nginx
              port:
                number: 80
          pathType: ImplementationSpecific
测试验证:
执行以下命令,访问当前服务:
curl -H "Host: nginx.ikubernetes.cloud" http://nginx.ikubernetes.cloud执行以下命令,请求头中满足foo=bar 的客户端请求访问服务:
curl -H "Host: nginx.ikubernetes.cloud" -H "foo: bar" http://nginx.ikubernetes.cloud
二、Ingress Nginx 参数调优
主要从 ingress-nginx-controller 资源的 Pod 、ConfigMap 、以及业务的 ingress 规则入手。
1、ingress-nginx-controller Pod
1.1、主容器内核参数优化
# 在 values.yaml 文件中修改 extraInitContainers 添加一个初始化
initContainers 容器
  - name: sysctl
    image: alpine:3.10
    imagePullPolicy: IfNotPresent
    command:
    - sh
    - -c
    - |
        mount -o remount rw /proc/sys
        sysctl -w net.core.somaxconn=65535
        sysctl -w net.ipv4.tcp_tw_reuse=1
        sysctl -w net.ipv4.ip_local_port_range="1024 65535"
        sysctl -w fs.file-max=1048576
        sysctl -w fs.inotify.max_user_instances=16384
        sysctl -w fs.inotify.max_user_watches=524288
        sysctl -w fs.inotify.max_queued_events=16384
    securityContext:
      privileged: true
更新验证:
helm upgrade ingress-nginx -f values.yaml -n ingress-nginx .查看ingress-nginx全局配置参数
kubectl get ds -n ingress-nginx ingress-nginx-controller -o yaml2、ingress-nginx-controller ConfigMap
官方网站:ConfigMap - Ingress-Nginx Controller (kubernetes.github.io)
将下述K/V配置项插入到 ingress-nginx 的 configMap 里的 data 对象下。
# 在 values.yaml 文件中修改 config 添加参数
load-balance: "round_robin"
2.1 优化配置
# 负载工作机制,轮询
load-balance: "round_robin"
# 错误日志等级设置 (debug, info, notice, warn, error, crit, alert, or
emerg)
error-log-level: "notice"
# 启用Gzip资源压缩 (3k以上)
use-gzip: "true"
gzip-level: "2"
gzip-min-length: "3072"
gzip-types: "text/html text/plain text/css text/javascript
application/javascript application/x-javascript application/xml
application/x-httpd-php application/x-font-ttf application/json
image/x-icon image/svg+xml image/avif image/webp font/ttf
font/opentype"
# 不建议进行照片压缩 image/jpeg image/gif image/png 可能反而会增加其体积
# 启用Brotli资源压缩(同等条件下优于Gzip,任选一个)
# 参考: https://kubernetes.github.io/ingress-nginx/user-guide/nginxconfiguration/
configmap/#enable-brotli
enable-brotli: "true"
brotli-level: 5
brotli-types: "text/plain text/css text/javascript
application/javascript application/x-javascript application/xml
application/x-httpd-php application/x-font-ttf image/x-icon
image/svg+xml image/avif image/webp font/ttf font/opentype"
# 不建议进行照片压缩 image/jpeg image/gif image/png 可能反而会增加其体积
# 启用http2支持(实际上默认是开启的,如果过关闭请将其设置为true)
use-http2: "true"
# ssl 会话复用
ssl_session_cache: "shared:SSL:10m;"
ssl-session-timeout: "10m"
# worker 每个工作进程可以打开的最大文件数与同时打开最大连接数设置
# 参考: https://kubernetes.github.io/ingress-nginx/user-guide/nginxconfiguration/
configmap/#max-worker-connections
worker-processes: "auto"
max-worker-open-files: "10240"
max-worker-connections: "32767"
# 连接复用
enable-multi-accept: "true"
# keep-alive 连接超时和最大请求数调整
keep-alive: "75"
keep-alive-requests: "10000"
# 参考: https://kubernetes.github.io/ingress-nginx/user-guide/nginxconfiguration/
configmap/#upstream-keepalive-connections
# upstream-keepalive 与上游Pod连接超时与最大请求数调整
upstream-keepalive-time: "30m"
upstream-keepalive-timeout: "60"
upstream-keepalive-requests: "10000"
upstream-keepalive-connections: "512"
# 参考:https://kubernetes.github.io/ingress-nginx/user-guide/nginxconfiguration/
configmap/#proxy-read-timeout
# 参考:https://kubernetes.github.io/ingress-nginx/user-guide/nginxconfiguration/
configmap/#proxy-send-timeout
# proxy-connect 设置 ingress-nginx 与 upstream pod 之间连接请求超时实践。
# 设置与代理服务器建立连接的超时时间(不能超过75s)
proxy-connect-timeout: "1"
# 设置将请求传输到代理服务器的超时时间(以秒为单位)(超时仅在两个连续的写操作之间设
置,而不是为整个请求的传输设置)
proxy-send-timeout: "3"
# 设置从代理服务器读取响应的超时时间(以秒为单位)
proxy-read-timeout: "3"
ingress-nginx 资源查看
# 查看 Ingress-nginx 全局配置参数:
kubectl get cm -n ingress-nginx ingress-nginx-controller -o yaml
Nginx 全局配置通过 configmap 配置(Nginx Ingress Controller 会 watch 并自动reload 配置)。
2.2 安全配置
ModSecurity (http://modsecurity.org/) 是一个开源的Web Application防火墙, 可以为一组特定的入口位置启用它。
必须首先通过在 ConfigMap 中启用 ModSecurity 来启用 ModSecurity 模块。
建议的配置参考 :https://github.com/SpiderLabs/ModSecurity/blob/v3/master/modsecurity.conf-recommended
# 启用 modsecurity waf模块拦截常规Web攻击
enable-modsecurity: "true"
2.3 分布式跟踪
参考:https://kubernetes.github.io/ingress-nginx/user-guide/third-party-addons/opentracing/
启用 NGINX 服务的请求,通过 OpenTracing 项目进行分布式跟踪。
使用第三方模块 opentracing-contrib/nginx-opentracing(https://github.com/opentracing-contrib/nginx-opentracing) ,NGINX 入口控制器可以配置 NGINX 以启用OpenTracing(http://opentracing.io/) 检测。 默认情况下,此功能处于禁用状态。
用法:
要启用检测,我们必须在配置 ConfigMap 中启用 OpenTracing:
data:
  enable-opentracing: "true"
要为单个 Ingress 启用或禁用检测,请使用 enable-opentracing注解:
kind: Ingress
  metadata:
    annotations:
      nginx.ingress.kubernetes.io/enable-opentracing: "true"
2.4 总结:
- 在 Nginx 中的 upstream 主要是配置均衡池和调度方法.
- 在 Nginx 中的 proxy_pass 主要是配置代理服务器ip或服务器组的名字.
- 常用的压缩算法是 gzip(Ingress-nginx也是默认使用gzip),据说brotli要比gzip高出20%至30%的压缩率。默认的压缩算法是gzip,压缩级别为1,如需要启用brotli,需要配置以下三个参数:
enable-brotli: true 或 false,是否启用brotli压缩算法。
brotli-level: 压缩级别,范围1~11,默认为4,级别越高,越消耗CPU性能。
brotli-types: 由brotli即时压缩的MIME类型。 - 在高并发场景下,我们需配置upstream-keepalive-* 相关参数, 使得 nginx 尽可能快速处理 HTTP 请求(尽量少释放并重建 TCP 连接),同时控制 nginx 内存使用量。
- Ingress nginx 与 upstream pod 建立 TCP 连接并进行通信,其中涉及 3 个超时配置我们需要重点关注。
proxy-read-timeout / proxy-send-timeout: 设置 nginx 与 upstream pod 之间读操作的超时时间,默认设置为 60s,当业务方服务异常导致响应耗时飙涨时,异常请求会长时间夯住 ingress 网关,我们在拉取所有服务正常请求的P99.99 耗时之后,将网关与 upstream pod 之间读写超时均缩短到 3s,使得nginx 可以及时掐断异常请求,避免长时间被夯住。
proxy-connect-timeout: 设置 nginx 与 upstream pod 连接建立的超时时间,默认设置为 5s,由于在 nginx 和业务均在内网同机房通信,我们将此超时时间缩短到 1s。
3、Ingress Rule
描述:通常我们需要为单个业务进行相应调优配置, 此时我们就需要在业务的ingress上做修改。
例如:编辑 java.kubernets.cn 虚拟主机站点的 ingress 规则 ( kubectl edit ingress-n default java-ingress-nginx )
apiVersion: networking.k8s.io/v1
kind: Ingress
metadata:
  annotations:
    # 解决: 413 Request Entity Too Large
    nginx.ingress.kubernetes.io/proxy-body-size: "50m"

    # 解决:后端大文件上传问题
    nginx.ingress.kubernetes.io/client-body-buffer-size: 50m
    nginx.ingress.kubernetes.io/proxy-max-temp-file-size: 100m

    # 解决: 上传文件较慢问题
    nginx.ingress.kubernetes.io/proxy-buffer-size: 50m
    nginx.ingress.kubernetes.io/proxy-buffering: "on"
    nginx.ingress.kubernetes.io/proxy-buffers-number: "4"

    # 解决: 与后端backend超时问题
    nginx.ingress.kubernetes.io/proxy-connect-timeout: 300s
    nginx.ingress.kubernetes.io/proxy-read-timeout: 180s
    nginx.ingress.kubernetes.io/proxy-send-timeout: 180s

    # 解决: 处理Nginx代理转发与后端服务文件上传缓存区设置(原生命令)
    nginx.ingress.kubernetes.io/server-snippet: |
      location ~ /fastfile {
        client_max_body_size 1024m;   # 允许客户端请求的最大单文件字节数,人话:能上传多大文件
        client_body_buffer_size 10m;  # 缓冲区代理缓冲用户端请求的最大字节数,人话:一次能接受多少文件,建议根据带宽上限设置,减少磁盘读写,加快速度
        proxy_connect_timeout 300;    # Nginx与后端代理连接超时时间
        proxy_read_timeout 300;       # 后端服务器响应时间(代理接收超时)时间
        proxy_buffer_size 1024k;      # 设置代理服务器(nginx)保存用户头信息的缓冲区大小
        proxy_buffers 6 500k;             # proxy_buffers缓冲区,网页平均在32k以下的话>,这样设置
        proxy_busy_buffers_size 1024k;    # 高负荷下缓冲大小(proxy_buffers*2)
        proxy_temp_file_write_size 1024k; # 设定缓存文件夹大小,大于这个值将从upstream服务器传输
      }