pyenv install 3.9.13git clone git@gitlab.mobvista.com:QA/xmp-test.gitcd /code/xmp-test --pyenv local 3.9.13# 确认当前版本python --versionpython -m pip install virtualenv #需加路径到path,xx/xx/script,eg:D:\software\pyenv\pyenv-win\versions\3.9.13\Scriptsvirtualenv venv3venv3\Scripts\activate #需激活虚拟环境# -------有更新pull代码执行编译命令即可venv3/bin/python3 setup.py install #如cmd不行可用gitbash窗口执行,windows系统在venv/Scripts/python命令 |
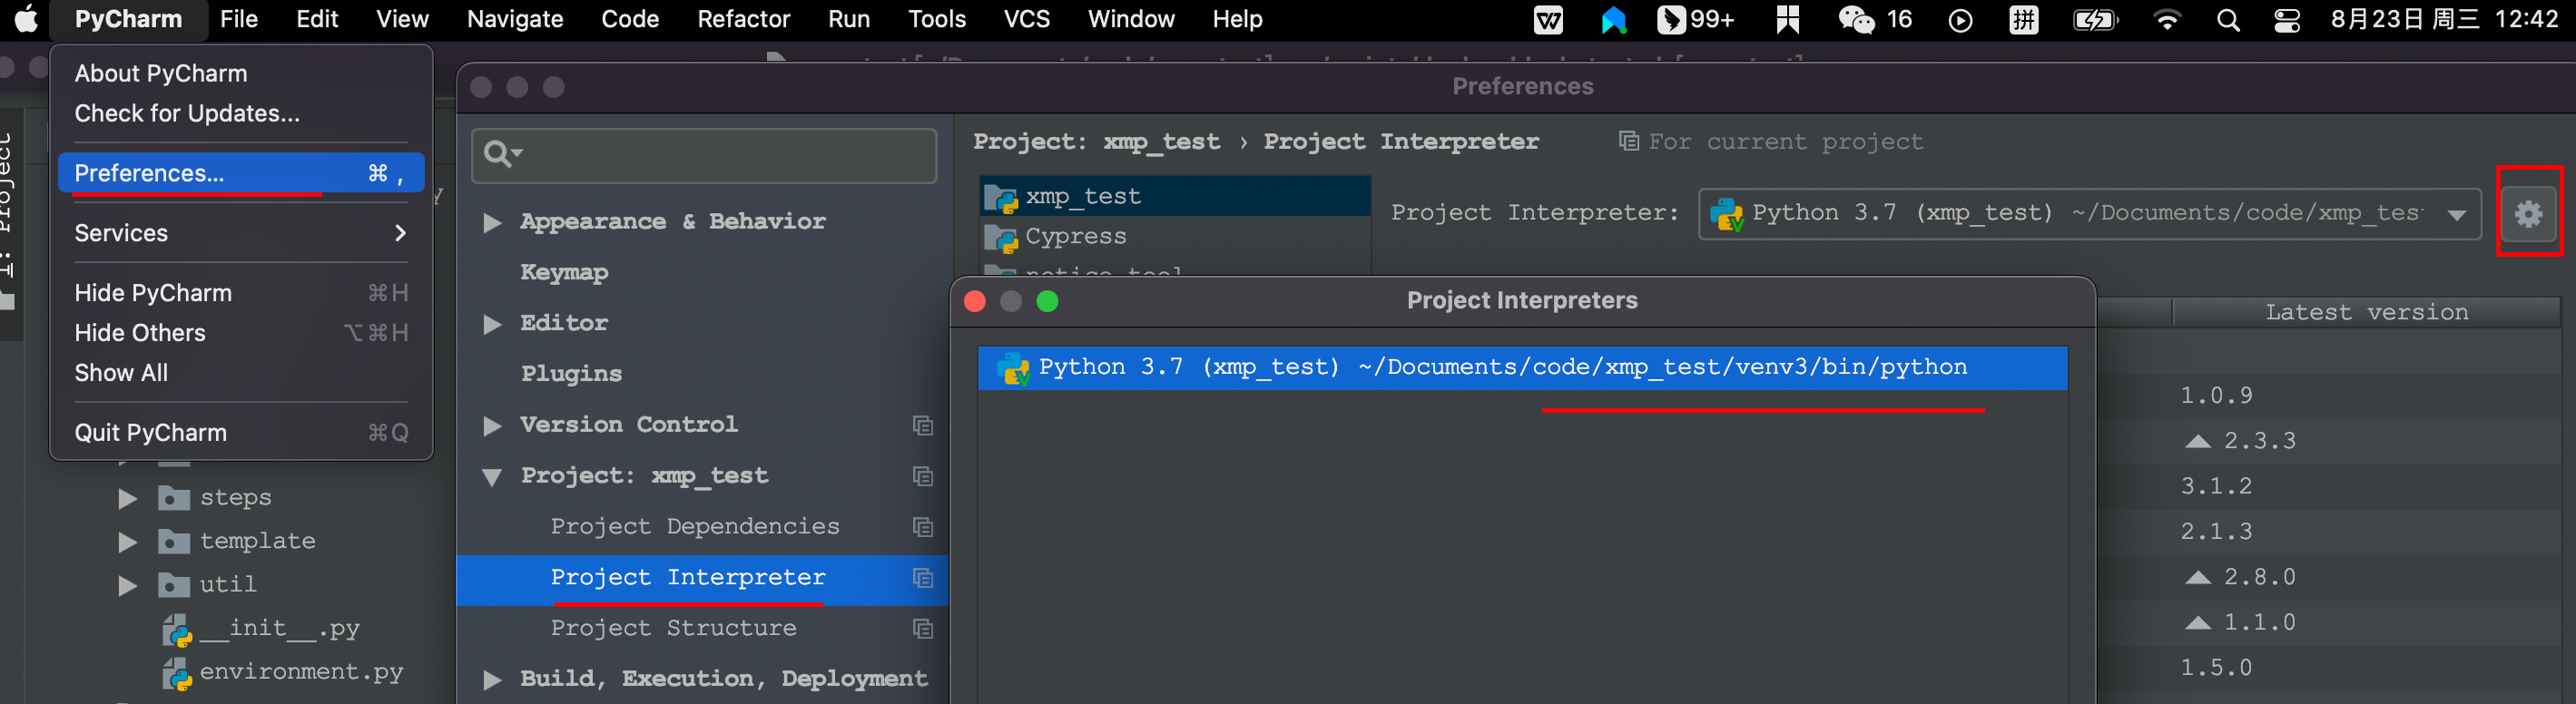
pycharm指向虚拟环境
执行case
pycharm运行
在测试类文件中添加如下代码,右键run/debug即可执行/调试
-m指定标签,精准匹配,支持多个
pytest.main(['-m', 'acc and camp'])
-k指定测试方法或测试类,模糊匹配,可and or链接,如
pytest.main(['-k', 'acc or camp'])
pytest.main并不只是匹配当前测试类文件,而是检索全局执行符合条件的case

命令行运行
进入代码目录
m/k的用法同上
venv3/bin/pytest features/py_case_suite -m "fun1 and finished"
重跑上次失败的case
venv3/bin/pytest --lf
测试报告
如果希望生成测试报告则执行
--report指定文件名,最终生成的文件名会自动加上时间前缀
--template=2就可以生成如图的漂亮报表了
venv3/bin/pytest features/py_case_suite -m "basic" --report=panda.html --title=全量测试 --tester=panda --desc=回归所有case --template=2
执行后在报告在代码的根目录的reports目录下
顶部呈现本次执行的汇总结果
底部可以查看case执行详情