在Cocos Creator游戏开发中,我们经常需要处理事件响应。所以,我们有必要对其中的事件响应内容熟记于心,因此,将其中重要内容归纳如下:
对啦!这里有个游戏开发交流小组里面聚集了一帮热爱学习游戏的零基础小白,也有一些正在从事游戏开发的技术大佬,欢迎你来交流学习。
- 触摸事件
1: 触摸事件类型: START, MOVED, ENDED(物体内), CANCEL(物体外);
2: 监听触摸事件: node.on(类型, callback, target(回掉函数的this), [useCapture]);
3: 关闭触摸事件: node.off(类型, callback, target(回掉函数的this), [useCapture]);
4: 移除所有的注册事件:targetOff (target) ;
5: 回调函数的参数设置 function(e(cc.Touch))
6: cc.Touch: 触摸对象,
常用方法getLocation返回触摸的位置;getDelta返回距离上次的偏移;
7: cc.Event: stopPropagationImmediate/stopPropagation 停止事件的传递;
8: 事件冒泡: 触摸事件支持节点树的事件冒泡,会从当前节点往上一层一层的向父节点传送;
如下案例,物体跟随手指触摸移动实现:
GameMgr.ts代码如下:
const {ccclass, property} = cc._decorator;
@ccclass
export default class GameMgr extends cc.Component {
@property({type:cc.Node, tooltip:"要控制的主角节点",})
player : cc.Node = null;
onLoad () {
// 触摸到哪红色块就到哪
this.node.on(cc.Node.EventType.TOUCH_START, function(e : cc.Touch){
let worldPos : cc.Vec2 = e.getLocation();
let localPos : cc.Vec2 = this.node.convertToNodeSpaceAR(worldPos);
this.player.setPosition(localPos);
}, this);
// 红色块随着触摸移动
this.node.on(cc.Node.EventType.TOUCH_MOVE, (e : cc.Touch)=>{
let pos : cc.Vec2 = this.player.getPosition();
this.player.setPosition(pos.add(e.getDelta()));
}, this);
this.node.on(cc.Node.EventType.TOUCH_CANCEL, this.onTouchCancel, this);
this.node.on(cc.Node.EventType.TOUCH_CANCEL, this.onTouchEnd, this);
}
private onTouchCancel() : void{
console.log("在节点之外释放鼠标!");
}
private onTouchEnd(e : cc.Touch) : void{
console.log("在节点之内释放鼠标");
}
onDestroy(){
this.node.off(cc.Node.EventType.TOUCH_CANCEL, this.onTouchCancel, this);
this.node.off(cc.Node.EventType.TOUCH_END, this.onTouchEnd, this);
}
}
- 键盘事件
1:cc.SystemEvent.on(type, function, target, useCapture);
type: cc.SystemEvent.EventType.KEY_DOWN 按键按下;
cc.SystemEvent.EventType.KEY_UP 按键弹起;
2: cc.SystemEvent.on(type, function, target, useCapture);
3: 监听的时候,我们需要一个cc.SystemEvent类的实例,我们有一个全局的实例cc.systemEvent,小写开头
3: 键盘回调函数: function(event) {
event.keyCode [cc.KEY.left, ...cc.KEY.xxxx]
案例:按上下左右键,控制红色块的运动。
新建PlayerCtrl.ts,挂载到Red节点上。代码如下:
const {ccclass, property} = cc._decorator;
@ccclass
export default class PlayerCtrl extends cc.Component {
start () {
// 按键按下时调用
cc.systemEvent.on(cc.SystemEvent.EventType.KEY_DOWN, this.onKeyDown, this);
// 按键释放时才调用
cc.systemEvent.on(cc.SystemEvent.EventType.KEY_UP, this.onKeyUp, this);
}
private onKeyDown(e : any){
switch(e.keyCode){
case cc.macro.KEY.up : this.node.y += 100; break;
case cc.macro.KEY.down : this.node.y -= 100; break;
}
}
private onKeyUp(e : any){
switch(e.keyCode){
case cc.macro.KEY.left : this.node.x -= 100; break;
case cc.macro.KEY.right : this.node.x += 100; break;
}
}
}
- 自定义事件
1: 监听: this.node.on(“自定义事件名称”, function, target, useCapture);
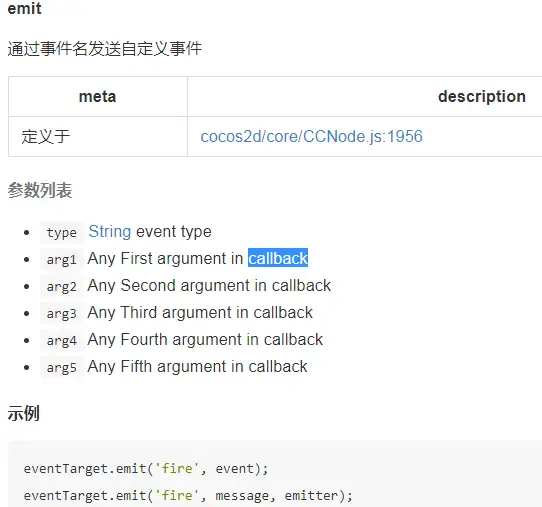
2: 自派送: emit(“事件名称”, [detail]); 只有自己能够收到;
3: 冒泡派送: dispatchEvent(new cc.Event.EventCustom(“name”, 是否冒泡传递));
- 自派送emit
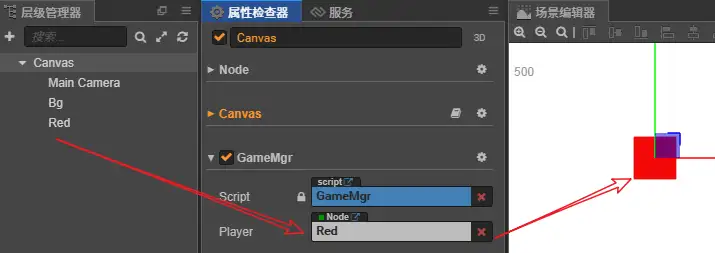
新建单色节点Blue,创建CustomEventTest.ts挂载到此节点上。
const {ccclass, property} = cc._decorator;
@ccclass
export default class CustomEventTest extends cc.Component {
onLoad () {
// 事件接收处理
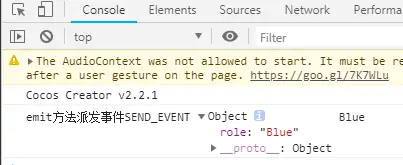
this.node.on("SEND_EVENT", (e)=>{
console.log("emit方法派发事件SEND_EVENT", e, e.role);
}, this);
this.node.emit("SEND_EVENT", {role: this.node.name});
}
}
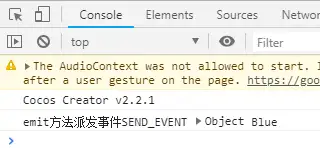
运行结果如下:
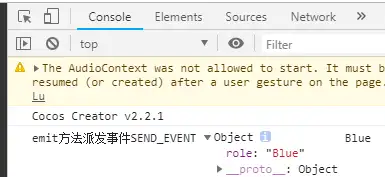
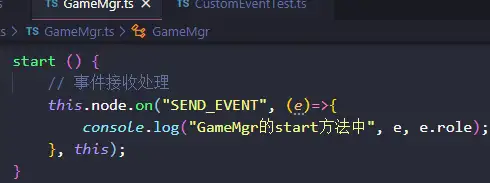
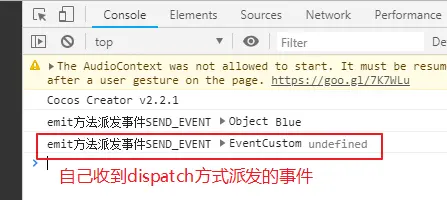
注意:此时,如果我们要在其父节点Canvas节点下也能接收到此SEND_EVENT事件,我们会设想,在GameMgr.ts中增加如下代码,但是事实上,运行后,GameMgr.ts的如下代码没有接收到派发事件。
运行结果如下(说明依然只有Blue自己这个节点接收到了emit派发的事件SEND_EVENT):
说明:如果派送的事件不只是发给自己,需要向上传递,则需要使用dispatchEvent。
- 冒泡派送dispatchEvent
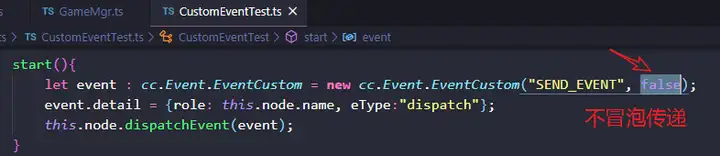
在CustomEventTest.ts中增加start方法如下:
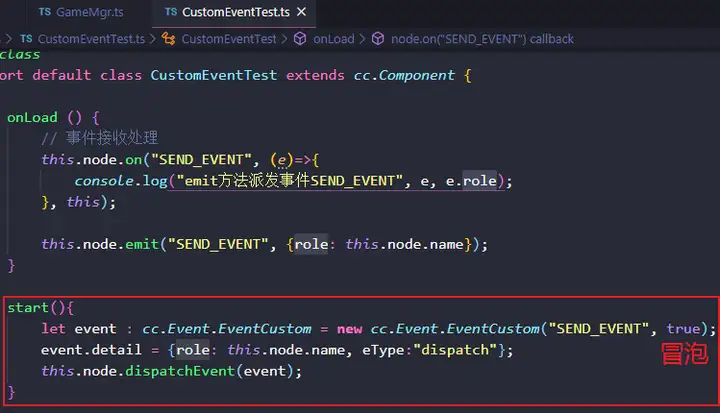
同时将GameMgr.ts中的方法略作修改如下:
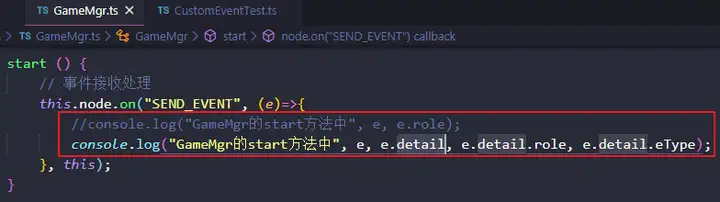
然后,运行结果如下:
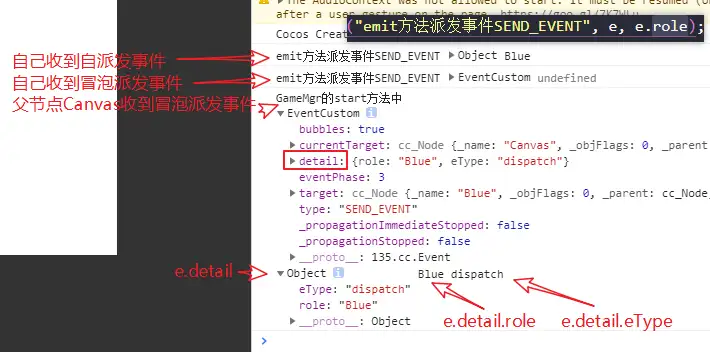
注意:若将CustomEventTest.ts中的事件冒泡属性改为false,如下,表示不冒泡传递,则其父节点Canvas将收不到派发的事件。
若将CustomEventTest.ts中的将start方法注释掉,则运行结果如下: