opencv是一个很强大的图像工具,经常被用来做图像工作,今天分享一个opencv画二维图像的工具方法
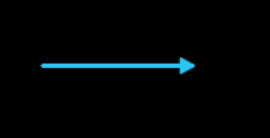
opencv画箭头很简单,只要调用arrowedLine方法并设置相应参数就行,但是出来的效果确是这样的,如下图,这个箭头是空心的,我如果想要实心的箭头怎么办,对不起arrowedLine方法不支持,它是由线段组成的箭头。

我们可以把原来arrowedLine的箭头设置为0,将线段的终点放置一个三角形,这样就变成实心的箭头了,不多说了,贴下代码
import cv2
import numpy as np
from PIL import Image
# 创建一个带有 alpha 通道的图像
img = np.zeros((512, 512, 3), np.uint8)


# 定义箭头的起点和终点坐标
start_point = (100, 100)
end_point = (200, 100)

# 定义箭头的颜色和粗细
color = (245, 198, 42)
thickness = 2
cv2.arrowedLine(img, start_point, end_point, color, thickness,tipLength=0.1)
triangle_end_point = (int(end_point[0]*1.006), int(end_point[1]*1.006))

# triangle_end_point = end_point
# 计算箭头的长度和方向
arrow_length = int(512/50)
angle = np.arctan2(triangle_end_point[1] - start_point[1], triangle_end_point[0] - start_point[0])

# 计算箭头的两个侧边点
arrow_tip1 = (triangle_end_point[0] - arrow_length * np.cos(angle - np.pi / 6), triangle_end_point[1] - arrow_length * np.sin(angle - np.pi / 6))
arrow_tip2 = (triangle_end_point[0] - arrow_length * np.cos(angle + np.pi / 6), triangle_end_point[1] - arrow_length * np.sin(angle + np.pi / 6))

# 创建一个封闭多边形作为箭头头部
arrow_pts = np.array([triangle_end_point, arrow_tip1, arrow_tip2], np.int32)
arrow_pts = arrow_pts.reshape((-1, 1, 2))

# 使用 cv2.fillPoly 绘制实心箭头
cv2.fillPoly(img, [arrow_pts], color,lineType = cv2.LINE_AA)

# 显示图像
cv2.imshow('Arrow with Antialiasing', img)
cv2.waitKey(0)
cv2.destroyAllWindows()

箭头的长度可以根据图像的分辨率大小设置,箭头的角度可以修改两个侧边点的比例设置,我在三角形的顶点triangle_end_point 坐标设置的长了一点点,不然线段的小角角会露出来,本来想设置短一点的,但是arrowedLine终点只能输入整数,稍微的偏差就会让直线不那么直
,而箭头比较短,多这一两个像素也看不出来。方法里的其他参数可以自己百度下作用,这里就不多说了。
至于为什么有空心的的箭头了还要用实心的,你可以问下**产品经理