Vue 搭配 Spring MVC 创建一个 web 项目
想要写一个登录的web应用程序。页面使用Vue,后端使用Spring MVC,最终打成war包,放在tomcat下启动。
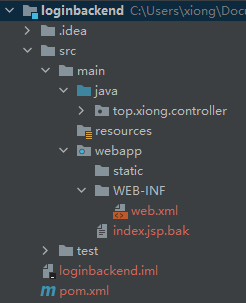
1.创建Spring MVC项目,命名loginbackend,配置成web项目。
- 创建好web项目后,在
src/main目录下创建webapp目录用来存放静态文件和web配置。(可以用idea开发工具直接配置成web项目,但是idea配置出来的webRoot目录不在src/main下边,我们自己新建webapp目录,配置成webRoot),目录结构如下图:
-
pom文件中配置打包方式为
war包,引入spring-webmvc依赖。pom如下:<?xml version="1.0" encoding="UTF-8"?> <project xmlns="http://maven.apache.org/POM/4.0.0" xmlns:xsi="http://www.w3.org/2001/XMLSchema-instance" xsi:schemaLocation="http://maven.apache.org/POM/4.0.0 http://maven.apache.org/xsd/maven-4.0.0.xsd"> <modelVersion>4.0.0</modelVersion> <groupId>top.xiong</groupId> <artifactId>loginbackend</artifactId> <version>1.0-SNAPSHOT</version> <properties> <maven.compiler.source>8</maven.compiler.source> <maven.compiler.target>8</maven.compiler.target> </properties> <packaging>war</packaging> <dependencies> <dependency> <groupId>org.springframework</groupId> <artifactId>spring-webmvc</artifactId> <version>5.3.14</version> </dependency> </dependencies> </project>
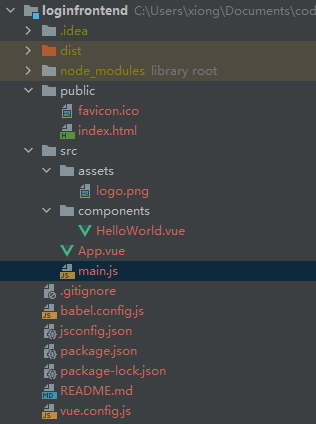
2.创建Vue工程,命名loginfrontend。
-
用Vue CLI工具创建工程。创建好后工作目录如下:
执行
npm install安装依赖包,执行npm run build编译项目,编译好后会在项目根目录下生成dist文件夹,dist文件夹里的内容就是前端的执行文件。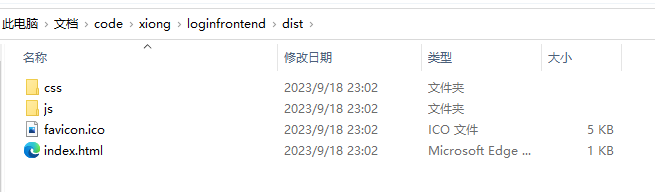
3.将loginfrontend与loginbackend工程结合,打成war包。
要把loginfrontend和loginbackend打成一个war包,需要在打包的收把 loginfrontend 工程 dist 下的文件copy到 loginbackend 打包目录的 webapp/static 下,在打成 war 包,这样前后端的工程就在一起了。
3.1 修改web.xml改变默认页面
<?xml version="1.0" encoding="UTF-8"?>
<web-app xmlns="https://jakarta.ee/xml/ns/jakartaee"
         xmlns:xsi="http://www.w3.org/2001/XMLSchema-instance"
         xsi:schemaLocation="https://jakarta.ee/xml/ns/jakartaee https://jakarta.ee/xml/ns/jakartaee/web-app_5_0.xsd"
         version="5.0">
    <welcome-file-list>
        <welcome-file>/static/index.html</welcome-file>
    </welcome-file-list>
</web-app>
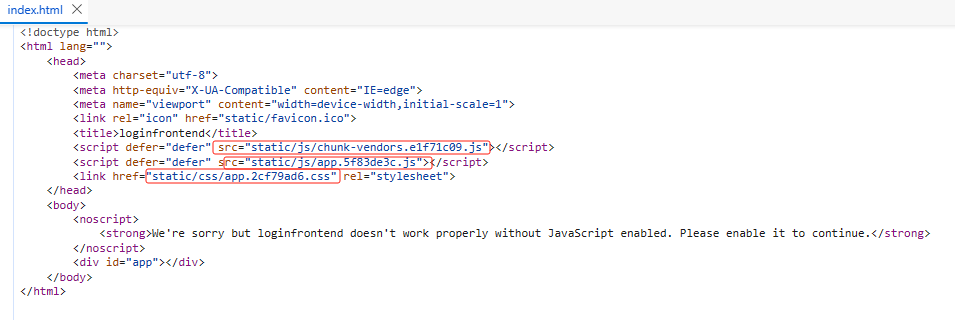
3.2 修改loginfrontend工程编译后默认引用文件路径
前端工程执行npm run build后编译出来的index.html中引用的js文件和css文件的目录是从dist目录下开始的,dist相当于工程的根目录,但是我们是把dist下的文件到copy到了后端工程static目录下的。工程启动后,index.html中引用的js和css资源文件的路径变成了ContextRoot/static/js、ContextRoot/static/css目录,所以要修改前端工程编译后的引用资源路径,修改方法为,在vue.config.js中加入publicPath:'static/配置:
const { defineConfig } = require('@vue/cli-service')
module.exports = defineConfig({
  transpileDependencies: true,
  publicPath: 'static/'
})
这样编译后的index.html中js和css的引用路径就成了static/js/**.js、static/css/**.css。
3.3 修改pom文件,使用插件将前端代码copy到后端打包目录下。
pom中加入build插件,如下;
    <build>
        <plugins>
            <plugin>
                <groupId>org.apache.maven.plugins</groupId>
                <artifactId>maven-resources-plugin</artifactId>
                <version>3.2.0</version>
                <executions>
                    <execution>
                        <id>copy-dist</id>
                        <phase>compile</phase>
                        <goals>
                            <goal>copy-resources</goal>
                        </goals>
                        <configuration>
                            <outputDirectory>${project.build.directory}/${project.artifactId}-${project.version}/static</outputDirectory>
                            <resources>
                                <resource>
                                    <directory>${project.basedir}/../loginfrontend/dist</directory>
                                </resource>
                            </resources>
                        </configuration>
                    </execution>
                </executions>
            </plugin>
            <plugin>
                <!-- 打war包插件,不用这个会报错,不知道为啥 -->
                <groupId>org.apache.maven.plugins</groupId>
                <artifactId>maven-war-plugin</artifactId>
                <version>3.3.1</version>
            </plugin>
        </plugins>
    </build>
3.4tomcat启动工程
将war包放到tomcat的webapps目录下,在tomcat的bin目录下启动startup.bat脚本,tomcat会自动将war包解压。
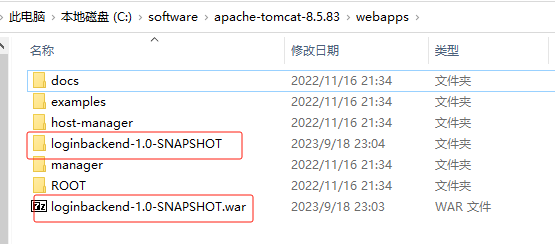
因为我们没有修改tomcat的任何配置,所以 Application Context 就是 war 包解压后的目录名,所以我们的访问rul就是http://localhost:8080/loginbackend-1.0-SNAPSHOT。浏览器访问试一下
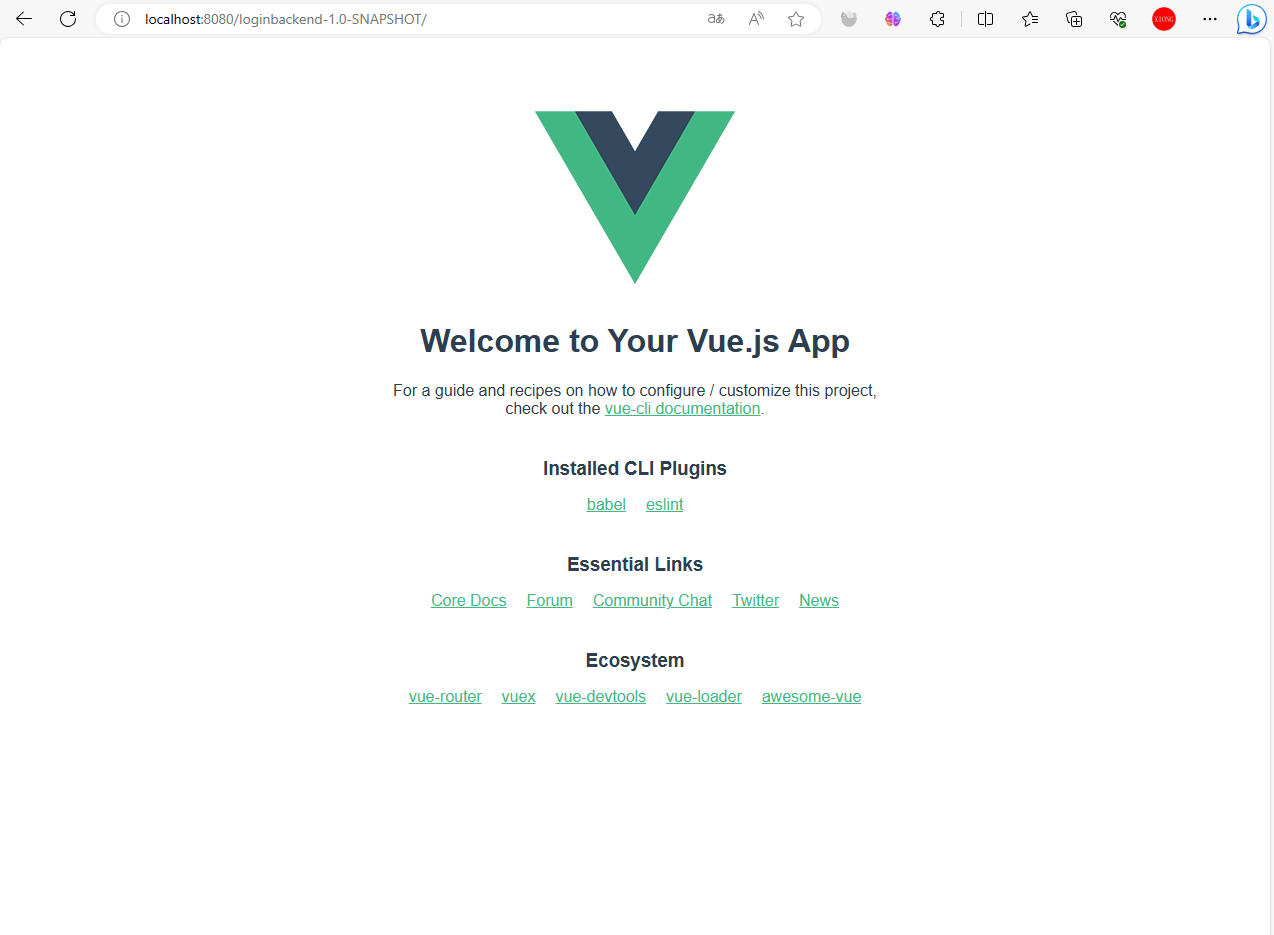
因为我们没有写任何的代码,所以页面展示的就是 vue 的默认页面。
至此,vue 和 Spring MVC 结合的框架就搭好了,可以愉快的敲代码了。