先看效果图


微信小程序的原有设置,有些特殊需求是不够用的。比如添加事件或者展示动态数据,类似“请选择小区”和“消息(3)”。
这时候我们就可以自定义导航栏了。
具体的原理就不啰嗦了,直接看代码。
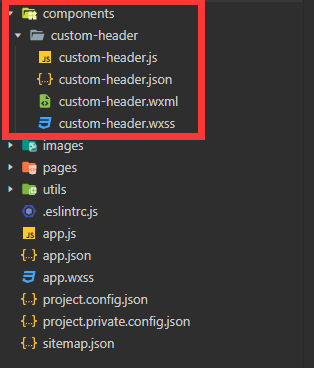
在组件文件夹(components)中新建一个custom-header组件
首页在app.js中,获取设备和胶囊信息:
// app.js
App({
  onLaunch() {
    wx.getSystemInfo({
        success: res => {
          this.system = res
        }
      })
      //获取胶囊信息
      this.menu = wx.getMenuButtonBoundingClientRect()
      //打印数据
      // console.log('系统信息', this.system)
      // console.log('胶囊信息', this.menu)
  }
})
然后在组件js文件里面,通过对设备和胶囊信息的处理,得到最终导航栏与胶囊等高的数据:
// components/custom-header/custom-header.js
const app = getApp()

Component({
  /**
   * 组件的属性列表
   */
  properties: {
    // 导航栏文字
    title: {
      type: String,
      value: ''
    },
    //导航栏图片
    imgUrl: {
        type: String,
        value: ''
    }
  },
  /**
   * 组件的初始数据
   */
  data: {
    s: app.system.statusBarHeight, //状态栏高度
    n: (app.menu.top - app.system.statusBarHeight) * 2 + app.menu.height, //导航栏高度
    h: app.menu.height //胶囊高度
  },

  /**
   * 组件的方法列表
   */
  methods: {
    // 导航栏文字的点击事件
    title(){
        wx.navigateTo({
          url: '/pages/switchXQ/switchXQ',
        })
    }
  }
})
随后就是组件的wxml文件了:
<!--components/custom-header/custom-header.wxml-->
<view class="nav_box>
  <view style='height:{{s}}px' />
  <view class='navBar' style='height:{{n}}px'>
    <view class='content' style='height:{{h}}px'>
     <!-- 自定义图标 -->
      <image wx:if="{{imgUrl}}" src="{{imgUrl}}" style="height:{{h/1.9}}px;padding-right: 5px;" mode="heightFix"></image>
      <view bindtap="title">{{title}}</view>
    </view>
  </view>
</view>
<view style='height:{{s+n}}px' /> <!-- 注:占位用 -->
wxss文件:
/* components/custom-header/custom-header.wxss */
.nav_box {
  position: fixed;
  width: 100%;
  font-size: 15px;
  z-index: 1000;
}

.navBar {
  display: flex;
  align-items: center;
  padding: 0 10px;
}

.content {
  width: 100%;
  display: flex;
  align-items: center;
}
倒数第二步就是在你组件使用页面的json里面添加如下代码:
{
  "navigationStyle": "custom", //设置自定义导航
  "usingComponents": {
    "navBar": "/components/custom-header/custom-header" //自己的路径
  }
}
最后在wxml文件加一行代码:
<custom-header title="请选择小区" imgUrl="/images/leftTop.png"></custom-header>
这里的title和imgUrl就是在组件的js文件中properties约定好的,在组件的wxml文件也可以直接使用,例如:
<view bindtap="title">{{title}}</view>
使用bindtap绑定事件之后,在组件的js文件里面就可以编写具体的方法了!
ps:微信小程序的组件和vue一样,也有自己的生命周期,组件和页面之间也有具体的生命周期关系。