保存深度值——小端序,位数,Android
accuireDepthImage
华为Mate Pro系列基本上前置摄像头都是有tof的,也就是能够得到场景的深度信息,在华为的AR engine里提供了一个方法可以读取场景的深度值。
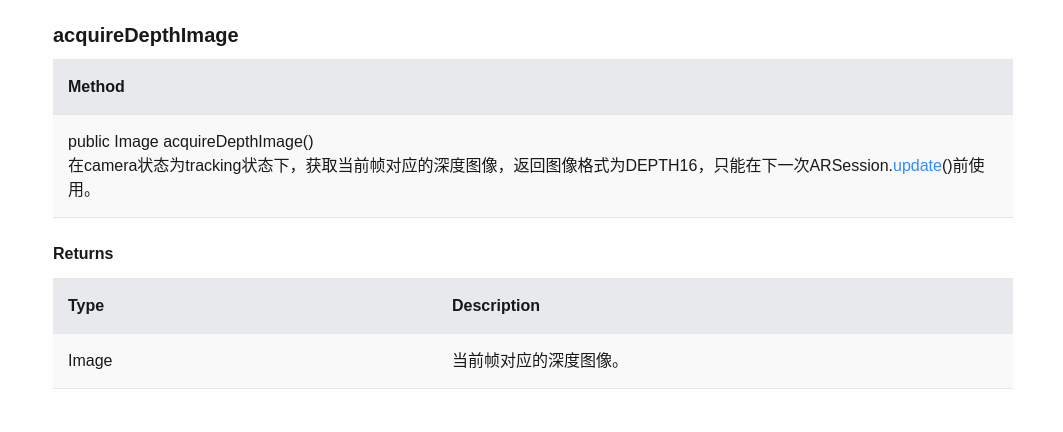
不过其官方文档里对这个方法的介绍很少,寥寥数语,前期也在这里踩了一些坑。Google的AR core对这个深度值做了详细的介绍:
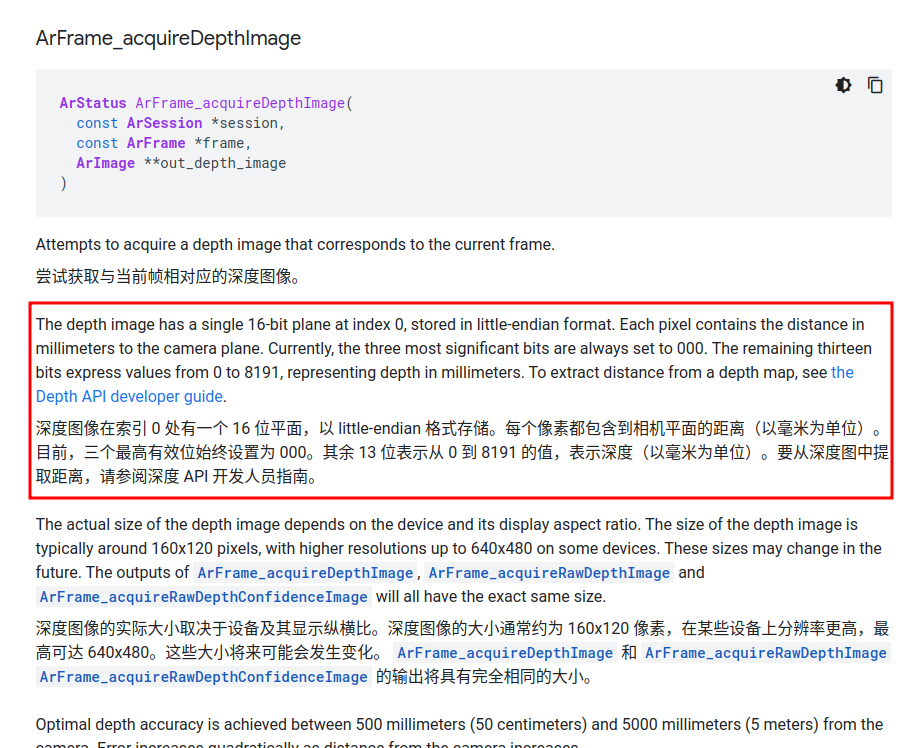
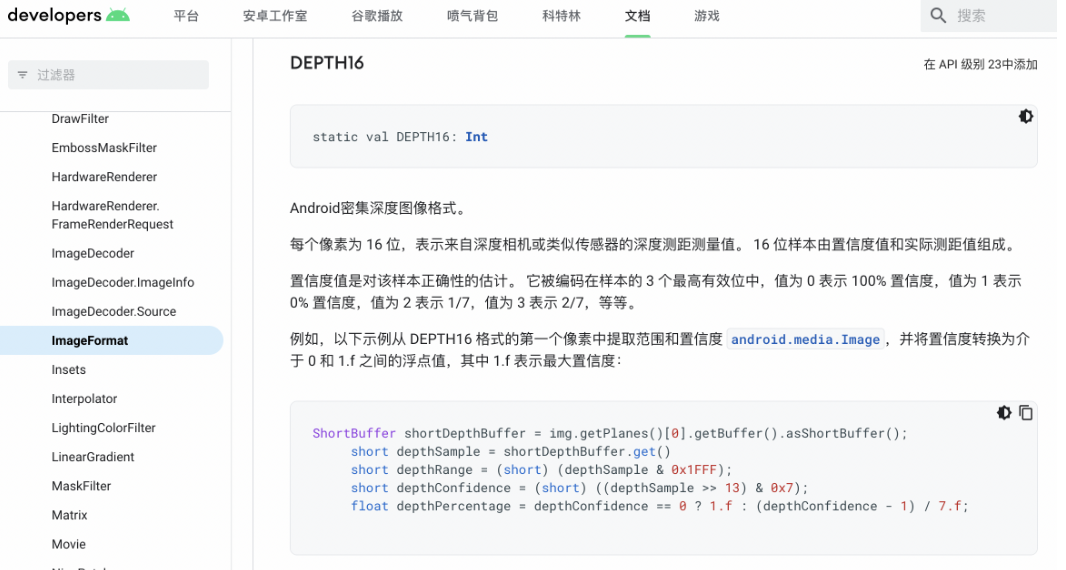
得到的深度图是16位的,其中高3位是置信度,低13位是采样得到的深度值,并且排列顺序是小端序。第一张图说设高3位为0,但是我看了一下,其实是第二种情况。
知道这个信息之后,我们便可以使用如下代码保存深度值(二进制文件):
Image depthImage = arFrame.acquireDepthImage();
File f = new File(dir, numFrameStr + "_depth16.bin");

if(depthImage.getFormat() != ImageFormat.DEPTH16)
    throw new RuntimeException("Expected image format is DEPTH16, but is:"+depthImage.getFormat());

ByteBuffer buffer = depthImage.getPlanes()[0].getBuffer();
try {
    FileChannel fc = new FileOutputStream(f).getChannel();
    fc.write(buffer);
    fc.close();
} catch (IOException e) {
    e.printStackTrace();
    Log.i(TAG, "Error writing image depth16: " +f.getPath());
}
将二进制文件打开看一下:
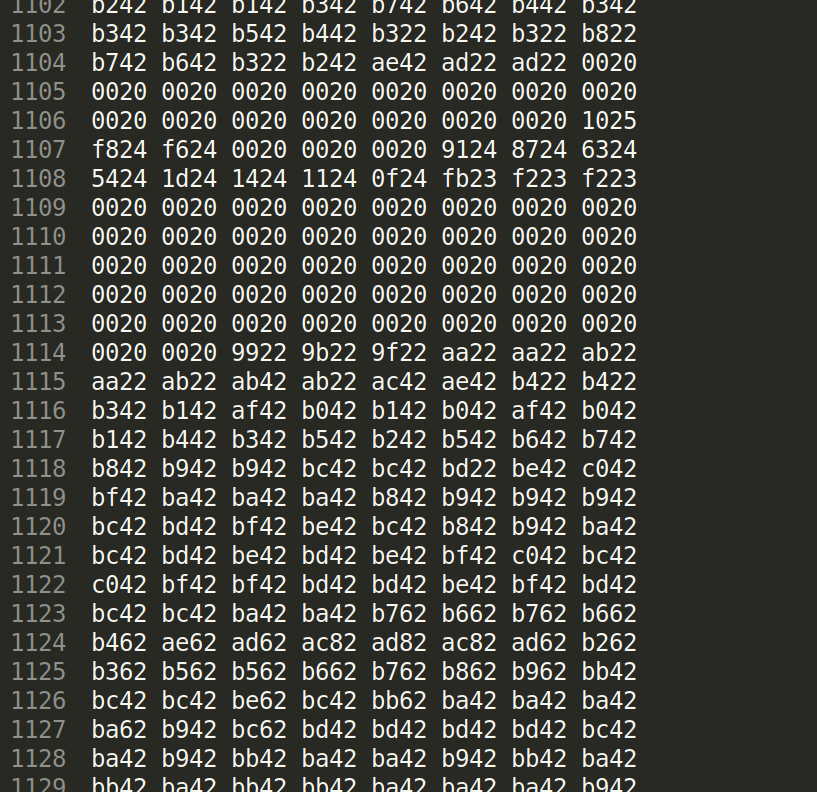
文件是以16进制保存的,所以每四个数字代表一个深度值。取0x0020,0x2242转化为十进制的深度值看一下。
| 16进制 | 0x0020 | 0x2242 | 0xba42 |
| 二进制 | 0000 0000 0010 0000 | 0010 0010 0100 0010 | 1011 1010 0100 0010 |
| 由于是小端序,将高位字节拿到前面 | 0010 0000 0000 0000 | 0100 0010 0010 0010 | 0100 0010 1011 1010 |
| 将高三位的置信度设为0 | 0000 0000 0000 0000 | 0000 0010 0010 0010 | 0000 0010 1011 1010 |
| 十进制 | 0mm | 546mm | 698mm |
最后我们将这个二进制文件转化为格式为CU_16的灰度图看一下:

效果还不错。
depthImag保存为图像
前面的保存的二进制文件是保存了置信度信息的,如果想要保存深度图就需要把高3位置信度信息设为0,才能保存。代码如下:
Image depthImg = arFrame.acquireDepthImage();
int width = depthImg.getWidth();
int height = depthImg.getHeight();

//ShortBuffer shortBuffer = depthImg.getPlanes()[0].getBuffer().asShortBuffer();
ShortBuffer shortBuffer = depthImg.getPlanes()[0].getBuffer().order(ByteOrder.LITTLE_ENDIAN).asShortBuffer();
Bitmap disBitmap = Bitmap.createBitmap(width, height, Bitmap.Config.ARGB_8888);
for (int i = 0; i < height; i++) {
    for (int j = 0; j < width; j++) {
        int index = (i * width + j);
        shortBuffer.position(index);
        short depthSample = shortBuffer.get();
        // 获取深度值后13位
        short depthRange = (short) (depthSample & 0x1FFF);

        // 拆分short数据成两个8位数据
        int highByte = (depthRange & 0xFF00) >> 8;  // 获取高8位
        int lowByte = depthRange & 0x00FF;  // 获取低8位
        disBitmap.setPixel(j, i, Color.argb(255 , highByte, lowByte, 0));
    }
}
try {
        FileOutputStream out = new FileOutputStream(file);
        disBitmap.compress(Bitmap.CompressFormat.PNG, 100, out);
        out.flush();
        out.close();
        //GLES20.glClear(GLES20.GL_DEPTH_BUFFER_BIT);
    } catch (Exception e) {
        e.printStackTrace();
    }
恢复深度值的时候就可以读出R通道的值,然后左移八位(乘256),再加上G通道的值。
注意这里有一个非常隐晦的BUG,就是如果使用的是第5行被注释的代码保存ShortBuffer,得到的将是大端序的值,现在一般的机器都是小端序列,如果使用大端序这将会导致一些错误。
可以看到小端法使用的是
ShortBuffer shortBuffer = depthImg.getPlanes()[0].getBuffer().order(ByteOrder.LITTLE_ENDIAN).asShortBuffer();:其值是准确的,而使用
ShortBuffer shortBuffer = depthImg.getPlanes()[0].getBuffer().asShortBuffer();得到了错误的结果。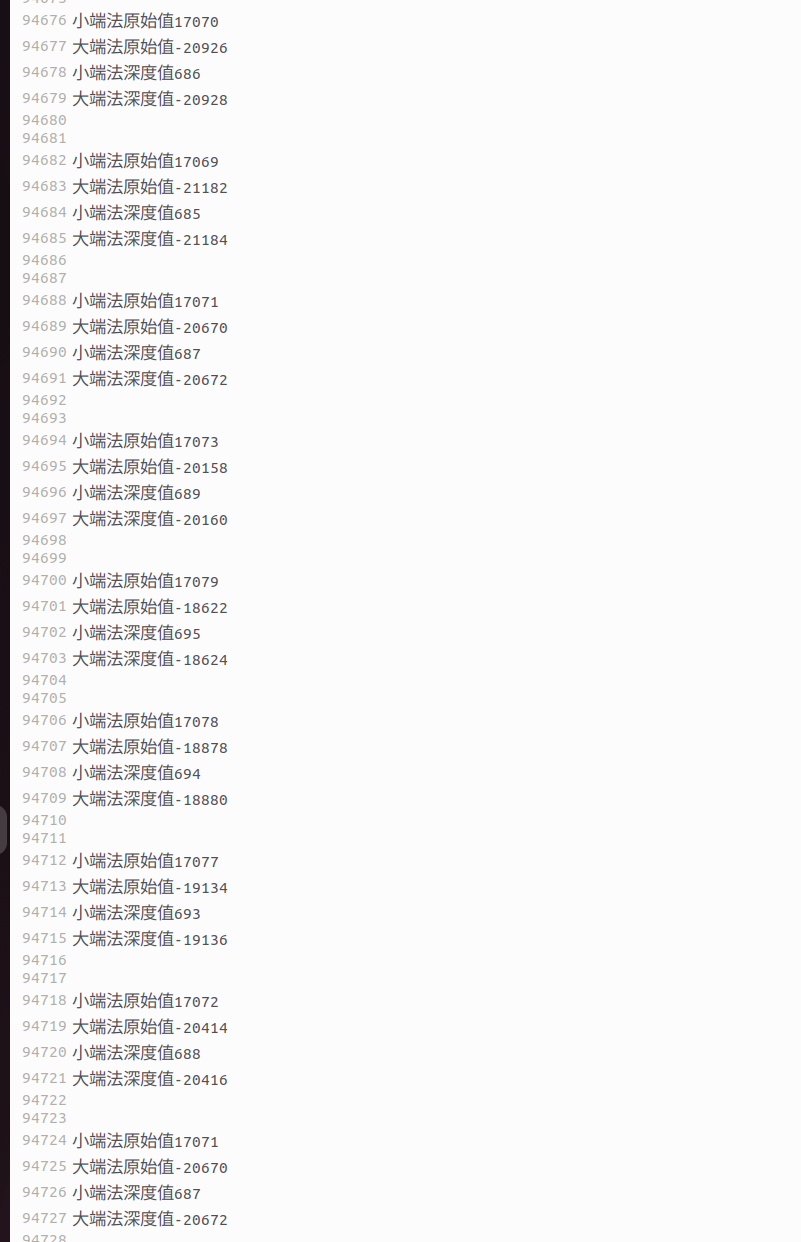
有些遗憾的是,我发现论坛里HMS 小助手提供的代码是有问题的:
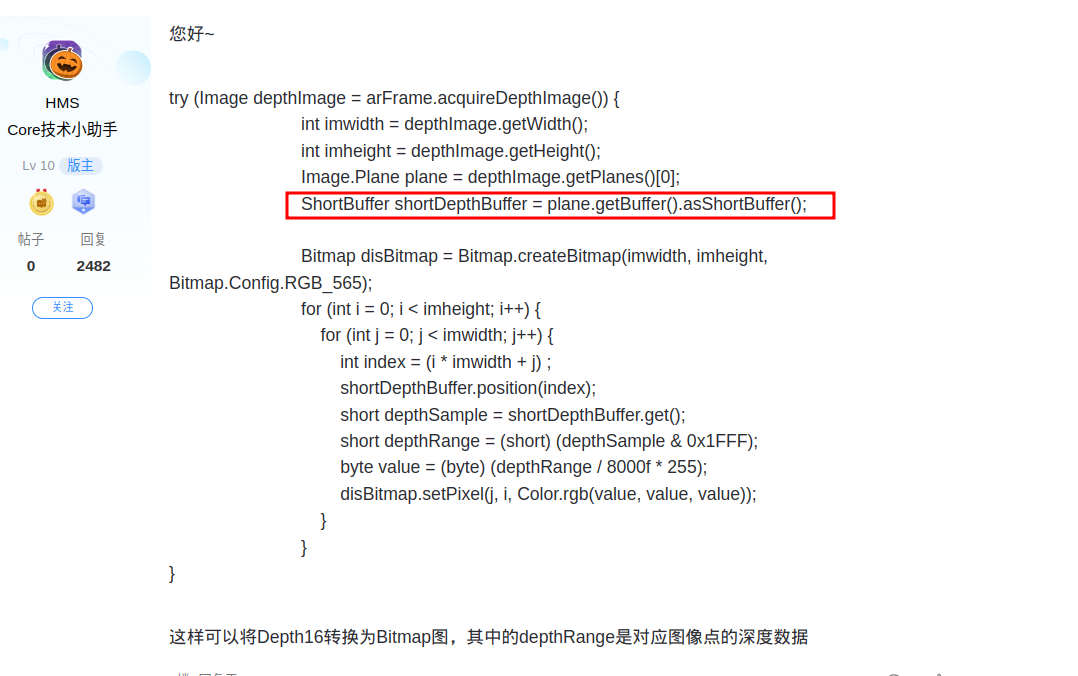
这里应该使用
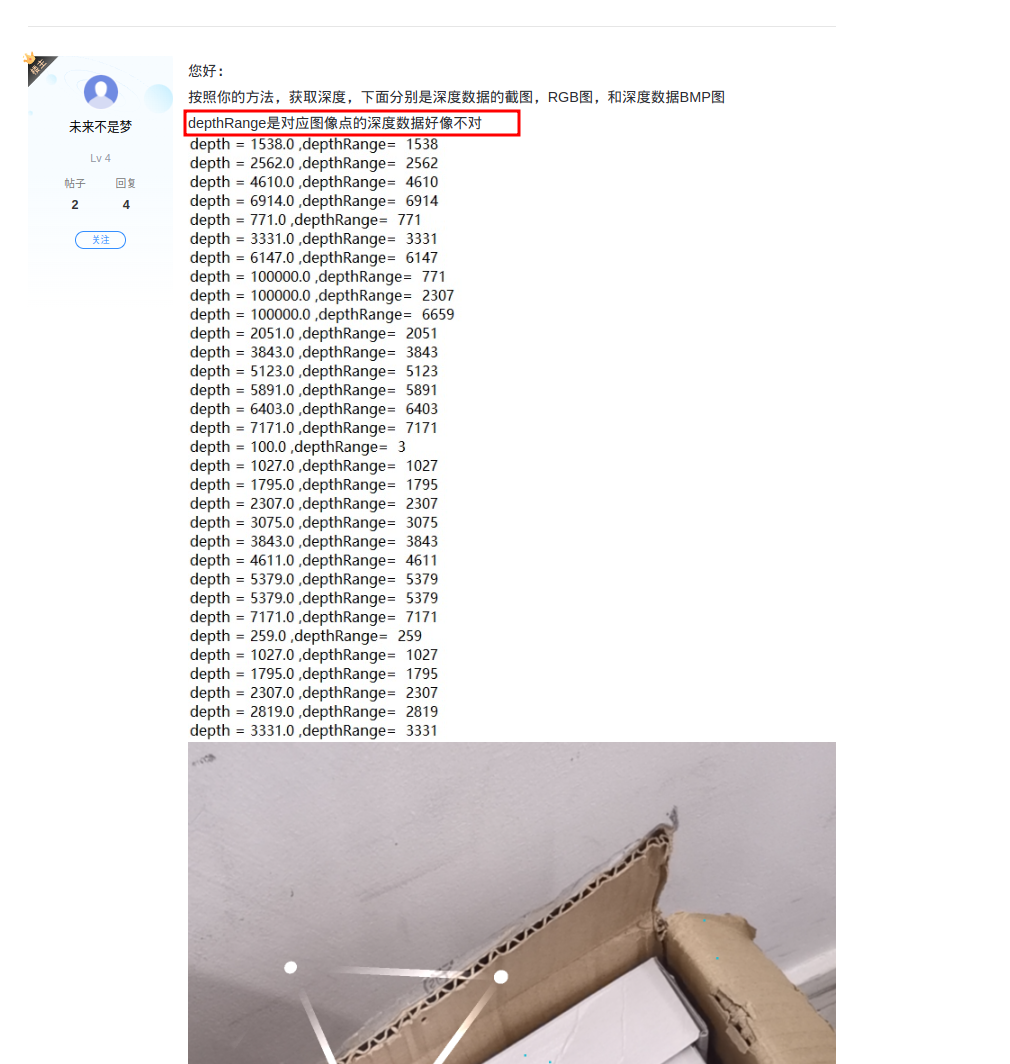
ShortBuffer shortDepthBuffer = plane.getBuffer().order(ByteOrder.LITTLE_ENDIAN).asShortBuffer();论坛里这个朋友也遇到了类似的问题:
最后建议在java中配置一下opencv直接保存为16位灰度图(推荐):
public static void writeDepth16binInPng16GrayscaleTum(String bin, int width, int height, String png) throws IOException {
    byte[] bytes = Files.readAllBytes(Paths.get(bin));
    ByteBuffer buffer = ByteBuffer.wrap(bytes);
    buffer = buffer.order(ByteOrder.LITTLE_ENDIAN);
    ShortBuffer sBuffer = buffer.asShortBuffer();
    short[] depthTum = new short[width*height];

    Mat mat = Mat.eye(height, width, CvType.CV_16UC1); //max is 65536 == 65meters / 16 bits = 2 bytes

    int i=0;
    for (int h = 0; h < height; h++) {
        for (int w = 0; w < width; w++) {
            short depthSample = sBuffer.get(); //depth16[y*width + x];
            short depthMm = (short) (depthSample & 0x1FFF);
//                short depthConfidence = (short) ((depthSample >> 13) & 0x7);
            depthTum[h*width+w] = (short)(depthMm * 5); //tum rgbd is 5==1mm / 5000==1m
        }
    }

    mat.put(0, 0, depthTum);
    Imgcodecs.imwrite(png, mat);
    //buffer.clear();
}
code
read_bin.cpp
//
// Created by xin on 23-11-15.
//
#include <iostream>
#include <opencv2/opencv.hpp>
#include <fstream>
#include <vector>


int main() {
    // 文件路径
    std::string file_path = "/home/xin/Code/CLionProjects/depth_image/img/another/0_depth16.bin";

    std::ifstream file(file_path, std::ios::binary);
    if (!file.is_open()) {
        std::cerr << "Failed to open the file." << std::endl;
        return 1;
    }

    // 读取文件内容到 vector
    std::vector<uint16_t> depth_values;
    uint16_t value;

    while (file.read(reinterpret_cast<char*>(&value), sizeof(value))) {
        value = value & uint16_t(0x1FFF); // 这个是真实的深度值
        value *= 5; // 为了更好的可视化,使得灰度图更亮一些
        depth_values.push_back(value);
    }

    file.close();

    cv::Mat depth_image(180, 240, CV_16UC1);
    // 将 depth_values 复制到 depth_image 中
    std::memcpy(depth_image.data, depth_values.data(), depth_values.size() * sizeof(uint16_t));

    cv::imwrite("DepthImage.png", depth_image);
    cv::waitKey(0);

    return 0;
}