1.gitee仓库地址(克隆到本地)
地址:https://gitee.com/xuxueli0323/xxl-job
2.项目结构

3.部署xxl-job-admin
切换到2.4.0分支
3.1修改数据库连接mysql8(默认)

3.2修改数据库连接mysql5.7
1.修改mysql驱动

2.修改配置文件

4.新springboot项目集成xxl_job
4.1.pom中加入下面依赖
<?xml version="1.0" encoding="UTF-8"?>
<project xmlns="http://maven.apache.org/POM/4.0.0"
         xmlns:xsi="http://www.w3.org/2001/XMLSchema-instance"
         xsi:schemaLocation="http://maven.apache.org/POM/4.0.0 http://maven.apache.org/xsd/maven-4.0.0.xsd">
    <modelVersion>4.0.0</modelVersion>

    <groupId>com.job</groupId>
    <artifactId>xxl-job-test</artifactId>
    <version>1.0-SNAPSHOT</version>

    <properties>
        <maven.compiler.source>8</maven.compiler.source>
        <maven.compiler.target>8</maven.compiler.target>
    </properties>

    <dependencyManagement>
        <dependencies>
            <dependency>
                <!-- Import dependency management from Spring Boot (依赖管理:继承一些默认的依赖,工程需要依赖的jar包的管理,申明其他dependency的时候就不需要version) -->
                <groupId>org.springframework.boot</groupId>
                <artifactId>spring-boot-starter-parent</artifactId>
                <version>2.7.9</version>
                <type>pom</type>
                <scope>import</scope>
            </dependency>
        </dependencies>
    </dependencyManagement>
    <!-- xxl-job-core -->
    <dependencies>
        <dependency>
            <groupId>org.springframework.boot</groupId>
            <artifactId>spring-boot-starter-web</artifactId>
        </dependency>
        <!-- xxl-job-core -->
        <dependency>
            <groupId>com.xuxueli</groupId>
            <artifactId>xxl-job-core</artifactId>
            <version>2.4.0</version>
        </dependency>
    </dependencies>
</project>
4.2.springboot启动类

import org.springframework.boot.SpringApplication;
import org.springframework.boot.autoconfigure.SpringBootApplication;

@SpringBootApplication
public class JobApplication {
    public static void main(String[] args){
        SpringApplication.run(JobApplication.class,args);
    }
}
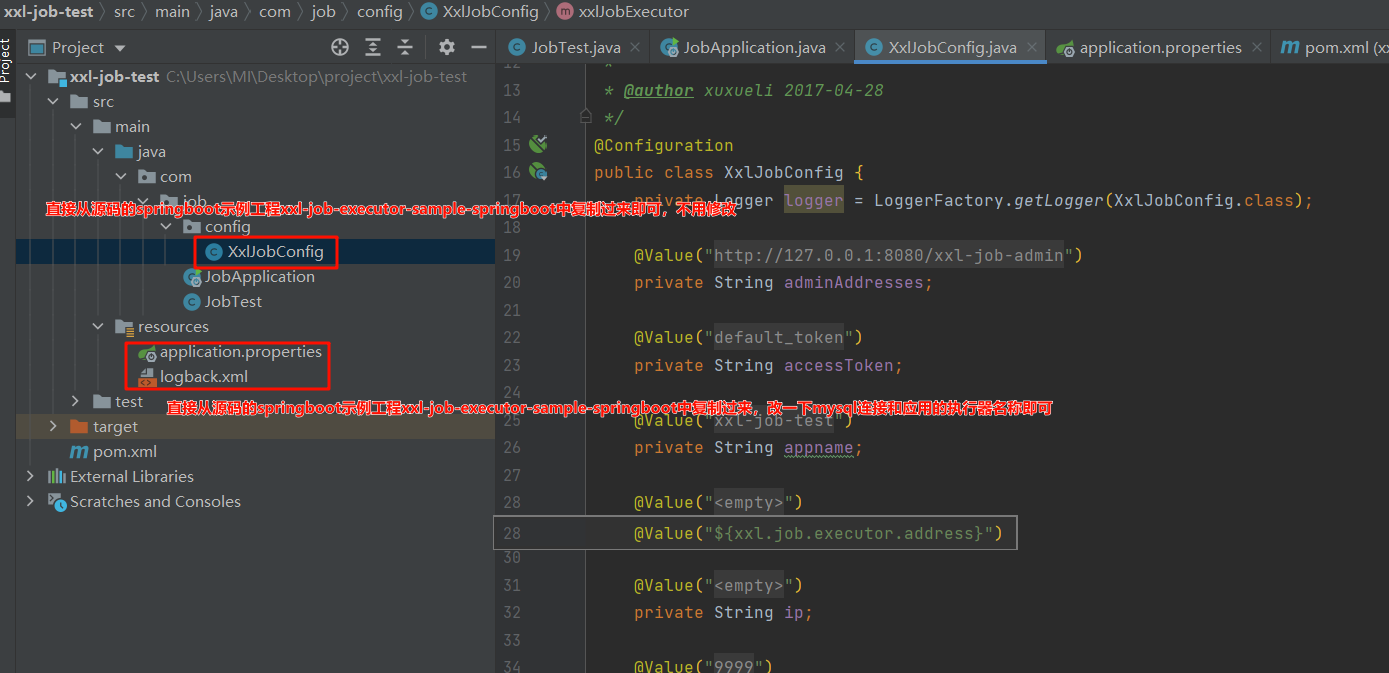
4.3.从源码复制配置文件,日志和配置类
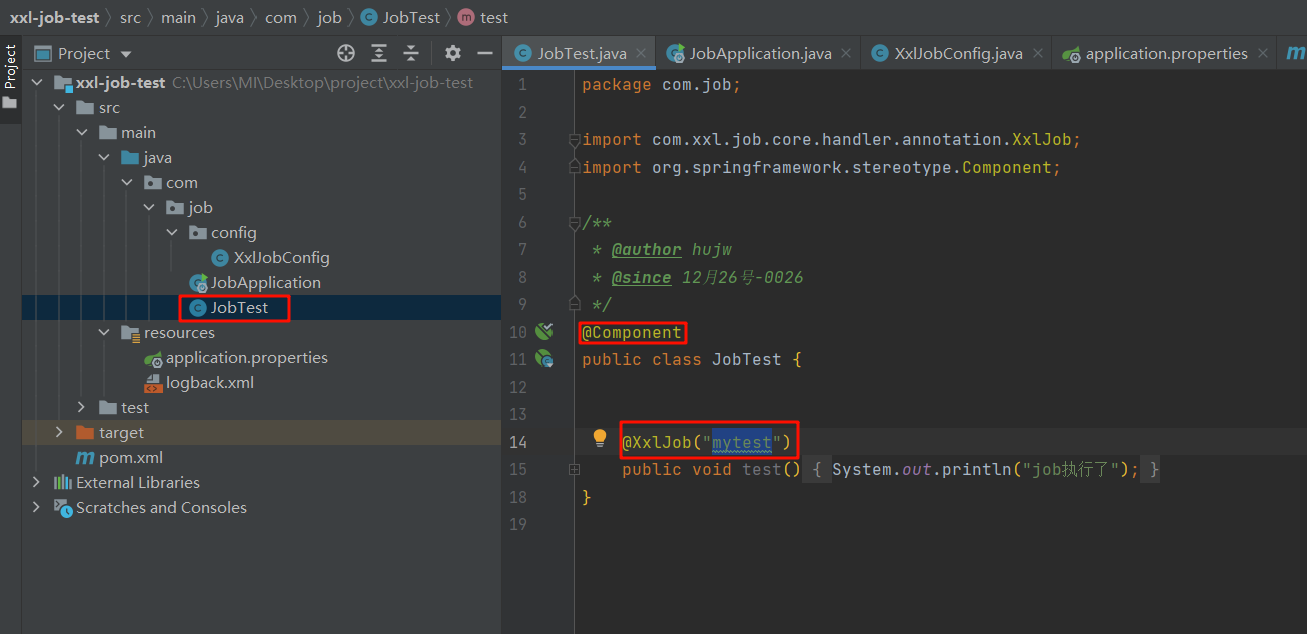
4.4.编写自己的任务
建议用新项目的目的是通过http触发任务,达到不侵入原项目的目的。当然,如果本身就是新项目,可以在按上面集成xxl_job的步骤把xxl_job集成到自己的项目中。
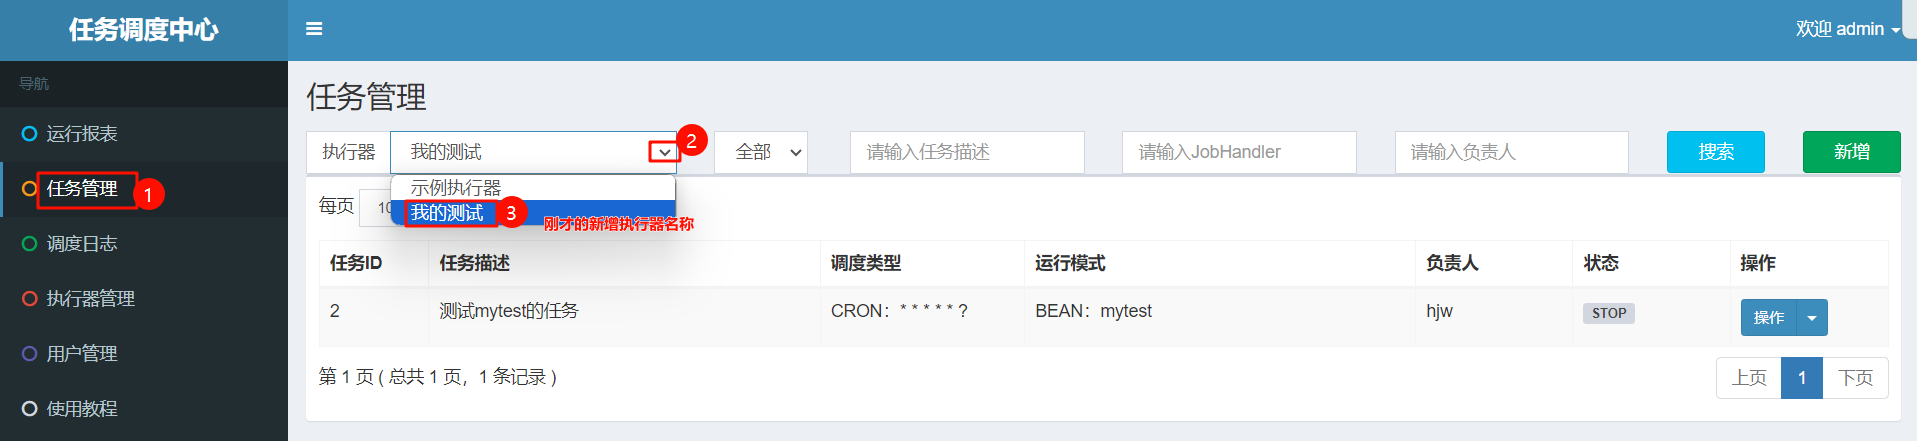
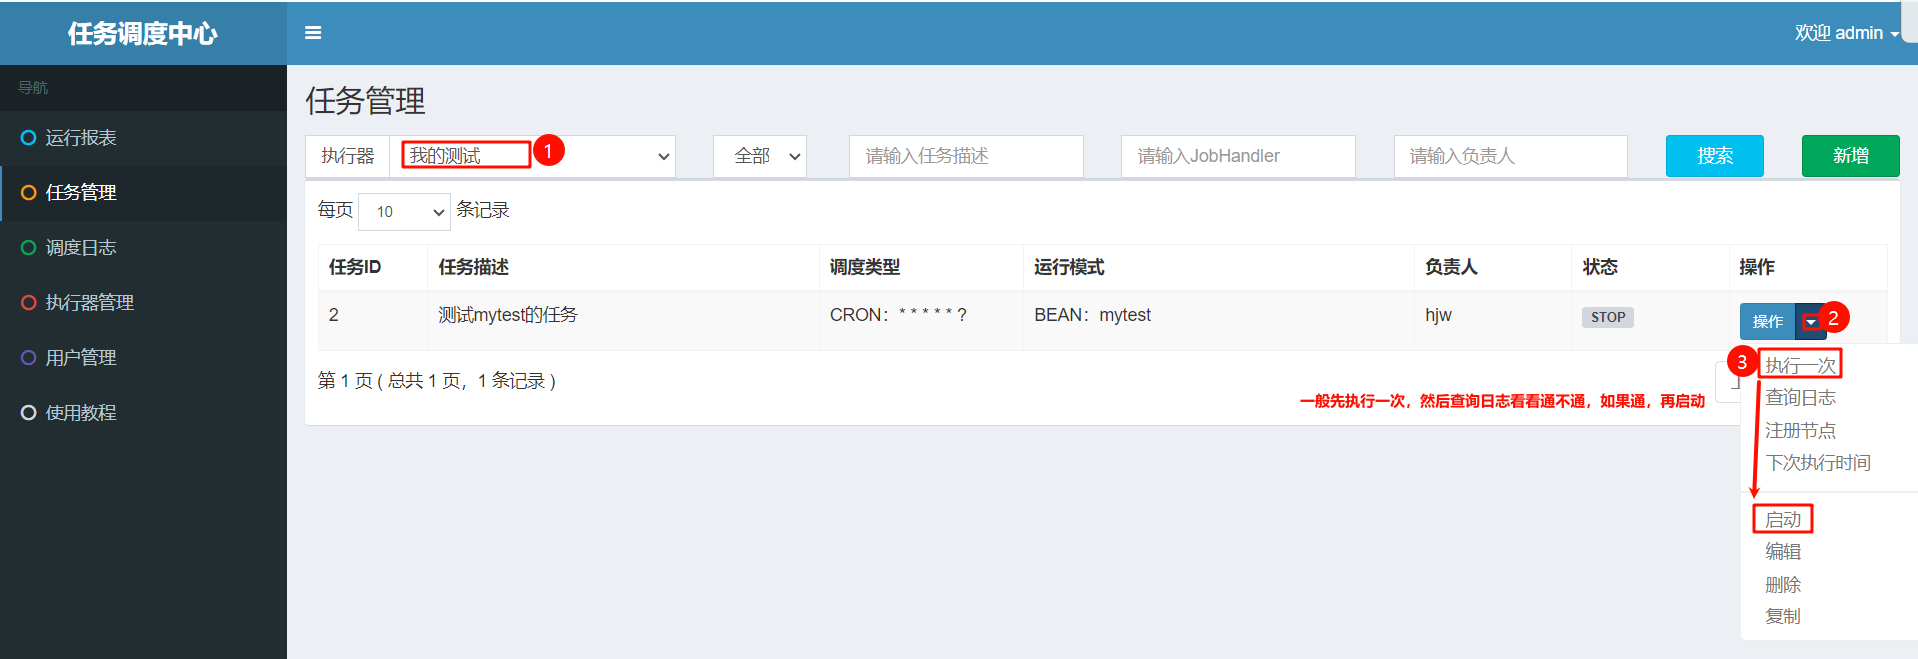
5.在后台管理页面配置任务
后台管理系统默认地址:http://localhost:8080/xxl-job-admin
账号密码:admin/123456
5.1新增执行器

5.2新增任务