一、安装和使用
官网下载安装Cursor,然后创建一个代码文件。
Ctrl + K生成, Ctrl + L提问。
默认每小时30词。
- # 1. Try generating with command K on a new line. Ask for a pytorch script of a feedforward neural network
- # 2. Then, select the outputted code and hit chat. Ask if there's a bug. Ask how to improve.
- # 3. Try selecting some code and hitting edit. Ask the bot to add residual layers.
- # 4. To try out cursor on your own projects, go to the file menu (top left) and open a folder.
有些包需要自行安装,程序不一定一次通过运行,可提问。
二、测试
1. 乒乓球游戏
请用python写一个乒乓球游戏。有如下要求:- 游戏包含两个参与者,一方是电脑,一方是玩家;电脑在界面左侧,玩家在界面右侧。- 游戏界面上包含一个开始按钮,点击开始按钮后,游戏才能开始。- 乒乓球接触球拍和界面上下边界时会反弹。- 玩家通过Up,Down键来控制球拍的上下运动,玩家按住对应的键,球拍会保持一个方向运动。- 电脑通过自动判断乒乓球的位置来进行移动,尽可能的将乒乓球反弹。- 一方的球拍没有接到球的时候,对方得1分,先得够5分的一方获胜,同时游戏结束。- 游戏结束后显示获胜的一方的角色:电脑或者玩家。
代码


# Import necessary modules
import pygame
import random

# Initialize Pygame
pygame.init()

# Set up the game window
WINDOW_WIDTH = 800
WINDOW_HEIGHT = 600
WINDOW = pygame.display.set_mode((WINDOW_WIDTH, WINDOW_HEIGHT))
pygame.display.set_caption("Ping Pong Game")

# Set up the colors
WHITE = (255, 255, 255)
BLACK = (0, 0, 0)

# Set up the fonts
FONT = pygame.font.SysFont(None, 48)

# Set up the ball
BALL_RADIUS = 10
ball_x = WINDOW_WIDTH // 2
ball_y = WINDOW_HEIGHT // 2
ball_dx = 5 * random.choice([-1, 1])
ball_dy = 5 * random.choice([-1, 1])

# Set up the paddles
PADDLE_WIDTH = 10
PADDLE_HEIGHT = 100
player_paddle_x = WINDOW_WIDTH - PADDLE_WIDTH - 10
player_paddle_y = WINDOW_HEIGHT // 2 - PADDLE_HEIGHT // 2
computer_paddle_x = 10
computer_paddle_y = WINDOW_HEIGHT // 2 - PADDLE_HEIGHT // 2
paddle_speed = 5

# Set up the scores
player_score = 0
computer_score = 0

# Set up the game loop
game_running = False
game_ended = False
clock = pygame.time.Clock()

while not game_ended:
    # Handle events
    for event in pygame.event.get():
        if event.type == pygame.QUIT:
            game_ended = True
        elif event.type == pygame.KEYDOWN:
            if event.key == pygame.K_SPACE:
                game_running = True
        elif event.type == pygame.KEYUP:
            if event.key == pygame.K_UP or event.key == pygame.K_DOWN:
                player_paddle_dy = 0

    # Handle player input
    keys = pygame.key.get_pressed()
    if keys[pygame.K_UP]:
        player_paddle_dy = -paddle_speed
    elif keys[pygame.K_DOWN]:
        player_paddle_dy = paddle_speed
    else:
        player_paddle_dy = 0

    # Move the paddles
    player_paddle_y += player_paddle_dy
    if player_paddle_y < 0:
        player_paddle_y = 0
    elif player_paddle_y > WINDOW_HEIGHT - PADDLE_HEIGHT:
        player_paddle_y = WINDOW_HEIGHT - PADDLE_HEIGHT

    computer_paddle_y += ball_dy
    if computer_paddle_y < 0:
        computer_paddle_y = 0
    elif computer_paddle_y > WINDOW_HEIGHT - PADDLE_HEIGHT:
        computer_paddle_y = WINDOW_HEIGHT - PADDLE_HEIGHT

    # Move the ball
    if game_running:
        ball_x += ball_dx
        ball_y += ball_dy

        # Check for collisions with the walls
        if ball_y < BALL_RADIUS or ball_y > WINDOW_HEIGHT - BALL_RADIUS:
            ball_dy *= -1

        # Check for collisions with the paddles
        if ball_x < computer_paddle_x + PADDLE_WIDTH and \
                computer_paddle_y < ball_y < computer_paddle_y + PADDLE_HEIGHT:
            ball_dx *= -1
        elif ball_x > player_paddle_x and \
                player_paddle_y < ball_y < player_paddle_y + PADDLE_HEIGHT:
            ball_dx *= -1
        elif ball_x < 0:
            player_score += 1
            game_running = False
            ball_x = WINDOW_WIDTH // 2
            ball_y = WINDOW_HEIGHT // 2
            ball_dx = 5 * random.choice([-1, 1])
            ball_dy = 5 * random.choice([-1, 1])
        elif ball_x > WINDOW_WIDTH:
            computer_score += 1
            game_running = False
            ball_x = WINDOW_WIDTH // 2
            ball_y = WINDOW_HEIGHT // 2
            ball_dx = 5 * random.choice([-1, 1])
            ball_dy = 5 * random.choice([-1, 1])

        # Check for game over
        if player_score == 5 or computer_score == 5:
            game_running = False
            game_over_text = FONT.render("Game Over", True, WHITE)
            if player_score == 5:
                winner_text = FONT.render("Player Wins!", True, WHITE)
            else:
                winner_text = FONT.render("Computer Wins!", True, WHITE)

    # Draw the game
    WINDOW.fill(BLACK)

    if not game_running:
        start_text = FONT.render("Press Space to Start", True, WHITE)
        start_rect = start_text.get_rect(center=(WINDOW_WIDTH // 2, WINDOW_HEIGHT // 2))
        WINDOW.blit(start_text, start_rect)

    pygame.draw.circle(WINDOW, WHITE, (ball_x, ball_y), BALL_RADIUS)
    pygame.draw.rect(WINDOW, WHITE, (player_paddle_x, player_paddle_y, PADDLE_WIDTH, PADDLE_HEIGHT))
    pygame.draw.rect(WINDOW, WHITE, (computer_paddle_x, computer_paddle_y, PADDLE_WIDTH, PADDLE_HEIGHT))

    player_score_text = FONT.render(str(player_score), True, WHITE)
    computer_score_text = FONT.render(str(computer_score), True, WHITE)
    score_rect = player_score_text.get_rect(midtop=(WINDOW_WIDTH // 2, 10))
    WINDOW.blit(player_score_text, score_rect.move(-50, 0))
    WINDOW.blit(computer_score_text, score_rect.move(50, 0))

    if not game_running and (player_score > 0 or computer_score > 0):
        WINDOW.blit(game_over_text, game_over_text.get_rect(center=(WINDOW_WIDTH // 2, WINDOW_HEIGHT // 2 - 50)))
        WINDOW.blit(winner_text, winner_text.get_rect(center=(WINDOW_WIDTH // 2, WINDOW_HEIGHT // 2 + 50)))

    pygame.display.update()
    clock.tick(60)

# Quit Pygame
pygame.quit()
可以运行
2. 手写数字识别
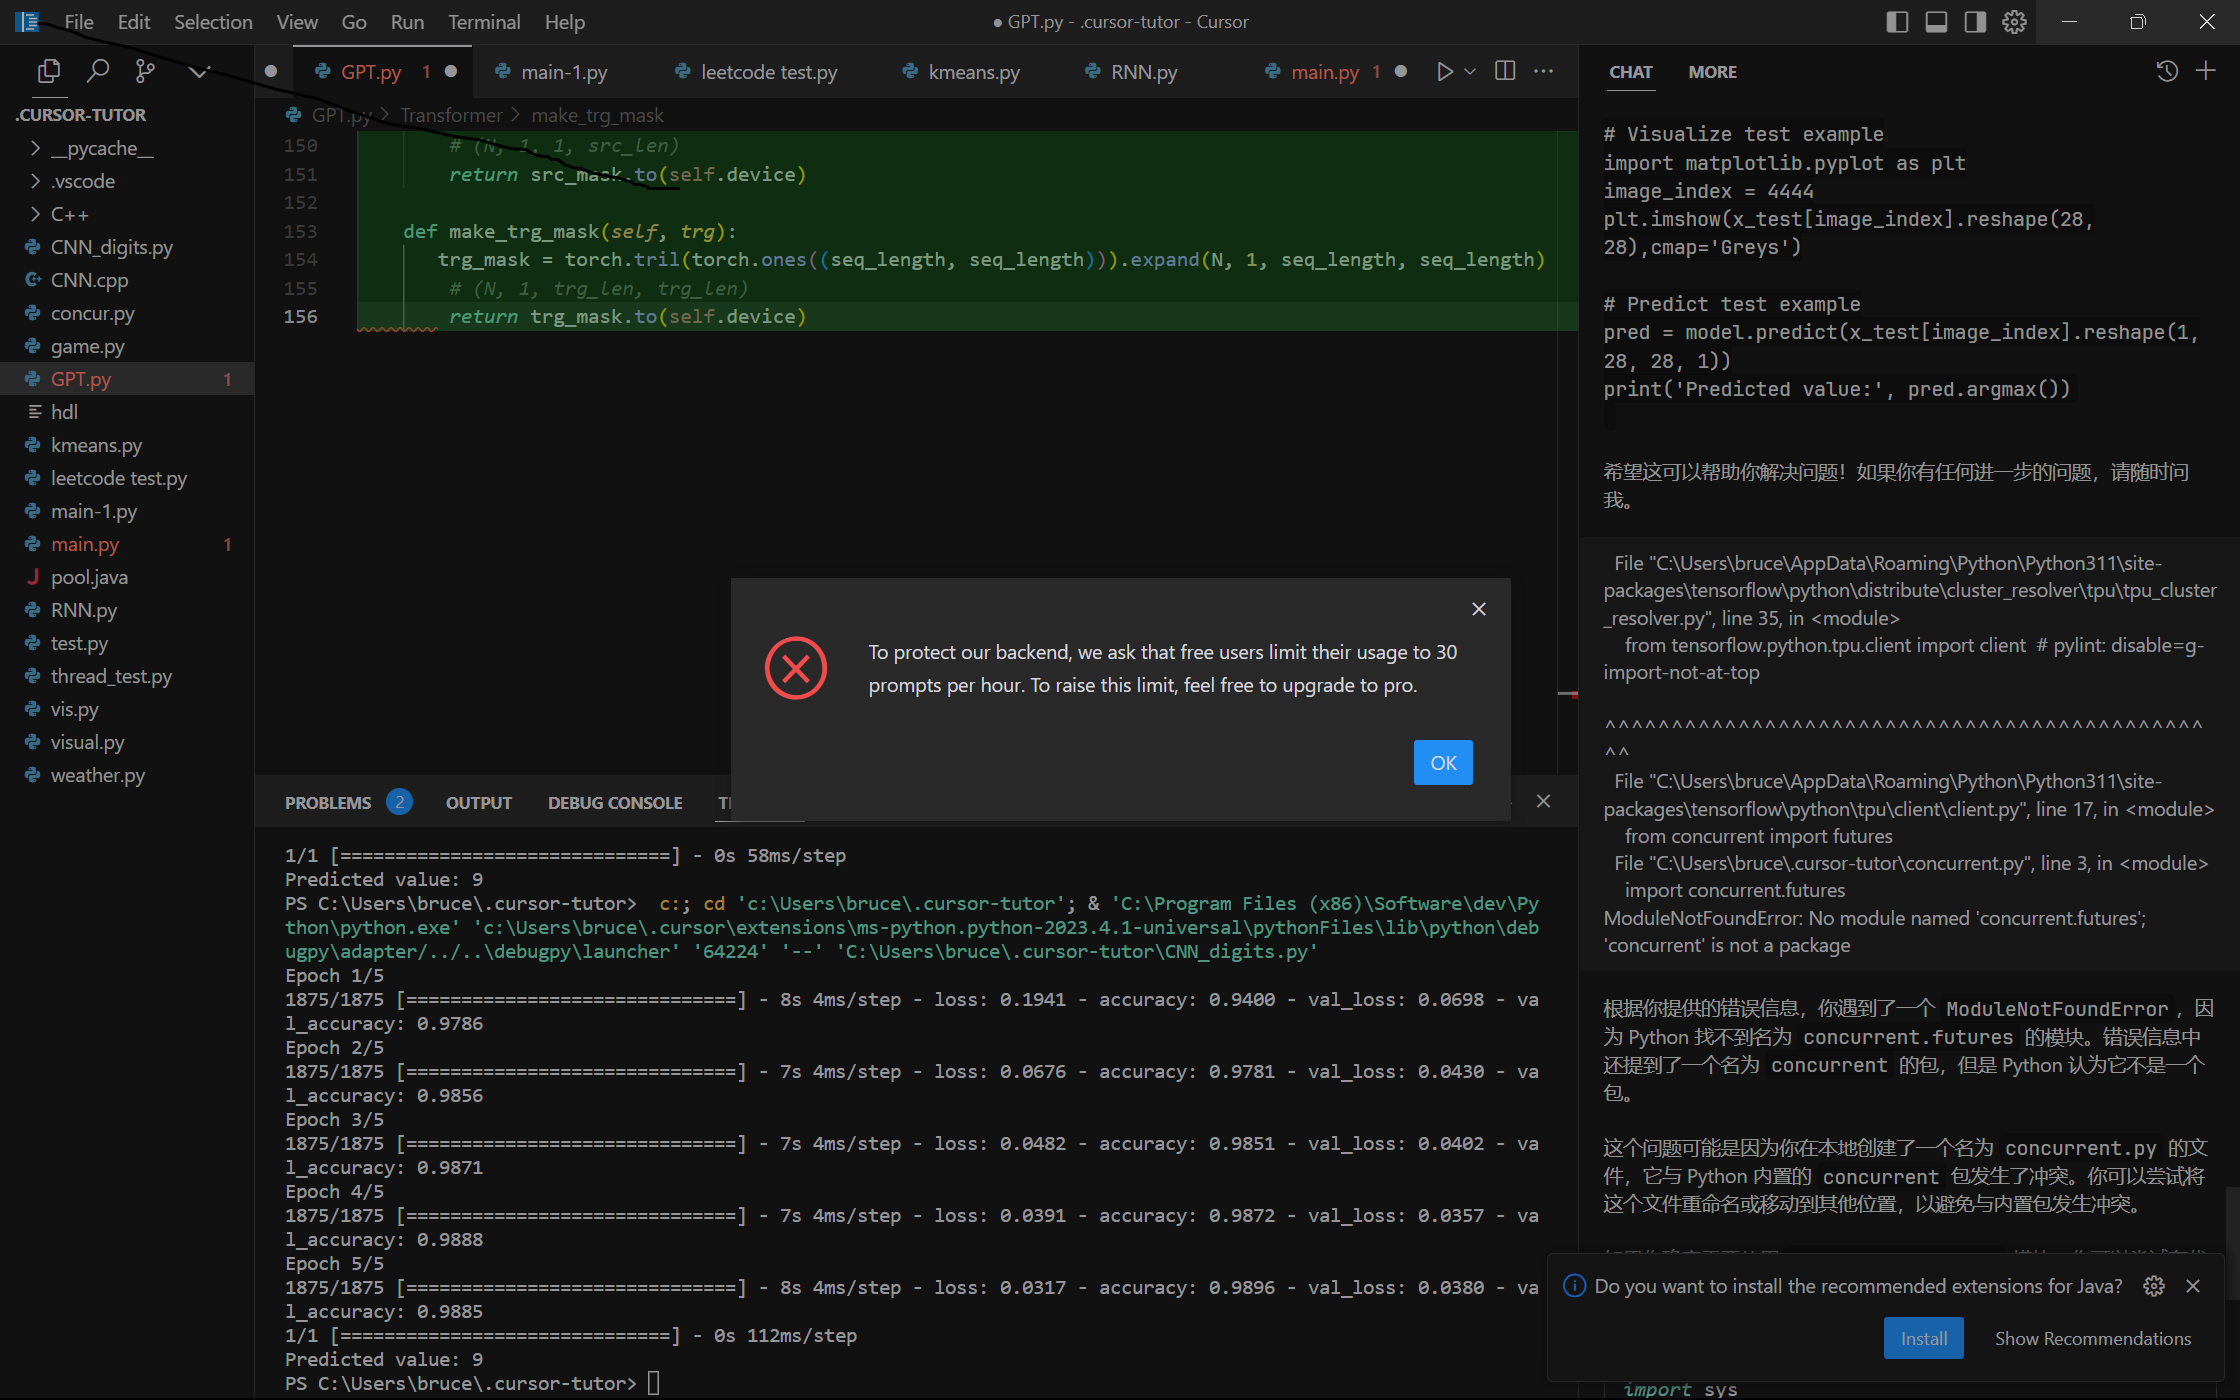
用Python写一个基于MINIST数据集的手写数字识别代码,并给出测试样例
import numpy as np
import tensorflow as tf
from tensorflow.keras.datasets import mnist
from tensorflow.keras.models import Sequential
from tensorflow.keras.layers import Conv2D, MaxPooling2D, Flatten, Dense

# Load MNIST dataset
(x_train, y_train), (x_test, y_test) = mnist.load_data()

# Normalize pixel values to be between 0 and 1
x_train = x_train / 255.0
x_test = x_test / 255.0

# Reshape input data to have a single channel
x_train = np.reshape(x_train, (x_train.shape[0], x_train.shape[1], x_train.shape[2], 1))
x_test = np.reshape(x_test, (x_test.shape[0], x_test.shape[1], x_test.shape[2], 1))

# Define LeNet model
model = Sequential()
model.add(Conv2D(filters=6, kernel_size=(5, 5), activation='relu', input_shape=(28, 28, 1)))
model.add(MaxPooling2D(pool_size=(2, 2)))
model.add(Conv2D(filters=16, kernel_size=(5, 5), activation='relu'))
model.add(MaxPooling2D(pool_size=(2, 2)))
model.add(Flatten())
model.add(Dense(units=120, activation='relu'))
model.add(Dense(units=84, activation='relu'))
model.add(Dense(units=10, activation='softmax'))

# Compile model
model.compile(optimizer='adam', loss='sparse_categorical_crossentropy', metrics=['accuracy'])

# Train model
model.fit(x_train, y_train, epochs=5, validation_data=(x_test, y_test))

# Visualize test example
# Visualize test example
import matplotlib.pyplot as plt
image_index = 4444
plt.imshow(x_test[image_index].reshape(28, 28),cmap='Greys')
plt.show()


# Predict test example
pred = model.predict(x_test[image_index].reshape(1, 28, 28, 1))
print('Predicted value:', pred.argmax())

3. 聚类
k-means: 用Python实现K-means算法,并在iris数据集上进行测试,最后对结果进行可视化
from sklearn.datasets import load_iris
from sklearn.cluster import KMeans
import matplotlib.pyplot as plt

# load iris dataset
iris = load_iris()
X = iris.data

# initialize KMeans model with 3 clusters
kmeans = KMeans(n_clusters=3)

# fit the model to the data
kmeans.fit(X)

# predict the clusters for each data point
y_kmeans = kmeans.predict(X)

# plot the clusters
plt.scatter(X[:, 0], X[:, 1], c=y_kmeans, cmap='viridis')
centers = kmeans.cluster_centers_
plt.scatter(centers[:, 0], centers[:, 1], c='black', s=200, alpha=0.5);
plt.show()
GMM: 用numpy实现GMM算法,给出测试样例
# Welcome to Cursor
import numpy as np
import matplotlib.pyplot as plt
from scipy.stats import multivariate_normal

# Generate some random data
np.random.seed(0)
n_samples = 300
mean1 = [0, 0]
cov1 = [[1, 0], [0, 1]]
mean2 = [5, 5]
cov2 = [[1, 0], [0, 1]]
X = np.concatenate([np.random.multivariate_normal(mean1, cov1, int(n_samples/2)),
                    np.random.multivariate_normal(mean2, cov2, int(n_samples/2))])

# Define the number of clusters and the tolerance for convergence
n_clusters = 2
tolerance = 0.01

# Initialize the means, covariances, and mixing coefficients
means = np.random.rand(n_clusters, X.shape[1])
covs = np.array([np.eye(X.shape[1])] * n_clusters)
mixing_coeffs = np.ones(n_clusters) / n_clusters

# Define the function to compute the responsibilities
def compute_responsibilities(X, means, covs, mixing_coeffs):
    responsibilities = np.zeros((X.shape[0], len(mixing_coeffs)))
    for k in range(len(mixing_coeffs)):
        responsibilities[:, k] = mixing_coeffs[k] * multivariate_normal.pdf(X, means[k], covs[k])
    responsibilities /= np.sum(responsibilities, axis=1, keepdims=True)
    return responsibilities

# Define the function to update the means, covariances, and mixing coefficients
def update_parameters(X, responsibilities):
    n_clusters = responsibilities.shape[1]
    n_samples = X.shape[0]
    means = np.zeros((n_clusters, X.shape[1]))
    covs = np.zeros((n_clusters, X.shape[1], X.shape[1]))
    mixing_coeffs = np.zeros(n_clusters)
    for k in range(n_clusters):
        nk = np.sum(responsibilities[:, k])
        means[k] = np.sum(responsibilities[:, k].reshape(-1, 1) * X, axis=0) / nk
        covs[k] = np.dot((responsibilities[:, k].reshape(-1, 1) * (X - means[k])).T, (X - means[k])) / nk
        mixing_coeffs[k] = nk / n_samples
    return means, covs, mixing_coeffs

# Run the EM algorithm
log_likelihoods = []
for i in range(100):
    responsibilities = compute_responsibilities(X, means, covs, mixing_coeffs)
    means, covs, mixing_coeffs = update_parameters(X, responsibilities)
    log_likelihood = np.sum(np.log(np.sum(responsibilities, axis=1)))
    log_likelihoods.append(log_likelihood)
    if i > 0 and np.abs(log_likelihoods[-1] - log_likelihoods[-2]) < tolerance:
        break

# Plot the data and the clusters
plt.scatter(X[:, 0], X[:, 1], c=np.argmax(responsibilities, axis=1))
plt.show()
4. RNN
用分别用Pytorh和Numpy写一个RNN网络,然后在一个1960年到2022年世界总人口树的时序数据上对它们进行测试。要求:-对比Arima算法-对数据进行可视化-用1960年到2012年预测2013年到2022年,对预测结果可视化
# PyTorch RNN network
import torch
import torch.nn as nn

class RNN(nn.Module):
    def __init__(self, input_size, hidden_size, output_size):
        super(RNN, self).__init__()
        self.hidden_size = hidden_size

        self.i2h = nn.Linear(input_size + hidden_size, hidden_size)
        self.i2o = nn.Linear(input_size + hidden_size, output_size)
        self.softmax = nn.LogSoftmax(dim=1)

    def forward(self, input, hidden):
        combined = torch.cat((input, hidden), 1)
        hidden = self.i2h(combined)
        output = self.i2o(combined)
        output = self.softmax(output)
        return output, hidden

    def initHidden(self):
        return torch.zeros(1, self.hidden_size)

# Numpy RNN network
import numpy as np

class NumpyRNN:
    def __init__(self, input_size, hidden_size, output_size):
        self.hidden_size = hidden_size

        self.Wxh = np.random.randn(hidden_size, input_size) * 0.01
        self.Whh = np.random.randn(hidden_size, hidden_size) * 0.01
        self.Why = np.random.randn(output_size, hidden_size) * 0.01
        self.bh = np.zeros((hidden_size, 1))
        self.by = np.zeros((output_size, 1))

    def forward(self, inputs, hprev):
        xs, hs, ys, ps = {}, {}, {}, {}
        hs[-1] = np.copy(hprev)
        for t in range(len(inputs)):
            xs[t] = np.zeros((input_size, 1))
            xs[t][inputs[t]] = 1
            hs[t] = np.tanh(np.dot(self.Wxh, xs[t]) + np.dot(self.Whh, hs[t-1]) + self.bh)
            ys[t] = np.dot(self.Why, hs[t]) + self.by
            ps[t] = np.exp(ys[t]) / np.sum(np.exp(ys[t]))
        return ps, hs

    def initHidden(self):
        return np.zeros((self.hidden_size, 1))

# Testing on world population data
import pandas as pd
import matplotlib.pyplot as plt
from statsmodels.tsa.arima_model import ARIMA

# Load data
data = pd.read_csv('world_population.csv', index_col=0)
data.index = pd.to_datetime(data.index)

# Train-test split
train_data = data.loc['1960':'2012']
test_data = data.loc['2013':'2022']

# ARIMA model
model = ARIMA(train_data, order=(1, 1, 1))
model_fit = model.fit(disp=0)
arima_pred = model_fit.predict(start='2013', end='2022', dynamic=False)

# PyTorch RNN model
input_size = 1
hidden_size = 32
output_size = 1
pytorch_rnn = RNN(input_size, hidden_size, output_size)
criterion = nn.MSELoss()
optimizer = torch.optim.Adam(pytorch_rnn.parameters(), lr=0.01)

# Train PyTorch RNN model
for epoch in range(1000):
    hidden = pytorch_rnn.initHidden()
    optimizer.zero_grad()
    loss = 0

    for i in range(len(train_data)-1):
        input_tensor = torch.tensor(train_data.iloc[i])
        target_tensor = torch.tensor(train_data.iloc[i+1])
        output, hidden = pytorch_rnn(input_tensor, hidden)
        loss += criterion(output, target_tensor)

    loss.backward()
    optimizer.step()

# Test PyTorch RNN model
pytorch_rnn.eval()
pytorch_pred = []
hidden = pytorch_rnn.initHidden()
for i in range(len(test_data)):
    input_tensor = torch.tensor(test_data.iloc[i])
    output, hidden = pytorch_rnn(input_tensor, hidden)
    pytorch_pred.append(output.detach().numpy()[0][0])

# Numpy RNN model
input_size = 1
hidden_size = 32
output_size = 1
numpy_rnn = NumpyRNN(input_size, hidden_size, output_size)

# Train Numpy RNN model
loss_fn = nn.MSELoss()
learning_rate = 0.01
for epoch in range(1000):
    hprev = numpy_rnn.initHidden()
    loss = 0

    for i in range(len(train_data)-1):
        x = np.array(train_data.iloc[i])
        y = np.array(train_data.iloc[i+1])
        ps, hprev = numpy_rnn.forward(x, hprev)
        loss += loss_fn(torch.tensor(ps[len(ps)-1]), torch.tensor(y))

        # Backpropagation
        dWhy = np.dot((ps[len(ps)-1]-y), hprev.T)
        dby = ps[len(ps)-1]-y
        dhnext = np.dot(numpy_rnn.Why.T, ps[len(ps)-1]-y)
        dWxh, dWhh, dbh = np.zeros_like(numpy_rnn.Wxh), np.zeros_like(numpy_rnn.Whh), np.zeros_like(numpy_rnn.bh)
        for t in reversed(range(len(ps)-1)):
            dy = np.copy(ps[t])
            dy[train_data.iloc[t+1]] -= 1
            dWhy += np.dot(dy, hs[t].T)
            dby += dy
            dh = np.dot(numpy_rnn.Why.T, dy) + dhnext
            dhraw = (1 - hs[t] * hs[t]) * dh
            dbh += dhraw
            dWxh += np.dot(dhraw, xs[t].T)
            dWhh += np.dot(dhraw, hs[t-1].T)
            dhnext = np.dot(numpy_rnn.Whh.T, dhraw)
        for dparam in [dWxh, dWhh, dWhy, dbh, dby]:
            np.clip(dparam, -5, 5, out=dparam)
        numpy_rnn.Wxh -= learning_rate * dWxh
        numpy_rnn.Whh -= learning_rate * dWhh
        numpy_rnn.Why -= learning_rate * dWhy
        numpy_rnn.bh -= learning_rate * dbh
        numpy_rnn.by -= learning_rate * dby

# Test Numpy RNN model
numpy_pred = []
hprev = numpy_rnn.initHidden()
for i in range(len(test_data)):
    x = np.array(test_data.iloc[i])
    ps, hprev = numpy_rnn.forward(x, hprev)
    numpy_pred.append(ps[len(ps)-1].argmax())

# Visualize results
plt.figure(figsize=(10,5))
plt.plot(train_data.index, train_data, label='Training data')
plt.plot(test_data.index, test_data, label='True values')
plt.plot(test_data.index, arima_pred, label='ARIMA')
plt.plot(test_data.index, pytorch_pred, label='PyTorch RNN')
plt.plot(test_data.index, numpy_pred, label='Numpy RNN')
plt.legend()
plt.show()
不知道对不对,训练代码都给出了
5. 自注意力
用Pytorch实现自注意力网络,并进行测试
import torch
import torch.nn as nn
import torch.nn.functional as F

class SelfAttention(nn.Module):
    def __init__(self, embed_size, heads):
        super(SelfAttention, self).__init__()
        self.embed_size = embed_size
        self.heads = heads
        self.head_dim = embed_size // heads

        assert (self.head_dim * heads == embed_size), "Embed size needs to be divisible by heads"

        self.values = nn.Linear(self.head_dim, self.head_dim, bias=False)
        self.keys = nn.Linear(self.head_dim, self.head_dim, bias=False)
        self.queries = nn.Linear(self.head_dim, self.head_dim, bias=False)
        self.fc_out = nn.Linear(heads*self.head_dim, embed_size)

    def forward(self, values, keys, query, mask):
        N = query.shape[0]
        value_len, key_len, query_len = values.shape[1], keys.shape[1], query.shape[1]

        # Split embedding into self.heads pieces
        values = values.reshape(N, value_len, self.heads, self.head_dim)
        keys = keys.reshape(N, key_len, self.heads, self.head_dim)
        query = query.reshape(N, query_len, self.heads, self.head_dim)

        values = self.values(values) # (N, value_len, heads, head_dim)
        keys = self.keys(keys) # (N, key_len, heads, head_dim)
        queries = self.queries(query) # (N, query_len, heads, head_dim)

        energy = torch.einsum("nqhd,nkhd->nhqk", [queries, keys]) # (N, heads, query_len, key_len)

        if mask is not None:
            energy = energy.masked_fill(mask == 0, float("-1e20"))

        attention = torch.softmax(energy / (self.embed_size ** (1/2)), dim=3) # (N, heads, query_len, key_len)

        out = torch.einsum("nhql,nlhd->nqhd", [attention, values]).reshape(N, query_len, self.heads*self.head_dim)

        out = self.fc_out(out)

        return out

class TransformerBlock(nn.Module):
    def __init__(self, embed_size, heads, dropout, forward_expansion):
        super(TransformerBlock, self).__init__()
        self.attention = SelfAttention(embed_size, heads)
        self.norm1 = nn.LayerNorm(embed_size)
        self.norm2 = nn.LayerNorm(embed_size)

        self.feed_forward = nn.Sequential(
            nn.Linear(embed_size, forward_expansion*embed_size),
            nn.ReLU(),
            nn.Linear(forward_expansion*embed_size, embed_size)
        )

        self.dropout = nn.Dropout(dropout)

    def forward(self, value, key, query, mask):
        attention = self.attention(value, key, query, mask)

        x = self.dropout(self.norm1(attention + query))
        forward = self.feed_forward(x)
        out = self.dropout(self.norm2(forward + x))

        return out

class Encoder(nn.Module):
    def __init__(self, src_vocab_size, embed_size, num_layers, heads, device, forward_expansion, dropout, max_length):
        super(Encoder, self).__init__()
        self.embed_size = embed_size
        self.device = device
        self.word_embedding = nn.Embedding(src_vocab_size, embed_size)
        self.position_embedding = nn.Embedding(max_length, embed_size)

        self.layers = nn.ModuleList([
            TransformerBlock(embed_size, heads, dropout=dropout, forward_expansion=forward_expansion)
            for _ in range(num_layers)
        ])

        self.dropout = nn.Dropout(dropout)

    def forward(self, x, mask):
        N, seq_length = x.shape
        positions = torch.arange(0, seq_length).expand(N, seq_length).to(self.device)

        out = self.dropout(self.word_embedding(x) + self.position_embedding(positions))

        for layer in self.layers:
            out = layer(out, out, out, mask)

        return out

class DecoderBlock(nn.Module):
    def __init__(self, embed_size, heads, forward_expansion, dropout, device):
        super(DecoderBlock, self).__init__()
        self.norm = nn.LayerNorm(embed_size)
        self.attention = SelfAttention(embed_size, heads)
        self.transformer_block = TransformerBlock(embed_size, heads, dropout, forward_expansion)
        self.dropout = nn.Dropout(dropout)

    def forward(self, x, value, key, src_mask, trg_mask):
        attention = self.attention(x, x, x, trg_mask)
        query = self.dropout(self.norm(attention + x))
        out = self.transformer_block(value, key, query, src_mask)
        return out

class Decoder(nn.Module):
    def __init__(self, trg_vocab_size, embed_size, num_layers, heads, forward_expansion, dropout, device, max_length):
        super(Decoder, self).__init__()
        self.device = device
        self.word_embedding = nn.Embedding(trg_vocab_size, embed_size)
        self.position_embedding = nn.Embedding(max_length, embed_size)

        self.layers = nn.ModuleList([
            DecoderBlock(embed_size, heads, forward_expansion, dropout, device)
            for _ in range(num_layers)
        ])

        self.fc_out = nn.Linear(embed_size, trg_vocab_size)
        self.dropout = nn.Dropout(dropout)

    def forward(self, x, enc_out, src_mask, trg_mask):
        N, seq_length = x.shape
        positions = torch.arange(0, seq_length).expand(N, seq_length).to(self.device)

        x = self.dropout(self.word_embedding(x) + self.position_embedding(positions))

        for layer in self.layers:
            x = layer(x, enc_out, enc_out, src_mask, trg_mask)

        out = self.fc_out(x)

        return out

class Transformer(nn.Module):
    def __init__(self, src_vocab_size, trg_vocab_size, src_pad_idx, trg_pad_idx, embed_size=256, num_layers=6, forward_expansion=4, heads=8, dropout=0, device="cuda", max_length=100):
        super(Transformer, self).__init__()

        self.encoder = Encoder(src_vocab_size, embed_size, num_layers, heads, device, forward_expansion, dropout, max_length)
        self.decoder = Decoder(trg_vocab_size, embed_size, num_layers, heads, forward_expansion, dropout, device, max_length)

        self.src_pad_idx = src_pad_idx
        self.trg_pad_idx = trg_pad_idx
        self.device = device

    def make_src_mask(self, src):
        src_mask = (src != self.src_pad_idx).unsqueeze(1).unsqueeze(2)
        # (N, 1, 1, src_len)
        return src_mask.to(self.device)

    def make_trg_mask(self, trg):
       trg_mask = torch.tril(torch.ones((seq_length, seq_length))).expand(N, 1, seq_length, seq_length)
        # (N, 1, trg_len, trg_len)
        return trg_mask.to(self.device)
不知道对不对,写到一般次数受限了(直接写Transformer了)
6. 聊天
实现一个聊天机器人,给出测试样例
# 使用Python调用BERT实现聊天机器人
import torch
from transformers import BertTokenizer, BertForQuestionAnswering

# 加载预训练的BERT模型
tokenizer = BertTokenizer.from_pretrained('bert-base-chinese')
model = BertForQuestionAnswering.from_pretrained('bert-base-chinese')

# 回答问题的函数
def answer_question(question, answer_text):
    # 将问题和答案文本编码为输入ID
    input_ids = tokenizer.encode(question, answer_text)
    tokens = tokenizer.convert_ids_to_tokens(input_ids)

    # 确定问题和答案文本的分段ID
    sep_index = input_ids.index(tokenizer.sep_token_id)
    num_seg_a = sep_index + 1
    num_seg_b = len(input_ids) - num_seg_a
    segment_ids = [0]*num_seg_a + [1]*num_seg_b
    assert len(segment_ids) == len(input_ids)

    # 使用BertForQuestionAnswering模型预测答案的开始和结束位置
    outputs = model(torch.tensor([input_ids]), token_type_ids=torch.tensor([segment_ids]))
    start_scores = outputs.start_logits
    end_scores = outputs.end_logits

    # 找到具有最高“start”和“end”分数的标记
    answer_start = torch.argmax(start_scores)
    answer_end = torch.argmax(end_scores)

    # 将标记转换回字符串
    answer = tokens[answer_start]
    for i in range(answer_start + 1, answer_end + 1):
        if tokens[i][0:2] == '##':
            answer += tokens[i][2:]
        else:
            answer += ' ' + tokens[i]

    return answer
# Here is an example of how to use the answer_question function:
question = "什么是BERT?"
answer_text = "BERT是一种预训练语言模型,可以用于各种自然语言处理任务。"
answer = answer_question(question, answer_text)
print(answer)

# Output: "一种预训练语言模型"
解释
BertForQuestionAnswering是一个预训练的BERT模型,用于回答问题。它是transformers库中的一个类,可以通过from_pretrained方法加载预训练的模型。在给定问题和答案文本的情况下,answer_question函数使用BertTokenizer将文本编码为输入ID,并使用BertForQuestionAnswering模型预测答案的开始和结束位置。然后,它将这些位置转换回标记并返回答案字符串。
直接调包,好像没理解问题,给出QA了。
7. 矩阵乘法
基于C++实现通用矩阵乘法,并给出多个测试样例。要求如下:- 矩阵乘法需要实现分块乘法- 需要根据矩阵的稀疏情况进行优化
#include <iostream>
#include <vector>
#include <algorithm>

using namespace std;

const int BLOCK_SIZE = 32;

void gemm(vector<vector<double>>& A, vector<vector<double>>& B, vector<vector<double>>& C) {
    int n = A.size(), m = B.size(), p = B[0].size();
    for (int i = 0; i < n; i += BLOCK_SIZE) {
        for (int j = 0; j < p; j += BLOCK_SIZE) {
            for (int k = 0; k < m; k += BLOCK_SIZE) {
                for (int ii = i; ii < min(n, i + BLOCK_SIZE); ii++) {
                    for (int jj = j; jj < min(p, j + BLOCK_SIZE); jj++) {
                        for (int kk = k; kk < min(m, k + BLOCK_SIZE); kk++) {
                            C[ii][jj] += A[ii][kk] * B[kk][jj];
                        }
                    }
                }
            }
        }
    }
}

void optimize_gemm(vector<vector<double>>& A, vector<vector<double>>& B, vector<vector<double>>& C) {
    int n = A.size(), m = B.size(), p = B[0].size();
    vector<vector<double>> Bt(p, vector<double>(m));
    for (int i = 0; i < p; i++) {
        for (int j = 0; j < m; j++) {
            Bt[i][j] = B[j][i];
        }
    }
    for (int i = 0; i < n; i += BLOCK_SIZE) {
        for (int j = 0; j < p; j += BLOCK_SIZE) {
            for (int k = 0; k < m; k += BLOCK_SIZE) {
                for (int ii = i; ii < min(n, i + BLOCK_SIZE); ii++) {
                    for (int jj = j; jj < min(p, j + BLOCK_SIZE); jj++) {
                        double sum = 0;
                        for (int kk = k; kk < min(m, k + BLOCK_SIZE); kk++) {
                            sum += A[ii][kk] * Bt[jj][kk];
                        }
                        C[ii][jj] += sum;
                    }
                }
            }
        }
    }
}

int main() {
    vector<vector<double>> A = {{1, 2, 3}, {4, 5, 6}};
    vector<vector<double>> B = {{7, 8}, {9, 10}, {11, 12}};
    vector<vector<double>> C1(2, vector<double>(2)), C2(2, vector<double>(2));
    gemm(A, B, C1);
    optimize_gemm(A, B, C2);
    cout << "C1:" << endl;
    for (auto row : C1) {
        for (auto x : row) {
            cout << x << " ";
        }
        cout << endl;
    }
    cout << "C2:" << endl;
    for (auto row : C2) {
        for (auto x : row) {
            cout << x << " ";
        }
        cout << endl;
    }
    return 0;
}
可运行
用python写一个基于多线程的并行矩阵乘法,并给出测试样例
import numpy as np
import threading

# Define a function to perform matrix multiplication
def matmul(A, B, C, i, j):
    C[i][j] = np.dot(A[i], B[:,j])

# Define a function to perform parallel matrix multiplication
def parallel_matmul(A, B, num_threads):
    # Get the shape of the matrices
    m, n = A.shape
    p, q = B.shape

    # Check if the matrices can be multiplied
    if n != p:
        print("Matrices cannot be multiplied")
        return None

    # Create a matrix to store the result
    C = np.zeros((m, q))

    # Create a list to store the threads
    threads = []

    # Create the threads
    for i in range(m):
        for j in range(q):
            thread = threading.Thread(target=matmul, args=(A, B, C, i, j))
            threads.append(thread)

    # Start the threads
    for i in range(num_threads):
        for j in range(i, len(threads), num_threads):
            threads[j].start()

    # Wait for the threads to finish
    for thread in threads:
        thread.join()

    # Return the result
    return C

# Test the function
A = np.array([[1, 2], [3, 4], [5, 6]])
B = np.array([[7, 8], [9, 10]])
C = parallel_matmul(A, B, 2)
print(C)
可运行
8. 可视化
获取贵州茅台从2018年元旦至2023年3月20日的行情数据,计算MACD指标
import tushare as ts
import matplotlib.pyplot as plt
from mpl_finance import candlestick_ochl
from matplotlib.pylab import date2num
import pandas as pd
import numpy as np

# 获取贵州茅台从2018年元旦至2023年3月20日的行情数据
df = ts.get_k_data('600519', start='2018-01-01', end='2023-03-20')

# 计算MACD指标
def MACD(df, fastperiod=12, slowperiod=26, signalperiod=9):
    ewma12 = pd.Series.ewm(df['close'], span=fastperiod).mean()
    ewma26 = pd.Series.ewm(df['close'], span=slowperiod).mean()
    dif = ewma12 - ewma26
    dea = pd.Series.ewm(dif, span=signalperiod).mean()
    macd = (dif - dea) * 2
    return dif, dea, macd

dif, dea, macd = MACD(df)

# 画图展示
df['time'] = pd.to_datetime(df['date'])
df['time'] = df['time'].apply(date2num)
df = df[['time', 'open', 'close', 'high', 'low']]
fig, ax = plt.subplots(figsize=(20, 10))
candlestick_ochl(ax, df.values, width=0.6, colorup='red', colordown='green', alpha=0.8)
plt.plot(dif, label='DIF', color='blue')
plt.plot(dea, label='DEA', color='orange')
plt.bar(macd.index, macd, label='MACD', color='purple')
plt.legend()
plt.title('Guizhou Maotai Stock Price with MACD')
plt.xlabel('Date')
plt.ylabel('Price')
plt.show()
可运行
9.WEB
用python爬取成都的7天内的天气,转换成WEB程序:- 使用Python Flask编写后端代码- 前端页面静态页面, 展示天气图标
from flask import Flask, render_template_string
import requests
from bs4 import BeautifulSoup


app = Flask(__name__)

@app.route('/')
def home():
    # Scrape weather data from website
    url = 'https://www.weather.com/zh-CN/weather/5day/l/CHXX0006:1:CH'
    response = requests.get(url)

    print("Start to crawling")
    soup = BeautifulSoup(response.content, 'html.parser')
    days = soup.find_all('h3', class_='DailyContent--daypartName--3G5Y8')
    temps = soup.find_all('div', class_='DailyContent--temp--_8DL5')
    icons = soup.find_all('img', class_='DailyContent--icon--2s5M5')
    weather_data = []
    for i in range(len(days)):
        day = days[i].text
        temp = temps[i].text
        icon = icons[i]['alt']
        weather_data.append({'day': day, 'temp': temp, 'icon': icon})

    print(weather_data)
    # Render template with weather data
    template = """
    <!DOCTYPE html>
    <html>
      <head>
        <title>Weather App</title>
      </head>
      <body>
        <h1>5-Day Weather Forecast</h1>
        <table>
          <thead>
            <tr>
              <th>Day</th>
              <th>Temperature</th>
              <th>Icon</th>
            </tr>
          </thead>
          <tbody>
            {% for data in weather_data %}
            <tr>
              <td>{{ data.day }}</td>
              <td>{{ data.temp }}</td>
              <td>{{ data.icon }}</td>
            </tr>
            {% endfor %}
          </tbody>
        </table>
      </body>
    </html>
    """
    return render_template_string(template, weather_data=weather_data)

if __name__ == '__main__':
    app.run()
爬虫有问题,程序有的包都没导入。
10.电机控制
用C语言写一个控制直流电机的算法。要求包括启动电机、多档加速电机、停止电机、基于PID算法对电机速度进行控制
View Code不知道对不对
11.Verilog HDL
加法器 乘法器 矩阵乘法
// This is a Verilog code for a simple adder
module adder(input a, input b, output sum);
    assign sum = a + b;
endmodule

// This is a Verilog code for a simple multiplier
module multiplier(input a, input b, output mult);
    assign mult = a * b;
endmodule

// This is a Verilog code for a matrix multiplication module
module matrix_multiplier(
    input [3:0][3:0] matrix_A, // 4x4 matrix A
    input [3:0][3:0] matrix_B, // 4x4 matrix B
    output [3:0][3:0] matrix_C // 4x4 matrix C = A * B
);

genvar i, j, k;
wire [7:0] temp;

generate
    // Multiply each element of matrix A with corresponding element of matrix B
    // and accumulate the results to get each element of matrix C
    for (i = 0; i < 4; i = i + 1) begin : ROWS_C
        for (j = 0; j < 4; j = j + 1) begin : COLS_C
            assign temp = 8'h0;
            for (k = 0; k < 4; k = k + 1) begin : ELEMENTS_A_B
                assign temp = temp + matrix_A[i][k] * matrix_B[k][j];
            end
            assign matrix_C[i][j] = temp;
        end
    end
endgenerate

endmodule
不知道对不对
12.线程池
用Java写一个线程池,并给出测试样例
import java.util.concurrent.ExecutorService;
import java.util.concurrent.Executors;

public class ThreadPoolExample {

    public static void main(String[] args) {
        ExecutorService executor = Executors.newFixedThreadPool(5);
        for (int i = 0; i < 10; i++) {
            Runnable worker = new WorkerThread("" + i);
            executor.execute(worker);
        }
        executor.shutdown();
        while (!executor.isTerminated()) {
        }
        System.out.println("Finished all threads");
    }
}

class WorkerThread implements Runnable {

    private String message;

    public WorkerThread(String s) {
        this.message = s;
    }

    public void run() {
        System.out.println(Thread.currentThread().getName() + " (Start) message = " + message);
        processMessage();
        System.out.println(Thread.currentThread().getName() + " (End)");
    }

    private void processMessage() {
        try {
            Thread.sleep(2000);
        } catch (InterruptedException e) {
            e.printStackTrace();
        }
    }
}
不知道对不对
总结比较强大的全能代码写手,但是需要设置合适的问题。
能够完成初级问题解答,有时可能比搜索快。