Spring Cloud Alibaba nacos
目录
安装(docker-compose方式)
https://github.com/nacos-group/nacos-docker/tree/master/example
使用
依赖
<!--SpringBoot版本-->
<parent>
    <groupId>org.springframework.boot</groupId>
    <artifactId>spring-boot-starter-parent</artifactId>
    <version>2.2.10.RELEASE</version
</parent>

<!--nacos-discovery-->
<dependency>
  <groupId>com.alibaba.cloud</groupId>
  <artifactId>spring-cloud-starter-alibaba-nacos-discovery</artifactId>
  <version>2.2.5.RELEASE</version>
</dependency>
<!--nacos-config-->
<dependency>
  <groupId>com.alibaba.cloud</groupId>
  <artifactId>spring-cloud-starter-alibaba-nacos-config</artifactId>
  <version>2.2.5.RELEASE</version>
</dependency>

 <dependencyManagement>
     <dependencies>
         <dependency>
             <groupId>org.springframework.cloud</groupId>
             <artifactId>spring-cloud-dependencies</artifactId>
              <version>Hoxton.SR3</version>
             <type>pom</type>
             <scope>import</scope>
         </dependency>
     </dependencies>
 </dependencyManagement>
yml
spring:
  application:
    name: hailtaxi-driver
  profiles:
    active: dev
  cloud:
    #======================================================================== nacos配置         ========================#
    nacos:
      discovery:
        server-addr: 59.110.6.119:8848                            # nacos支持配置中心与注册中心隔离
        namespace: 2a32361d-df48-40a9-946e-b83393363fa9
        group: template
        weight: 1                                                 # 不同实例间的权重
      config:
        server-addr: 59.110.6.119:8848
        namespace: 2a32361d-df48-40a9-946e-b83393363fa9
        group: template
        file-extension: yaml                                      # 配置文件扩展名  默认会加载 ${spring.application.name}-${spring.profiles.active}.${file-extension}
        shared-configs:                                           # 共享配置
          - dataId: datasource.yaml
            refresh: true                                         # 是否支持动态刷新
            group: template
        extension-configs:                                        # 扩展配置
          - dataId: customer.yaml
            refresh: true                                         # 是否支持动态刷新
            group: template
配置刷新
Environment自动刷新
更改在启动类,定时刷新配置信息
@SpringBootApplication
@EnableDiscoveryClient
@MapperScan(basePackages = "xx.template.driver.mapper")
class DemoApplication {
    public static void main(String[] args) {
        ApplicationContext applicationContext = SpringApplication.run(DemoApplication.class, args);
        while (true) {
            //监听指定配置
            //当动态配置刷新时,会更新到 Environment 中,
             String name = applicationContext.getEnvironment().getProperty("app.name");
            String version = applicationContext.getEnvironment().getProperty("app.version");
            System.out.println("app.name=" + name + ";app.version=" + version);
            try {
                // 每隔5秒中从 Environment 中获取一下
                TimeUnit.SECONDS.sleep(5);
            } catch (InterruptedException e) {
                e.printStackTrace();
            }
        }
    }
}
@Value刷新
程序中如果写了 @Value 注解,可以采用在指定类上添加 @RefreshScope 实现刷新,只需要在指定类上添加该注解即可
@RefreshScope
@RequestMapping(value = "/demo")
class DemoController {

    @Value("${app.version}")
    private String version;

    @Value("${app.name}")
    private String appName;

    @GetMapping("/appInfo")
    public String getAppInfo() {
        return appName + ":" + version;
    }
}
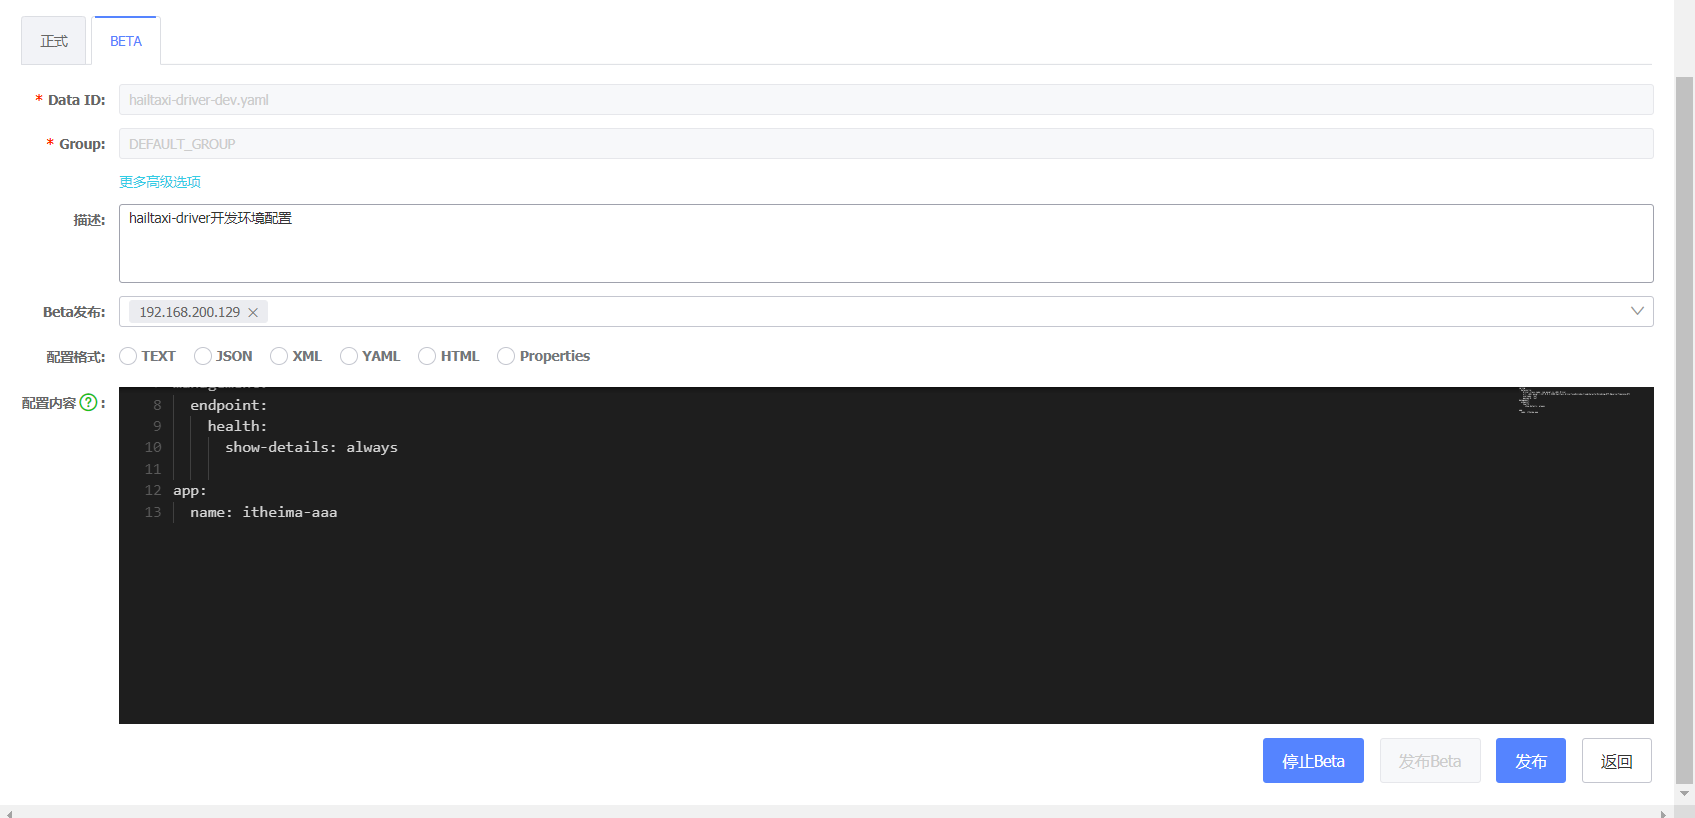
灰度发布
集群部署
Nacos集群模式包括 直连模式、VIP模式、域名模式,其中直连模式因为节点故障无法自动识别、效率低下不做介绍,官方也不推荐这种模式。
VIP模式
http://VIP:port/openAPI 挂载VIP模式,直连vip即可,下面挂server真实ip,可读性不好。
域名模式
http://nacos.com:port/openAPI 域名 + VIP模式,可读性好,而且换ip方便,因此官方推荐该模式
部署方式
-
服务下载
通过https://github.com/alibaba/nacos/releases/下载需要的服务,并上传到服务器解压缩。
-
配置数据库
修改 conf/application.properties 配置数据库
修改spring.datasource.platform为对应的数据库类型;Connect URL of DB为对应的数据库连接信息。
多节点应使用相同数据库。
-
集群配置
修改 conf/cluster.conf 配置集群
将所有节点的ip、端口信息配置到cluster.conf 保证所有节点互通。
-
启动节点
进入到每个节点 nacos/bin 目录下,执行sh startup.sh
完成后,访问任何一个单节点,可以在节点列表中查看集群状态,项目使用时,进行如下配置即可

nginx 代理
客户端接入,不建议写多个节点的IP:Port,建议以域名的方式连接Nacos,因此需要配置Nacos域名。
#负载均衡池配置
upstream nacos-cluster{
  server 192.168.211.145:8848; # 修改为conf/cluster.conf中配置的集群信息
  server 192.168.211.146:8848;
  server 192.168.211.147:8848;
}
server {
  listen    80;
  server_name nacos.cluster.com;

  location / {
    proxy_pass http://nacos-cluster;
  }
}
完成代理配置后,项目使用时只需要修改 server-addr为192.168.211.145(nginx所在服务器ip):80 即可
- Alibaba Spring Cloud nacosalibaba spring cloud nacos spring-cloud-starter-alibaba-naco spring-cloud-starter-alibaba-naco s-discovery spring-cloud-starter-alibaba-naco springcloud spring-cloud-alibaba alibaba cloud nacos alibaba spring cloud spring单体alibaba cloud spring-cloud-alibaba alibaba项目spring alibaba spring cloud jdk