选择器
要设置样式,我们首先要找到对应的控件吧,所以各种各样选择的方式就出现了,这就是要说的Selector,有以下几种方式可供使用
类型选择
可以通过控件的类型来选择,也是最简单的一种选择器
比如
Selector="TextBlock"
如果是用户控件或者模块化控件,需要加上命名空间和 |
<Styles xmlns="https://github.com/avaloniaui"
        xmlns:x="http://schemas.microsoft.com/winfx/2006/xaml"
        xmlns:local="clr-namespace:StylesDemo.Controls">
    <Design.PreviewWith>
        <Border Padding="20">
            <local:FirstUserControl/>
            <!-- Add Controls for Previewer Here -->
        </Border>
    </Design.PreviewWith>

    <!-- Add Styles Here -->
    <Style Selector="local|FirstUserControl">
        <Setter Property="Background" Value="Blue"/>
    </Style>
    <!--<Style Selector=":is(local|FirstUserControl)">
        <Setter Property="Background" Value="Green"/>
    </Style>-->
</Styles>
xmlns:local="clr-namespace:StylesDemo.Controls" 这个就是我添加的用户控件所在的命名控件,选择器有俩种方式, 一种是 local|FirstUserControl 一种是is的写法 :is(local|FirstUserControl),注意前面的 :号。
Name选择
可以通过控件的Name属性来选择
Selector="TextBlock#my"
<TextBlock Name="my" Text="带名字的TextBlock"/>
Class选择
Selector="TextBlock.Big"
<TextBlock Classes="Big" Text="带Classes的TextBlock"/>
Child选择
Selector="StackPanel > TextBlock"
子选择器是通过用>字符分隔两个选择器来定义的 。此选择器匹配逻辑树中的直接子级,因此在上面的示例中,选择器将匹配作为 StackPanel 的直接逻辑子级的任何按钮。
后代选择
Selector="StackPanel TextBlock"
当俩个选择器用空格分隔时,选择器将匹配逻辑树中的后代,因此在这种情况下,选择器将匹配StackPanel逻辑后代的任何按钮。
属性选择
Selector="CheckBox[IsChecked=True]"
Template
<Style Selector="Button:pointerover /template/ ContentPresenter">
            <Setter Property="BorderBrush" Value="Red" />
</Style>
这个可能很多时候要和伪类(:pointerover)配合使用,因为它的实际背景由ContentPresenter呈现,而在源码中有对它的设定,这意味着你直接向下面这样写是没有效果的
<Style Selector="Button:pointerover">
            <Setter Property="BorderBrush" Value="Red" />
</Style>
Not
Selector="TextBlock:not(.Big)"
选择不具有Big类的TextBlock
Nth Child
Selector="TextBlock:nth-child(4)"
选择第四个TextBlock
Nth Lash Child
Selector="TextBlock:nth-last-child(3)"
根据元素在一组同级姐妹中的位置匹配元素,从末尾开始计算。
注意: 这个不是说找倒数第三个TextBlock,如果最后一个TextBlock下面还有俩个元素,这其实是找的最后一个TextBlock.
Nth Child()和Nth Lash Child() 都采用单个参数,而且元素索引从1开始。
功能符号
An+B 表示列表中的元素,其索引有An+B定义的自定义数字模式中的索引匹配,其中:
A 是整数步长
B 是整数偏移量
n 是所有非负整数,从0开始。
可以理解为从B开始的每个A th元素。
实例:
| 例 | 表示法 |
|---|---|
| :nth-child(odd) | 奇数元素 1、3、5等 |
| :nth-child(even) | 偶数元素 2、4、6等 |
| :nth-child(2n +1) | 奇数元素 |
| :nth-child(2n) | 偶数元素 |
| :nth-child(7) | 第7个元素 |
| :nth-child(n+7) | 从第7个元素开始,7、8、9... |
| :nth-child(3n+4) | 从第4个元素开始,4、7、10、13等 |
| :nth-child(-n+3) | 前3个元素 |
一些选择器的示例
| 选择器 | 描述 |
|---|---|
| Button | 选择所有按钮控件 |
| Button#myButton | 选择名称为 myButton的按钮控件 |
| Button.red | 选择具有red样式类的所有按钮控件 |
| Button.red.large | 选择具有red和large样式类的所有按钮控件 |
| Button.red:focus | 选择具有red样式类和:focus伪类的所有按钮控件 |
| StackPanel Button.foo | 选择具有 foo 类的所有按钮,这些按钮是StackPanel的后代 |
| StackPanel > Button.foo | 选择具有 foo类的所有按钮,这些按钮是StackPanel的子级 |
| Grid:pointerover Button | 选择有 :pointerover伪类的grid 下的所有按钮 |
| Button /template/ ContentPresenter | 选择按钮模板内的所有内容演示器控件 |
伪类
与 CSS 中一样,Avaloniad的控件可以具有伪类;这些伪类是由控件本身而不是由用户定义的类。个人感觉跟事件触发器差不多。 可以选择 处于什么状态的控件
伪类以 : 字符开头.如 Border:pointerover
一个简单的伪类例子
<Window xmlns="https://github.com/avaloniaui"
        xmlns:x="http://schemas.microsoft.com/winfx/2006/xaml"
        xmlns:d="http://schemas.microsoft.com/expression/blend/2008"
        xmlns:mc="http://schemas.openxmlformats.org/markup-compatibility/2006"
        mc:Ignorable="d" d:DesignWidth="800" d:DesignHeight="450"
        x:Class="AvaloniaStyle.MainWindow"
        Title="AvaloniaStyle">
    <Window.Styles>
        <Style Selector="Border:pointerover">
            <Setter Property="Background" Value="Red"/>
        </Style>
    </Window.Styles>

    <StackPanel Spacing="20">
        <Border>
            <TextBlock Text="鼠标滑过将变红"/>
        </Border>
        <Button Content="按钮" />
        <CheckBox />
    </StackPanel>
</Window>
我们在写代码的时候,如果要用到这个伪类,要在控件元素后空一格, 然后敲 : 这时候是会有代码提示的,如果不空格的话,我试的是没有的。
还有就是我们怎么知道它有哪些可以事件可以用来设置呢?
我们可以通过Avalonia工具窗口来获取。比方在我这个例子里, 通过F12打开工具窗口,在右下角的这里可以看到有哪些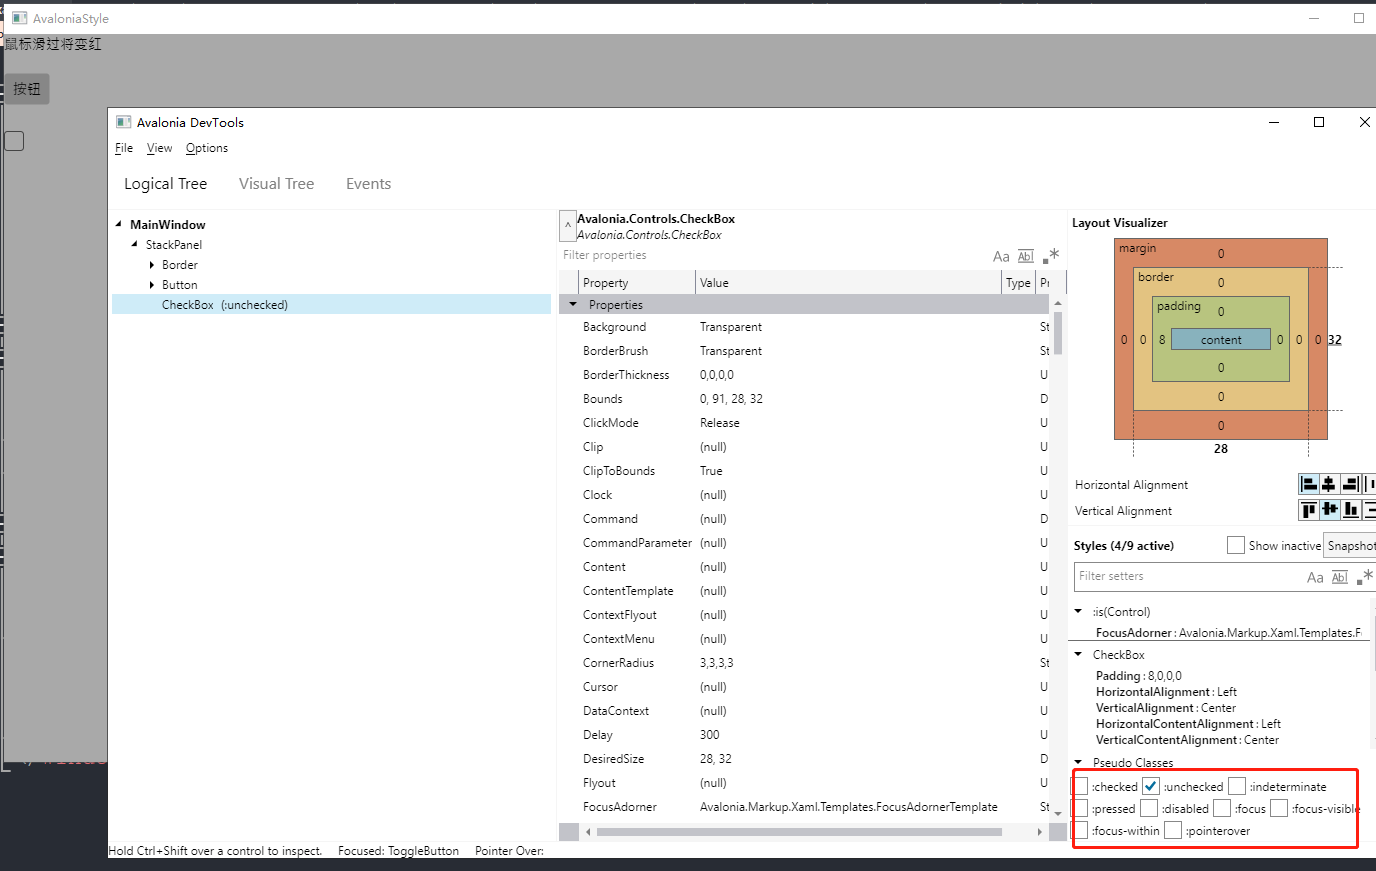
原文地址:https://www.cnblogs.com/mchuang/p/17328603.html