引子
国产AI芯片已经出了两篇博客,作为国产芯片老大的华为。定然不会错过,OK,那就让我们开始吧
国产AI芯片已经出了两篇博客,作为国产芯片老大的华为。定然不会错过,OK,那就让我们开始吧
一、安装
1、x86-gpu版本
(1)下载CUDA 11.1镜像版本 docker pull vistart/cuda:11.1-ubuntu18.04
(2)启动 docker run --rm -it -v /work/zzq:/workspace vistart/cuda:11.1-ubuntu18.04 bash
(3)安装MindSpore2.0 pip install mindspore-cuda11-dev -i https://pypi.tuna.tsinghua.edu.cn/simple
(注:Altas 310t芯片MindSpore安装pip install https://ms-release.obs.cn-north-4.myhuaweicloud.com/2.0.0a0/MindSpore/unified/aarch64/mindspore-2.0.0a0-cp39-cp39-linux_aarch64.whl --trusted-host ms-release.obs.cn-north-4.myhuaweicloud.com -i https://pypi.tuna.tsinghua.edu.cn/simple)
(4)重启docker docker run --gpus=1 --rm -it -v /work:/workspace mindspore:v2.0 bash
2、arm-npu版本
(1)下载安装驱动、cann-toolkit
chmod +x Ascend-hdk-910-npu-driver_23.0.rc1_linux-aarch64.run Ascend-hdk-910-npu-firmware_6.3.0.1.241.run
./Ascend-hdk-910-npu-driver_23.0.rc1_linux-aarch64.run --full --install-for-all
./Ascend-hdk-910-npu-firmware_6.3.0.1.241.run --full
cd /home/guest/zzq/300i_soft/
./Ascend-cann-toolkit_6.3.RC1_linux-aarch64.run --full --install-for-all
(2) 安装MindSpore
conda create -n mindspore_py37 python=3.7 -y
conda activate mindspore_py37
python -m pip install -U pip
pip install sympy
pip install /usr/local/Ascend/ascend-toolkit/latest/lib64/te-*-py3-none-any.whl -i https://pypi.tuna.tsinghua.edu.cn/simple
pip install /usr/local/Ascend/ascend-toolkit/latest/lib64/hccl-*-py3-none-any.whl -i https://pypi.tuna.tsinghua.edu.cn/simple
export MS_VERSION=2.0.0
pip install https://ms-release.obs.cn-north-4.myhuaweicloud.com/${MS_VERSION}/MindSpore/unified/aarch64/mindspore-${MS_VERSION/-/}-cp37-cp37m-linux_aarch64.whl --trusted-host ms-release.obs.cn-north-4.myhuaweicloud.com -i https://pypi.tuna.tsinghua.edu.cn/simple
export GLOG_v=2
LOCAL_ASCEND=/usr/local/Ascend
export LD_LIBRARY_PATH=${LOCAL_ASCEND}/ascend-toolkit/latest/lib64:${LOCAL_ASCEND}/driver/lib64:${LOCAL_ASCEND}/ascend-toolkit/latest/opp/built-in/op_impl/ai_core/tbe/op_tiling:${LD_LIBRARY_PATH}
export TBE_IMPL_PATH=${LOCAL_ASCEND}/ascend-toolkit/latest/opp/built-in/op_impl/ai_core/tbe
export ASCEND_OPP_PATH=${LOCAL_ASCEND}/ascend-toolkit/latest/opp
export ASCEND_AICPU_PATH=${ASCEND_OPP_PATH}/..
export PATH=${LOCAL_ASCEND}/ascend-toolkit/latest/compiler/ccec_compiler/bin/:${PATH}
export PYTHONPATH=${TBE_IMPL_PATH}:${PYTHONPATH}
python -c "import mindspore;mindspore.run_check()"

二、训练
cd /workspace/zzq/MindSpore/models/official/cv/YOLOv5
python3 train.py
三、模型转换
1、YOLOv5
python3 export.py --ckpt_file ./output/yolov5_305_964.ckpt --file_name "object" --file_format "MINDIR"
python3 export.py --ckpt_file ./output/yolov5_14_964.ckpt --file_name "object" --file_format "ONNX"
四、评估
1、YOLOv5
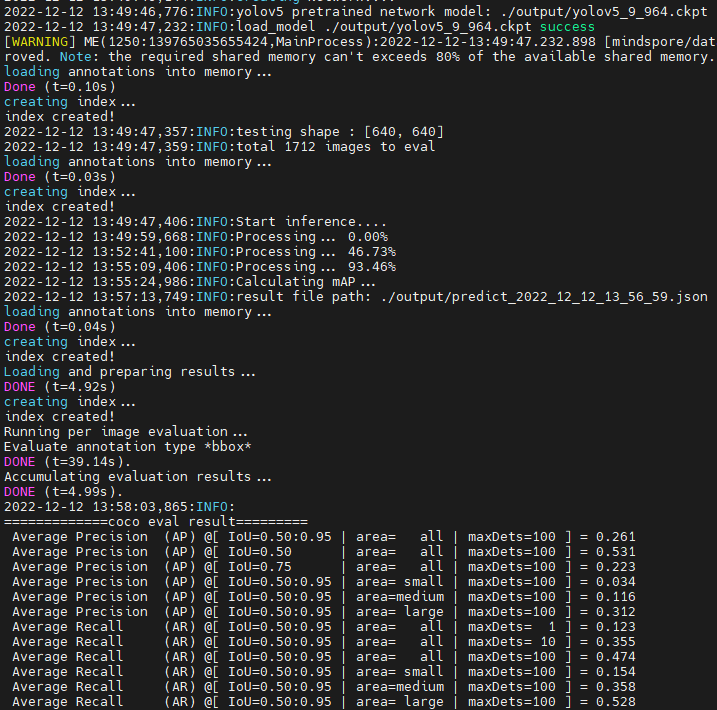
(1)原始模型yolov5_305_964.ckpt评估
python3 eval.py
(2)onnx模型评估
修改default_config.yaml

pip3 install onnxruntime -i
python3 eval_onnx.py

五、Atlas 300i pro推理服务器部署
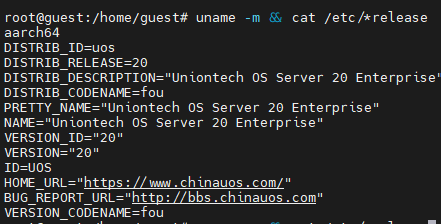
1、确认操作系统和内核版本
(1)命令查询服务器当前运行环境的操作系统架构及版本 uname -m && cat /etc/*release
(2)查看操作系统内核版本 uname -r

2、安装npu驱动、cann-toolkit、mindx
添加用户组
groupadd HwHiAiUser
useradd -g HwHiAiUser -d /home/HwHiAiUser -m HwHiAiUser -s /bin/bash
(1)Arm版本
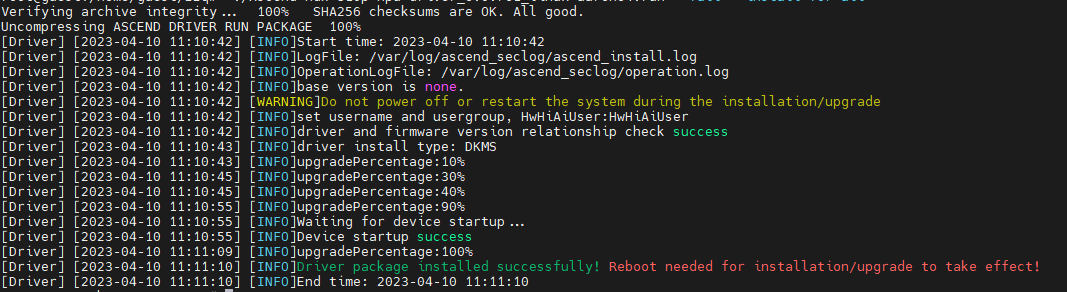
a、安装驱动
cd /home/guest/zzq/300i_soft
chmod +x Ascend-hdk-310p-npu-driver_23.0.rc1_linux-aarch64.run
./Ascend-hdk-310p-npu-driver_23.0.rc1_linux-aarch64.run --full --install-for-all
chmod +x Ascend-hdk-310p-npu-firmware_6.3.0.1.241.run
./Ascend-hdk-310p-npu-firmware_6.3.0.1.241.run --full

b、安装cann-toolkit
cd /home/guest/zzq/300i_soft
add-apt-repository ppa:ubuntu-toolchain-r/test
apt-get update
apt-get install gcc-9 g++-9
apt-get install dkms
chmod +x Ascend-cann-toolkit_6.3.RC1_linux-aarch64.run
./Ascend-cann-toolkit_6.0.RC1_linux-aarch64.run --full --install-for-all
./Ascend-cann-toolkit_6.3.RC1_linux-aarch64.run --full --install-for-all
(2)x86版本
a、安装驱动
cd /home/nick/Ascend/hw_software/
apt-get install gcc
apt-get install dkms
chmod +x Ascend-hdk-310p-npu-driver_23.0.rc1_linux-x86-64.run
./Ascend-hdk-310p-npu-driver_23.0.rc1_linux-x86-64.run --full --install-for-all
chmod +x Ascend-hdk-310p-npu-firmware_6.3.0.1.241.run
./Ascend-hdk-310p-npu-firmware_6.3.0.1.241.run --full
b、安装cann-toolkits
Ubuntu20.04
chmod +x Ascend-cann-toolkit_6.3.RC1_linux-x86_64.run
./Ascend-cann-toolkit_6.3.RC1_linux-x86_64.run --full --install-for-all
Ubuntu18.04
chmod +x Ascend-cann-toolkit_6.0.1_linux-x86_64.run
./Ascend-cann-toolkit_6.0.1_linux-x86_64.run --full --install-for-all
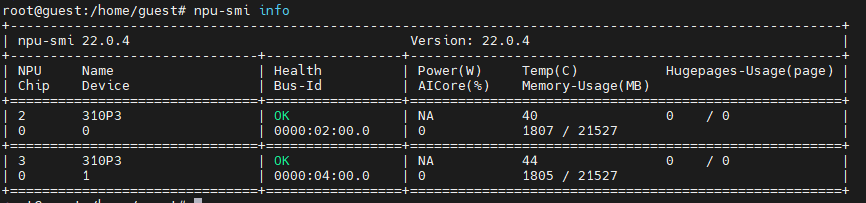
3、查看驱动加载是否成功 npu-smi info
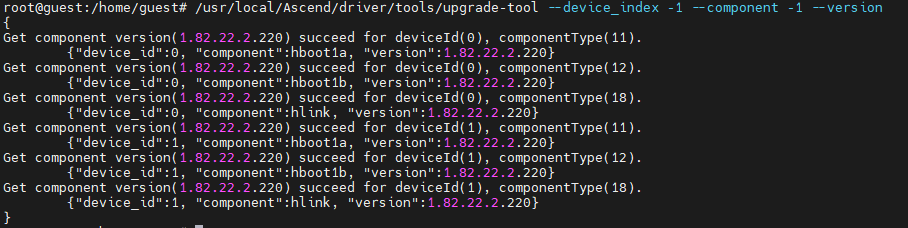
4、查看芯片固件版本号 /usr/local/Ascend/driver/tools/upgrade-tool --device_index -1 --component -1 --version
5、转换在芯片上跑的om模型
开启转换环境
source /usr/local/Ascend/ascend-toolkit/set_env.sh
pip install numpy
pip install sympy
cd /home/guest/zzq/models-master/official/cv/YOLOv5/infer/convert
转onnx
sh /usr/local/Ascend/ascend-toolkit/latest/bin/atc --framework=5 --model=../data/models/yolov5.onnx --input_shape="x:1,12,320,320" --output=yolov5 --enable_small_channel=1 --soc_version=Ascend310P3
转air
sh /usr/local/Ascend/ascend-toolkit/latest/bin/atc --framework=1 --model=../data/yolov5.air --input_shape="actual_input_1:1,12,320,320" --output=yolov5 --enable_small_channel=1 --soc_version=Ascend310P3
6、docker配置并拉取
(1)解决无法apt-get install update问题
vim /etc/apt/sources.list
将第二行替换成:
deb https://mirrors.aliyun.com/debian stable main contrib non-free
(2)安装docker
apt-get install docker.io
(3)设置docker并拉取镜像
a、vi /etc/docker/daemon.json添加如下内容
{ "registry-mirrors": ["http://docker.mirrors.ustc.edu.cn"], "insecure-registries": ["docker.mirrors.ustc.edu.cn", "ascendhub-registry.rnd.huawei.com", "registry.docker-cn.com", "ustc-edu-cn.mirror.aliyuncs.com","ascendhub.huawei.com"], "experimental" : true}
b、docker重启
sudo systemctl daemon-reload
sudo systemctl restart docker
c、登录拉取镜像
AscendHub,点击infer-modelzoo链接获取容器镜像。
https://ascendhub.huawei.com/#/detail/infer-modelzoo 里面选择镜像并点击下载,有可选参数(注意:过24小时,记得更新凭证)
docker login -u nick-zhuo ascendhub.huawei.com
密码:nick1989
docker pull ascendhub.huawei.com/public-ascendhub/infer-modelzoo:22.0.0
d、启动镜像
arm版本
docker run -itd --name infer1 --network=host --device=/dev/davinci0 --device=/dev/davinci_manager --device=/dev/devmm_svm --device=/dev/hisi_hdc -v /usr/local/sbin/npu-smi:/usr/local/sbin/npu-smi -v /home/guest:/home/guest -v /usr/local/Ascend/driver:/usr/local/Ascend/driver ascendhub.huawei.com/public-ascendhub/infer-modelzoo:22.0.0 /bin/bash
docker exec -it -u 0 infer1 /bin/bash
x86版本
docker run -itd --name infer1 --network=host --device=/dev/davinci0 --device=/dev/davinci_manager --device=/dev/devmm_svm --device=/dev/hisi_hdc -v /usr/local/sbin/npu-smi:/usr/local/sbin/npu-smi -v /home/nick:/home/nick -v /usr/local/Ascend/driver:/usr/local/Ascend/driver ascendhub.huawei.com/public-ascendhub/infer-modelzoo-lw:22.0.0 /bin/bash
docker exec -it -u 0 infer1 /bin/bash
e、安装mindxsdk-mxvision
arm版本
cd /home/guest/zzq
./Ascend-mindxsdk-mxvision_5.0.RC1_linux-aarch64.run --install
x86版本
cd /home/nick/Ascend/hw_software/
./Ascend-mindxsdk-mxvision_5.0.RC1_linux-x86_64.run --install
f、添加mxvision环境变量
vi ~/.bashrc
添加 . /home/guest/zzq/mxVision/set_env.sh
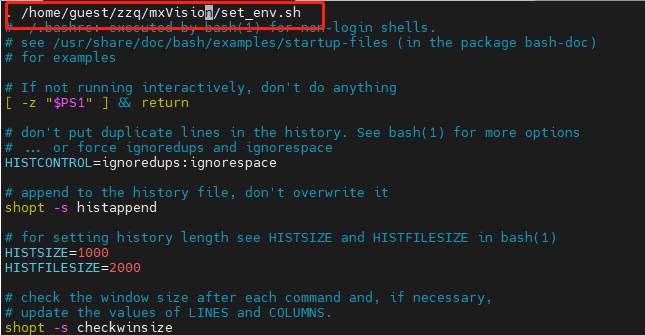
source ~/.bashrc
cd /home/guest/zzq/models-master/official/cv/YOLOv5/infer/sdk
python main.py

结果查看
cd /home/guest/zzq/models-master/official/cv/YOLOv5/infer/sdk/result/
cat predict.json