通过群里发的安装包进行安装
VMware 16安装
参考网页:
https://blog.csdn.net/qq_40950957/article/details/80467513
密钥自行从网上搜索
Ubuntu 20.04安装过程
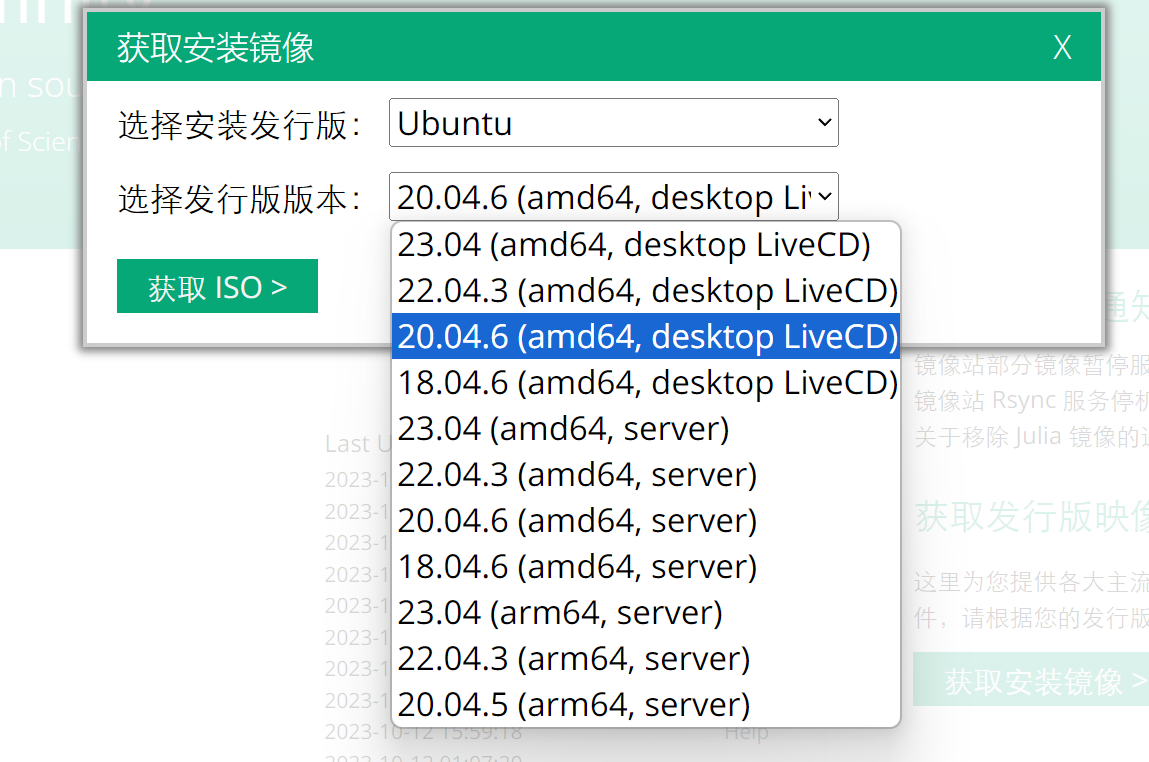
在此之前,先去下载Ubuntu22.04镜像,下载地址:

选择这个
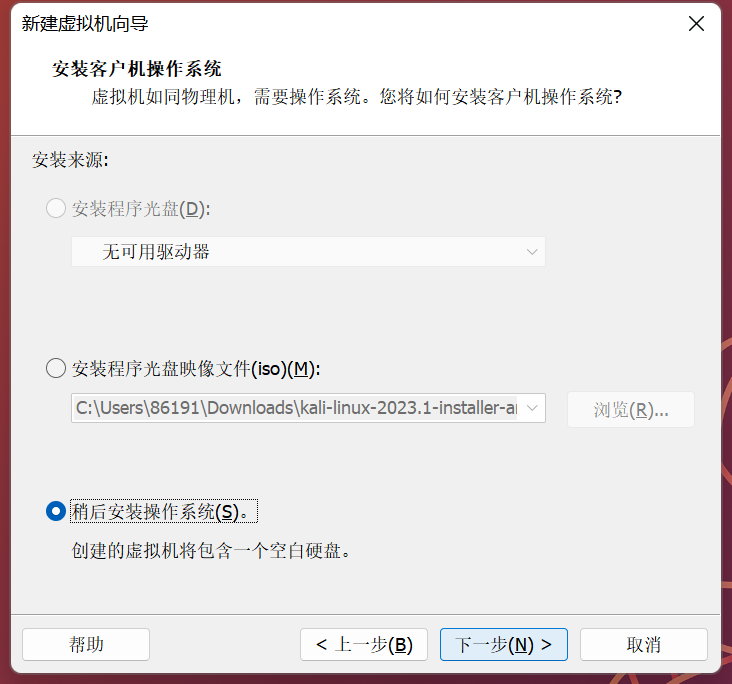
下载完成之后,进行新建虚拟机

自己选择一个路径,最好是空间比较大的盘
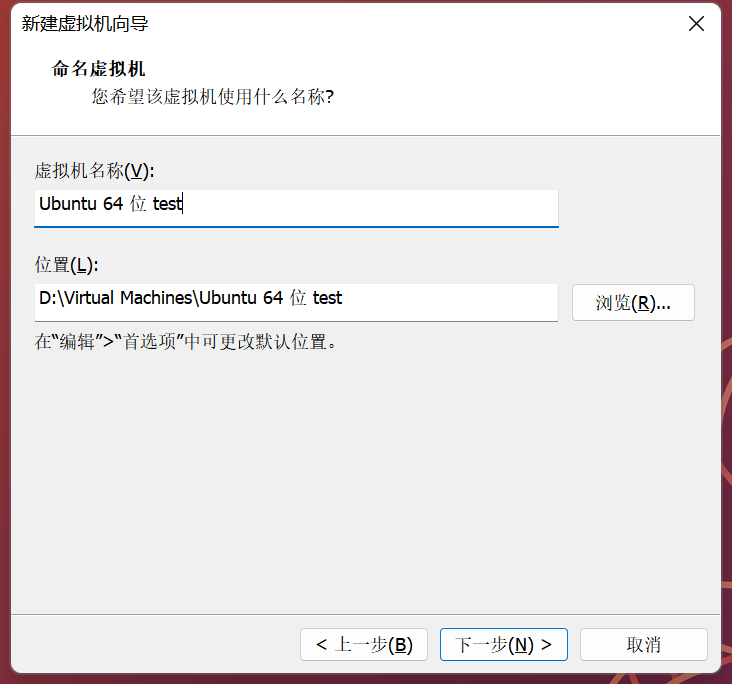
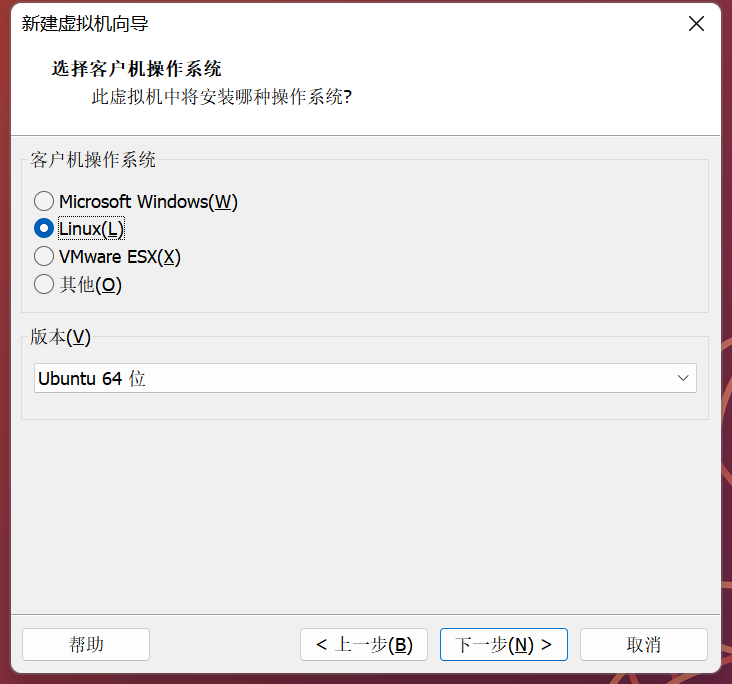
以上没有提到的过程都选择默认
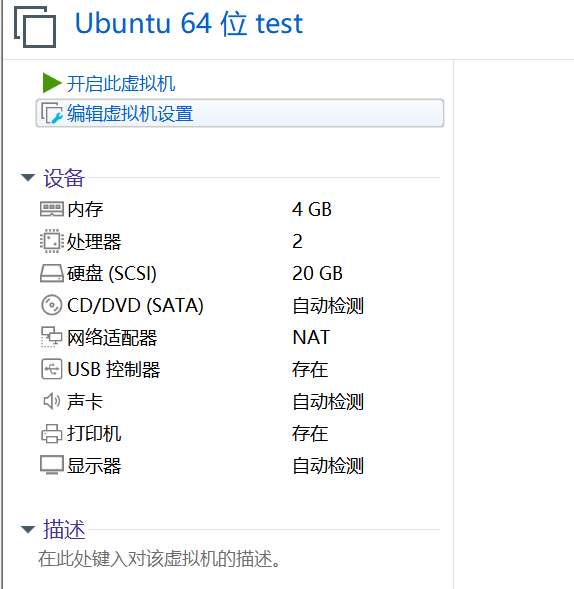
之后点击编辑虚拟机设置
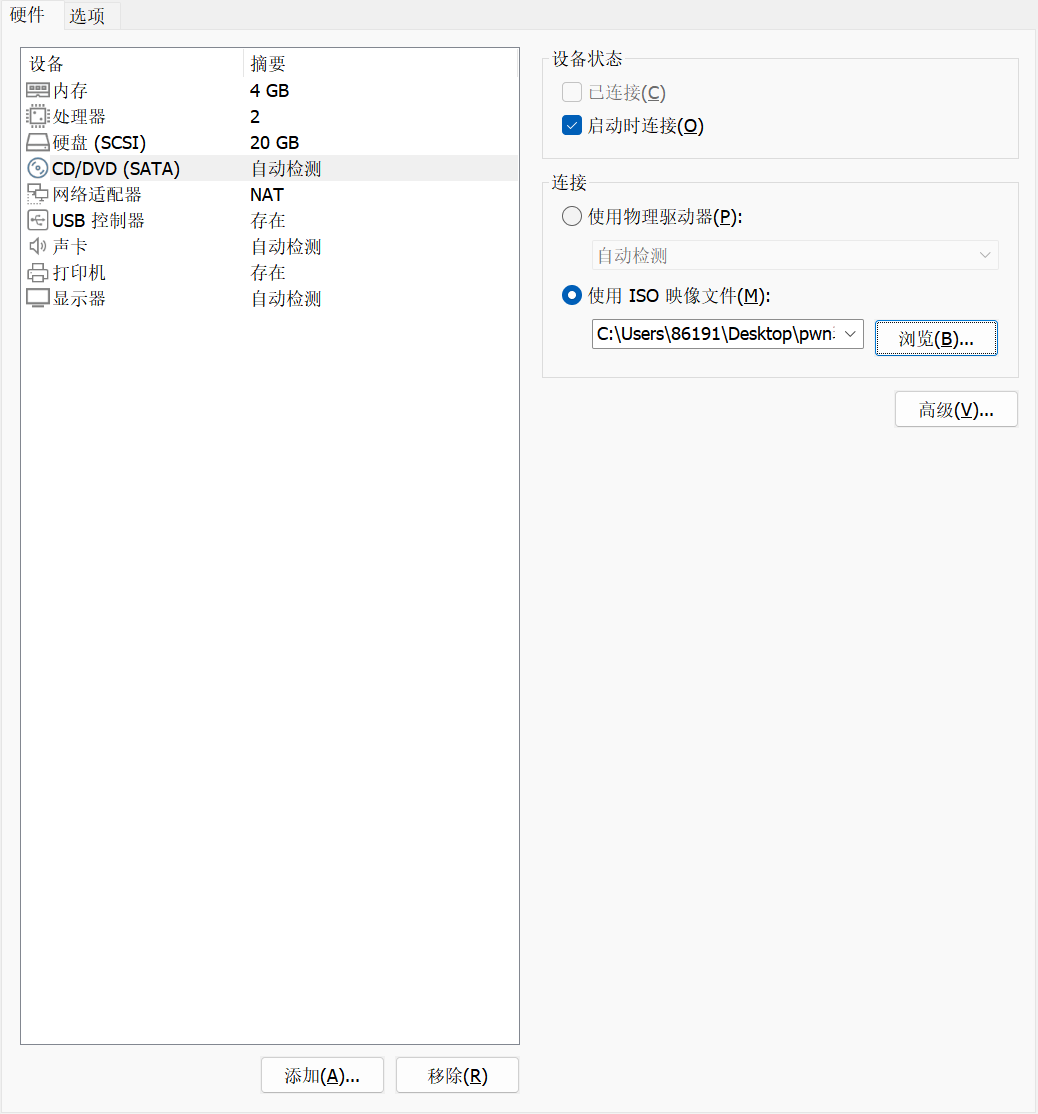
点击CD/DVD,设置映像文件,选择文件夹中所给的Ubuntu20.04光盘
点击确定后开启虚拟机即可
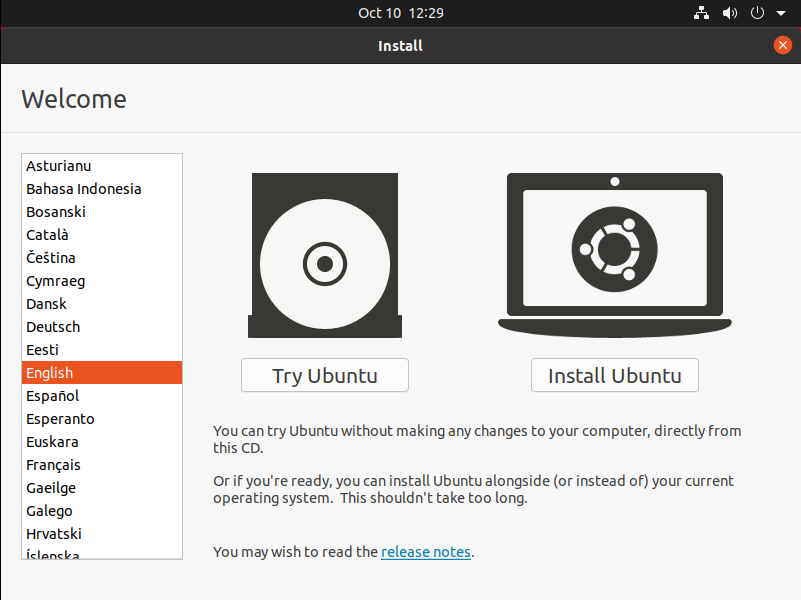
接着在左边选择语言可以选英文和简体中文(建议英文)
然后点击install Ubuntu
之后会让选择键盘类型,选择汉语拼音
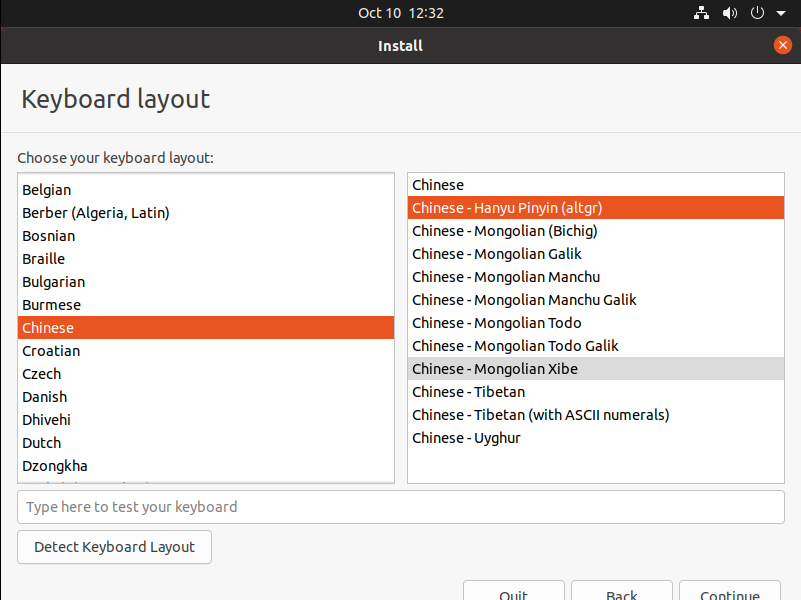
点击右下角的continue
然后一路继续
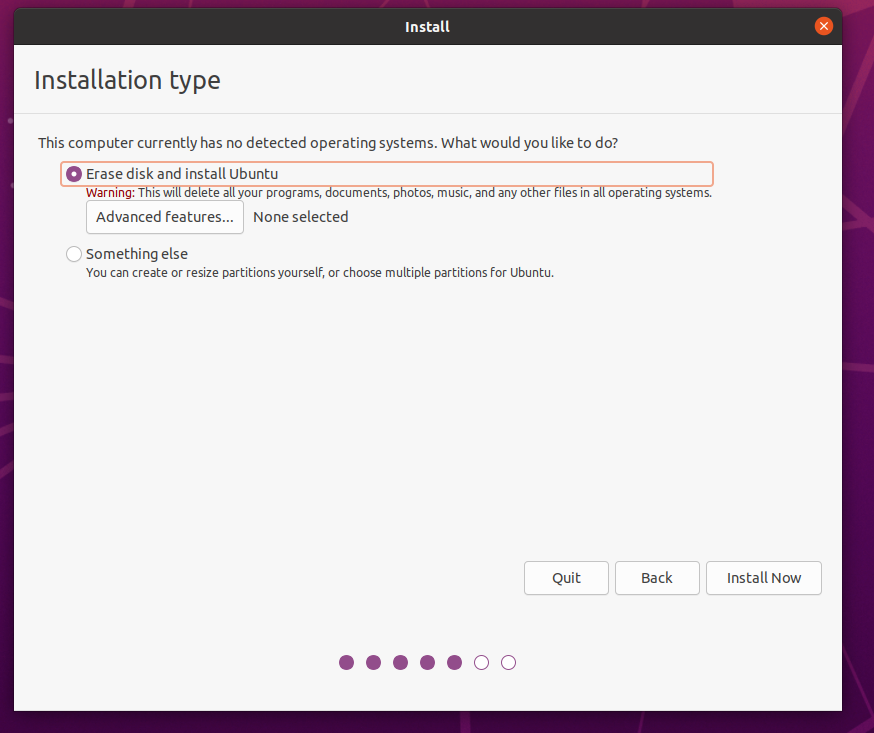
点击install Now ,continue,点击地图选择上海时区
之后填写个人资料和密码,密码填1
之后继续便开始安装
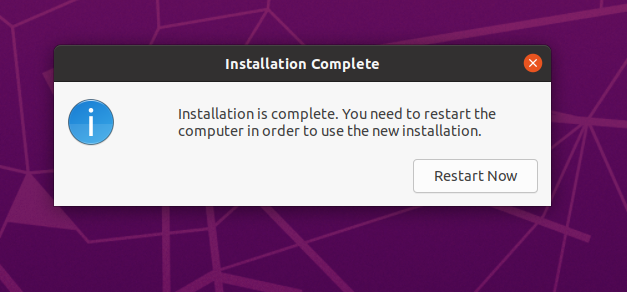
点击重启
进入之后一路跳过即可
这里先保存一个快照,方便之后操作错误回退
打开终端
依次执行以下命令
sudo apt-get install python3 python3-pip python3-dev git libssl-dev libffi-dev build-essential
sudo python3 -m pip install --upgrade pip -i https://pypi.tuna.tsinghua.edu.cn/simple
sudo python3 -m pip install --upgrade pwntools -i https://pypi.tuna.tsinghua.edu.cn/simple
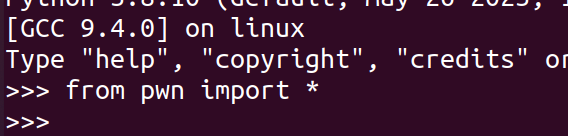
输入python3,进入python交互界面
输入
from pwn import *
验证pwntools是否安装成功
如下为成功
之后再执行
cd ~/
git clone https://github.com/scwuaptx/Pwngdb.git
cp ~/Pwngdb/.gdbinit ~/
再执行
git clone https://github.com/pwndbg/pwndbg
注意 pwndbg和pwngdb都在用户目录下克隆
这里在安装pwndbg之前
先在用户目录下执行
mkdir .pip
cd .pip
gedit pip.conf
在该文件中添加
 [global]
 index-url = https://pypi.tuna.tsinghua.edu.cn/simple
之后再
cd ~
cd pwndbg
./setup.sh
最后执行
cd ~
gedit .gdbinit
将.gdbinit换为
source ~/pwndbg/gdbinit.py
source ~/Pwngdb/pwngdb.py
source ~/Pwngdb/angelheap/gdbinit.py

define hook-run
python
import angelheap
angelheap.init_angelheap()
end
end
source /home/hacker/pwndbg/gdbinit.py
在命令行输入gdb
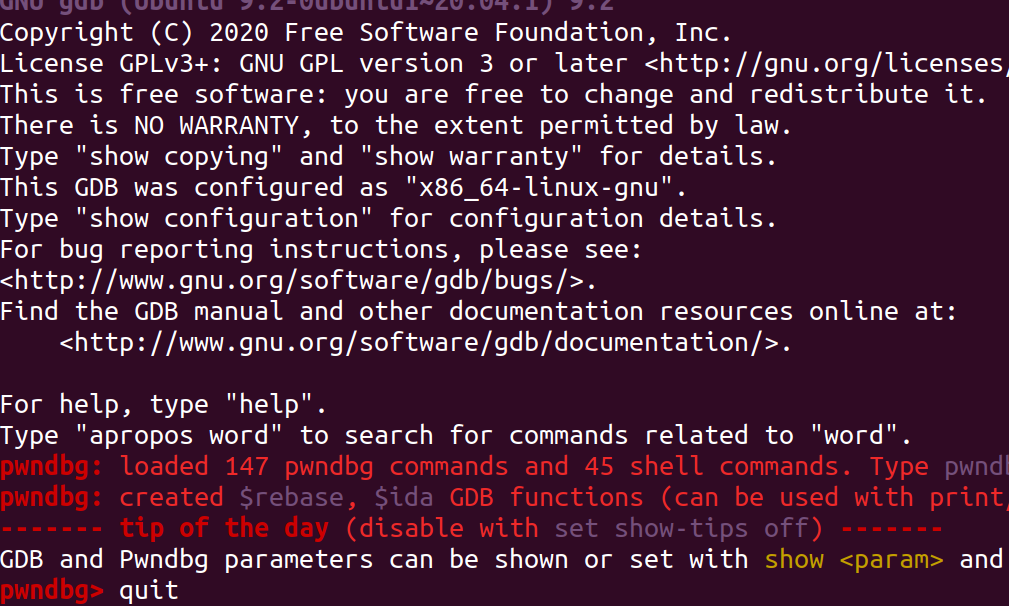
出现如上界面,即为成功
到此你已经可以进行pwn了!