一.OAuth2简介
OAuth 2.0(开放授权 2.0)是一种用于授权的开放标准,旨在允许用户在不提供他们的用户名和密码的情况下,授权第三方应用访问其在另一网站上的信息。它是在网络服务之间安全地共享用户资源的流行协议。
以下是OAuth2的主要组成部分和概念:
-
资源所有者(Resource Owner):通常是用户,拥有需要被保护的资源,如照片、文件等。
-
客户端(Client):请求访问资源的应用,可能是网站、移动应用或其他服务。
-
授权服务器(Authorization Server):负责验证用户身份并颁发访问令牌(Access Token)的服务器。
-
资源服务器(Resource Server):存储和管理受保护的用户资源,只响应有效的访问令牌。
-
授权许可(Authorization Grant):授权服务器颁发给客户端的凭证,用于获取访问令牌。
-
访问令牌(Access Token):客户端用于访问资源服务器上受保护资源的令牌。
-
刷新令牌(Refresh Token):在访问令牌过期时用于获取新的访问令牌的令牌。
OAuth2的工作流程大致如下:
- 客户端请求授权,将用户导向授权服务器。
- 用户登录并同意授权。
- 授权服务器颁发授权许可。
- 客户端使用授权许可请求访问令牌。
- 授权服务器验证请求并颁发访问令牌。
- 客户端使用访问令牌访问资源服务器上的受保护资源。
OAuth2提供了一种安全的机制,使第三方应用可以在用户授权的情况下访问其受保护的资源,而无需直接获取用户的凭证。这使得用户可以更安全地共享他们的数据。
二.GitHub中的OAuth2
申请GitHub OAuth2应用需要在GitHub上注册一个应用。以下是详细步骤:
-
登录GitHub账户: 在GitHub上登录您的账户。
-
转至开发者设置: 转至 GitHub开发者设置 页面。
-
创建新应用: 点击页面上的“New OAuth App”按钮。
-
填写应用信息: 在弹出的表单中填写应用信息,包括应用名称、主页URL、授权回调URL等。
-
获取Client ID和Client Secret: 完成表单后,GitHub将为您的应用生成一个唯一的Client ID和Client Secret。这两个值在后续步骤中将用于验证您的应用。
-
设置授权范围: 根据您的应用需求,选择适当的授权范围,以确定应用在用户授权时可以访问的资源。
-
保存应用设置: 最后,点击“Register application”按钮,保存应用设置。
完成上述步骤后,您的应用就可以使用GitHub OAuth2进行授权了。在实际编写代码时,您将使用刚刚生成的Client ID和Client Secret来获取访问令牌,进而访问用户授权的资源。请确保妥善保管这两个值,以确保安全性。
三.编写授权代码
在这我使用SpringBoot来展开将Github OAuth2授权的具体方式
第一步
将申请到的ClientId和ClientSecret写入配置文件,在这我选择写到SpringBoot的application.yml文件中,然后用@ConfigurationProperties注解映射到实体类。
配置文件:
server:
  port: 8080

github:
  clientId: yourClientIdHere
  clientSecret: yourClientSecretHere
实体类:
package com.github.config;

import lombok.Data;
import org.springframework.boot.context.properties.ConfigurationProperties;
import org.springframework.stereotype.Component;

@ConfigurationProperties(prefix = "github")
@Component
@Data
public class GithubConfig {

    private String clientId;

    private String ClientSecret;


}
在这里就大概配置好了Github OAuth2授权的上下文。
第二步
编写前端代码,这里我选择使用原生HTML来展示页面效果(你也可以编写复杂的页面来实现美观效果)
<!DOCTYPE html>
<html>

<head>
    <meta charset="utf-8" />
    <meta http-equiv="X-UA-Compatible" content="IE=edge">
    <title>OAuth2 Demo</title>
    <meta name="viewport" content="width=device-width, initial-scale=1">
</head>

<body>
<a id="login">Login with GitHub</a>

<script>
    const client_id = 'your_clientId_here';

    const authorize_uri = 'https://github.com/login/oauth/authorize';
    const redirect_uri = 'http://localhost:8080/oauth/callback';

    const link = document.getElementById('login');

    function generateSecureRandomString(length) {
        const charset = "abcdefghijklmnopqrstuvwxyzABCDEFGHIJKLMNOPQRSTUVWXYZ0123456789";
        const crypto = window.crypto || window.msCrypto;
        const randomValues = new Uint32Array(length);

        crypto.getRandomValues(randomValues);

        let randomString = "";
        for (let i = 0; i < length; i++) {
            const randomIndex = randomValues[i] % charset.length;
            randomString += charset.charAt(randomIndex);
        }

        return randomString;
    }

    let state = generateSecureRandomString(10)
    link.href = `${authorize_uri}?client_id=${client_id}&scope=user:email&redirect_uri=${redirect_uri}&state=${state}`;
</script>

</body>

</html>
注意在这里总共有四个参数,redirectUrl和state参数最好由后端生成,其中state参数用来防止CSRF攻击,请务必在后端生成,下文会提及如何使用该参数来防止CSRF攻击,关于scope参数请查阅github官方文档
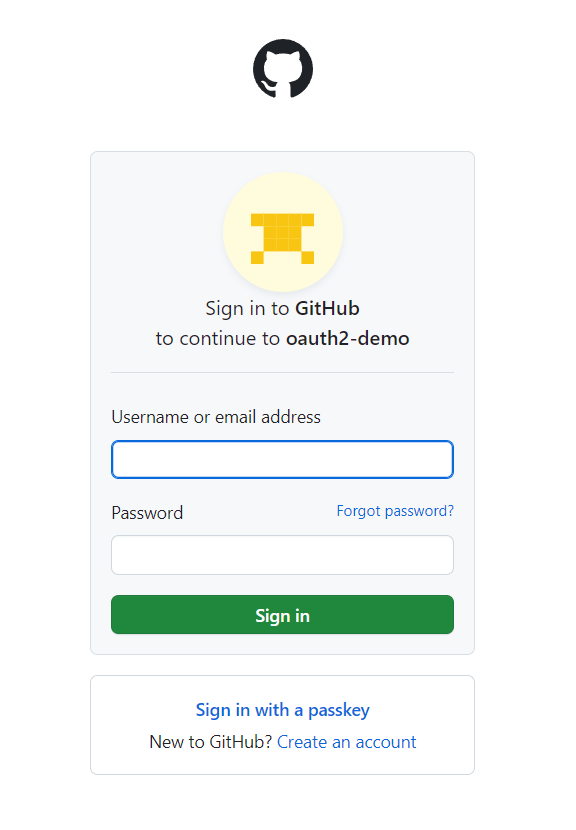
点击页面的Login with GitHub后,会跳转到Github的授权页面
第三步
到了我们的后端主逻辑,在这我们需要携带我们的clientId和ClientSecret,来请求Github的地址,授权过后Github将重定向到我们设置的回调地址并返回一个code参数和前文提到的state参数,我们在后端需判定此state参数和我们生成的state参数是否一致,来达到拒绝CSRF攻击的目的,下面我们就可以用Github返回的code参数去请求我们想要的信息了。
package com.github.contoller;

import com.github.config.GithubConfig;
import com.github.entity.AccessTokenResponse;
import org.apache.commons.lang3.time.DateUtils;
import org.springframework.beans.factory.annotation.Autowired;
import org.springframework.http.HttpEntity;
import org.springframework.http.HttpHeaders;
import org.springframework.http.HttpMethod;
import org.springframework.http.ResponseEntity;
import org.springframework.stereotype.Controller;
import org.springframework.ui.Model;
import org.springframework.web.bind.annotation.GetMapping;
import org.springframework.web.bind.annotation.RequestMapping;
import org.springframework.web.bind.annotation.RequestParam;
import org.springframework.web.bind.annotation.RestController;
import org.springframework.web.client.RestTemplate;
import org.springframework.web.servlet.ModelAndView;

import java.util.Map;
import java.util.concurrent.ConcurrentHashMap;

@Controller
@RequestMapping("/oauth")
public class IndexController {

    @Autowired
    private GithubConfig githubConfig;


    // 存储生成的state参数,可以使用更适合线程安全的数据结构,如ConcurrentHashMap
    private ConcurrentHashMap<String, String> storedStates = new ConcurrentHashMap<>();


    @GetMapping("/params")
    public Map<String,Object>  getParams(){
        //TODO 生成state参数等
        return null;
    }

    @GetMapping("/callback")
    public String handleRedirect(@RequestParam("code") String requestToken,Model model) {
        //TODO 在这判断state参数是否一致

        // 使用RestTemplate来发送HTTP请求
        RestTemplate restTemplate = new RestTemplate();

        // 获取Token的Url
        String tokenUrl = "https://github.com/login/oauth/access_token" +
                "?client_id=" + githubConfig.getClientId() +
                "&client_secret=" + githubConfig.getClientSecret() +
                "&code=" + requestToken;

        // 使用restTemplate向GitHub发送请求,获取Token
        AccessTokenResponse tokenResponse = restTemplate.postForObject(tokenUrl, null, AccessTokenResponse.class);

        // 从响应体中获取Token数据
        String accessToken = tokenResponse.getAccessToken();

        System.out.println("accessToken = " + accessToken);

        // 携带Token向GitHub发送请求
        String apiUrl = "https://api.github.com/user/emails";
        HttpHeaders headers = new HttpHeaders();
        headers.set("Authorization", "token " + accessToken);
        HttpEntity<String> entity = new HttpEntity<>("parameters", headers);
        ResponseEntity<String> response = restTemplate.exchange(apiUrl, HttpMethod.GET, entity, String.class);

        // 将 userData 添加到模型
        model.addAttribute("userData", response.getBody());

        // 返回视图的逻辑名称
        return "welcome";
    }

}
有关CSRF的具体解释请参照wikipedia,这里不做过多解释。
注:我这里并没有在后端生成state参数,如将代码用于生产环境,请自行改写代码!!!!!
第四步
到这基本上可以说是结束了,你已经获取到了你想要的参数,接下来就看你如何处理你的业务逻辑了。
总结
以上就是GitHub OAuth2的授权指南,其中方法并不完善,本意是学习第三方授权,还请多多见谅。