系统基础优化
#系统版本:Ubuntu22.04
#docker版本:20.10
#kubeadm版本:1.27.2


root@k8s-master1:~# cat /etc/sysctl.conf
###################################################################
net.ipv4.ip_forward=1
vm.max_map_count=262144
kernel.pid_max=4194303
fs.file-max=1000000
net.ipv4.tcp_max_tw_buckets=6000
net.netfilter.nf_conntrack_max=2097152
net.bridge.bridge-nf-call-ip6tables = 1
net.bridge.bridge-nf-call-iptables = 1
vm.swappiness=0

内核模块开机挂载:
root@k8s-master1:~#vim /etc/modules-load.d/modules.conf
ip_vs
ip_vs_lc
ip_vs_lblc
ip_vs_lblcr
ip_vs_rr
ip_vs_wrr
ip_vs_sh
ip_vs_dh
ip_vs_fo
ip_vs_nq
ip_vs_sed
ip_vs_ftp
ip_vs_sh
ip_tables
ip_set
ipt_set
ipt_rpfilter
ipt_REJECTip
ipxt_set
br_netfilter
nf_conntrack
overlay

#重启后验证内核模块与内存参数:
root@k8s-master1:~# lsmod | grep br_netfilter
br_netfilter 32768 0
bridge 307200 1 br_netfilter
root@k8s-master1:~# sysctl -a | grep bridge-nf-call-iptables
net.bridge.bridge-nf-call-iptables = 1


#修改主机名称
hostnamectl set-hostname master1
hostnamectl set-hostname master2
hostnamectl set-hostname master3
hostnamectl set-hostname node1
hostnamectl set-hostname node2
hostnamectl set-hostname node3
hostnamectl set-hostname lb1
hostnamectl set-hostname lb2


#配置hosts解析
cat >> /etc/hosts <<'EOF'
10.0.0.30 master1
10.0.0.31 master2
10.0.0.32 master3
10.0.0.33 node1
10.0.0.34 node2
10.0.0.35 node2
10.0.0.36 lb
10.0.0.37 lb
EOF

#生产当中最好禁用swap,防止程序出现慢,安装k8s就是要禁用swap
#使用sed命令快速禁用,/swap/s@^@#@g把包含swap的行首替换为#号
sed -i.bak '/swap/s@^@#@g' /etc/fstab
##命令行立即禁用swap
#swapoff -a
安装docker和cri-docker
##安装GPG证书
curl -fsSL http://mirrors.aliyun.com/docker-ce/linux/ubuntu/gpg | sudo apt-key add -

##写入软件源信息
add-apt-repository "deb [arch=amd64] http://mirrors.aliyun.com/docker-ce/linux/ubuntu $(lsb_release -cs) stable"


##更新软件
apt-get -y update

##查看docker可安装的版本
apt-cache madison docker-ce docker-ce-cli

##安装docker
apt install -y docker-ce=5:20.10.23~3-0~ubuntu-jammy docker-ce-cli=5:20.10.23~3-0~ubuntu-jammy

#设置docker开机自启动
systemctl start docker && systemctl enable docker

##参数优化,配置镜像加速并使用systemd
mkdir -p /etc/docker
tee /etc/docker/daemon.json <<-'EOF'
{
"exec-opts": ["native.cgroupdriver=systemd"],
"registry-mirrors": ["https://9916w1ow.mirror.aliyuncs.com"]
}
EOF

##重启docker使配置生效
systemctl daemon-reload && sudo systemctl restart docker
cat /etc/docker/daemon.json
{
"exec-opts": ["native.cgroupdriver=systemd"],
"registry-mirrors": ["https://9916w1ow.mirror.aliyuncs.com"]
}

#安装cri-docker
#github下载地址
https://github.com/Mirantis/cri-dockerd/tags

#下载安装包
wget https://github.com/Mirantis/cri-dockerd/releases/download/v0.3.1/cri-dockerd-0.3.1.amd64.tgz
tar xvf cri-dockerd-0.3.1.amd64.tgz
cp cri-dockerd/cri-dockerd /usr/local/bin/

#创建service文件
cat >/lib/systemd/system/cri-docker.service<<'EOF'
[Unit]
Description=CRI Interface for Docker Application Container Engine
Documentation=https://docs.mirantis.com
After=network-online.target firewalld.service docker.service
Wants=network-online.target
Requires=cri-docker.socket
[Service]
Type=notify
ExecStart=/usr/local/bin/cri-dockerd --network-plugin=cni --pod-infra-container-image=registry.aliyuncs.com/google_containers/pause:3.7
ExecReload=/bin/kill -s HUP $MAINPID
TimeoutSec=0
RestartSec=2
Restart=always
StartLimitBurst=3
StartLimitInterval=60s
LimitNOFILE=infinity
LimitNPROC=infinity
LimitCORE=infinity
TasksMax=infinity
Delegate=yes
KillMode=process
[Install]
WantedBy=multi-user.target
EOF


#安装cri-dockerd:
#配置cri-docker.socket文件:
cat >/etc/systemd/system/cri-docker.socket<<'EOF'
[Unit]
Description=CRI Docker Socket for the API
PartOf=cri-docker.service

[Socket]
ListenStream=%t/cri-dockerd.sock
SocketMode=0660
SocketUser=root
SocketGroup=docker

[Install]
WantedBy=sockets.target
EOF

启动服务:
systemctl daemon-reload && systemctl restart cri-docker && systemctl enable --now cri-docker && systemctl enable --now cri-docker.socket

#查看cri-docker的启动状态
root@buntu2204:~# systemctl status cri-docker.service
● cri-docker.service - CRI Interface for Docker Application Container Engine
     Loaded: loaded (/lib/systemd/system/cri-docker.service; enabled; vendor preset: enabled)
     Active: active (running) since Fri 2023-12-15 09:52:21 CST; 2min 34s ago
TriggeredBy: ● cri-docker.socket
       Docs: https://docs.mirantis.com
   Main PID: 4012 (cri-dockerd)
      Tasks: 8
     Memory: 8.6M
        CPU: 96ms
     CGroup: /system.slice/cri-docker.service
             └─4012 /usr/local/bin/cri-dockerd --network-plugin=cni --pod-infra-container-image=registry.aliyuncs.com/google_containers/pause:3.7
负载均衡节点搭建
#负载均衡节点安装软件
yum install -y haproxy keepalived

#修改lb1的配置文件
cat >/etc/keepalived/keepalived.conf<<'EOF'
! Configuration File for keepalived

global_defs {
   notification_email {
     acassen
   }
   notification_email_from Alexandre.Cassen@firewall.loc
   smtp_server 192.168.200.1
   smtp_connect_timeout 30
   router_id LVS_DEVEL
}

vrrp_instance VI_1 {
    state MASTER
    interface eth0
    virtual_router_id 50
    nopreempt
    priority 100
    advert_int 1
    authentication {
       auth_type PASS
       auth_pass 1111
    }
    virtual_ipaddress {
        10.0.0.71 dev eth0 label eth0:0
        10.0.0.72 dev eth0 label eth0:1
        10.0.0.73 dev eth0 label eth0:2
        10.0.0.74 dev eth0 label eth0:3
    }
}
EOF
#修改lb2的配置文件
cat >/etc/keepalived/keepalived.conf<<'EOF'
! Configuration File for keepalived

global_defs {
   notification_email {
     acassen
   }
   notification_email_from Alexandre.Cassen@firewall.loc
   smtp_server 192.168.200.1
   smtp_connect_timeout 30
   router_id LVS_DEVEL
}

vrrp_instance VI_1 {
    state BACKUP
    interface eth0
    virtual_router_id 50
    nopreempt
    priority 80
    advert_int 1
    authentication {
       auth_type PASS
       auth_pass 1111
    }
    virtual_ipaddress {
        10.0.0.71 dev eth0 label eth0:0
        10.0.0.72 dev eth0 label eth0:1
        10.0.0.73 dev eth0 label eth0:2
        10.0.0.74 dev eth0 label eth0:3
    }
}
EOF

#启动和配置自启动
systemctl restart keepalived
systemctl enable keepalived


#配置haproxy
cat >>/etc/haproxy/haproxy.cfg<<'EOF'
listen k8s-6443
        bind 10.0.0.71:6443
        mode tcp
        server master1-haproxy1-keepalived1 10.0.0.30:6443 check inter 3000s fall 3 rise 5
        server master2-haproxy2-keepalived2 10.0.0.31:6443 check inter 3000s fall 3 rise 5
        server master3-haproxy3-keepalived3 10.0.0.32:6443 check inter 3000s fall 3 rise 5
EOF

#启动haproxy
systemctl restart haproxy
systemctl enable haproxy
安装kubeadm
#安装kubeadm
##使用阿里云源
apt-get update && apt-get install -y apt-transport-https -y
curl https://mirrors.aliyun.com/kubernetes/apt/doc/apt-key.gpg | apt-key add -
#添加apt源
cat <<EOF >/etc/apt/sources.list.d/kubernetes.list
deb https://mirrors.aliyun.com/kubernetes/apt/ kubernetes-xenial main
EOF
##检查更新
apt-get update

#所有节点安装kubeadm
apt-get install -y kubeadm=1.27.2-00 kubectl=1.27.2-00 kubelet=1.27.2-00

#查看需要下载的镜像
kubeadm config images list --kubernetes-version v1.27.2
root@master1:~# kubeadm config images list --kubernetes-version v1.27.2
W1216 19:59:22.826119    3394 images.go:80] could not find officially supported version of etcd for Kubernetes v1.27.2, falling back to the nearest etcd version (3.5.7-0)
registry.k8s.io/kube-apiserver:v1.27.2
registry.k8s.io/kube-controller-manager:v1.27.2
registry.k8s.io/kube-scheduler:v1.27.2
registry.k8s.io/kube-proxy:v1.27.2
registry.k8s.io/pause:3.9
registry.k8s.io/etcd:3.5.7-0
registry.k8s.io/coredns/coredns:v1.10.1


#下载镜像
#所有节点替换镜像的下载地址进行下载
docker pull registry.cn-hangzhou.aliyuncs.com/google_containers/kube-apiserver:v1.27.2
docker pull registry.cn-hangzhou.aliyuncs.com/google_containers/kube-controller-manager:v1.27.2
docker pull registry.cn-hangzhou.aliyuncs.com/google_containers/kube-scheduler:v1.27.2
docker pull registry.cn-hangzhou.aliyuncs.com/google_containers/kube-proxy:v1.27.2
docker pull registry.cn-hangzhou.aliyuncs.com/google_containers/pause:3.9
docker pull registry.cn-hangzhou.aliyuncs.com/google_containers/pause:3.7
docker pull registry.cn-hangzhou.aliyuncs.com/google_containers/pause:3.6
docker pull registry.cn-hangzhou.aliyuncs.com/google_containers/etcd:3.5.7-0
docker pull registry.cn-hangzhou.aliyuncs.com/google_containers/coredns:v1.10.1

#在master节点执行初始化之前设置自启动kubelet
systemctl enable kubelet.service

#在master1节点执行初始化,初始化之前记得检查swap空间是否已经关闭
kubeadm init --apiserver-advertise-address=10.0.0.30 --control-plane-endpoint=10.0.0.71 --apiserver-bind-port=6443 --kubernetes-version=v1.27.2 --pod-network-cidr=10.100.0.0/16 --service-cidr=10.200.0.0/16 --service-dns-domain=cluster.local --image-repository=registry.cn-hangzhou.aliyuncs.com/google_containers --ignore-preflight-errors=swap --cri-socket unix:///var/run/cri-dockerd.sock
#执行
root@master1:/tools# kubeadm init --apiserver-advertise-address=10.0.0.30 --control-plane-endpoint=10.0.0.71 --apiserver-bind-port=6443 --kubernetes-version=v1.27.2 --pod-network-cidr=10.100.0.0/16 --service-cidr=10.200.0.0/16 --service-dns-domain=cluster.local --image-repository=registry.cn-hangzhou.aliyuncs.com/google_containers --ignore-preflight-errors=swap --cri-socket unix:///var/run/cri-dockerd.sock
[init] Using Kubernetes version: v1.27.2
[preflight] Running pre-flight checks
[preflight] Pulling images required for setting up a Kubernetes cluster
[addons] Applied essential addon: CoreDNS
[addons] Applied essential addon: kube-proxy

Your Kubernetes control-plane has initialized successfully!

To start using your cluster, you need to run the following as a regular user:

  mkdir -p $HOME/.kube
  sudo cp -i /etc/kubernetes/admin.conf $HOME/.kube/config
  sudo chown $(id -u):$(id -g) $HOME/.kube/config

Alternatively, if you are the root user, you can run:

  export KUBECONFIG=/etc/kubernetes/admin.conf

You should now deploy a pod network to the cluster.
Run "kubectl apply -f [podnetwork].yaml" with one of the options listed at:
  https://kubernetes.io/docs/concepts/cluster-administration/addons/

You can now join any number of control-plane nodes by copying certificate authorities
and service account keys on each node and then running the following as root:

  kubeadm join 10.0.0.71:6443 --token o5t8iq.kpjv0vhfvkol3m7e \
    --discovery-token-ca-cert-hash sha256:b8b6877773460a9a6b712b2dbfa0e60dd360b3113214a27df4aadebb5a0badb8 \
    --control-plane

Then you can join any number of worker nodes by running the following on each as root:

kubeadm join 10.0.0.71:6443 --token o5t8iq.kpjv0vhfvkol3m7e \
    --discovery-token-ca-cert-hash sha256:b8b6877773460a9a6b712b2dbfa0e60dd360b3113214a27df4aadebb5a0badb8

#创建config文件
mkdir -p $HOME/.kube
sudo cp -i /etc/kubernetes/admin.conf $HOME/.kube/config
sudo chown $(id -u):$(id -g) $HOME/.kube/config

#检查node节点
root@master1:/tools# kubectl get node
NAME      STATUS     ROLES           AGE   VERSION
master1   NotReady   control-plane   51s   v1.27.2
添加master节点
#添加命令
#--control-plane代表添加管理节点
kubeadm join 10.0.0.71:6443 --token o5t8iq.kpjv0vhfvkol3m7e \
    --discovery-token-ca-cert-hash sha256:b8b6877773460a9a6b712b2dbfa0e60dd360b3113214a27df4aadebb5a0badb8 \
    --cri-socket unix:///var/run/cri-dockerd.sock \
    --control-plane

#如提升缺少证书执行
#在master2和master3节点创建证书目录
mkdir -p /etc/kubernetes/pki/etcd/
#在master1节点拷贝证书
scp -rp /etc/kubernetes/pki/ca.* 10.0.0.32:/etc/kubernetes/pki
scp -rp /etc/kubernetes/pki/sa.* 10.0.0.32:/etc/kubernetes/pki
scp -rp /etc/kubernetes/pki/front-proxy-ca.* 10.0.0.32:/etc/kubernetes/pki
scp -rp /etc/kubernetes/pki/etcd/ca.* 10.0.0.32:/etc/kubernetes/pki/etcd
scp -rp /etc/kubernetes/admin.conf 10.0.0.32:/etc/kubernetes
scp -rp /etc/kubernetes/pki/etcd/ca.* 10.0.0.32:/etc/kubernetes/pki/etcd/

#master2
root@master2:~# mkdir -p /etc/kubernetes/pki/etcd/
root@master2:~# kubeadm join 10.0.0.71:6443 --token o5t8iq.kpjv0vhfvkol3m7e \
> --discovery-token-ca-cert-hash sha256:b8b6877773460a9a6b712b2dbfa0e60dd360b3113214a27df4aadebb5a0badb8 \
> --cri-socket unix:///var/run/cri-dockerd.sock \
> --control-plane
[preflight] Running pre-flight checks
This node has joined the cluster and a new control plane instance was created:

* Certificate signing request was sent to apiserver and approval was received.
* The Kubelet was informed of the new secure connection details.
* Control plane label and taint were applied to the new node.
* The Kubernetes control plane instances scaled up.
* A new etcd member was added to the local/stacked etcd cluster.

To start administering your cluster from this node, you need to run the following as a regular user:

    mkdir -p $HOME/.kube
    sudo cp -i /etc/kubernetes/admin.conf $HOME/.kube/config
    sudo chown $(id -u):$(id -g) $HOME/.kube/config

Run 'kubectl get nodes' to see this node join the cluster.

#master3
root@master3:~# mkdir -p /etc/kubernetes/pki/etcd/
root@master3:~# #--control-plane代表添加管理节点
root@master3:~# kubeadm join 10.0.0.71:6443 --token o5t8iq.kpjv0vhfvkol3m7e \
> --discovery-token-ca-cert-hash sha256:b8b6877773460a9a6b712b2dbfa0e60dd360b3113214a27df4aadebb5a0badb8 \
> --cri-socket unix:///var/run/cri-dockerd.sock \
> --control-plane
[preflight] Running pre-flight checks
[preflight] Reading configuration from the cluster...
This node has joined the cluster and a new control plane instance was created:

* Certificate signing request was sent to apiserver and approval was received.
* The Kubelet was informed of the new secure connection details.
* Control plane label and taint were applied to the new node.
* The Kubernetes control plane instances scaled up.
* A new etcd member was added to the local/stacked etcd cluster.

To start administering your cluster from this node, you need to run the following as a regular user:

    mkdir -p $HOME/.kube
    sudo cp -i /etc/kubernetes/admin.conf $HOME/.kube/config
    sudo chown $(id -u):$(id -g) $HOME/.kube/config

Run 'kubectl get nodes' to see this node join the cluster.

root@master1:/tools# kubectl get node
NAME      STATUS     ROLES           AGE     VERSION
master1   NotReady   control-plane   13m     v1.27.2
master2   NotReady   control-plane   2m48s   v1.27.2
master3   NotReady   control-plane   45s     v1.27.2
node1     NotReady   <none>          6m42s   v1.27.2
node2     NotReady   <none>          11m     v1.27.2
node3     NotReady   <none>          11m     v1.27.2

后期添加master节点:#当前maste⽣成证书⽤于添加新控制节点:
root@k8s-master1:~# kubeadm init phase upload-certs --upload-certs
I0414 16:21:59.283672 14673 version.go:256] remote version is much newer: v1.27.0;
falling back to: stable-1.26
[upload-certs] Storing the certificates in Secret "kubeadm-certs" in the "kube-system" Namespace
[upload-certs] Using certificate key: e4226754e61e5cbcec412db6693597e2489ccf62187137357bd40a50b6c9b313
#后期添加命令
kubeadm join 10.0.0.71:6443 --token abcdef.0123456789abcdef \
  --discovery-token-ca-cert-hash sha256:5e36ce948f5f2ef7af33d61664d6572a4818239c4ec593d4fb0ee66eda17dfea \
  --control-plane --certificate-key e4226754e61e5cbcec412db6693597e2489ccf62187137357bd40a50b6c9b313(certificate key)
添加node
#添加执行命令
kubeadm join 10.0.0.71:6443 --token o5t8iq.kpjv0vhfvkol3m7e \
    --cri-socket unix:///var/run/cri-dockerd.sock \
    --discovery-token-ca-cert-hash sha256:b8b6877773460a9a6b712b2dbfa0e60dd360b3113214a27df4aadebb5a0badb8

#添加node1节点
root@node1:~# kubeadm join 10.0.0.71:6443 --token o5t8iq.kpjv0vhfvkol3m7e \
>     --cri-socket unix:///var/run/cri-dockerd.sock \
> --discovery-token-ca-cert-hash sha256:b8b6877773460a9a6b712b2dbfa0e60dd360b3113214a27df4aadebb5a0badb8
[preflight] Running pre-flight checks
[preflight] Reading configuration from the cluster...
[preflight] FYI: You can look at this config file with 'kubectl -n kube-system get cm kubeadm-config -o yaml'
[kubelet-start] Writing kubelet configuration to file "/var/lib/kubelet/config.yaml"
[kubelet-start] Writing kubelet environment file with flags to file "/var/lib/kubelet/kubeadm-flags.env"
[kubelet-start] Starting the kubelet
[kubelet-start] Waiting for the kubelet to perform the TLS Bootstrap...

This node has joined the cluster:
* Certificate signing request was sent to apiserver and a response was received.
* The Kubelet was informed of the new secure connection details.

Run 'kubectl get nodes' on the control-plane to see this node join the cluster.


#添加node2节点
root@node2:~# kubeadm join 10.0.0.71:6443 --token o5t8iq.kpjv0vhfvkol3m7e \
> --discovery-token-ca-cert-hash sha256:b8b6877773460a9a6b712b2dbfa0e60dd360b3113214a27df4aadebb5a0badb8 \
> --cri-socket unix:///var/run/cri-dockerd.sock
[preflight] Running pre-flight checks

[preflight] Reading configuration from the cluster...
[preflight] FYI: You can look at this config file with 'kubectl -n kube-system get cm kubeadm-config -o yaml'
[kubelet-start] Writing kubelet configuration to file "/var/lib/kubelet/config.yaml"
[kubelet-start] Writing kubelet environment file with flags to file "/var/lib/kubelet/kubeadm-flags.env"
[kubelet-start] Starting the kubelet
[kubelet-start] Waiting for the kubelet to perform the TLS Bootstrap...

This node has joined the cluster:
* Certificate signing request was sent to apiserver and a response was received.
* The Kubelet was informed of the new secure connection details.

Run 'kubectl get nodes' on the control-plane to see this node join the cluster.
#添加node3节点
root@master3:~# kubeadm join 10.0.0.71:6443 --token o5t8iq.kpjv0vhfvkol3m7e \
> --discovery-token-ca-cert-hash sha256:b8b6877773460a9a6b712b2dbfa0e60dd360b3113214a27df4aadebb5a0badb8 \
> --cri-socket unix:///var/run/cri-dockerd.sock
[preflight] Running pre-flight checks
[preflight] Reading configuration from the cluster...
[preflight] FYI: You can look at this config file with 'kubectl -n kube-system get cm kubeadm-config -o yaml'
[kubelet-start] Writing kubelet configuration to file "/var/lib/kubelet/config.yaml"
[kubelet-start] Writing kubelet environment file with flags to file "/var/lib/kubelet/kubeadm-flags.env"
[kubelet-start] Starting the kubelet
[kubelet-start] Waiting for the kubelet to perform the TLS Bootstrap...

This node has joined the cluster:
* Certificate signing request was sent to apiserver and a response was received.
* The Kubelet was informed of the new secure connection details.

Run 'kubectl get nodes' on the control-plane to see this node join the cluster.

root@master1:/tools# kubectl get node
NAME      STATUS     ROLES           AGE     VERSION
master1   NotReady   control-plane   13m     v1.27.2
master2   NotReady   control-plane   2m48s   v1.27.2
master3   NotReady   control-plane   45s     v1.27.2
node1     NotReady   <none>          6m42s   v1.27.2
node2     NotReady   <none>          11m     v1.27.2
node3     NotReady   <none>          11m     v1.27.2
部署flannel网络组件
#检查pod,coredns还未就绪
root@master1:/tools# kubectl get pod -A
NAMESPACE NAME READY STATUS RESTARTS AGE
kube-system coredns-65dcc469f7-bx7mf 0/1 Pending 0 14m
kube-system coredns-65dcc469f7-nndzf 0/1 Pending 0 14m
kube-system etcd-master1 1/1 Running 0 15m
kube-system etcd-node2 1/1 Running 0 4m30s
kube-system etcd-node3 1/1 Running 0 2m26s
kube-system kube-apiserver-master1 1/1 Running 0 15m
kube-system kube-apiserver-node2 1/1 Running 0 4m30s
kube-system kube-apiserver-node3 1/1 Running 0 2m27s
kube-system kube-controller-manager-master1 1/1 Running 1 (4m18s ago) 15m
kube-system kube-controller-manager-node2 1/1 Running 0 4m30s
kube-system kube-controller-manager-node3 1/1 Running 0 2m27s
kube-system kube-proxy-76vgx 1/1 Running 0 4m30s
kube-system kube-proxy-82ppw 1/1 Running 0 2m27s
kube-system kube-proxy-h7ljk 1/1 Running 0 8m24s
kube-system kube-proxy-krq92 1/1 Running 0 13m
kube-system kube-proxy-zdxhz 1/1 Running 0 14m
kube-system kube-proxy-zkckc 1/1 Running 0 12m
kube-system kube-scheduler-master1 1/1 Running 1 (4m17s ago) 15m
kube-system kube-scheduler-node2 1/1 Running 0 4m30s
kube-system kube-scheduler-node3 1/1 Running 0 2m27s
#在node节点创建认证文件存放目录
mkdir -p /root/.kune
#拷贝认证文件到node节点
scp /root/.kube/config root@10.0.0.33:/root/.kube
scp /root/.kube/config root@10.0.0.34:/root/.kube
scp /root/.kube/config root@10.0.0.35:/root/.kube
#下载网络插件
wget https://github.com/flannel-io/flannel/releases/latest/download/kube-flannel.yml
#查看
root@master1:/tools# cat kube-flannel.yml
apiVersion: v1
kind: Namespace
metadata:
labels:
k8s-app: flannel
pod-security.kubernetes.io/enforce: privileged
name: kube-flannel
---
apiVersion: v1
kind: ServiceAccount
metadata:
labels:
k8s-app: flannel
name: flannel
namespace: kube-flannel
---
apiVersion: rbac.authorization.k8s.io/v1
kind: ClusterRole
metadata:
labels:
k8s-app: flannel
name: flannel
rules:
- apiGroups:
- ""
resources:
- pods
verbs:
- get
- apiGroups:
- ""
resources:
- nodes
verbs:
- get
- list
- watch
- apiGroups:
- ""
resources:
- nodes/status
verbs:
- patch
- apiGroups:
- networking.k8s.io
resources:
- clustercidrs
verbs:
- list
- watch
---
apiVersion: rbac.authorization.k8s.io/v1
kind: ClusterRoleBinding
metadata:
labels:
k8s-app: flannel
name: flannel
roleRef:
apiGroup: rbac.authorization.k8s.io
kind: ClusterRole
name: flannel
subjects:
- kind: ServiceAccount
name: flannel
namespace: kube-flannel
---
apiVersion: v1
data:
cni-conf.json: |
{
"name": "cbr0",
"cniVersion": "0.3.1",
"plugins": [
{
"type": "flannel",
"delegate": {
"hairpinMode": true,
"isDefaultGateway": true
}
},
{
"type": "portmap",
"capabilities": {
"portMappings": true
}
}
]
}
net-conf.json: |
{
"Network": "10.100.0.0/16",#修改此处pod的地址
"Backend": {
"Type": "vxlan"#flannel的网络模式
}
}
kind: ConfigMap
metadata:
labels:
app: flannel
k8s-app: flannel
tier: node
name: kube-flannel-cfg
namespace: kube-flannel
---
apiVersion: apps/v1
kind: DaemonSet
metadata:
labels:
app: flannel
k8s-app: flannel
tier: node
name: kube-flannel-ds
namespace: kube-flannel
spec:
selector:
matchLabels:
app: flannel
k8s-app: flannel
template:
metadata:
labels:
app: flannel
k8s-app: flannel
tier: node
spec:
affinity:
nodeAffinity:
requiredDuringSchedulingIgnoredDuringExecution:
nodeSelectorTerms:
- matchExpressions:
- key: kubernetes.io/os
operator: In
values:
- linux
containers:
- args:
- --ip-masq
- --kube-subnet-mgr
command:
- /opt/bin/flanneld
env:
- name: POD_NAME
valueFrom:
fieldRef:
fieldPath: metadata.name
- name: POD_NAMESPACE
valueFrom:
fieldRef:
fieldPath: metadata.namespace
- name: EVENT_QUEUE_DEPTH
value: "5000"
image: docker.io/flannel/flannel:v0.23.0
name: kube-flannel
resources:
requests:
cpu: 100m
memory: 50Mi
securityContext:
capabilities:
add:
- NET_ADMIN
- NET_RAW
privileged: false
volumeMounts:
- mountPath: /run/flannel
name: run
- mountPath: /etc/kube-flannel/
name: flannel-cfg
- mountPath: /run/xtables.lock
name: xtables-lock
hostNetwork: true
initContainers:
- args:
- -f
- /flannel
- /opt/cni/bin/flannel
command:
- cp
image: docker.io/flannel/flannel-cni-plugin:v1.2.0
name: install-cni-plugin
volumeMounts:
- mountPath: /opt/cni/bin
name: cni-plugin
- args:
- -f
- /etc/kube-flannel/cni-conf.json
- /etc/cni/net.d/10-flannel.conflist
command:
- cp
image: docker.io/flannel/flannel:v0.23.0
name: install-cni
volumeMounts:
- mountPath: /etc/cni/net.d
name: cni
- mountPath: /etc/kube-flannel/
name: flannel-cfg
priorityClassName: system-node-critical
serviceAccountName: flannel
tolerations:
- effect: NoSchedule
operator: Exists
volumes:
- hostPath:
path: /run/flannel
name: run
- hostPath:
path: /opt/cni/bin
name: cni-plugin
- hostPath:
path: /etc/cni/net.d
name: cni
- configMap:
name: kube-flannel-cfg
name: flannel-cfg
- hostPath:
path: /run/xtables.lock
type: FileOrCreate
name: xtables-lock
#修改配置文件pod的配置
root@master1/yaml: vim kube-flannel.yml
apiVersion: v1
data:
...
net-conf.json: |
{
"Network": "10.100.0.0/16",
"Backend": {
"Type": "vxlan"
}
}
#创建网络组件
root@master1:/tools# kubectl apply -f kube-flannel.yml
namespace/kube-flannel created
serviceaccount/flannel created
clusterrole.rbac.authorization.k8s.io/flannel created
clusterrolebinding.rbac.authorization.k8s.io/flannel created
configmap/kube-flannel-cfg created
daemonset.apps/kube-flannel-ds created
#检查pod
root@master1:/tools# kubectl get pod -A
NAMESPACE NAME READY STATUS RESTARTS AGE
kube-flannel kube-flannel-ds-hk6pt 1/1 Running 0 2m46s
kube-flannel kube-flannel-ds-q6kqf 1/1 Running 0 2m46s
kube-flannel kube-flannel-ds-rk48b 1/1 Running 0 2m46s
kube-flannel kube-flannel-ds-w64dt 1/1 Running 0 2m46s
kube-flannel kube-flannel-ds-xvg4x 1/1 Running 0 2m46s
kube-flannel kube-flannel-ds-xwrpr 1/1 Running 0 2m46s
kube-system coredns-65dcc469f7-bx7mf 1/1 Running 0 37m
kube-system coredns-65dcc469f7-nndzf 1/1 Running 0 37m
kube-system etcd-master1 1/1 Running 0 37m
kube-system etcd-node2 1/1 Running 0 27m
kube-system etcd-node3 1/1 Running 0 25m
kube-system kube-apiserver-master1 1/1 Running 0 37m
kube-system kube-apiserver-node2 1/1 Running 0 27m
kube-system kube-apiserver-node3 1/1 Running 0 25m
kube-system kube-controller-manager-master1 1/1 Running 1 (26m ago) 37m
kube-system kube-controller-manager-node2 1/1 Running 0 27m
kube-system kube-controller-manager-node3 1/1 Running 0 25m
kube-system kube-proxy-76vgx 1/1 Running 0 27m
kube-system kube-proxy-82ppw 1/1 Running 0 25m
kube-system kube-proxy-h7ljk 1/1 Running 0 31m
kube-system kube-proxy-krq92 1/1 Running 0 36m
kube-system kube-proxy-zdxhz 1/1 Running 0 37m
kube-system kube-proxy-zkckc 1/1 Running 0 35m
kube-system kube-scheduler-master1 1/1 Running 1 (26m ago) 37m
kube-system kube-scheduler-node2 1/1 Running 0 27m
kube-system kube-scheduler-node3 1/1 Running 0 25m
#flannel部署完毕coredns也部署完成
#部署测试pod测试网络
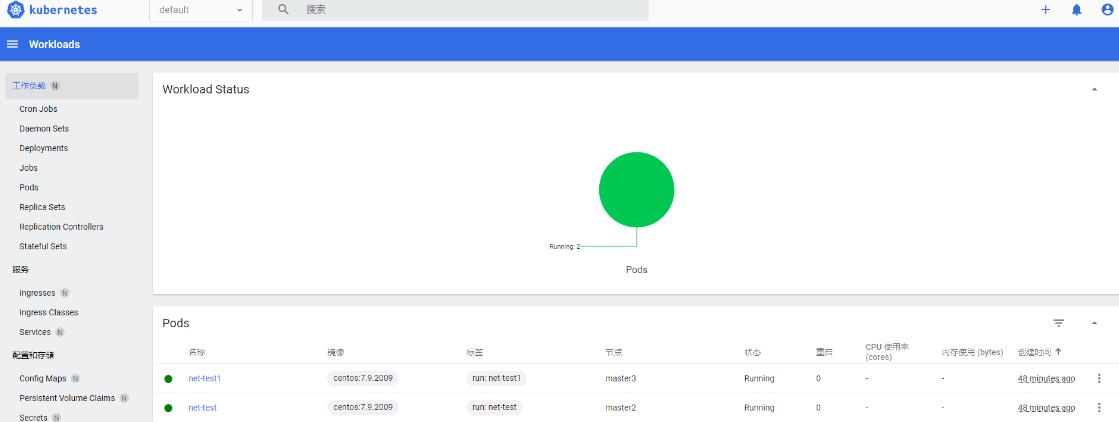
kubectl run net-test --image=centos:7.9.2009 sleep 100000000
kubectl run net-test1 --image=centos:7.9.2009 sleep 100000000
root@master1:/tools# kubectl run net-test --image=centos:7.9.2009 sleep 100000000
pod/net-test created
root@master1:/tools# kubectl run net-test1 --image=centos:7.9.2009 sleep 100000000
pod/net-test1 created
#检查pod
root@master1:/tools# kubectl get pod -n default -o wide
NAME READY STATUS RESTARTS AGE IP NODE
net-test 1/1 Running 0 105s 10.100.1.2 node2
net-test1 1/1 Running 0 104s 10.100.2.2 node3
#网络测试
root@master1:/tools# kubectl exec -it -n default net-test bash
kubectl exec [POD] [COMMAND] is DEPRECATED and will be removed in a future version. Use kubectl exec [POD] -- [COMMAND] instead.
[root@net-test /]# ping 10.100.2.2
PING 10.100.2.2 (10.100.2.2) 56(84) bytes of data.
64 bytes from 10.100.2.2: icmp_seq=1 ttl=62 time=2.88 ms
64 bytes from 10.100.2.2: icmp_seq=2 ttl=62 time=0.662 ms
[root@net-test /]# ping www.baidu.com
PING www.a.shifen.com (120.232.145.144) 56(84) bytes of data.
64 bytes from 120.232.145.144 (120.232.145.144): icmp_seq=1 ttl=127 time=12.6 ms
64 bytes from 120.232.145.144 (120.232.145.144): icmp_seq=2 ttl=127 time=13.4 ms
部署dashboard
#下载地址
https://github.com/kubernetes/dashboard

#下载
wget https://raw.githubusercontent.com/kubernetes/dashboard/v2.7.0/aio/deploy/recommended.yaml

#修改访问端口
root@master1:/tools# vim recommended.yaml
---

kind: Service
apiVersion: v1
metadata:
  labels:
    k8s-app: kubernetes-dashboard
  name: kubernetes-dashboard
  namespace: kubernetes-dashboard
spec:
  ports:
    - port: 443
      targetPort: 8443
      nodePort: 30001
  type: NodePort
  selector:
    k8s-app: kubernetes-dashboard


#部署
root@master1:/tools# kubectl apply -f recommended.yaml
namespace/kubernetes-dashboard created
serviceaccount/kubernetes-dashboard created
service/kubernetes-dashboard created
secret/kubernetes-dashboard-certs created
secret/kubernetes-dashboard-csrf created
secret/kubernetes-dashboard-key-holder created
configmap/kubernetes-dashboard-settings created
role.rbac.authorization.k8s.io/kubernetes-dashboard created
clusterrole.rbac.authorization.k8s.io/kubernetes-dashboard created
rolebinding.rbac.authorization.k8s.io/kubernetes-dashboard created
clusterrolebinding.rbac.authorization.k8s.io/kubernetes-dashboard created
deployment.apps/kubernetes-dashboard created
service/dashboard-metrics-scraper created
deployment.apps/dashboard-metrics-scraper created

#检查
root@master1:/tools# kubectl get pods,svc -n kubernetes-dashboard
NAME                                             READY   STATUS              RESTARTS   AGE
pod/dashboard-metrics-scraper-5cb4f4bb9c-bn8nn   0/1     ContainerCreating   0          83s
pod/kubernetes-dashboard-6967859bff-nxcwp        0/1     ContainerCreating   0          83s

NAME                                TYPE        CLUSTER-IP      EXTERNAL-IP   PORT(S)         AGE
service/dashboard-metrics-scraper   ClusterIP   10.200.90.164   <none>        8000/TCP        83s
service/kubernetes-dashboard        NodePort    10.200.140.22   <none>        443:30001/TCP   83s

#创建用户:
wget https://raw.githubusercontent.com/cby-chen/Kubernetes/main/yaml/dashboard-user.yaml
root@master1:/tools# kubectl apply -f dashboard-user.yaml
serviceaccount/admin-user created
clusterrolebinding.rbac.authorization.k8s.io/admin-user created


#创建token
kubectl -n kubernetes-dashboard create token admin-user
root@master1:/tools# kubectl -n kubernetes-dashboard create token admin-user
eyJhbGciOiJSUzI1NiIsImtpZCI6IjlLNXJhclZva3gycFUtVjd2d0gzUVNZcGtvT2FMYU9TSTdEcnU4Xy0yaWsifQ.eyJhdWQiOlsiaHR0cHM6Ly9rdWJlcm5ldGVzLmRlZmF1bHQuc3ZjLmNsdXN0ZXIubG9jYWwiXSwiZXhwIjoxNzAyNzM3MzY5LCJpYXQiOjE3MDI3MzM3NjksImlzcyI6Imh0dHBzOi8va3ViZXJuZXRlcy5kZWZhdWx0LnN2Yy5jbHVzdGVyLmxvY2FsIiwia3ViZXJuZXRlcy5pbyI6eyJuYW1lc3BhY2UiOiJrdWJlcm5ldGVzLWRhc2hib2FyZCIsInNlcnZpY2VhY2NvdW50Ijp7Im5hbWUiOiJhZG1pbi11c2VyIiwidWlkIjoiODMyZGI1MjMtYmY4Ni00YjE3LWIzZDItMjUwMGIyMWUxY2I4In19LCJuYmYiOjE3MDI3MzM3NjksInN1YiI6InN5c3RlbTpzZXJ2aWNlYWNjb3VudDprdWJlcm5ldGVzLWRhc2hib2FyZDphZG1pbi11c2VyIn0.LP1mDNbEezrTSL254MZqnkZ6Cd9IK5_z4ePmEXcN-prj69k35rKYxa-La3qm4Zb2UYeWbwmcX8xv_9qVVdvkHZMpRD-3T_oUIdyU5aHI3o4MUk2EbkEeOD-3jjXhER7p-t112SjY_JPQWPPltDUpky__y_-R-m4FOtY85y90d5srzSEpGyE9Esl-IRxYrMN49CpgZn_3LiLMxmEoZ5Js1wLMg71nG-XeSAR8v3l9e7onzydyCyF6p7b1uzYfZb0QtXN7TUvlYK86yOTn4N0pF0em32x6r68-xhYK6n2YgsbcswH1gnCkIjLoIx8Ae6_eIh_DIsWyZ2_dGGXncTl-7Q