官方文档:https://docs.cypress.io/guides/getting-started/installing-cypress
结合git代码运行项目
1.cd到指定目录路径,git clone 代码下来(eg我的路径是sy_cypress下)//没有的话忽略gitclone这一步
2.根目录下cmd,输入命令安装cypress:npm install cypress --save-dev
运行
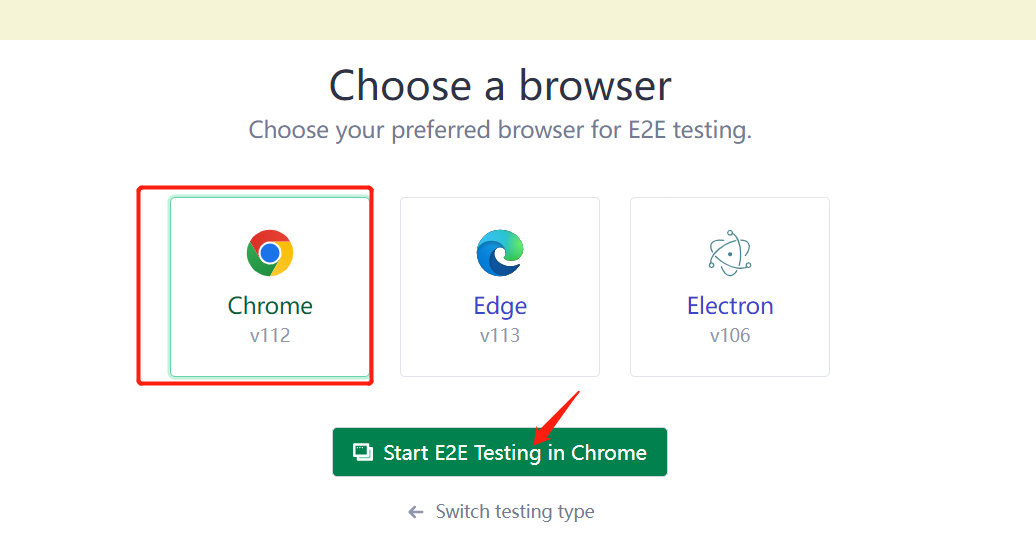
安装路径根目录下输入指令:npx cypress open

选择E2E,等待自动配置

选择浏览器
使用编辑器(pycharm/vscode)打开git项目代码,可编辑修改内容
执行测试用例:spec 标签下点击js文件即可运行

目录层级解析:
|
│ cypress.config.js #配置文件,可配置基础域名,超时时间等
│ package-lock.json
│ package.json
│ yarn-error.log
│
├─cypress
│ ├─e2e
│ │ │
│ │ └─xmp_fe###########################存放用例,js文件后缀即可
│ │ └─ads_manage
│ │ facebook_edit_budget.cy.js
│ │ facebook_edit_status.cy.js
│ │ facebook_template_create.cy.js
│ │
│ ├─fixtures#############################mock接口返回的内容存放
│ │ example.json
│ │ login.json
│ │ profile.json
│ │ users.json
│ │
│ │
│ ├─support
│ │ commands.js##方法定义,一些步骤封装如登陆,可在用例中用cy.方法名调用
│ │ e2e.js
│ │ index.js
│ │
|
|---|
常用示例
//js文件
//这是一个用例集
describe('验证facebook模板创建', function () {

 const channel = 'facebook'
 const username = 'huangdou@qq.com'
 const password = '12345678'


 context(`验证${channel}模板创建`, function () {

      // 在所有用例执行之前登录系统
 beforeEach(() => {
         cy.login_abc(username, password) //login_abc定义在command文件,下同
 })
      //这是一个用例
 it(`${channel}普通应用模板创建`, function () {
         cy.open_create(channel)
         cy.read_template(channel,"应用推广+默认选项+自定义创意")
      })
   })
})
|
|---|
//command文件,步骤和校验封装定义
//获取页面元素、点击、输入、等待、常用校验should
Cypress.Commands.add('read_template', (channel, template_name) => {
   cy.log(`读取${channel}模板`)
      // 点击选择模板
 cy.get('[data-test-id=\'button_select_tpl\']').click()
      // 搜索模板并等待查询结果
 cy.get('[data-test-id=\'input_search_tpl\']').type(template_name)
   cy.wait(2000)
      // 选中模板并确认
 cy.get('[data-test-id=\'ratio_select_tpl\'] .input-box-circle').click()
   cy.get('[data-test-id=\'button_confirm_tpl\']').click()
      // 提交预览
 cy.wait(5000)
      //force:true会强制操作命令的发生,避开前面的所有检查,只要页面元素存在即可操作,跟鼠标操作等无关,比如需要hover才出现的元素
 cy.get('[data-test-id=\'button_submit_draft\']').click({force:true})
      // 验证跳转到预览页
 cy.get('.flex-table-body .flex-table-tr .flex-table-row .flex-table-col:nth-child(3) div').should("contain","自动化")
   cy.wait(2000)
   cy.url( ).should('include', 'http://www.abc.com/ads_create/facebook/publish')
      // 点击返回上一步
 cy.get('[data-test-id=\'button_return\']').click({force:true})
      // 验证回到创建页
 cy.url( ).should('include', 'http://www.abc.com/ads_create/facebook/edit')
})
|
|---|
//command文件,步骤和校验封装定义
//拦截接口校验返回的写法
Cypress.Commands.add('open_create', (channel) => {
 cy.log(`打开${channel}创建广告页面`)
   //注册一个想校验的接口,命名
 cy.intercept('GET', '/adcreate/draft/read?module=facebook').as('getdraft')
 let create_url = '/ads_create/' + channel + '/edit'
 //触发接口调用
 cy.visit(create_url)
   //等待捕捉到符合的接口进行校验
 cy.wait('@getdraft').then((interception) => {
      const today = new Date().toISOString().slice(0, 10)
      expect(interception.response.statusCode).to.eq(200)
      expect(interception.response.body.code).to.eq(0)
        //其他校验写法
    assert.isNotEmpty(interception.response.body.data,"data can't be empty")
   })
   //另一种校验写法
 //cy.wait('@getdraft').its('response.statusCode').should('eq',200)
 //cy.wait('@getdraft').its('request.body.data').should('have.property', 'draft_campaign')
})
|
|---|
//mock接口返回的几种方式
 1.该接口会以fixtures目录下的users.json的内容返回
 cy.intercept('/users.json', { fixture: 'users.json' })
 2.定义内容作为返回
 const staticResponse = {delayMs:2000,延迟20s返回}
 cy.intercept('/projects', staticResponse)
 3.直接修改相应内容
 cy.intercept('/projects',(req)=>{
 req.reply({code:0})}) as ('sample')

//接口请求前修改参数
cy.intercept('/req-headers', (req) => {
req.headers['x-custom-headers'] = 'added by cy.intercept'
}).as('headers')
发起请求步骤
cy.wait校验
|
|---|
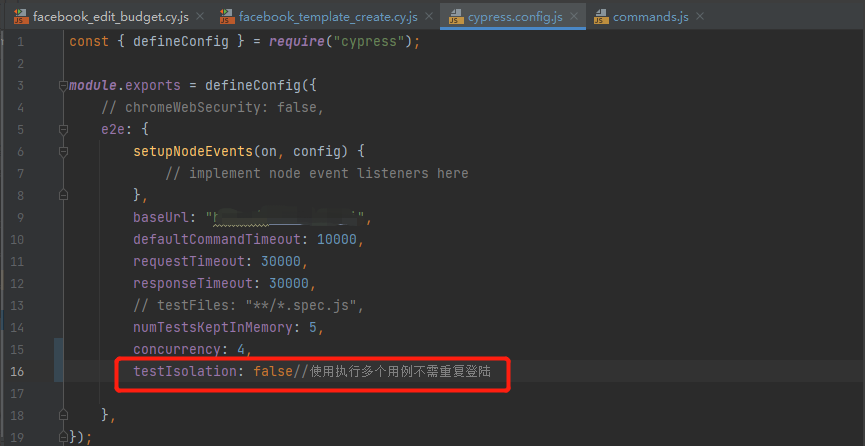
tips:
config文件e2e下加配置:
testIsolation: false
可避免多个用例连续执行时,第一个用例执行后出现空白页面导致获第二个用例获取不到元素,不需每个用例都从登陆开始