一、Prometheus简介、
容器监控的实现方对比虚拟机或者物理机来说比大的区别,比如容器在k8s环境中可以任意横向扩容与缩容,那么就需要监控服务能够自动对新创建的容器进行监控,
当容器删除后又能够及时的从监控服务中删除,而传统的zabbix的监控方式需要在每一个容器中安装启动agent,并且在容器自动发现注册及模板关联方面并没有比较好的实现方式。

k8s的早期版本基于组件heapster实现对pod和node节点的监控功能,但是从k8s 1.8版本开始使用metrics API的方式监控,并在1.11版本 正式将heapster替换,
后期的k8s监控主要是通过metrics Server提供核心监控指标,比如Node节点的CPU和内存使用率,其他的监控交由另外一个组件Prometheus 完成。

https://prometheus.io/docs/ #官方文档
https://github.com/prometheus #github地址


Prometheus是基于go语言开发的一套开源的监控、报警和时间序列数据库的组合,是由SoundCloud公司开发的开源监控系统,
Prometheus是CNCF(Cloud Native Computing Foundation,云原生计算基金会)继kubernetes 之后毕业的第二个项目,
prometheus在容器和微服务领域中得到了广泛的应用,其特点主要如下:
    使用key-value的多维度格式保存数据
    数据不使用MySQL这样的传统数据库,而是使用时序数据库,目前是使用的TSDB
    支持第三方dashboard实现更高的图形界面,如grafana(Grafana 2.5.0版本及以上)
    功能组件化
    不需要依赖存储,数据可以本地保存也可以远程保存
    服务自动化发现
    强大的数据查询语句功(PromQL,Prometheus Query Language)


prometheus系统架构图
    prometheus server:主服务,接受外部http请求,收集、存储与查询数据等
    prometheus targets: 静态收集的目标服务数据
    service discovery:动态发现服务
    prometheus alerting:报警通知
    pushgateway:数据收集代理服务器(类似于zabbix proxy)
    data visualization and export: 数据可视化与数据导出(访问客户端)

组件名称和监听端口:
    prometheus:9090         #主服务,接受外部http请求,收集、存储与查询数据等
    node_expoter:9100      #安装在master和node节点上的,主要收集各节点的数据信息
    grafana:3000             #可视化展示收集到的数据
    cadvisor: 8080          #主要收集各node节点上pod的数据信息工具
    alertmanager:9093        #报警服务器,prometheus收到负载信息,转发给alerting,alerting发送邮件,微信 手机等。
    haproxy_exporter: 9091    #


相关命令参数
/usr/local/prometheus/prometheus -h
     --config.file="prometheus.yml"           #指定配置文件
     --web.listen-address="0.0.0.0:9090"    #监听端口
     --web.max-connections=512              #默认最大连接数:512
     --storage.tsdb.path="data/"              #默认的存储路径:data目录下
     --storage.tsdb.retention.time=15d      #默认的数据保留时间:15天。原有的
     --alertmanager.timeout=10s              #把报警发送给alertmanager的超时限制 10s
     --query.timeout=2m                      #查询超时时间限制默认为2min,超过自动被kill掉。可以结合grafana的限时配置如60s
     --query.max-concurrency=20             #并发查询数 prometheus的默认采集指标中有一项prometheus_engine_queries_concurrent_max可以拿到最大查询并发数及查询情况
二、prometheus 安装方式几种方式:
https://prometheus.io/download/ #官方二进制下载及安装
https://prometheus.io/docs/prometheus/latest/installation/  docker镜像直接启动
https://github.com/coreos/kube-prometheus # operator部署


1、docker镜像直接启动
docker run  -p 9090:9090 -v /path/to/prometheus.yml:/etc/prometheus/prometheus.yml prom/prometheus
docker run  -p 9090:9090  prom/prometheus

----------------------------------------------------
2、官方二进制下载及安装
[root@localhost7I prometheus]# tar xvf prometheus-2.11.1.linux-amd64.tar.gz
[root@localhost7I prometheus]# ln -sv /usr/local/src/prometheus-2.11.1.linux-amd64 /usr/local/prometheus

#创建prometheus启动脚本:
[root@localhost7I prometheus]# cat  /etc/systemd/system/prometheus.service
[Unit]
Description=Prometheus Server
Documentation=https://prometheus.io/docs/introduction/overview/
After=network.target
[Service]
Restart=on-failure
WorkingDirectory=/usr/local/prometheus/
ExecStart=/usr/local/prometheus/prometheus --config.file=/usr/local/prometheus/prometheus.yml
[Install]
WantedBy=multi-user.target

#prometheus配置文件说明
[root@localhost7I prometheus]# vim prometheus.yml

global:
  scrape_interval:     15s #默认情况下抓取目标的频率
  evaluation_interval: 15s #评估规则的频率

# 报警配置
alerting:
  alertmanagers:
  - static_configs:
    - targets:
      # - alertmanager:9093 #报警服务器地址。

#报警条件,设置告警规则,基于设定什么指标进行报警(类似触发器trigger)
rule_files:
  # - "first_rules.yml"
  # - "second_rules.yml"

被收集指标的服务器列表。
scrape_configs:
  - job_name: 'prometheus'
    static_configs:
    - targets: ['localhost:9090']


访问prometheus web界面查看中status-targets

访问prometheus web界面查看中Graph选择相应指标查看

----------------------------------------------------
3、operator部署
三、各节点安装node expoter,收集各k8s node节点上的监控指标数据,监听端口为9100

[root@localhost7C local]# tar xvf node_exporter-1.0.0-rc.0.linux-amd64.tar.gz
[root@localhost7C local]# ln  -sv node_exporter-1.0.0-rc.0.linux-amd64 node_exporter

创建node_exporter启动脚本:
[root@localhost7C local]# cat /etc/systemd/system/node-exporter.service
[Unit]
Description=Prometheus Node Exporter
After=network.target
[Service]
ExecStart=/usr/local/node_exporter/node_exporter
[Install]
WantedBy=multi-user.target


prometheus采集node 指标数据:配置prometheus通过node exporter采集 监控指标数据

[root@localhost7I prometheus]# cat prometheus.yml

global:
  scrape_interval:     15s #默认情况下抓取目标的频率
  evaluation_interval: 15s #评估规则的频率

# 报警配置
alerting:
  alertmanagers:
  - static_configs:
    - targets:
      # - alertmanager:9093 #报警服务器地址。

#报警条件,设置告警规则,基于设定什么指标进行报警(类似触发器trigger)
rule_files:
  # - "first_rules.yml"
  # - "second_rules.yml"

被收集指标的服务器列表。
scrape_configs:
  - job_name: 'prometheus'
    static_configs:
    - targets: ['localhost:9090']

  - job_name: 'promethues-master'   #通过node exporter采集master
    static_configs:
    - targets: ['192.168.80.120:9100','192.168.80.130:9100']

  - job_name: 'promethues-node'        #通过node exporter采集node
    static_configs:
    - targets: ['192.168.80.150:9100','192.168.80.160:9100']
访问prometheus web界面中status-targets
访问prometheus web界面查看中Graph选择相应指标查看

访问node exporter web界面中http://IP:9100/metrics

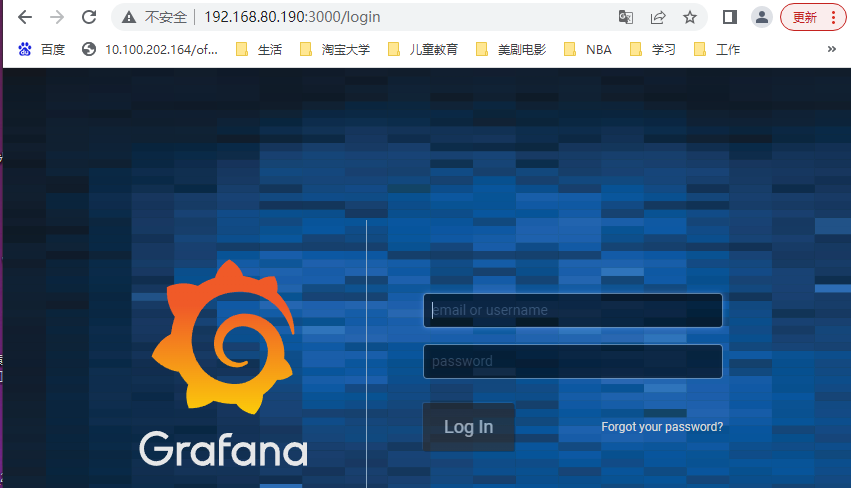
四、安装grafana:调用prometheus的数据,进行更专业的可视化
1.安装grafana
[root@localhost7J ~]# yum install grafana-6.7.2-1.x86_64.rpm

2.配置文件
 vim /etc/grafana/grafana.ini
[server]
# Protocol (http, https, socket)
protocol = http
# The ip address to bind to, empty will bind to all interfaces
http_addr = 0.0.0.0
# The http port to use
http_port = 3000


3.grafana web界面 默认账号和密码都是: admin
4.有后台的configuration中添加 data_sources,选择prometheus, 填写name和URL即可。


5.grafana添加节点监控模板,在create --import 输入模板号或json文件,关联data_sources名称即可展示.
注意模板是否跟grafana版本和node_expoter的版本兼容。


最后展示效果

6.插件和模板说明
插件下载地址https://grafana.com/grafana/plugins/
模板下载地址https://grafana.com/grafana/dashboards/

Grafana CLI插件命令
[root@localhost7J ~]# /usr/share/grafana/bin/grafana-cli   plugins  -h
   install                  安装<插件id><插件版本(可选)>
   list-remote              列出远程可用插件
   list-versions            列表版本<plugin id>
   update, upgrade          升级更新<插件id>
   update-all, upgrade-all  更新所有已安装的插件
   ls                       列出所有已安装的插件
   uninstall, remove        卸载<插件id>


在线安装:
# grafana-cli plugins install grafana-piechart-panel

离线安装:
# cd  /var/lib/grafana/plugins
# unzip grafana-piechart-panel-v1.3.8-0-g4f34110.zip
# mv grafana-piechart-panel-4f34110 grafana-piechart-panel
# systemctl restart grafana-server
- Prometheus grafanaprometheus grafana prometheus模板grafana prometheus grafana docker alertmanager prometheus grafana prometheus windows grafana jmeter node-exporter prometheus exporter grafana node_exporter prometheus exporter grafana 磁盘prometheus内存grafana prometheus grafana服务器 资源 上集prometheus grafana helm