一:选题背景:
通过爬取各个城市的历史天气数据及近日数据,来进行对天气的数据分析与可视化。从而帮助我们的生活更加便利。
所爬取的网站为2345天气王https://tianqi.2345.com/wea_forty/71924.htm
这里我们进入网站后右键检查,点击网络这一栏,并刷新页面能够看到有两个文件,而我们所需要的就是第二个文件里的地址。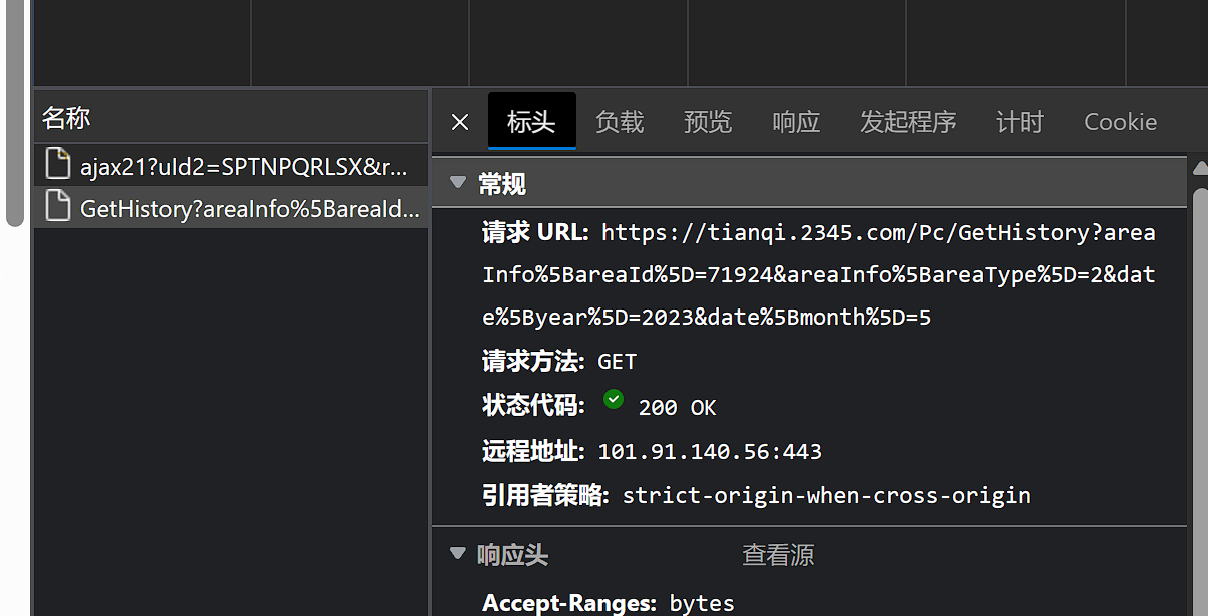
随后我们讲这栏地址嵌入我们的代码中
import parsel
import csv
with open('泉州福州厦门历史天气.csv',mode='a',encoding='utf-8',newline='')as f:
csv_writer = csv.writer(f)
csv_writer.writerow(['日期','最高温度','最低温度','天气','风向','城市'])
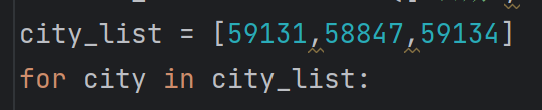
city_list = [59131,58847,59134]
for city in city_list:
for year in range(2022, 2023):
for month in range(1,5):
url = f'https://tianqi.2345.com/Pc/GetHistory?areaInfo[areaId]={city}&areaInfo[areaType]=2&date[year]={year}&date[month]={month}'
response = requests.get(url=url)
select = parsel.Selector(response.json()['data'])
trs = select.css('table tr')
for tr in trs[1:]:
tds = tr.css('td::text').getall()
if city == 59131:
tds.append('泉州')
elif city == 58847:
tds.append('福州')
elif city == 59134:
tds.append('厦门')
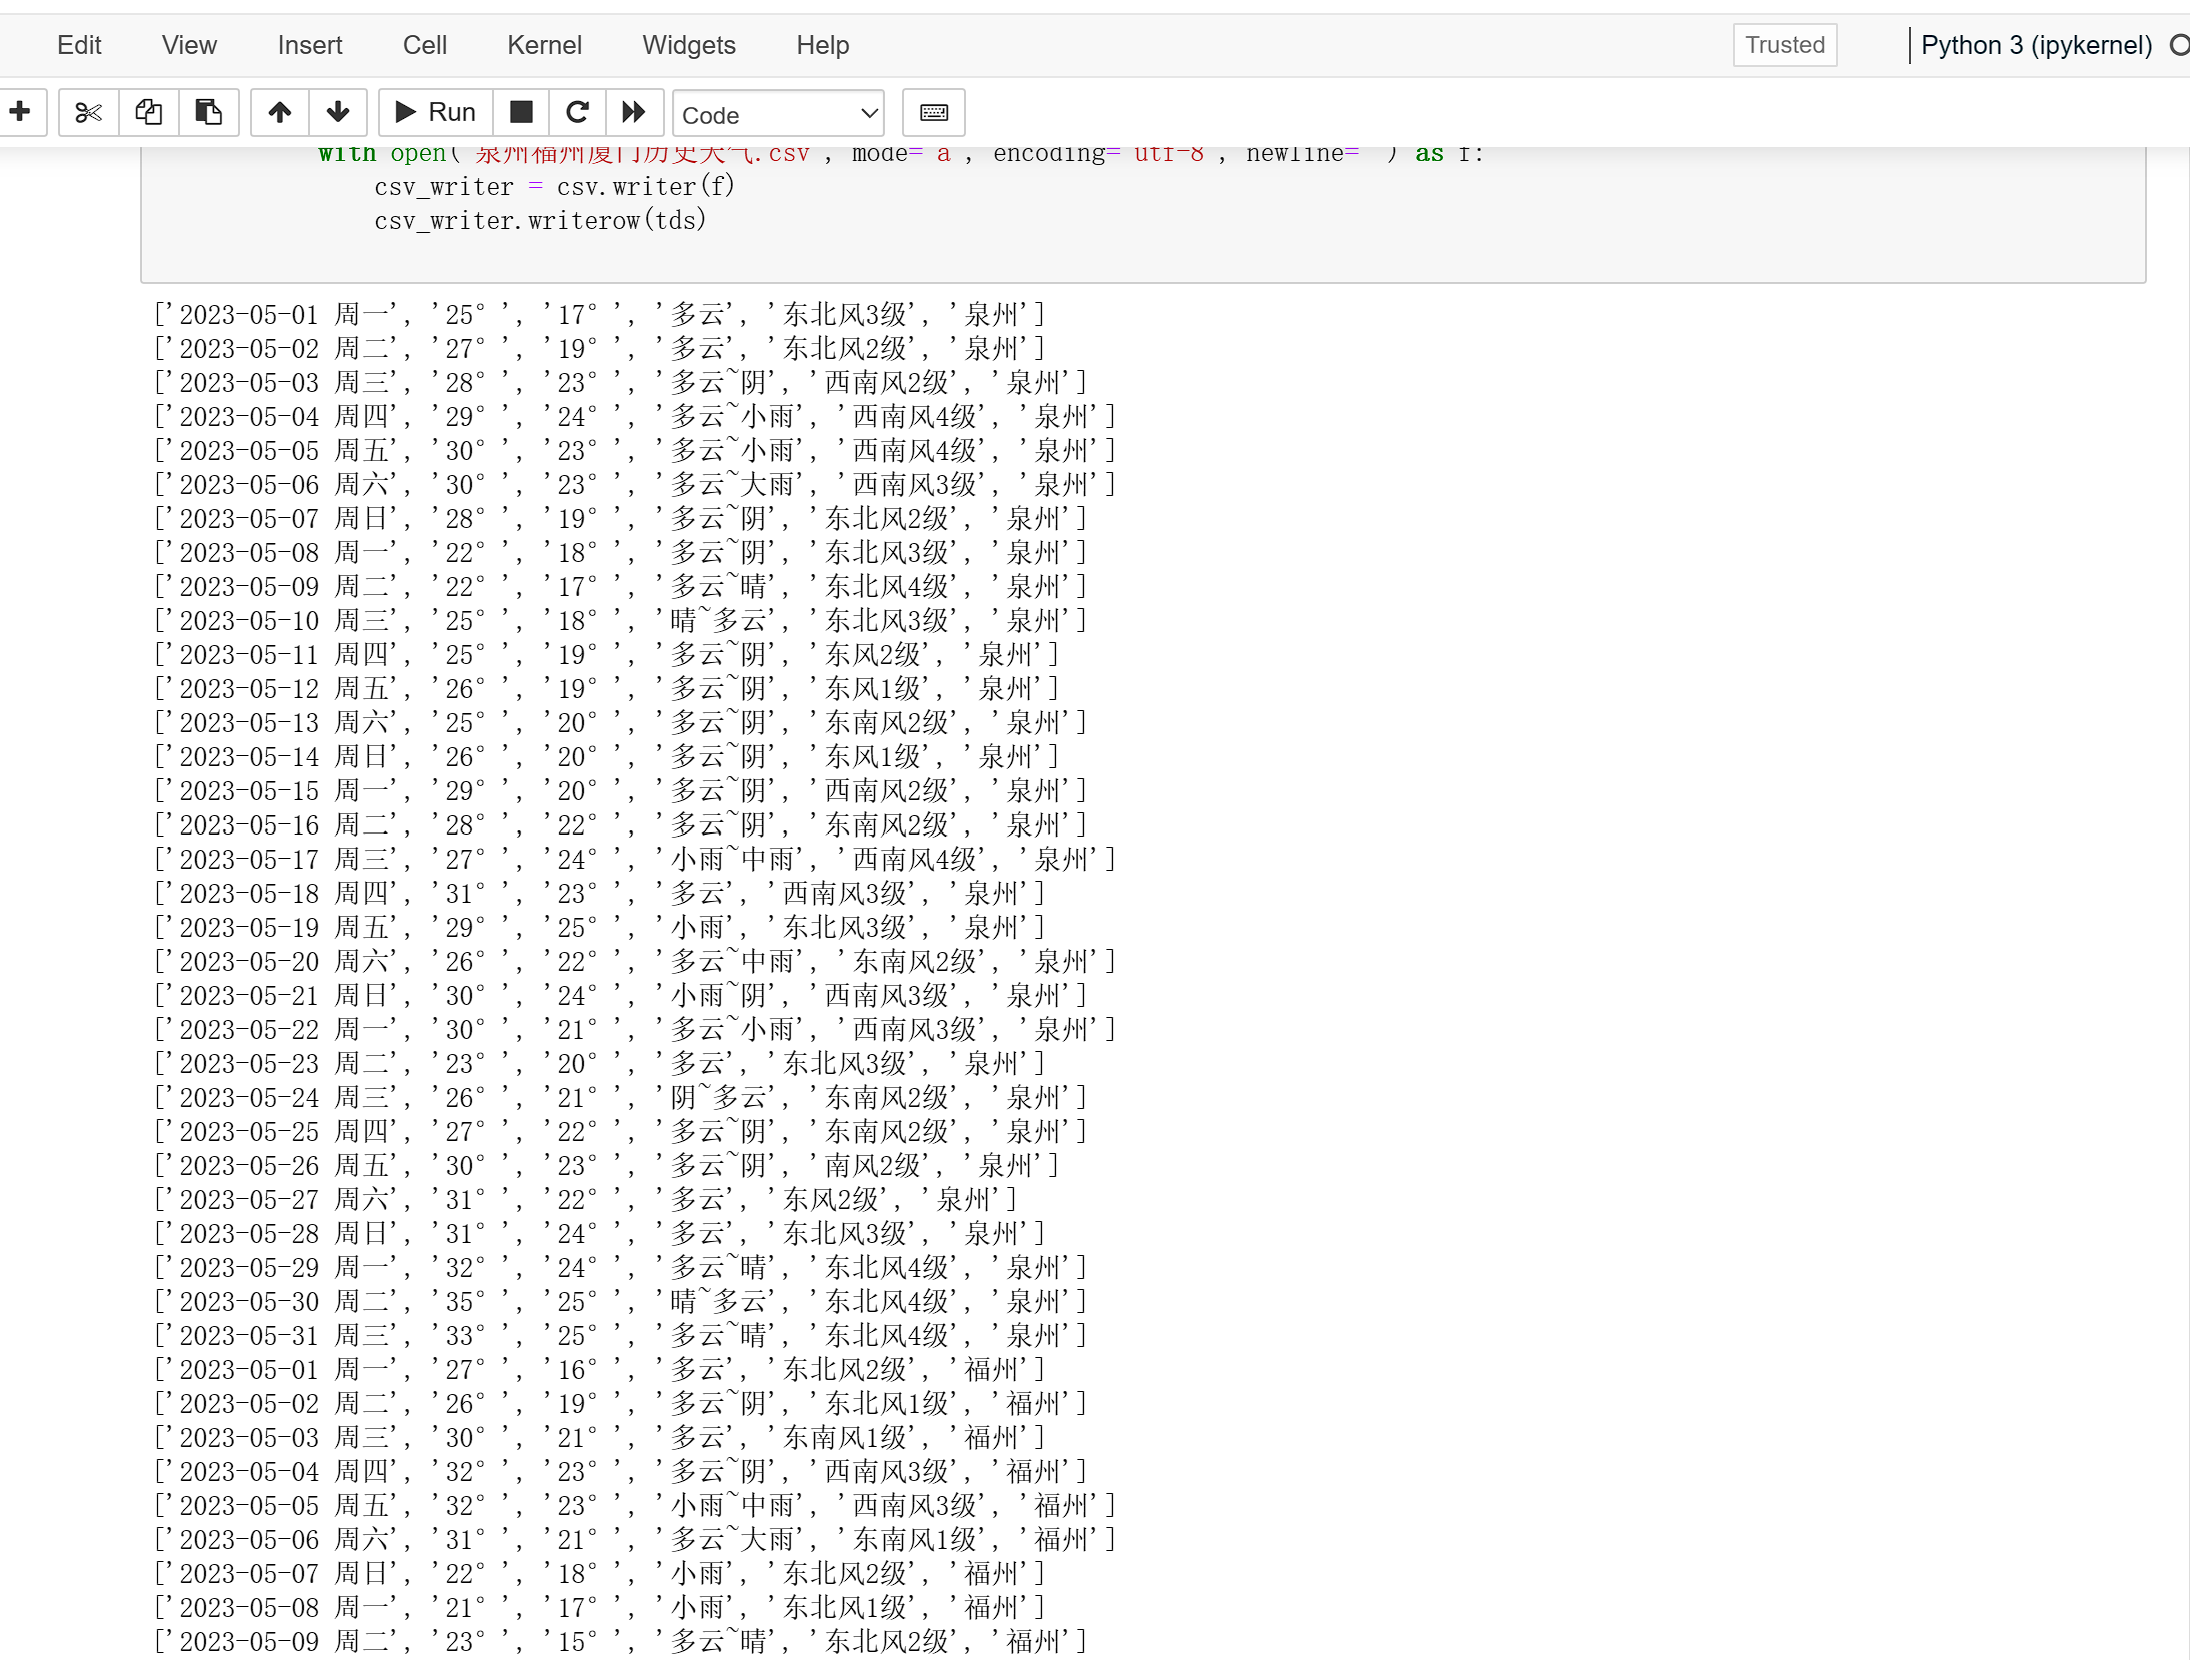
print(tds)
with open('泉州福州厦门历史天气.csv', mode='a', encoding='utf-8', newline='') as f:
csv_writer = csv.writer(f)
csv_writer.writerow(tds)
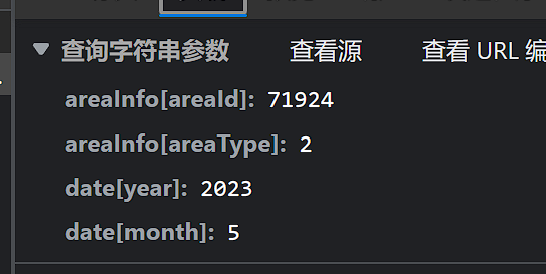
第一行的数字就是代表着对应的城市,我这边截图的是丰泽区的。泉州的是59131。
这是采集的城市的代码:
采集城市天气数据的时间段:

对数据进行采集

用with open来保存数据,前面导入csv模块来写入我们的数据

随后我们就可以进行数据采集了。
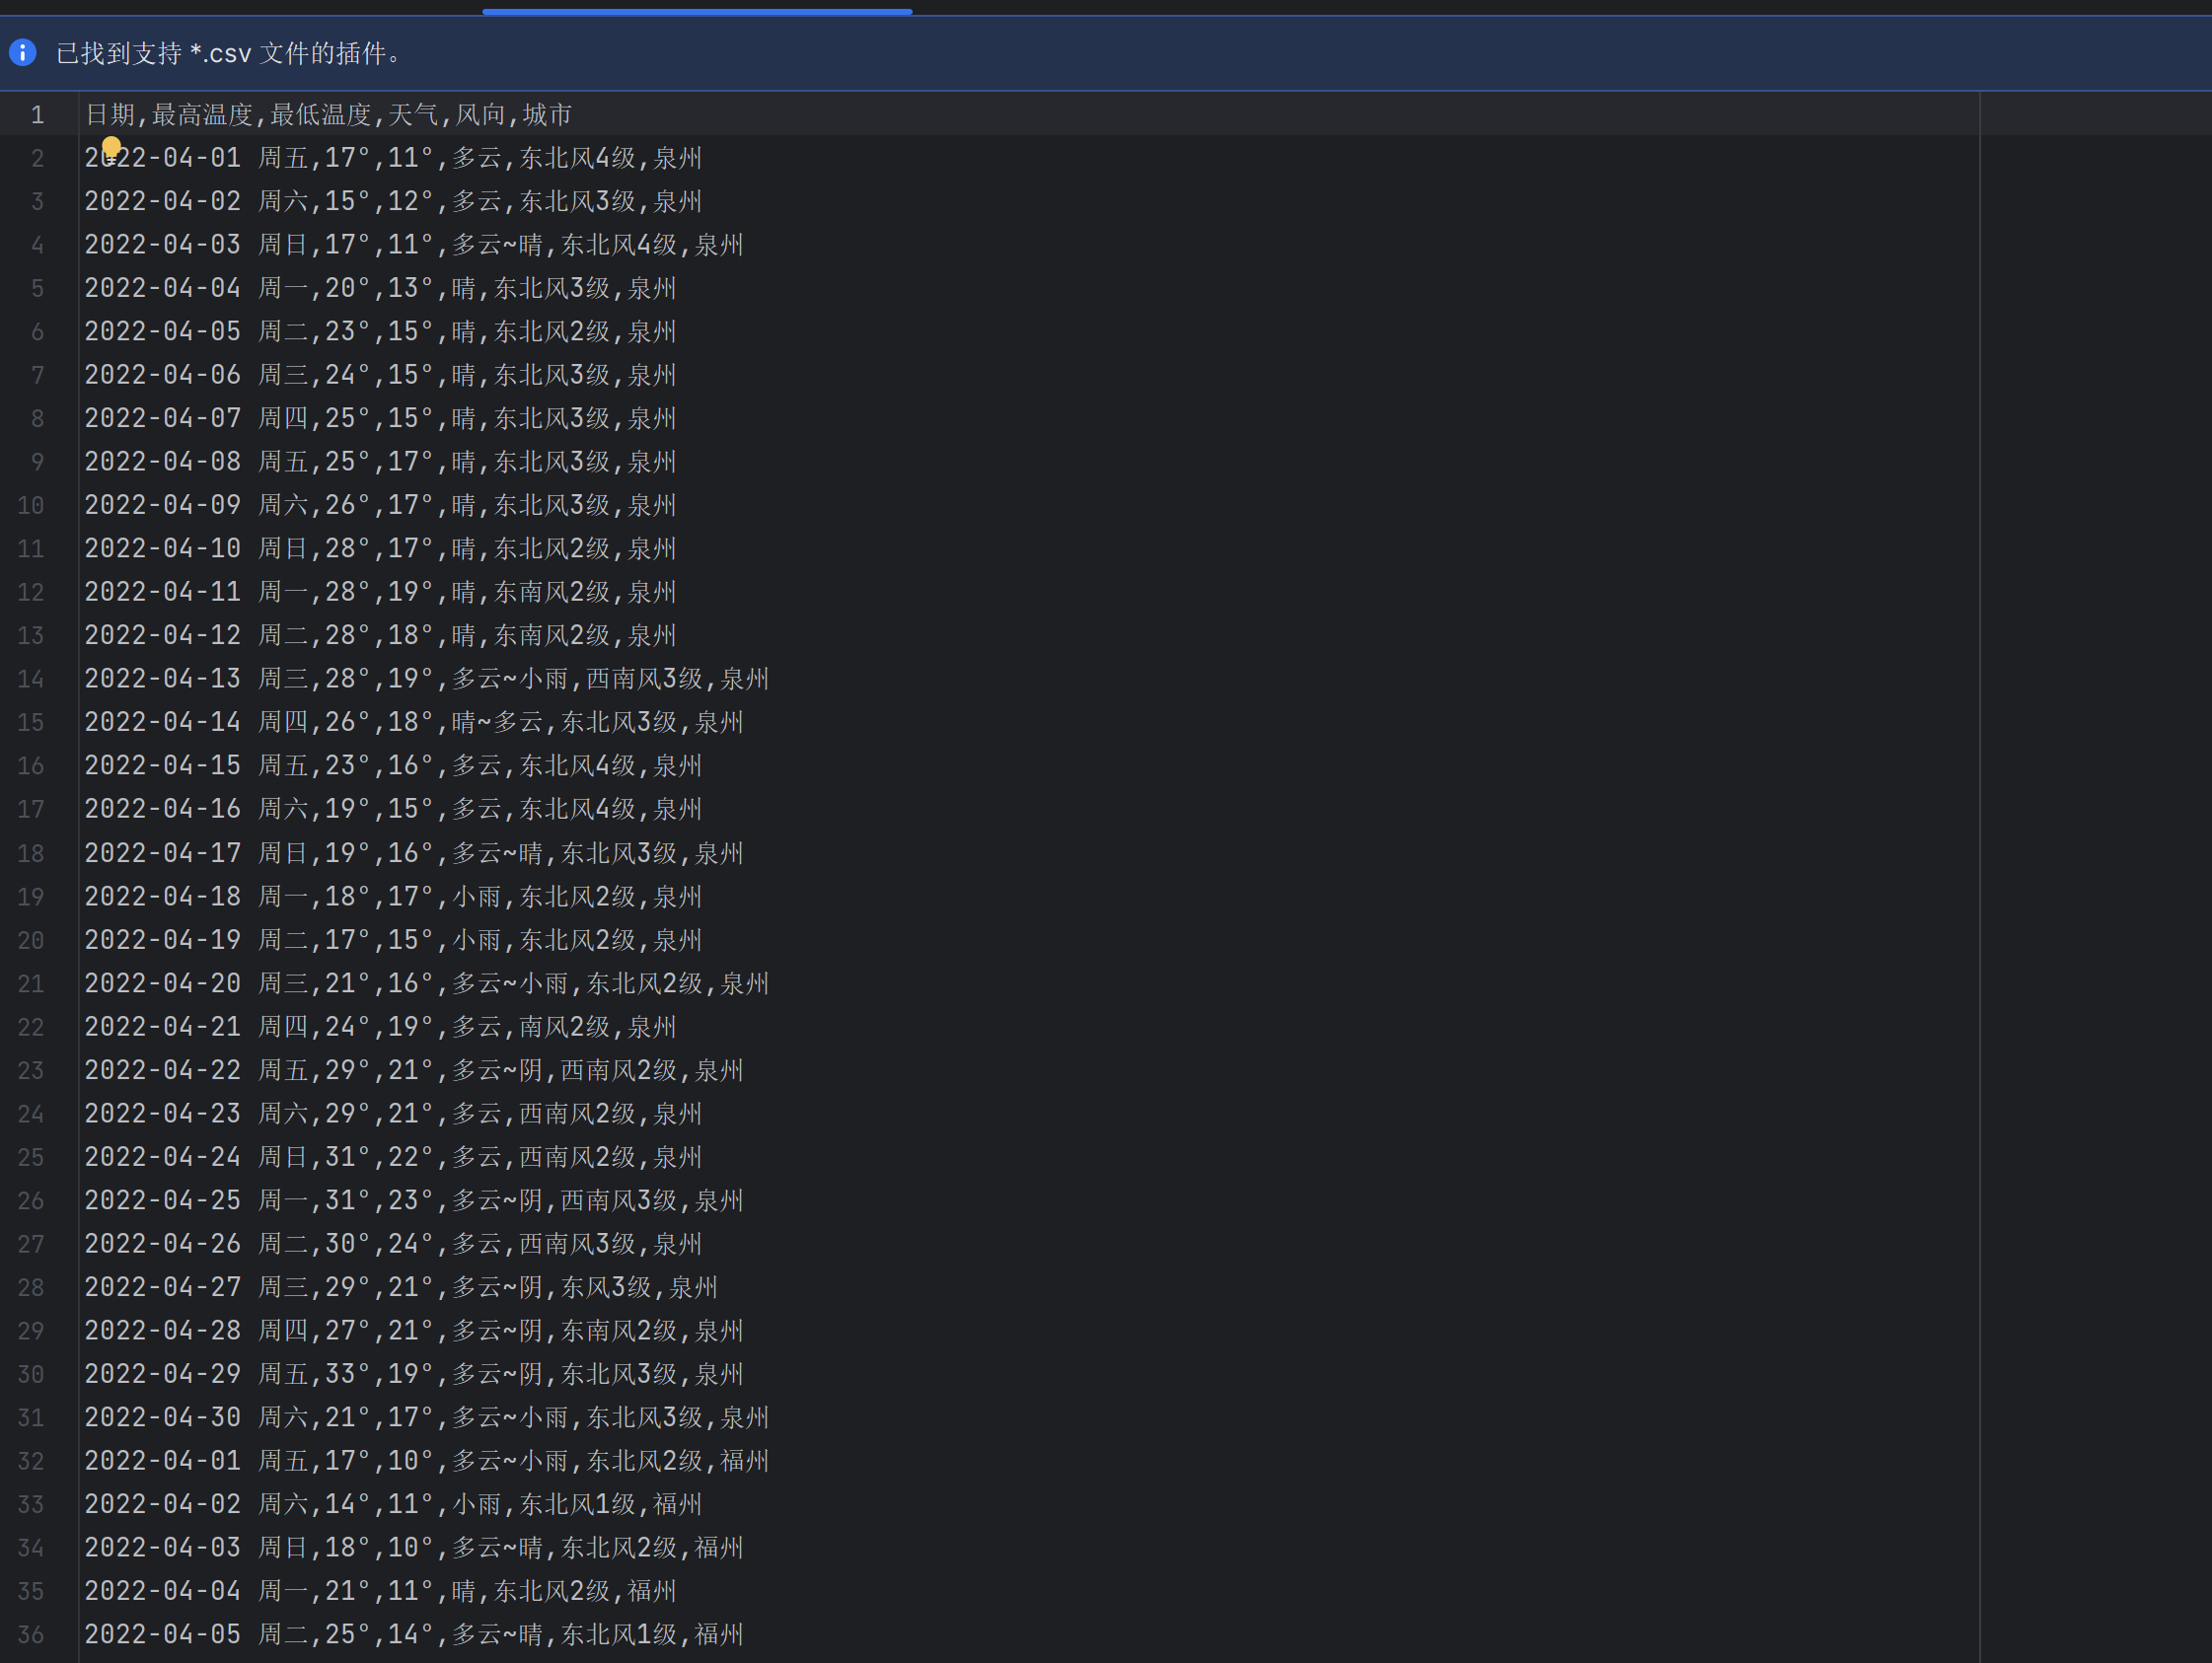
采集后的效果如下
随后我们来到jupyter notebook。
先运行一遍我们的代码:
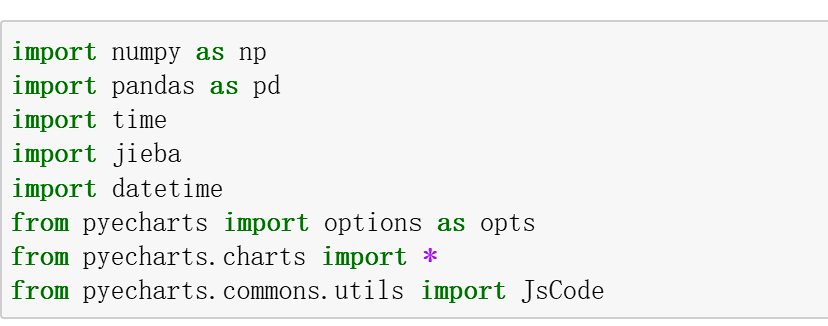
导入我们需要用到的模块:
import numpy as np
import pandas as pd
import time
import jieba
import datetime
from pyecharts import options as opts
from pyecharts.charts import *
from pyecharts.commons.utils import JsCode
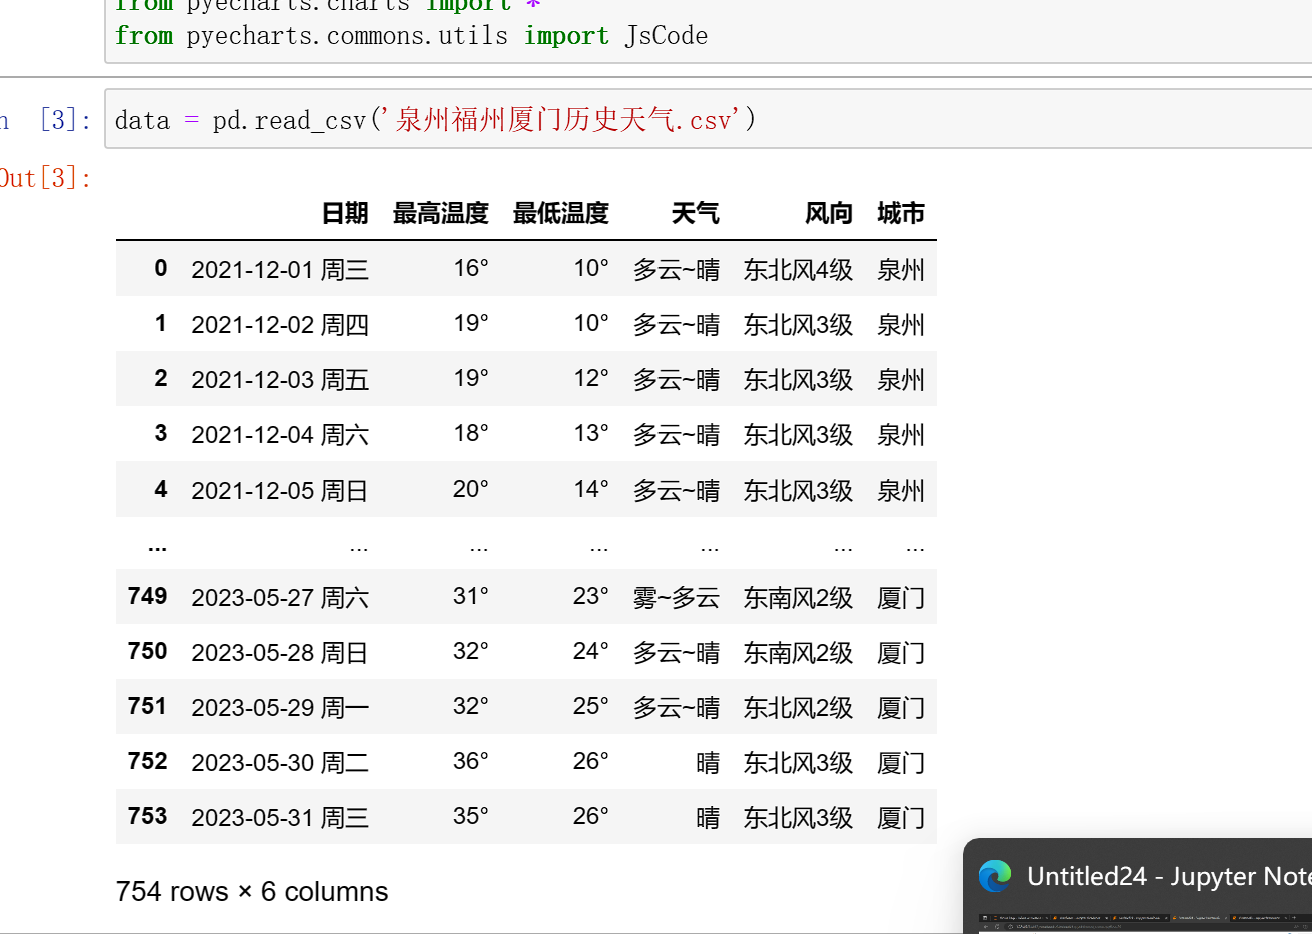
用read来读取我们的数据:
可以看到有非常多条符合我们的内容。
data = pd.read_csv('泉州福州厦门历史天气.csv')
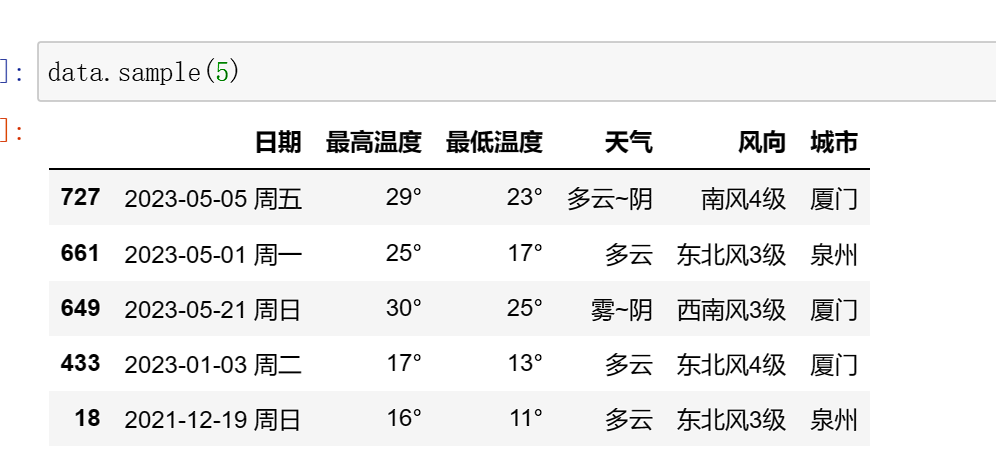
读入数据以后我们来进行数据预览:
用data.sample(5)来随机采样五个
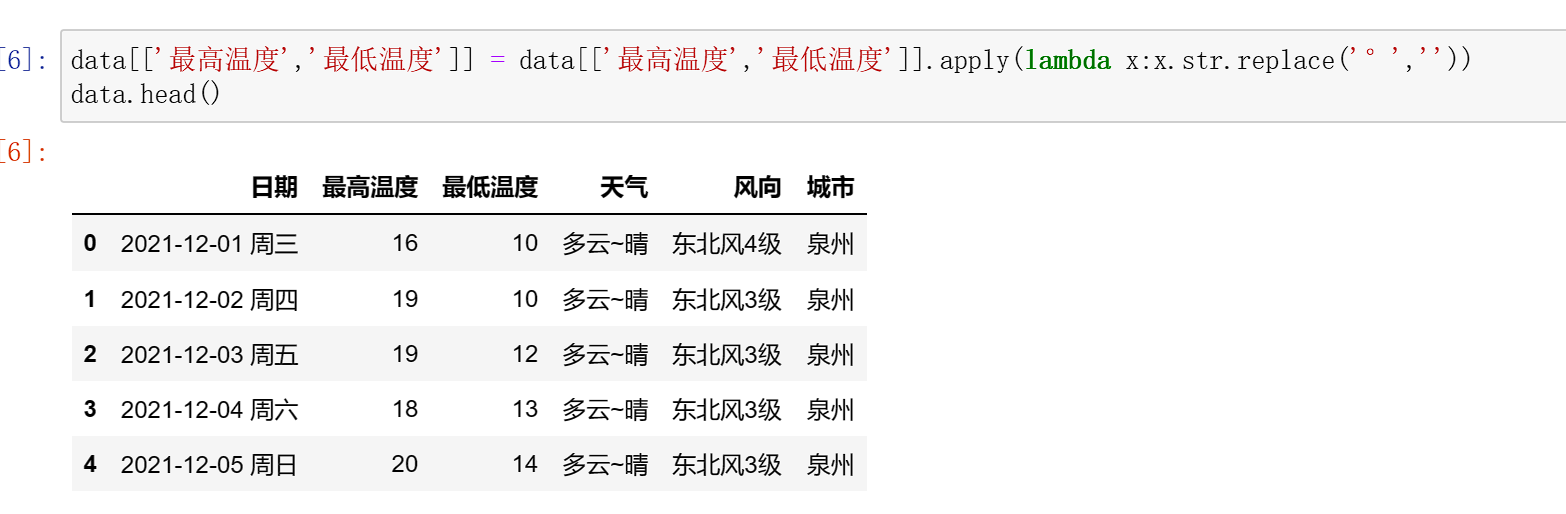
将图表中多余的符号删除:
data[['最高温度','最低温度']] = data[['最高温度','最低温度']].apply(lambda x:x.str.replace('°',''))
data.head()
这里我采样的是不同的数据,所以与上面的内容不同。
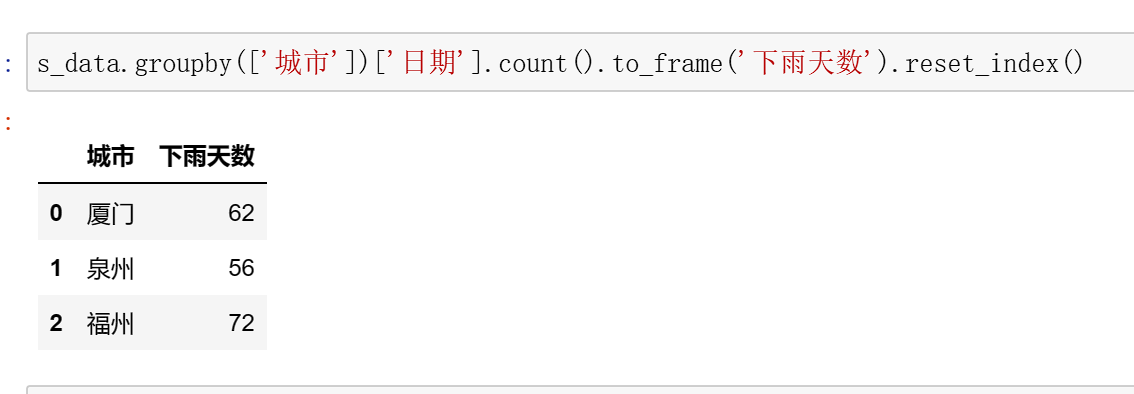
同时我们也可以用代码来知道各个城市的下雨天数:
data.loc[data['天气'].str.contains('雨'),'下雨吗'] = '是'
data.fillna('否',inplace=True)
data.sample(5)
可以看到通过代码得出福州下雨天数最多
接下来就要进行最近七日的天气爬取,来分析未来的天气走势,直观表达内容。
我们将会用到三个地址:
厦门:http://www.weather.com.cn/weather/101230201.shtml
福州:http://www.weather.com.cn/weather/101230101.shtml
泉州:http://www.weather.com.cn/weather/101230501.shtm
我们把他们填入代码中

用requests来进行爬取代码

拿到天气的li,里面包含城市的数据:

创建数组,反便进一步用plot绘制折线图:
接下来对七天的li进行遍历,将数据存到数组中:
接下来是绘制折线图:

接下来展示不同网址后,运行的结果:
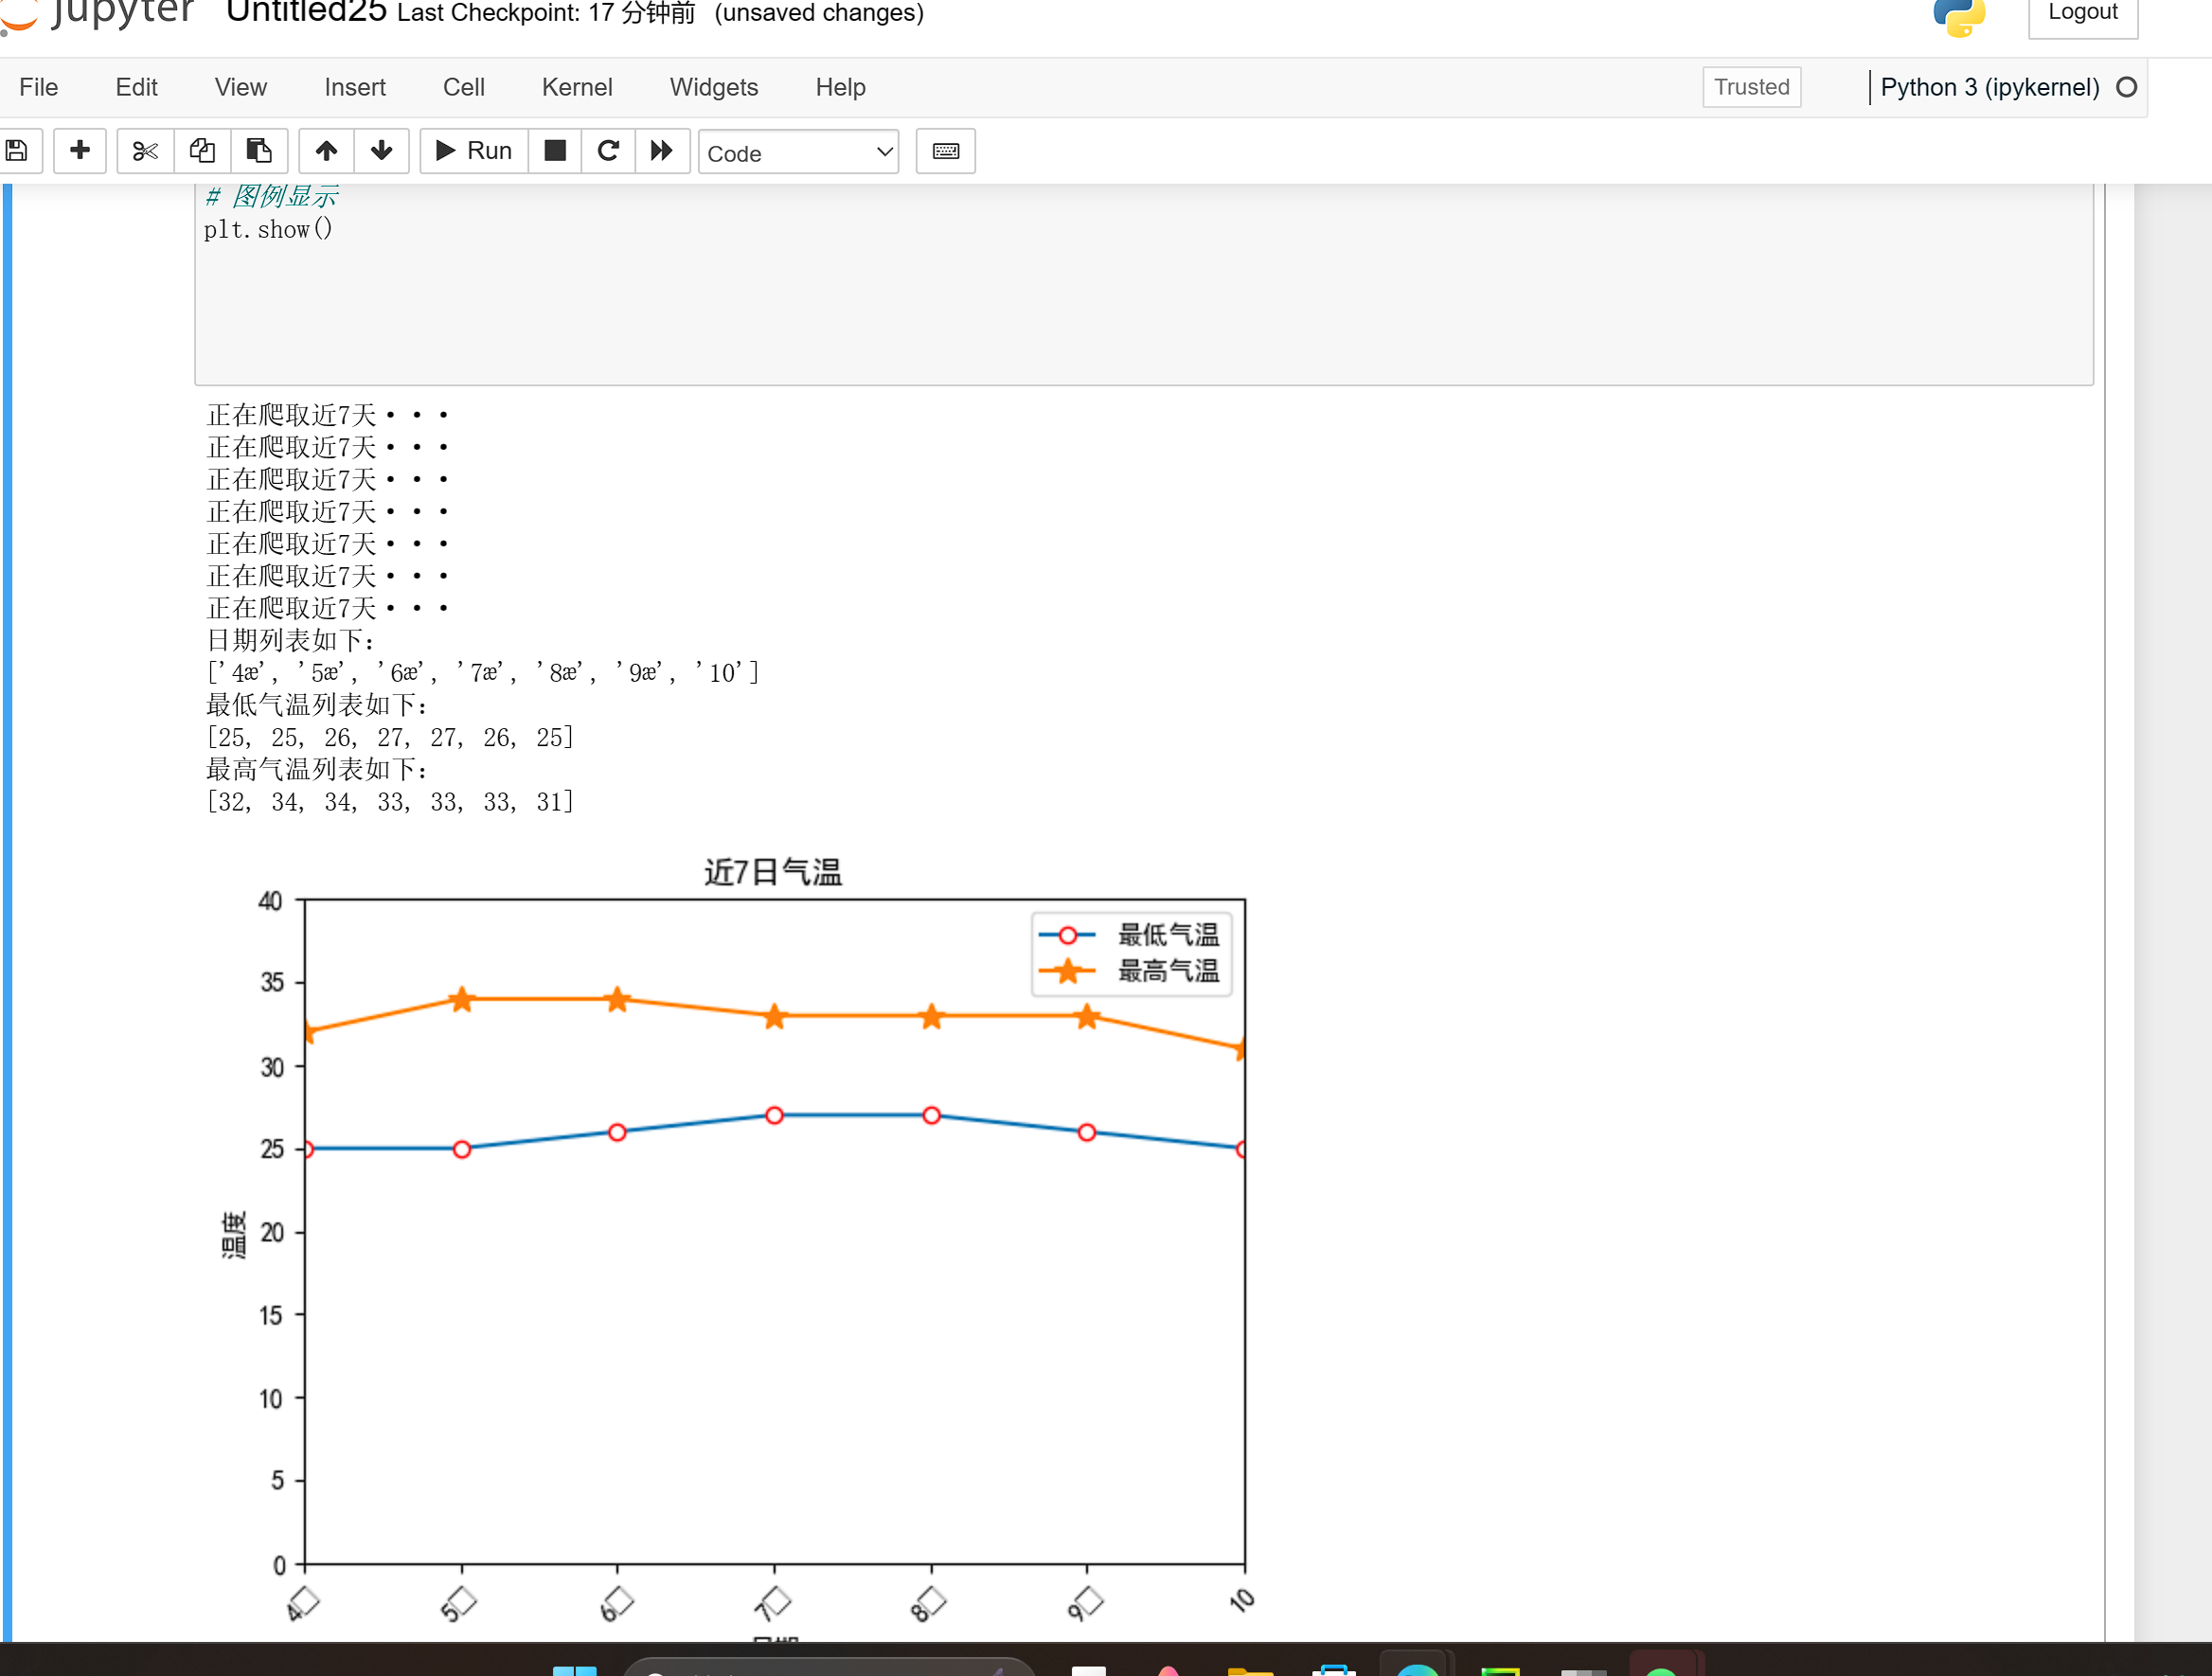
这张为泉州的近七日气温折线图:
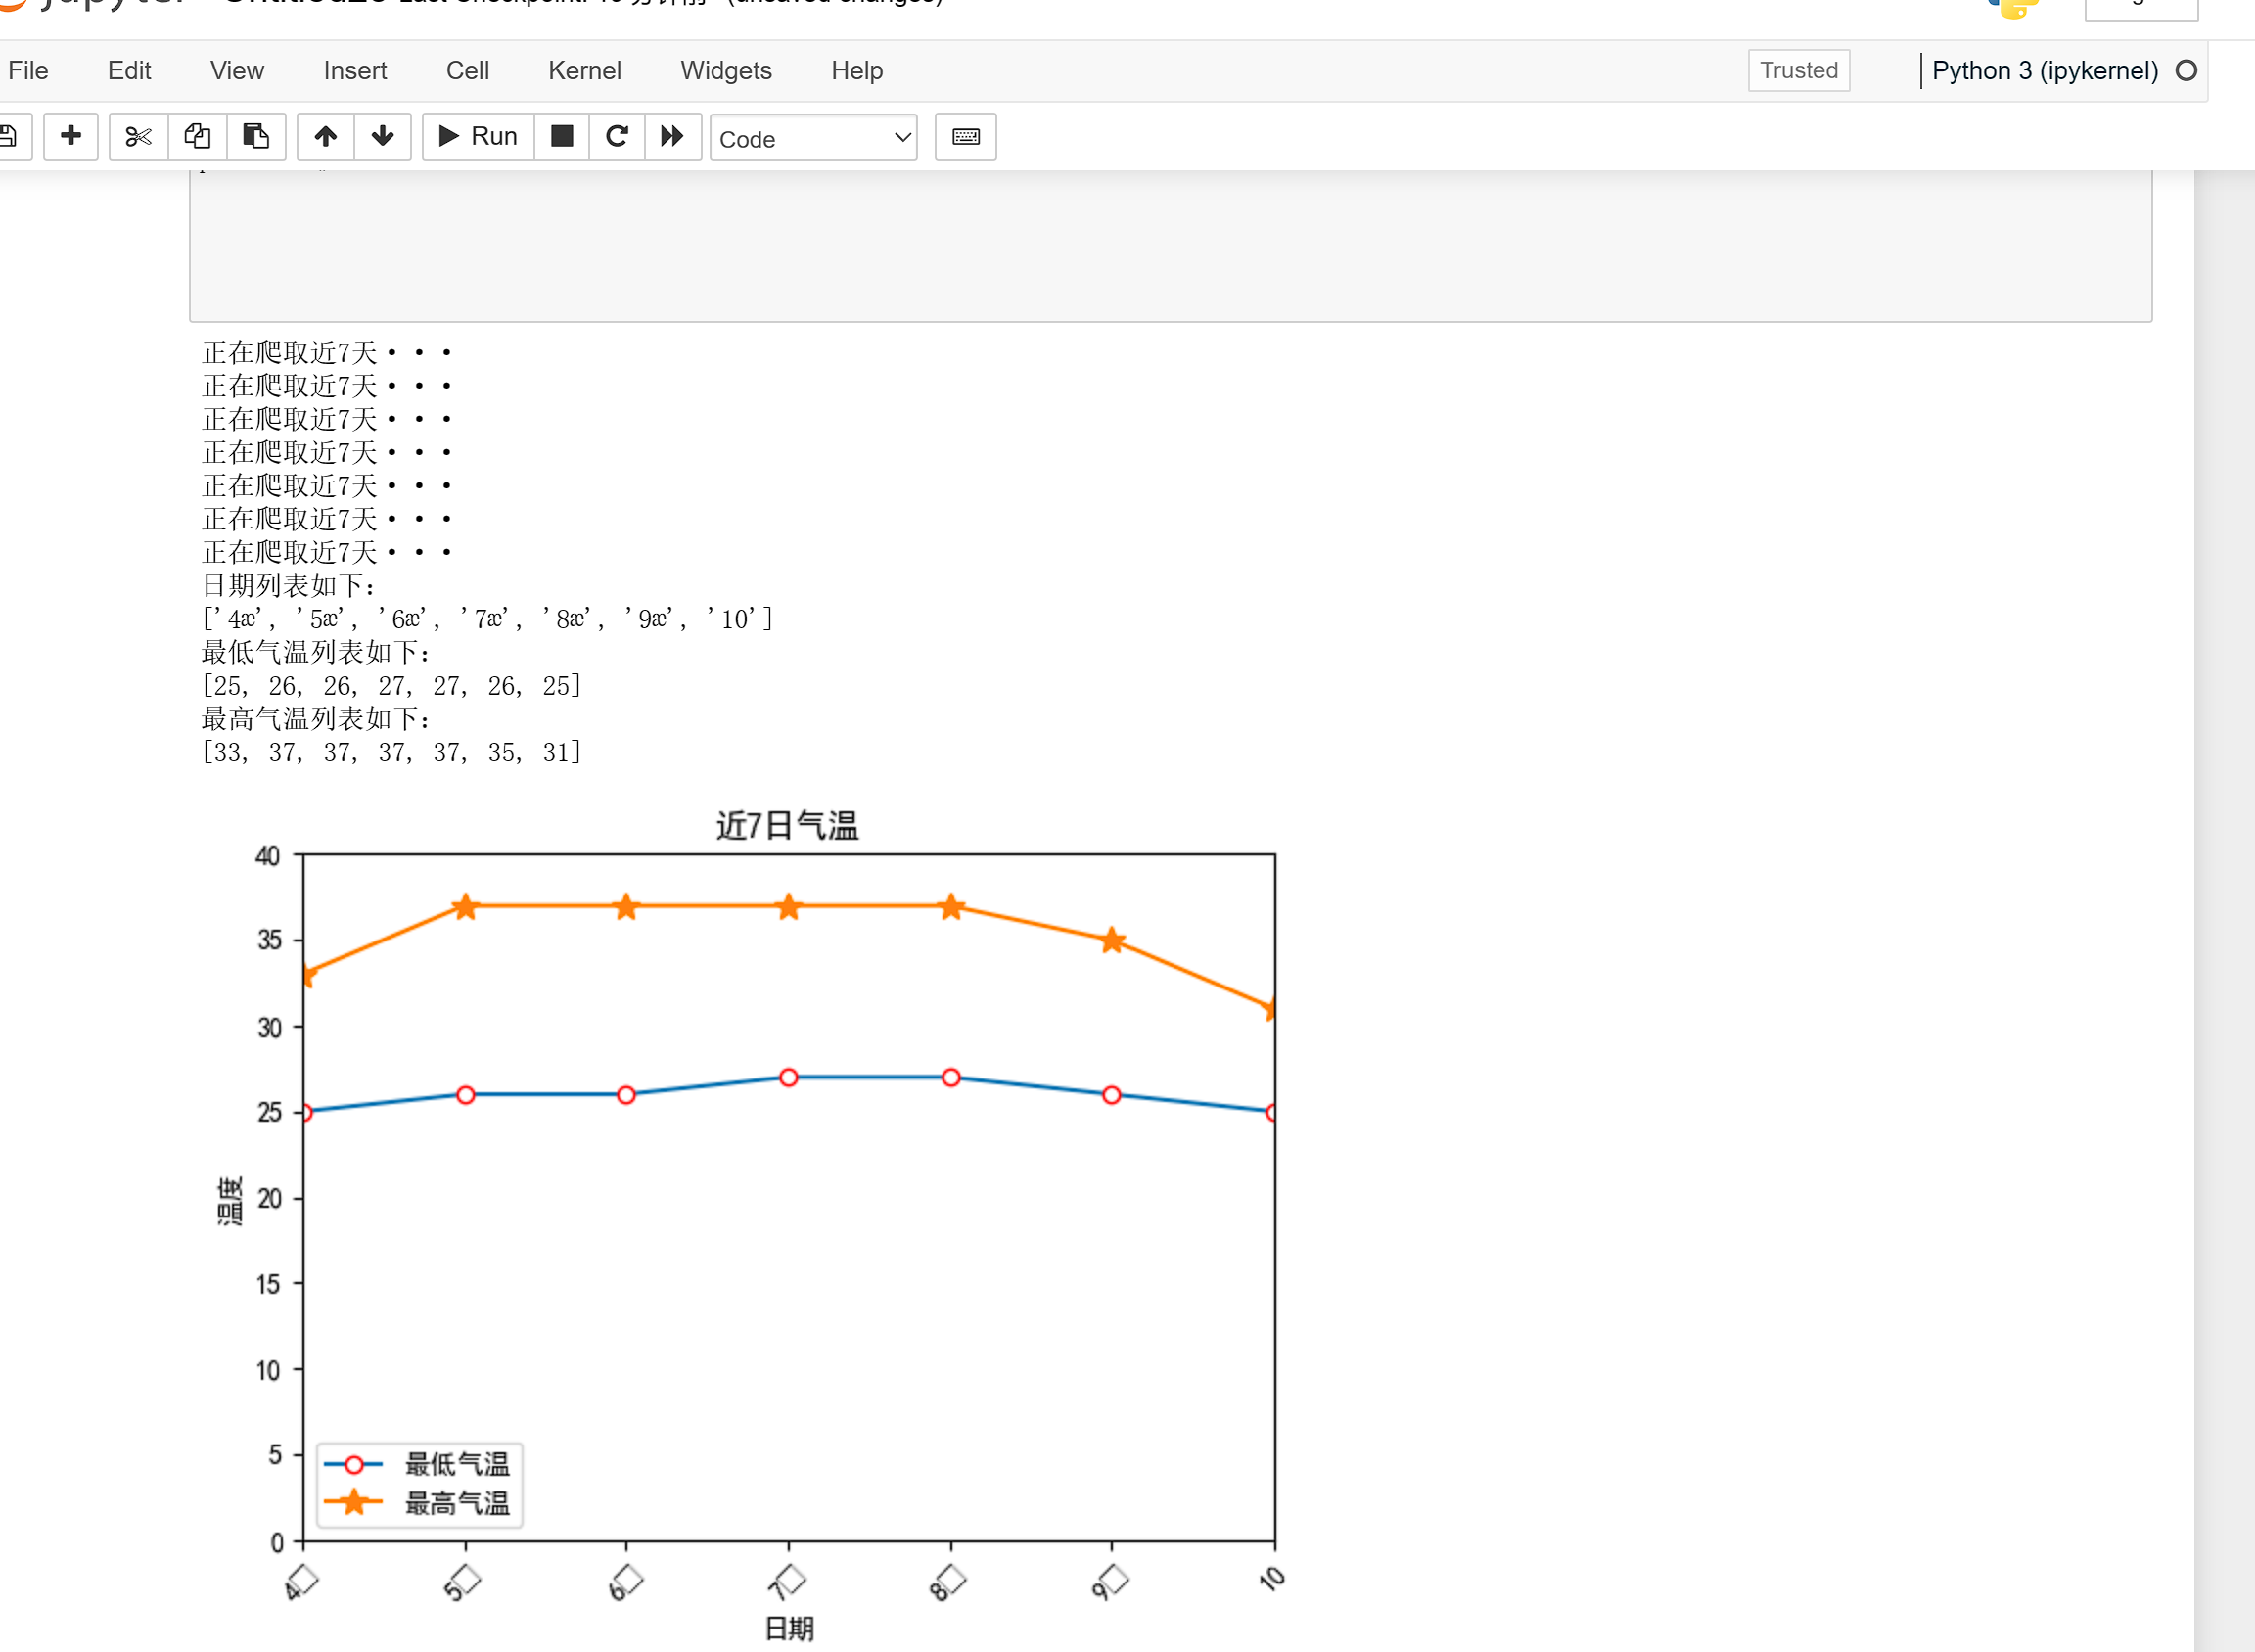
这张是福州的近七日气温折现图:
这张是厦门的近七日气温折现图:
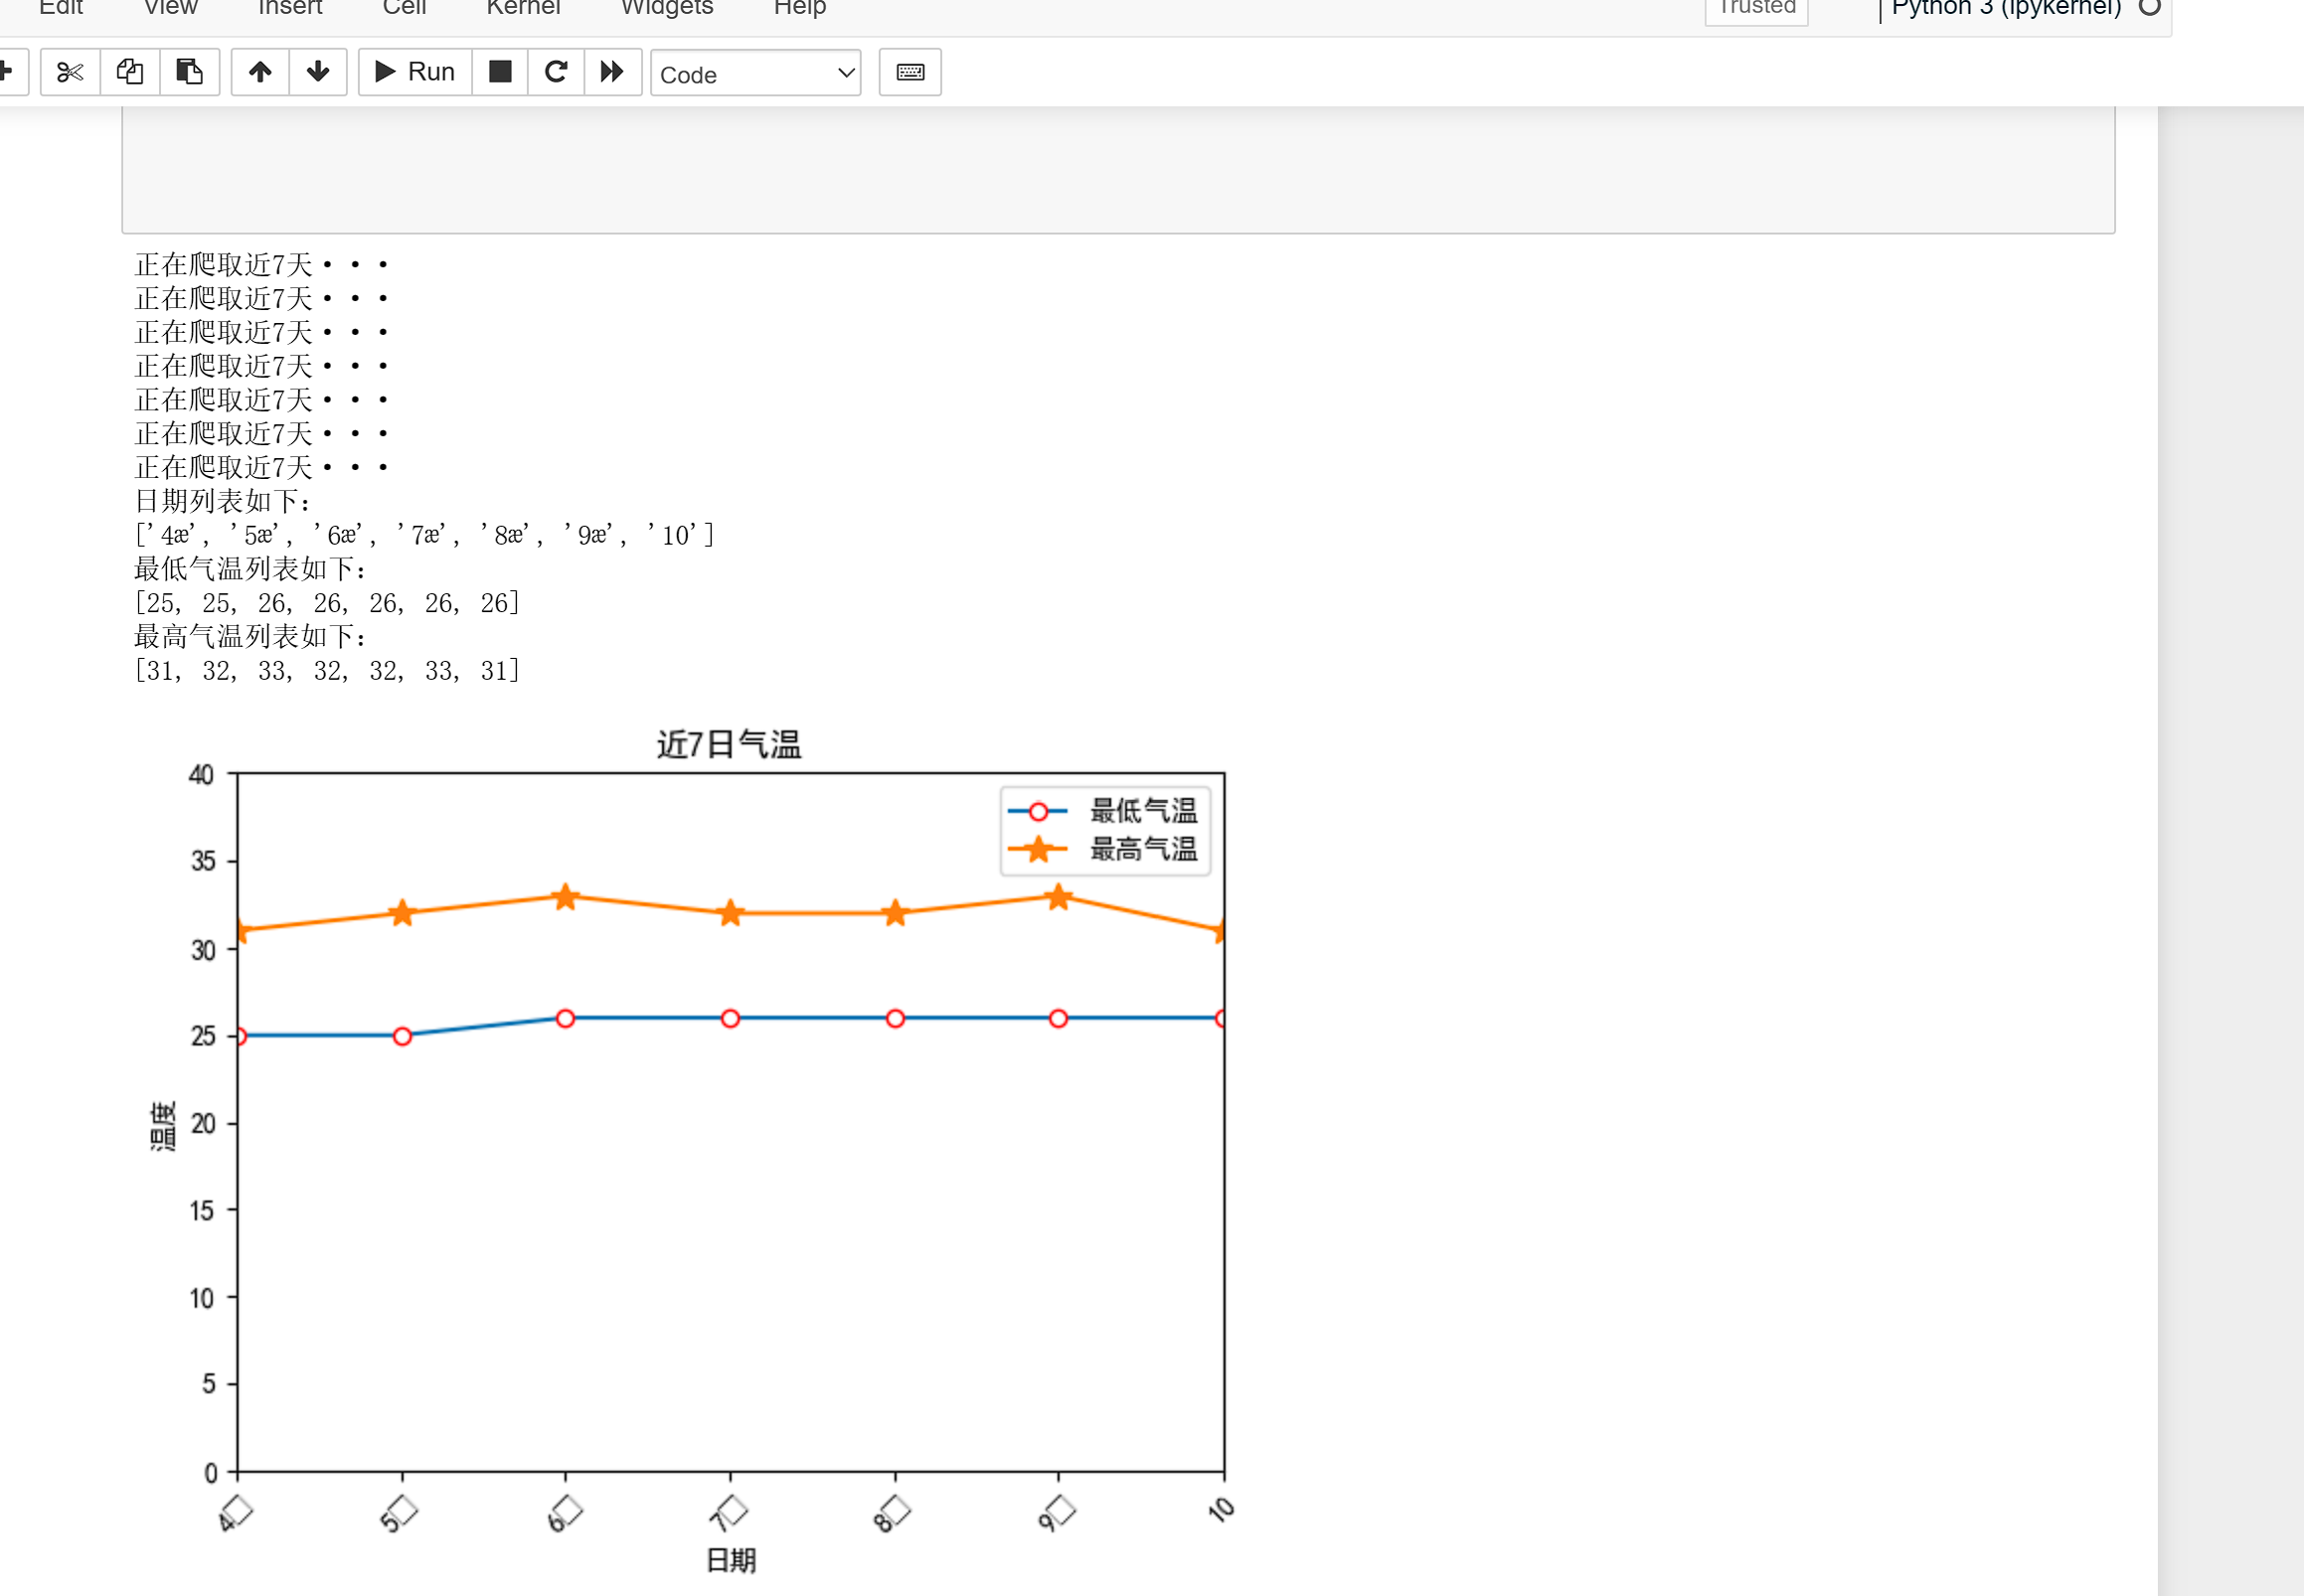
从这几张图可以看出所爬取的三个城市的气温变化图,直观明了。
以下是从头到尾的代码;
爬取2345天气网:
import requests
import parsel
import csv
with open('泉州福州厦门历史天气.csv',mode='a',encoding='utf-8',newline='')as f:
csv_writer = csv.writer(f)
csv_writer.writerow(['日期','最高温度','最低温度','天气','风向','城市'])
city_list = [59131,58847,59134]
for city in city_list:
for year in range(2022, 2023):
for month in range(1,5):
url = f'https://tianqi.2345.com/Pc/GetHistory?areaInfo[areaId]={city}&areaInfo[areaType]=2&date[year]={year}&date[month]={month}'
response = requests.get(url=url)
select = parsel.Selector(response.json()['data'])
trs = select.css('table tr')
for tr in trs[1:]:
tds = tr.css('td::text').getall()
if city == 59131:
tds.append('泉州')
elif city == 58847:
tds.append('福州')
elif city == 59134:
tds.append('厦门')
print(tds)
with open('泉州福州厦门历史天气.csv', mode='a', encoding='utf-8', newline='') as f:
csv_writer = csv.writer(f)
csv_writer.writerow(tds)
来到jupyter notebook。
import numpy as np
import pandas as pd
import time
import jieba
import datetime
from pyecharts import options as opts
from pyecharts.charts import *
from pyecharts.commons.utils import JsCode
data = pd.read_csv('泉州福州厦门历史天气.csv')
data.sample(5)
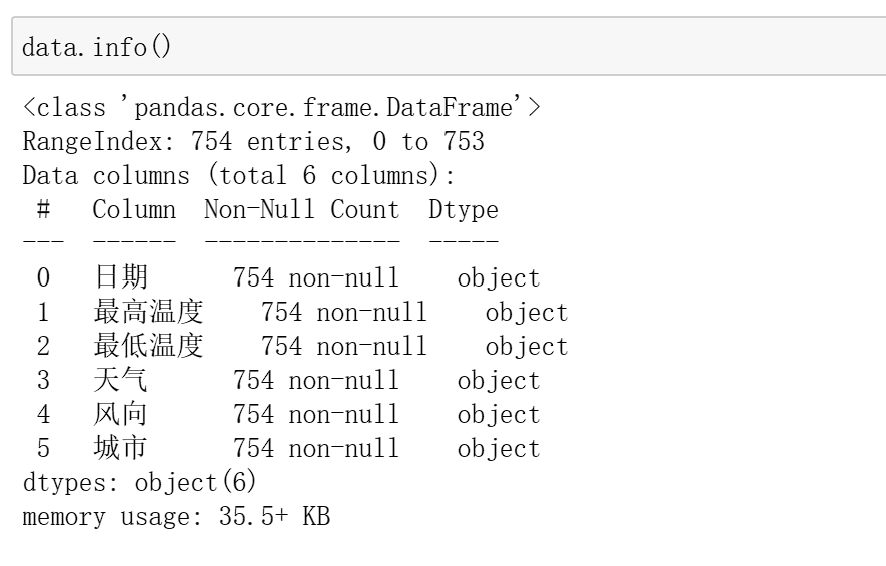
data.info()
data[['最高温度','最低温度']] = data[['最高温度','最低温度']].apply(lambda x:x.str.replace('°',''))
data.head()
data.loc[data['天气'].str.contains('雨'),'下雨吗'] = '是'
data.fillna('否',inplace=True)
data.sample(5)
爬取近七日天气数据折现图:
import requests
from lxml import etree
from pylab import *
# 设置爬取网站url
base_url = "http://www.weather.com.cn/weather/101230501.shtml"
# requests进行爬取代码
resp = requests.get(url=base_url)
# XPATH解析
html = etree.HTML(resp.text)
# 拿到天气的li,在li里包含每天天气的全部数据,包括日期/天气/气温/城市等等
lis = html.xpath('//*[@id="7d"]/ul/li')
# 创建日期、最高气温、最低气温的数组,为了后续把爬取的数据添加到数组中,进而进一步把数组用plot进行绘制折线图
days = []
lows = []
highs = []
# 对7天天气的li进行遍历,为了获取高低温度和日期
for li in lis:
print("正在爬取近7天···")
# 获取7天高温
high = li.xpath("./p[2]/span/text()")[0]
# 获取7天低温
low = li.xpath("./p[2]/i/text()")[0][0:2]
# 获取7天日期
day = li.xpath("./h1/text()")[0][0:2]
# 把7天日期、高温、低温添加到数组中
days.append(day)
lows.append((int)(low))
highs.append((int)(high))
# 设置休眠1秒
time.sleep(1)
print("日期列表如下:")
print(days)
print("最低气温列表如下:")
print(lows)
print("最高气温列表如下:")
print(highs)
# 下方代码绘制高低气温折线图图表
# 设置字体
mpl.rcParams['font.sans-serif'] = ['SimHei']
# 设置x轴长度
x = range(len(days))
# 限定纵轴的范围
plt.ylim(0, 40)
# 低温、高温数据加载,设置图形表示,设置解释
plt.plot(x, lows, marker='o', mec='r', mfc='w', label=u'最低气温')
plt.plot(x, highs, marker='*', ms=10, label=u'最高气温')
# 让图例生效
plt.legend()
plt.xticks(x, days, rotation=45)
plt.margins(0)
plt.subplots_adjust(bottom=0.15)
# X轴标签
plt.xlabel(u"日期")
# Y轴标签
plt.ylabel("温度")
# 标题
plt.title("近7日气温")
# 图例显示
plt.show()