Jedis基本使用
<dependency>
    <groupId>redis.clients</groupId>
    <artifactId>jedis</artifactId>
    <version>3.7.1</version>
</dependency>
public class RedisTest {
    private Jedis jedis;
    @Before
    public void setJedis(){
        //建立连接
        jedis = new Jedis("127.0.0.1",6379);
        //设置密码,没有不写
        //jedis.auth()
        //选择库,默认是0
        jedis.select(0);
    }
    @After
    public void destroyJedis(){
        if (jedis!=null)
            jedis.close();
    }
    @Test
    public void fn(){
        String result=jedis.set("name","hello");
        System.out.println("name-->"+result);//ok
        String name = jedis.get("name");
        System.out.println(name);//hello
    }
}
Jedis连接池
- Jedis本身是线程不安全的,并且频繁的创建和销毁连接会有性能损耗,因此应该使用线程池代替Jedis的直连方式
//工具类的封装
public class JedisConnPool {
    private static JedisPool jedisPool;
    static {
        JedisPoolConfig jedisPoolConfig=new JedisPoolConfig();
        //最大连接数
        jedisPoolConfig.setMaxTotal(10);
        //最大空闲连接
        jedisPoolConfig.setMaxIdle(10);
        //最小空闲连接
        jedisPoolConfig.setMinIdle(0);
        //设置最长等待时间
        jedisPoolConfig.setMaxWaitMillis(200);
        jedisPool = new JedisPool(jedisPoolConfig,"127.0.0.1",6379,1000,null);
    }
    public static Jedis getJedis(){
        return jedisPool.getResource();
    }
}
SpringDataRedis
<dependency>
    <groupId>org.springframework.boot</groupId>
    <artifactId>spring-boot-starter-data-redis</artifactId>
</dependency>
<dependency>
    <groupId>org.apache.commons</groupId>
    <artifactId>commons-pool2</artifactId>
</dependency>
 <dependency>
     <groupId>com.fasterxml.jackson.core</groupId>
     <artifactId>jackson-databind</artifactId>
 </dependency>
spring:
  main:
    banner-mode: off
  redis:
    host: 127.0.0.1
    port: 6379
    #password:
    lettuce:
      pool:
        max-active: 10 # 最大连接
        max-idle: 10 # 最大空闲连接
        min-idle: 0 # 最小空闲连接
        max-wait: 100 # 连接等待时间
@SpringBootTest
public class RedisTest {
@Autowired
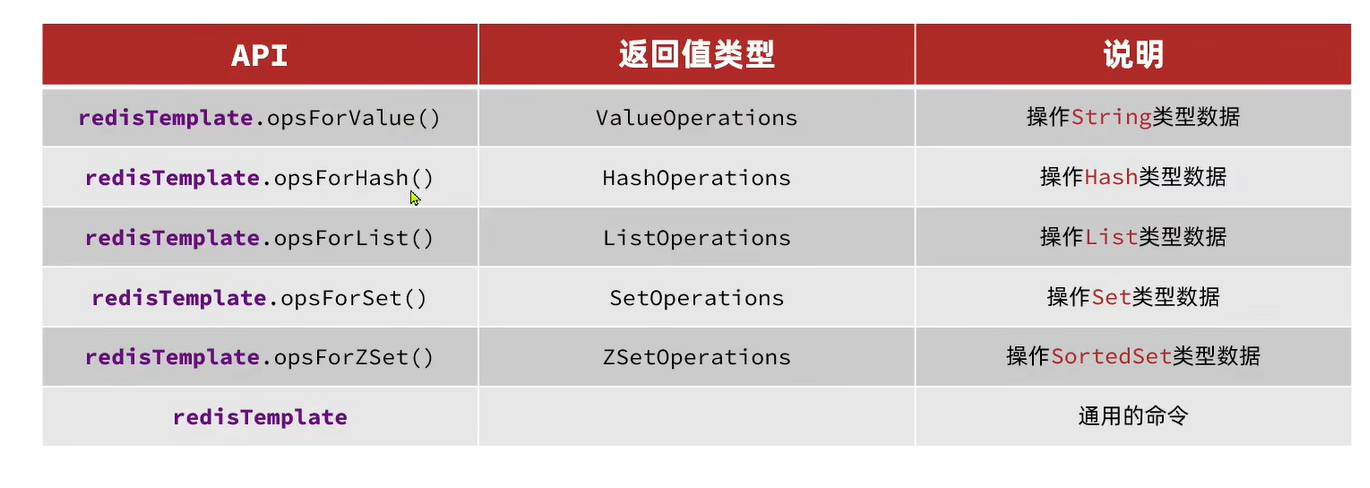
private RedisTemplate redisTemplate;
@Test
public void fun(){
redisTemplate.opsForValue().set("name", "xue");
Object name = redisTemplate.opsForValue().get("name");
System.out.println(name);
}
}
- 配置RedisTemplate的序列化,这样会自动将对象序列化成json字符串,但是这样的话会占用大量的内存空间,因为自动序列化时,会多一个属性-@class
@Configuration
public class RedisConfig {
    @Bean
    public RedisTemplate<String,Object> redisTemplate(RedisConnectionFactory connectionFactory){
        //创建RedisTemplate对象
        RedisTemplate<String,Object> template = new RedisTemplate<>();
        //设置连接工厂
        template.setConnectionFactory(connectionFactory);
        //设置JSON序列化工具
        GenericJackson2JsonRedisSerializer JsonRedisSerializer = new GenericJackson2JsonRedisSerializer();
        //设置Key的序列化
        template.setKeySerializer(RedisSerializer.string());
        template.setHashKeySerializer(RedisSerializer.string());
        //设置value的序列化
        template.setHashValueSerializer(JsonRedisSerializer);
        template.setValueSerializer(JsonRedisSerializer);
        return template;
    }
}
/*{
    "@class": "com.example.springdatademo.bean.User", //多余的属性
    "username": "jack",
    "age": 22,
    "sex": "男"
}*/
- 使用StringRedisTemplate手动序列化和反序列化
@SpringBootTest
public class StringRedisTest {
    @Autowired
    private StringRedisTemplate stringRedisTemplate;
    private final ObjectMapper objConvertStr = new ObjectMapper();
    @Test
    public void fun() throws JsonProcessingException {
        //创建对象
        User user = new User("test",22,"男");
        //手动转化为json字符串
        String json = objConvertStr.writeValueAsString(user);
        //写入数据
        stringRedisTemplate.opsForValue().set("user:2",json);
        //读取数据
        String str = stringRedisTemplate.opsForValue().get("user:2");
        //反序列化
        User obj = objConvertStr.readValue(str, User.class);
        System.out.println(obj);
    }
}
/*{
    "username": "jack",
    "age": 22,
    "sex": "男"
}*/