suricata之IPS模式
一、简介
suricata具有IDS(Intrusion Detection Systems,入侵检测系统)的功能外,还具有IPS(Intrusion Prevention System,入侵防御系统)功能,对不符合配置规则的报文进行直接阻断,对滥用报文进行限流以保护网络带宽资源。Suricata 本身是不具有拦截功能的,想要让它拦截包需要配合 iptables 使用。 首先要确定安装的suricata是否支持IPS模式,如果在安装编译的时候没有启用IPS模式,NFQueue默认为no
二、流量场景
1、经过设备的流量

该场景下,suricata部署机器为网关设备,iptables配置需要使用FORWARD
iptables -I FORWARD -j NFQUEUE
2、设备产生的流量

该场景下,suricata部署机器和主机为同一个设备,iptables配置需要使用INPUT和OUTPUT
iptables -I INPUT -j NFQUEUE
iptables -I OUTPUT -j NFQUEUE
三、IDS和IPS区别
| 对比项 | IDS引擎 | IPS产品 |
|---|---|---|
| 部署方式 | 旁路部署 | 串联部署 |
| 部署位置 | 一般在交换机 | 一般在网络出入口 |
| 重要作用 | 监测告警 | 阻断攻击 |
- 旁路:
- 在内网的支路上,流量一般不经过这里
- 旁路一般是指通过交换机等网络设备的“端口镜像”功能来实现监控,在此模式下,监控设备只需要连接到交换机的指定镜像端口,所以形象的称之为“旁路监控”
- 旁路监控模式部署起来比较灵活方便,只需要在交换机上面配置镜像端口即可,不会影响现有的网络结构
- 旁路模式分析的是镜像端口拷贝过来的数据,对原始传递的数据包不会造成延时,不会对网速造成任何影响
- 旁路监控设备一旦故障或者停止运行,不会影响现有网络的正常
- 需要交换机支持端口镜像才可以实现监控
- 串联:
- 串接在出口,所有出去的流量经过
- 串联模式一般是通过网关或者网桥的模式来进行监控,由于监控设备做为网关或者网桥串联在网络中,所以称之为“串联监控模式”
- 串联模式一般要作为网关或者网桥,所以需要对现有网络结构进行变动
- 串联模式是串联在网络中的,那么所有的数据必须先经过监控系统,通过监控系统的分析检查之后,才能够发送到各个客户端,所以会对网速有一定的延时
- 联监控设备如果出现故障,会导致网络中断,导致网络单点故障
四、安装IPS模式suricata
- suricata IPS官网文档:https://suricata.readthedocs.io/en/latest/setting-up-ipsinline-for-linux.html#setting-up-ips-with-netfilter
- centos 7安装文档:https://redmine.openinfosecfoundation.org/projects/suricata/wiki/CentOS_Installation
1、安装依赖
yum install epel-release

yum -y install gcc libpcap-devel pcre-devel libyaml-devel file-devel \
  zlib-devel jansson-devel nss-devel libcap-ng-devel libnet-devel tar make \
  libnetfilter_queue-devel lua-devel PyYAML libmaxminddb-devel rustc cargo \
  lz4-devel
2、安装suricata
1)解压
1 [root@localhost 16:21 /<path>]# tar -zxvf suricata-6.0.0.tar.gz
2)预编译
- 查找pf_ring和:
find / -name 'pfring.h',find / -name 'libpfring.so' - 查找hyperscan库路径:
find / -name 'hs.h',find / -name 'libhs.so.5'
[root@localhost 16:22 /<path>]# cd suricata-6.0.0/
[root@localhost 16:23 /<path>/suricata-suricata-6.0.0]# ./autogen.sh # 原生没有configure,需要该脚本来生成configure
[root@localhost 16:24 /<path>/suricata-suricata-6.0.0]# ./configure --disable-gccmarch-native \
--prefix=/usr --sysconfdir=/etc --localstatedir=/var \
--enable-pfring --with-libpfring-includes=/usr/local/include --with-libpfring-libraries=/usr/local/lib \
--with-libhs-includes=/usr/local/include/hs --with-libhs-libraries=/usr/local/lib64 \
--enable-geoip \
--enable-nfqueue
# --localstatedir 指定日志保存位置
# --prefix 指定安装位置
# --sysconfdir 指定配置文件保存位置
# --enable-pfring, --with-libpfring-includes, --with-libpfring-libraries 表示将pf_ring编译到suricata,库路径可能不尽相同,自行修改
# --with-libhs-includes, --with-libhs-libraries 表示将hyperscan编译到suricata,库路径可能不尽相同,自行修改
# --enable-nfqueue 开启IPS模式
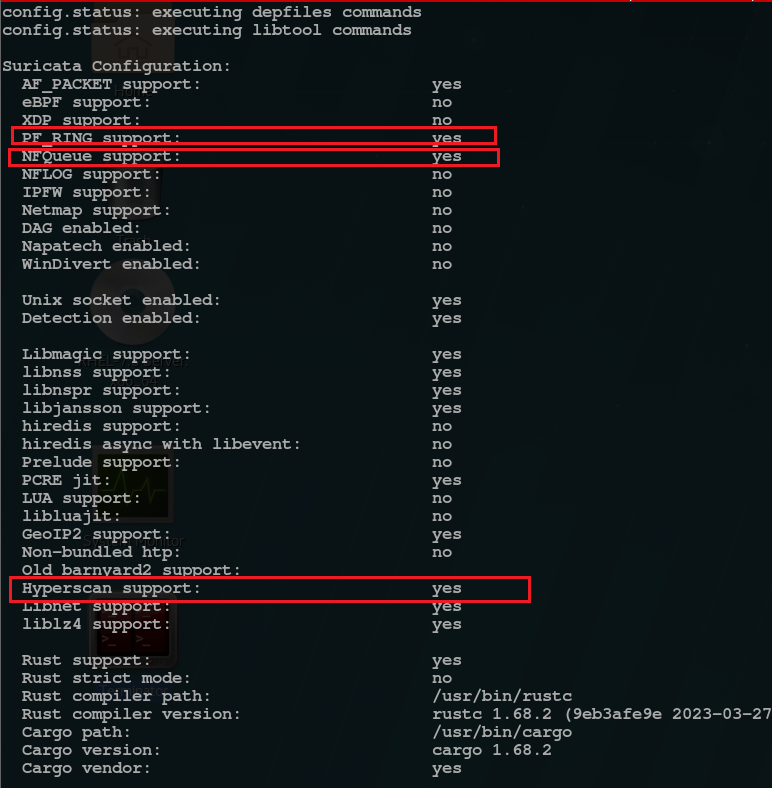
## 执行完configure之后,如果没有报错,可以看到当前预编译的suricata,支持哪些功能
-
预编译成功
- 如果没有报错,可以看到当前预编译的suricata,支持哪些功能
-
报错1
##### 如果configure时报出一下错误,根据提示,在当前目录下执行git clone https://github.com/OISF/libhtp,并重新执行./autogen.sh ########################################################################################## #ERROR: Libhtp is not bundled. Get libhtp by doing: # git clone https://github.com/OISF/libhtp #Then re-run Suricata's autogen.sh and configure script. #Or, if libhtp is installed in a different location, #pass --enable-non-bundled-htp to Suricata's configure script. #Add --with-libhtp-includes=<dir> and --with-libhtp-libraries=<dir> if #libhtp is not installed in the include and library paths. ########################################################################################## # 解决LibHtp的报错 [root@localhost 16:27 /<path>/suricata-suricata-6.0.0]# git clone https://github.com/OISF/libhtp [root@localhost 16:28 /<path>/suricata-suricata-6.0.0]# ./autogen.sh # 再次执行configure [root@localhost 16:29 /<path>/suricata-suricata-6.0.0]# ./configure --disable-............ -
报错2
##### 如果configure时报出一下错误, 在命令起始位置加上LIBS="-lrt -lnuma" ########################################################################################## ##checking for pfring_open in -lpfring... no ## ## ERROR! --enable-pfring was passed but the library was not found or version is >4, go get it ## from http://www.ntop.org/PF_RING.html ########################################################################################## [root@localhost 16:29 /<path>/suricata-suricata-6.0.0]# LIBS="-lrt -lnuma" ./configure --disabl......... -
报错3
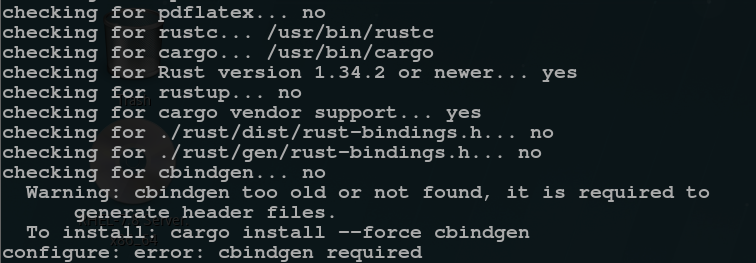
###################### 如果抛出以下错误,根据提示安装cbindgen,并加到PATH中 ###################### ########################################################################################## #Warning: cbindgen too old or not found, it is required to # generate header files. # To install: cargo install --force cbindgen #configure: error: cbindgen required ########################################################################################## [root@localhost 16:30 /<path>/suricata-suricata-6.0.0]# cargo install --force cbindgen # 该步骤需要联网 [root@localhost 16:40 /<path>/suricata-suricata-6.0.0]# export PATH=/root/.cargo/bin:$PATH # 再次执行configure [root@localhost 16:29 /<path>/suricata-suricata-6.0.0]# ./configure --disable-............ -
报错4
# 后续报错,缺什么依赖包,根据提示安装什么依赖包
3)编译安装
[root@localhost 16:45 /<path>/suricata-suricata-6.0.0]# make -j 4 && make install
4)添加htp库到系统目录
# 拷贝htp的库到lib中
[root@localhost 17:45 /<path>/suricata-suricata-6.0.0]# cp -d libhtp/htp/.libs/libhtp.so* /lib64/

########################### 如果不执行该步骤,在执行suricata命令时会报以下错误######################################
# [root@localhost ~]# suricata
# suricata: error while loading shared libraries: libhtp.so.2: cannot open shared object file: No such file or directory
############################################################################################################
5)添加库搜索路径
# 将pf_ring库路径加入到动态库搜索路径
[root@localhost suricata-suricata-6.0.0]# echo "/usr/local/lib" | tee --append /etc/ld.so.conf.d/usrlocal.conf
############################################################################################################
# 不将路径加到库搜索路径中,会出现找不到库文件的问题:
# [root@localhost suricata-suricata-6.0.0]# suricata
#  while loading shared libraries: libpfring.so.8: cannot open shared object file: No such file or directory
############################################################################################################

# 将hyperscan库路径加入到动态库搜索路径
[root@localhost suricata-suricata-6.0.0]# echo "/usr/local/lib64" | tee --append /etc/ld.so.conf.d/usrlocal.conf
############################################################################################################
# 不将路径加到库搜索路径中,会出现找不到库文件的问题:
# [root@localhost suricata-suricata-6.0.0]# suricata
# suricata: error while loading shared libraries: libhs.so.5: cannot open shared object file: No such file or directory
############################################################################################################

# 加载库
[root@localhost 16:45 /<path>/suricata-suricata-6.0.0]# ldconfig
6)生成conf目录、log目录等目录
# 生成conf目录、log目录等目录
[root@localhost 17:47 /<path>/suricata-suricata-6.0.0]# make install-conf
#install -d "/etc/suricata/"
#install -d "/var/log/suricata/files"
#install -d "/var/log/suricata/certs"
#install -d "/var/run/"
#install -m 770 -d "/var/run/suricata"
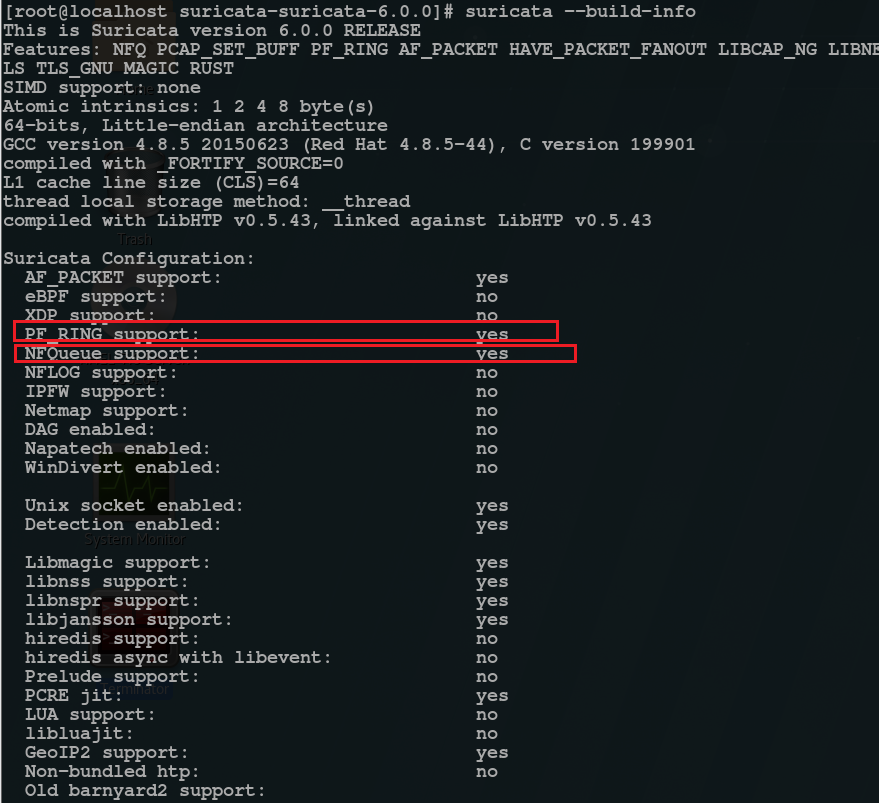
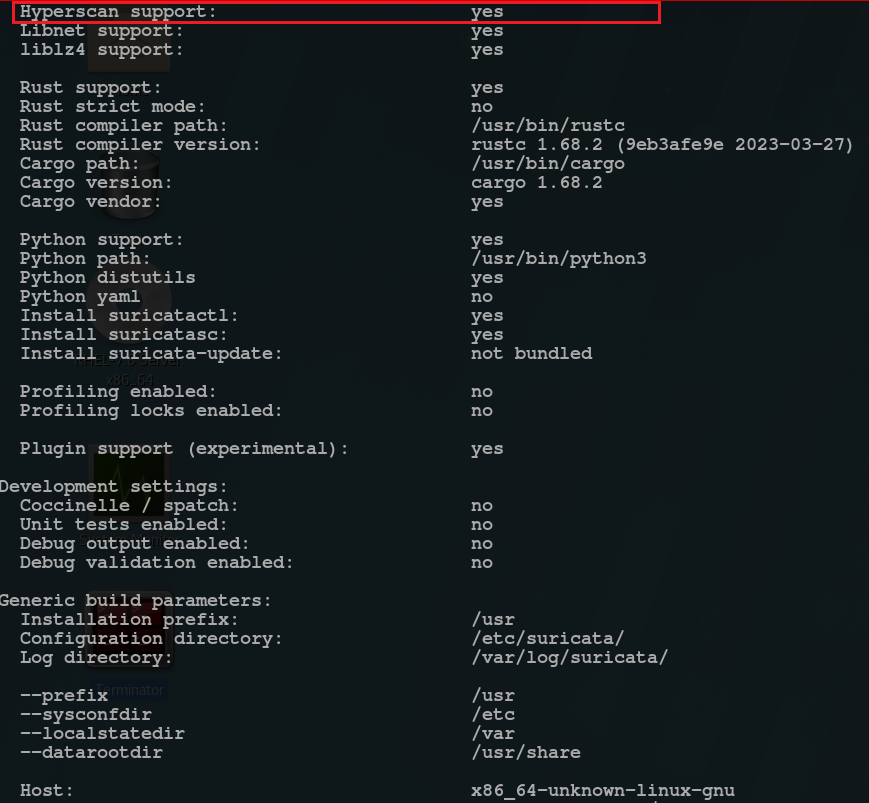
7)查看suricata信息
suricata --build-info

5、生成规则文件
- suricata-6.0.0引擎程序和规则是分开来安装的,因此需要单独安装
suricata-update程序进行规则的安装。由于该程序是python写的,因此linux环境最好支持python同时安装pip工具 - 安装完
suricata-update,直接运行该程序,则会到指定的网站下载rules,下载到/var/lib/suricata/rules/中
yum -y install epel-release
yum -y install python3-pip # 由于在安装依赖时已经安装python3,所以可以忽略此步
# 安装suricata-update
pip3 install --upgrade suricata-update
# 执行,下载规则文件,会自动下载到/var/lib/suricata/rules中,执行该步骤后,不需要再执行make install-rules
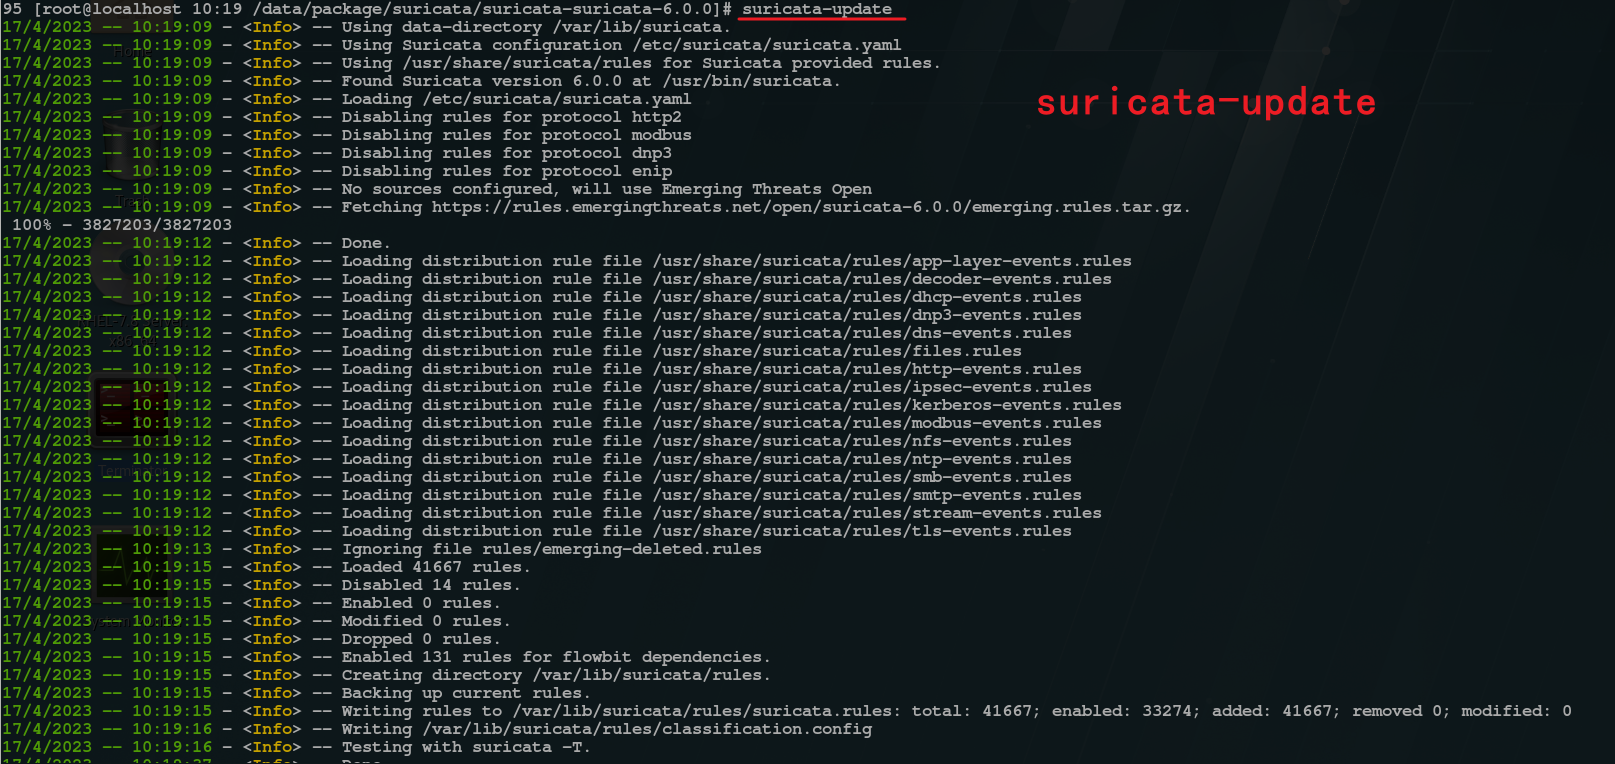
suricata-update
# 修改/etc/suricata/suricata.yaml文件,将default-rule-path修改为/var/lib/suricata/rules
# 一定要修改,因为默认使用/etc/suricata/rules作为规则目录, 否则使用时,会出现找不到规则文件的问题
# 简单测试suricata
suricata -T


6、设置 iptables 的 NFQUEUE
需要设置 iptables 的 NFQUEUE,,以让 Suricata 能访问到相应的数据包,可以使用如下命令:
# 设置iptables
iptables -I INPUT  -j NFQUEUE
iptables -I OUTPUT  -j NFQUEUE

# 查看iptables
iptables -L
7、测试IPS模式
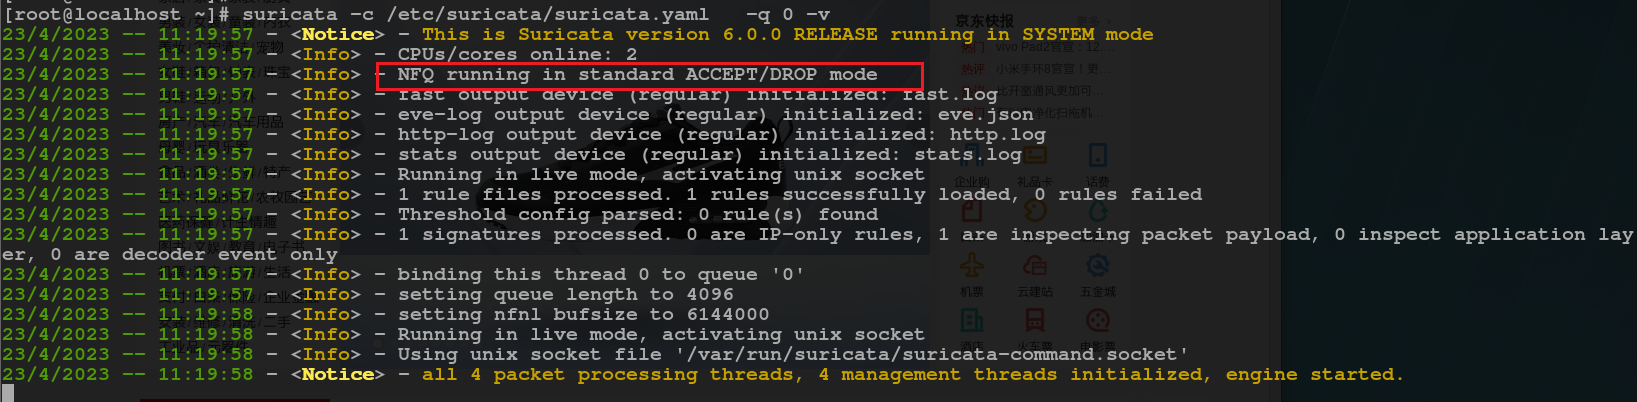
suricata -c /etc/suricata/suricata.yaml -q 0
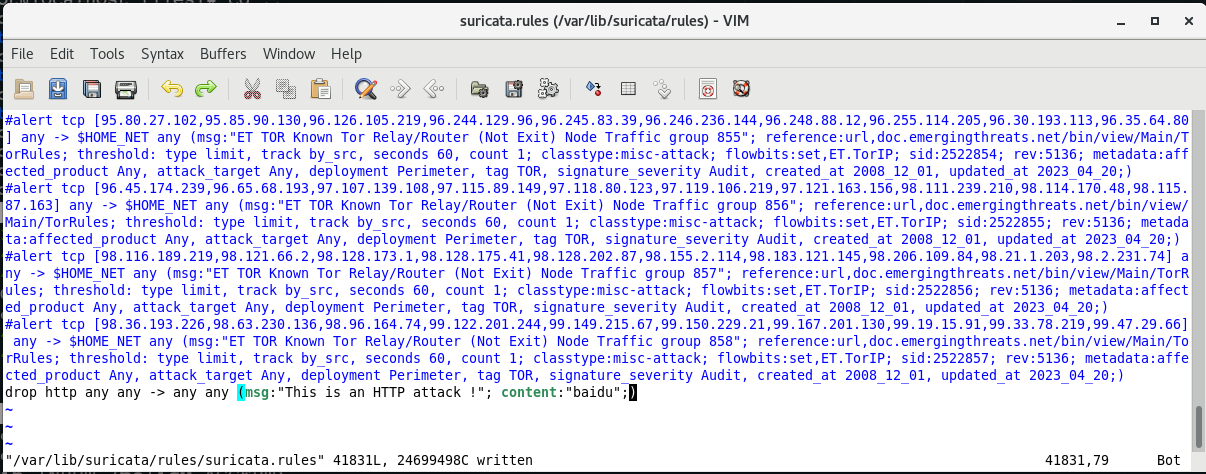
- 将baidu将入到drop规则中,此时发送到baidu的http包就无法发送出去,被丢弃
- 但是别的不满足规则的包依然可以正常发送


8、清除iptables规则
- 在不使用 Suricata 的时候,记得要
iptables -F清除配置,不然机器就没法连接外网了