title: 自建obsidian同步服务
banner_img: https://cdn.studyinglover.com/pic/2023/07/869e354fa5d2254251c10bc2e3cf1bef.png
date: 2023-8-31 15:47:00
自建obsidian同步服务
最近GitHub上有这样一个项目rev-obsidian-sync ,他逆向了obsidian的同步服务,使其可以在本地运行。
服务端
安装
首先安装服务端,
git clone https://github.com/acheong08/rev-obsidian-sync
cd obsidian-sync
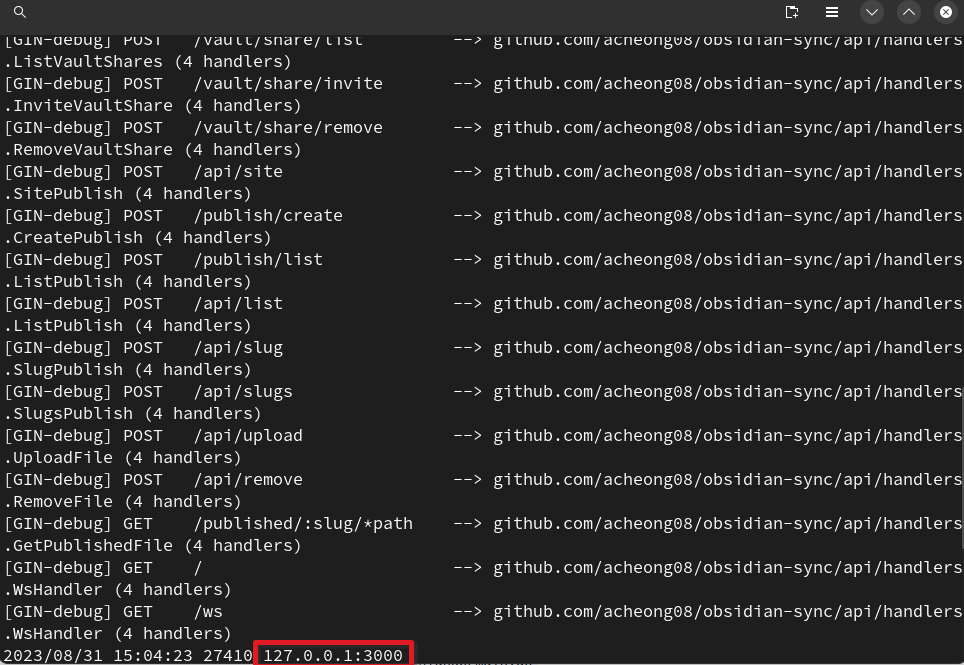
go run cmd/obsidian-sync/main.go
go会下载一堆依赖,然后你会在最下面看到这个
当然你也可以自定义域名,设置环境变量,DOMAIN_NAME 设置域名,ADDR_HTTP设置监听端口,DATA_DIR 设置数据保存的文件夹,SIGNUP_KEY 设置注册的密钥。
创建用户
需要新建一个用户给自己
go run cmd/signup/main.go
在命令行按照提示输入邮箱密码。
或者使用http请求的方式
curl --request POST \
  --url https://yourdomain.com/user/signup \
  --header 'Content-Type: application/json' \
  --data '{
	"email": "example@example.com",
	"password": "example_password",
	"name": "Example User",
	"signup_key": "<SIGNUP_KEY>"
}
客户端
在obsidian仓库打开命令行,然后
cd /path/to/vault/.obsidian
mkdir -p plugins/custom-sync-plugin && cd plugins/custom-sync-plugin
wget https://github.com/acheong08/rev-obsidian-sync-plugin/raw/master/main.js https://github.com/acheong08/rev-obsidian-sync-plugin/raw/master/manifest.json
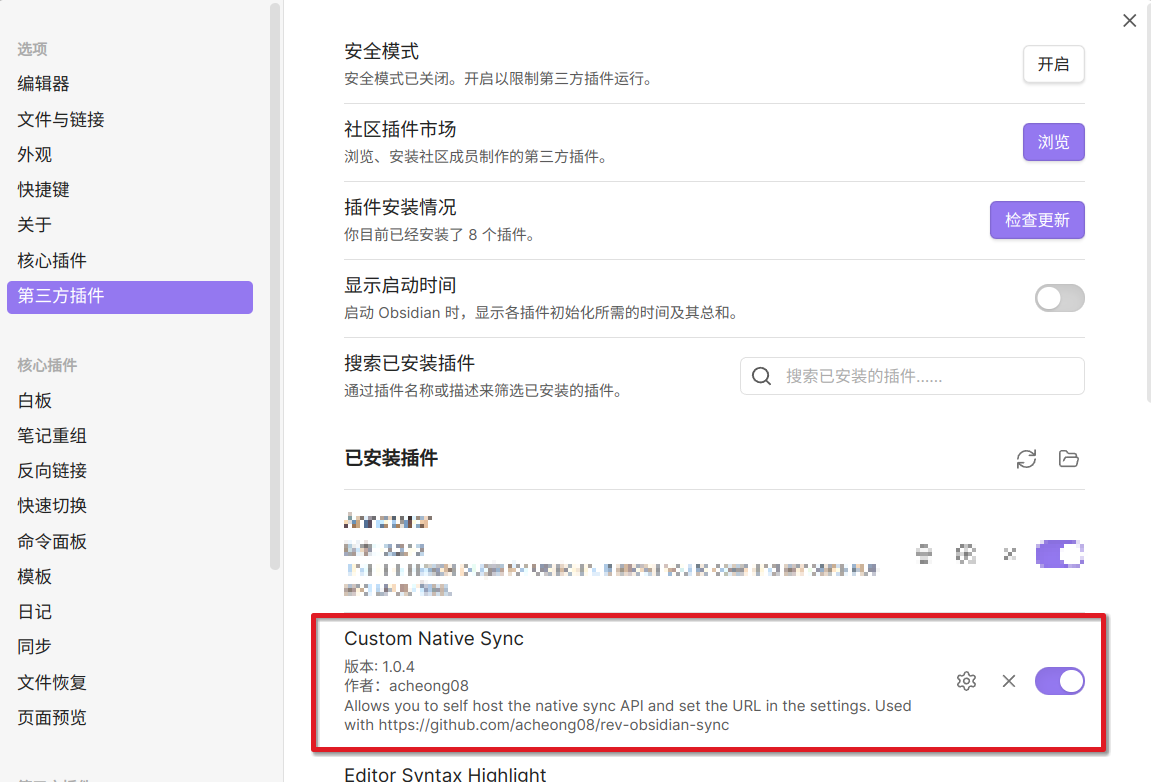
打开obsidian设置界面,选择第三方插件,启用Custom Native Sync
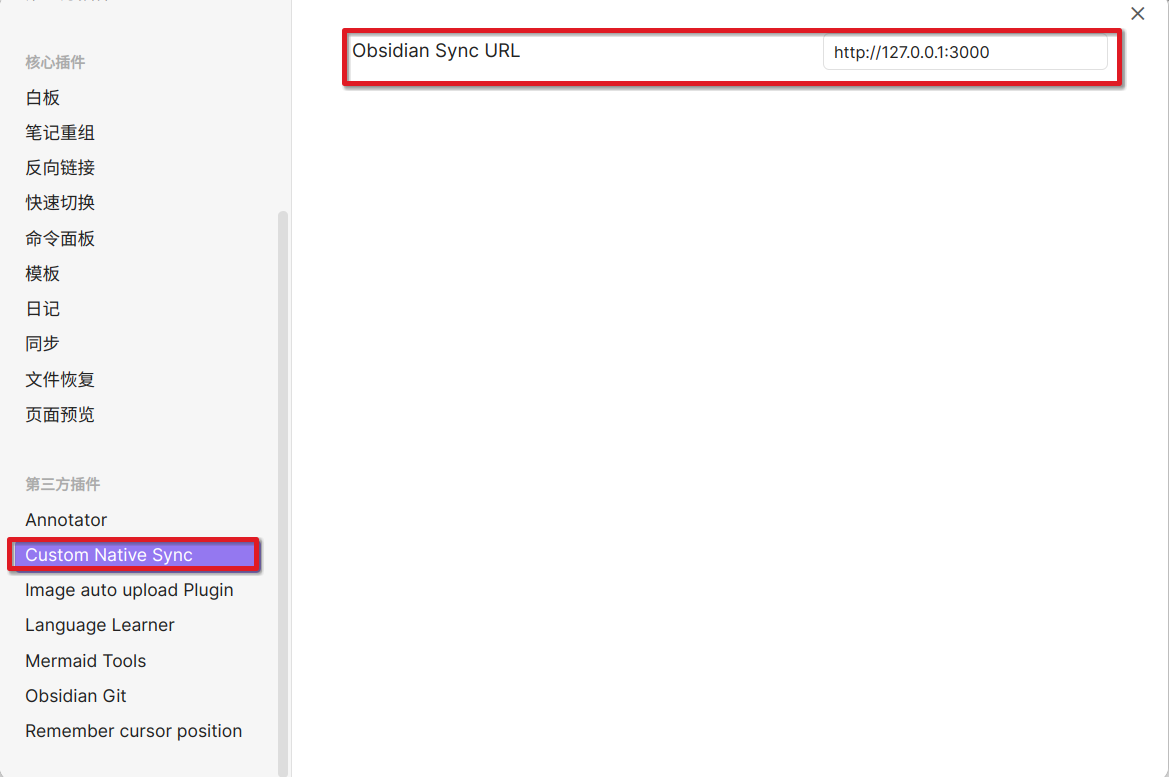
设置服务端地址
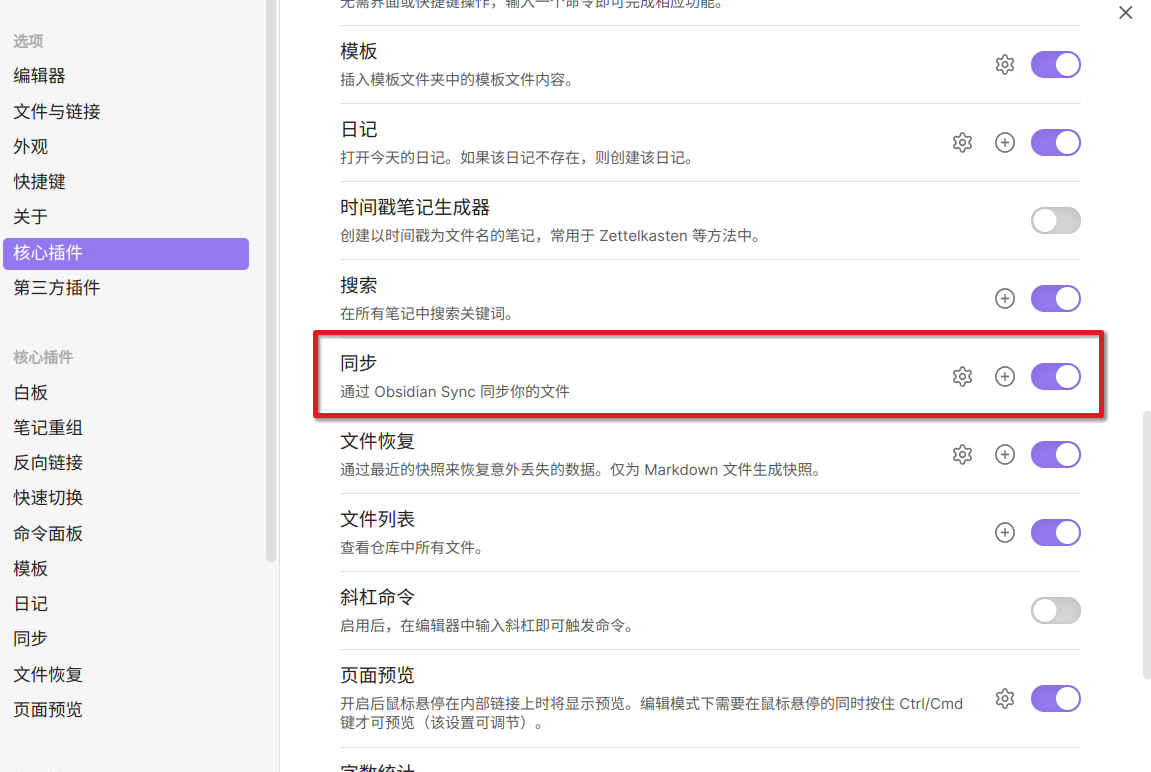
同时打开核心插件的同步
在点击左侧出现的同步按钮,输入前面设置的账号密码,就可以体验到官方的同步功能了。