背景:
iot-kit项目用的是jpa,不是mybatis,项目中需要引入多租户
参考文章:
【讲解多租户的实现与原理】 https://www.bilibili.com/video/BV1F84y1T7yf/?share_source=copy_web&vd_source=981718c4abc87423399e43793a5d3763
https://callistaenterprise.se/blogg/teknik/2020/10/17/multi-tenancy-with-spring-boot-part5/
https://www.baeldung.com/jpa-entity-lifecycle-events
https://nullbeans.com/how-to-use-prepersist-and-preupdate-in-jpa-hibernate/
https://stackoverflow.com/questions/14379365/jpa-entity-with-abstract-class-inheritance
https://blog.csdn.net/JavaSupeMan/article/details/125179429
https://plus-doc.dromara.org/#/ruoyi-vue-plus/quickstart/init
文章中心思想: 通过Hibernate Filters 和AspectJ 切面编程,实现JPA多租户
什么是多租户
多租户我理解就是一个网站允许你多个公司去登录,每个公司都有他们独立的数据,互相之间的数据能做到独立、隔离。比如像阿里云,华为云这些网站,肯定有很多公司把部署在云服务器上面,每个公司就是一个租户。
多租户的三种形式
一个租户一个数据库
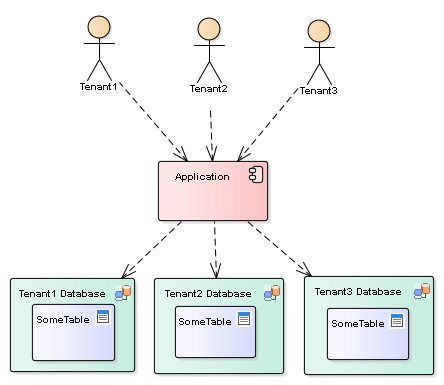
每个租户都有他自己的独立数据库,这种模式中,租户的数据是能做到物理隔离的,隔离性和安全性最好。一个租户一个数据库,能确保租户之间的数据做到彻底隔离,但这种方式的代价是每个数据库都得重复定义,维护起来也很低效,比如说,你要加一个字段,每个数据库都得加一编,非常麻烦。
相同Schema不同数据库
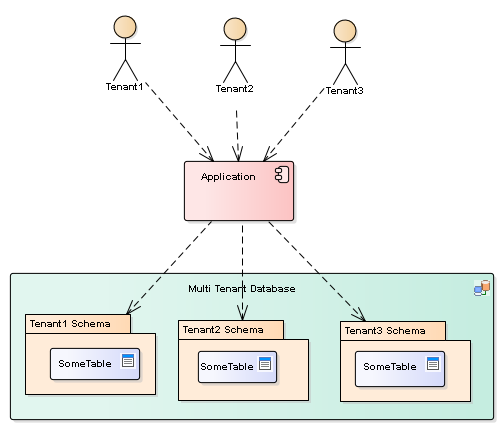
在共享数据库实例时,对每个租户使用单独的Schema。每个租户的数据通过数据库引擎提供的独立模式的语义进行逻辑隔离。如果模式由每个租户的单独数据库用户所拥有,数据库引擎的安全机制将进一步保证数据的隐私性和机密性(但是在这种情况下,数据库连接池不能被数据访问层重用)。
相同数据库,相同表,增加tenantId字段区分

这种模式,也是绝大多数公司采用的。
上面说了多租户的3中模式,本文采用最后一种模式。这种模式主要通过Hibernate 过滤器和切面技术实现。
在Hibernate 的 5.4.x之前的版本,虽然有MultiTenancyStrategy.DISCRIMINATOR这种策略,但是他们一直都没实现,参考下面的JIRA:https://hibernate.atlassian.net/browse/HHH-6054
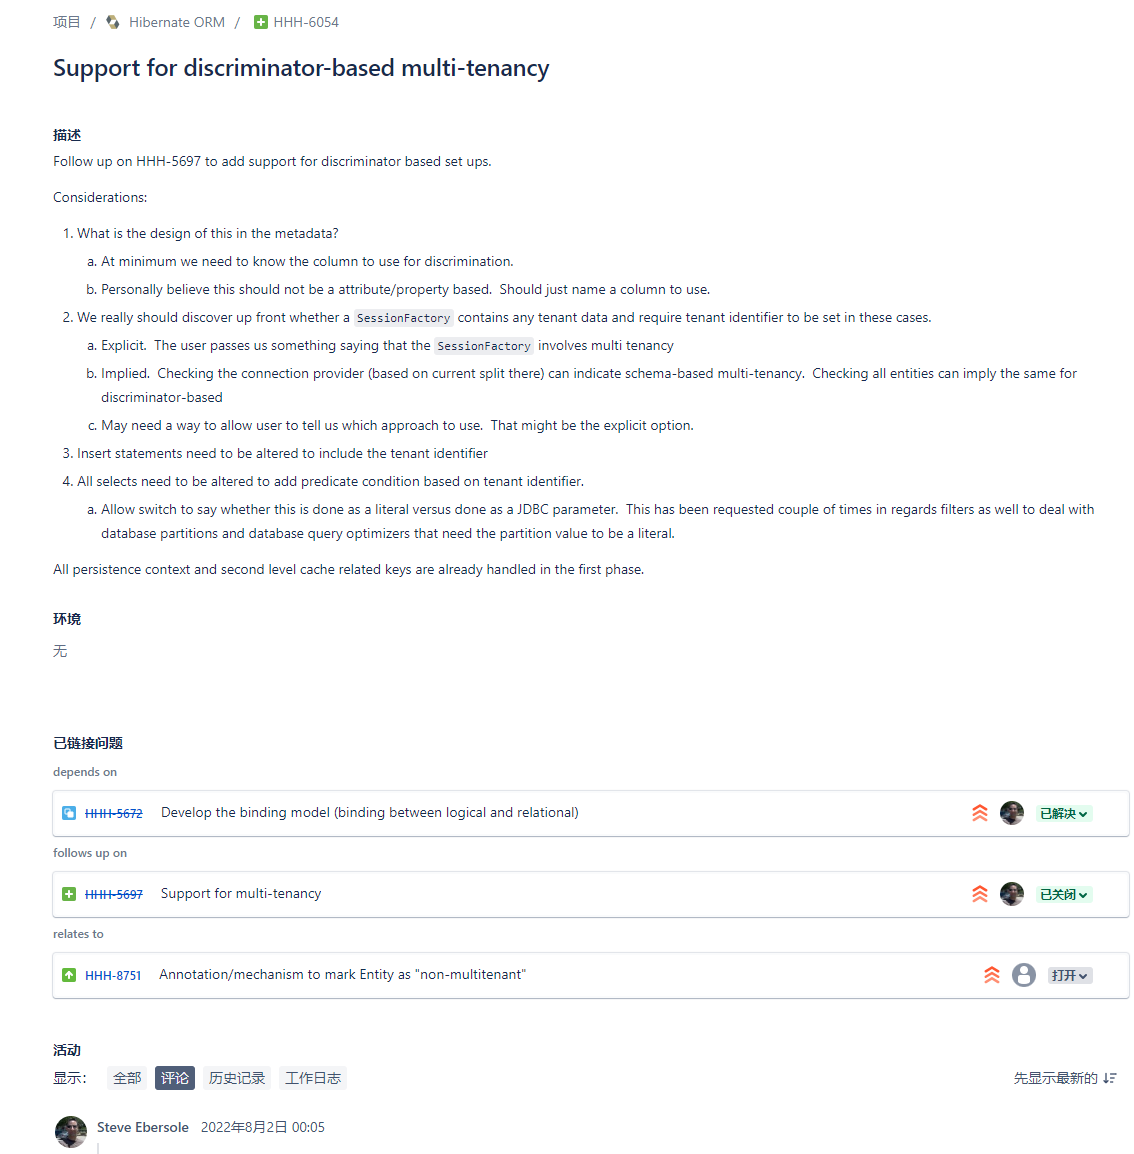
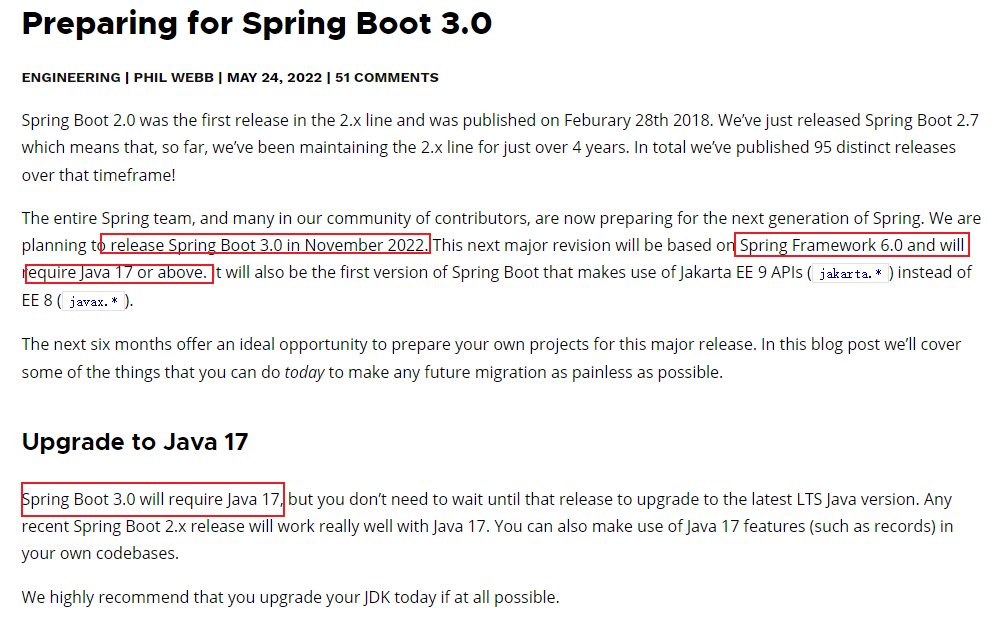
也就是说Hibernate 5.4.x的版本 官方并没有提供多租户的具体实现。直到Hibernate 6出来了,方法才正式支持共享数据库共享实例。但是呢,这个Hibernate 6需要使用 Spring Boot 3,而这个 Spring Boot 3又需要把JDK升级到17,这样就没得玩了,因为大多数都是用jdk8 或者jdk11的。
https://spring.io/blog/2022/05/24/preparing-for-spring-boot-3-0
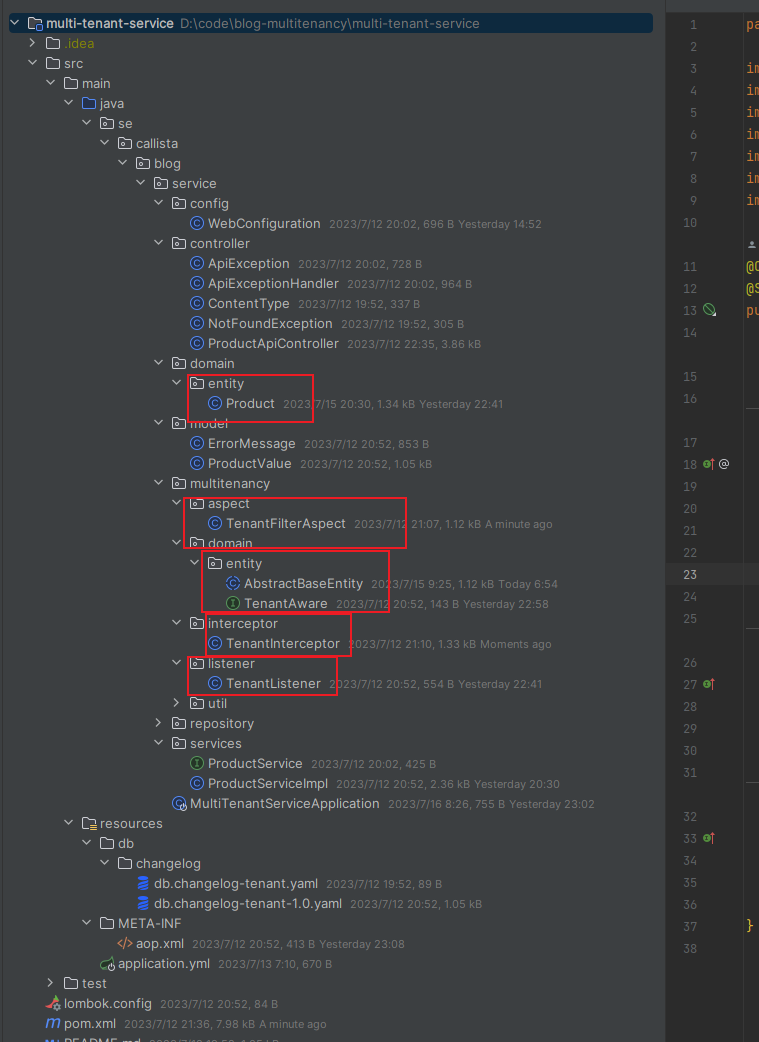
所以为了不升级spring boot版本以及JDK版本,我们就用另外一种形式实现多租户:Hibernate 过滤器 和 切面
Jpa Entity Listener
Entity Listener 允许我们在对一个实体进行新增、删除、更新的时候,做监听动作。当监听到对数据库的一条记录进行新增、删除、更新的时候,我们就可以做一些额外的操作了,例如增加一个字段值,tenantId。
public interface TenantAware {

    void setTenantId(String tenantId);

}

public class TenantListener {

    @PreUpdate
    @PreRemove
    @PrePersist
    public void setTenant(TenantAware entity) {
        final String tenantId = TenantContext.getTenantId();
        entity.setTenantId(tenantId);
    }
}
@PreUpdate、@PreRemove、@PrePersist 在实体更新、删除、插入的时候,触发这个监听器,然后给实体类设置租户ID。
然后再定义一个抽象实体类,并继承这个接口,如下所示:
@MappedSuperclass
@Getter
@Setter
@NoArgsConstructor
@FilterDef(name = "tenantFilter", parameters = {@ParamDef(name = "tenantId", type = "string")})
@Filter(name = "tenantFilter", condition = "tenant_id = :tenantId")
@EntityListeners(TenantListener.class)
public abstract class AbstractBaseEntity implements TenantAware, Serializable {
    private static final long serialVersionUID = 1L;

    @Size(max = 30)
    @Column(name = "tenant_id")
    private String tenantId;

    public AbstractBaseEntity(String tenantId) {
        this.tenantId = tenantId;
    }

}
最后,我们把所有的Java 实体类,都继承这个抽象类:AbstractBaseEntity,如下所示:
@Entity
public class Product extends AbstractBaseEntity {
...
}
到目前为止,可以对新增、删除、更新的操作进行拦截,然后设置对应的tenantId了。但是,查询的时候,仍然没发做到拦截。因此,不得不使用到AOP。
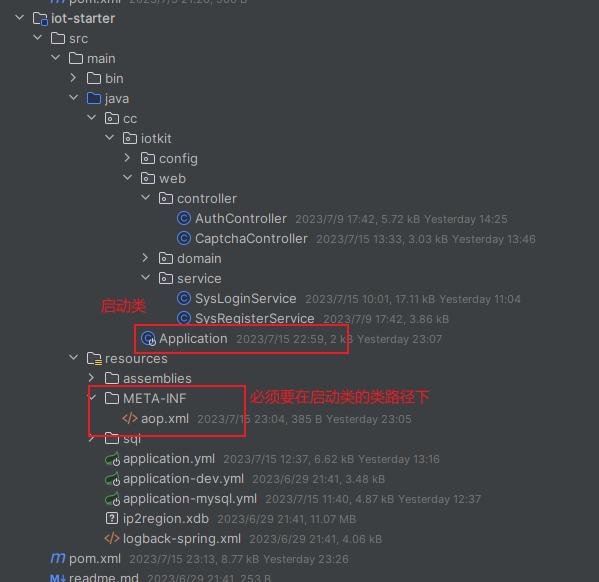
这个AOP跟我们平时用的不太一样,必须要在启动类的类路径下定义一个aop.xml文件,如下:
<aspectj>

    <weaver options="-Xreweavable -verbose -showWeaveInfo">
        <include within="se.callista.blog.service.multi_tenancy.aspect.TenantFilterAspect"/>
        <include within="org.hibernate.internal.SessionFactoryImpl.SessionBuilderImpl"/>
    </weaver>

    <aspects>
        <aspect name="se.callista.blog.service.multi_tenancy.aspect.TenantFilterAspect"/>
    </aspects>

</aspectj>
定义了aop.xml,还需要再代码中增加一个切面,代码如下:
@Aspect
public class TenantFilterAspect {

    @Pointcut("execution (* org.hibernate.internal.SessionFactoryImpl.SessionBuilderImpl.openSession(..))")
    public void openSession() {
    }

    @AfterReturning(pointcut = "openSession()", returning = "session")
    public void afterOpenSession(Object session) {
        if (session != null && Session.class.isInstance(session)) {
            final String tenantId = TenantContext.getTenantId();
            if (tenantId != null) {
                org.hibernate.Filter filter = ((Session) session).enableFilter("tenantFilter");
                filter.setParameter("tenantId", tenantId);
            }
        }
    }

}
然后再pom.xml中添加aop依赖
<dependency>
            <groupId>org.springframework.boot</groupId>
            <artifactId>spring-boot-starter-aop</artifactId>
        </dependency>
除此之外,在启动类还有一个特别的地方,那就是使用注解:@EnableLoadTimeWeaving
@SpringBootApplication
@EnableLoadTimeWeaving(aspectjWeaving = EnableLoadTimeWeaving.AspectJWeaving.ENABLED)
public class MultiTenantServiceApplication extends SpringBootServletInitializer {
...
}
最后,我们需要再增加一个JVM参数(pom的编译插件)
            <plugin>
                <groupId>org.springframework.boot</groupId>
                <artifactId>spring-boot-maven-plugin</artifactId>
                <configuration>
                    <agents>
                        <agent>${project.build.directory}/spring-instrument-${spring-framework.version}.jar</agent>
                        <agent>${project.build.directory}/aspectjweaver-${aspectj.version}.jar</agent>
                    </agents>
                </configuration>
            </plugin>
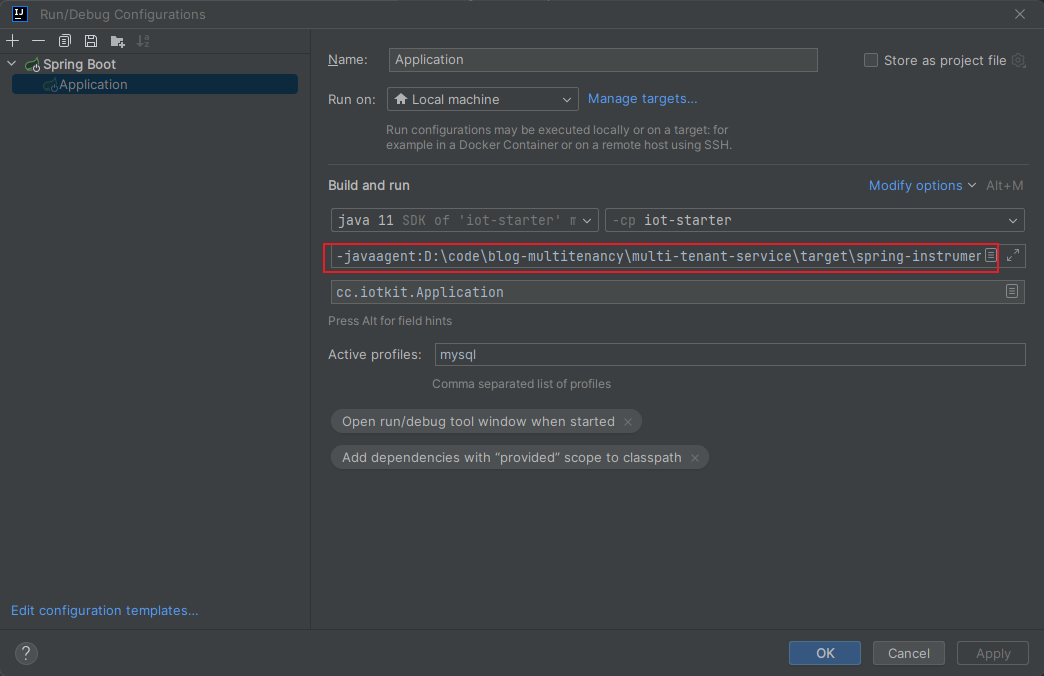
如果是在idea中启动,需要像下面一样增加JVM参数:-javaagent:D:\code\blog-multitenancy\multi-tenant-service\target\spring-instrument-5.3.18.jar 这个spring-instrument-xxxx.jar包编译后,在target目录下面可以找到。
如果是打包成jar,那么运行时,需要增加参数:java -javaagent:spring-instrument.jar -jar app.jar
代码仓库地址:
https://gitee.com/gxnualbert/multi-tenant/commits/master