如何把一组图像转换为3D模型,这可能是三维重建初学者们最常遇到的问题。这个过程融合了计算机视觉、计算机图形学、图像处理等多门学科的知识,是一套非常复杂的工程系统,许多同学想要学习却苦于没有资料参考,导致入门难度大大提高。
为了帮助想要学习三维重建的同学快速上手实践,本文整理了目前行业内最常使用的10种知名三维重建开源系统使用方法以及下载地址,以便大家更好理解,想进一步学习三维重建也可以查看深蓝学院开设的『基于图像的三维重建』在线课程,希望这些资料对大家有所帮助。
三维重建的基本原理
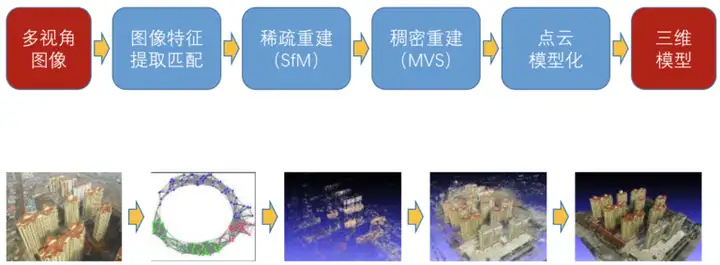
在介绍开源系统之前,我们先简单概述一下三维重建的基本原理:
- 首先,通过多角度拍摄或者从视频中提取得到一组图像序列,将这些图像序列作为三维重建系统的输入;
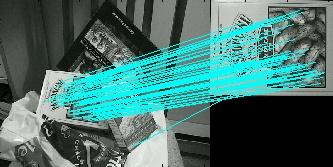
- 然后分析多个视角的图像,根据纹理特征提取出稀疏特征点(稀疏点云),通过这些特征点估计相机位置和参数;
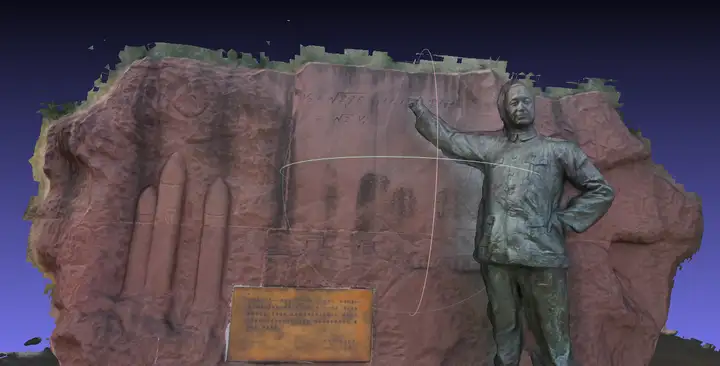
- 在得到相机参数并完成特征点匹配后,就可以获得更稠密的点云(这些点可以附带颜色,从远处看就像还原了物体本身一样,但从近处能明显看出它们只是一些点);
- 最后根据这些点重建物体表面,并进行纹理映射,就还原出三维场景和物体了。
三维重建开源系统
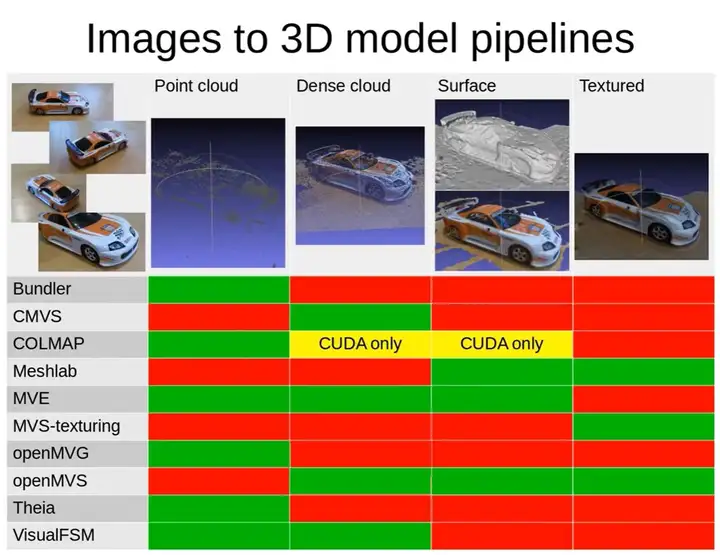
下图给出了各种三维重建开源系统的信息,第一列为开源系统名称,其他列为该系统支持重建的哪些阶段。绿色表示支持,红色表示不支持。
VisualSFM
VisualSFM的基本理念是SFM(Structure From Motion):
Structure from motion (SfM) is a range imaging technique; it refers to the process of estimating three-dimensional structures from two-dimensional image sequences which may be coupled with local motion signals. It is studied in the fields of computer vision and visual perception. In biological vision, SfM refers to the phenomenon by which humans (and other living creatures) can recover 3D structure from the projected 2D (retinal) motion field of a moving object or scene.
安装:
- 确定电脑中有ATI或者nVidia图像卡。软件处理过程中要利用ATI或者nVidia图像处理中心(ATI or nVidia graphical processing unit, GPU)。
2. 下载VisualSFM。网址:A Visual Structure from Motion System
下载好的文件名称叫VisualSFM_windows_32bit.zip,将其解压便可得到exe文件,无需安装。
VisualSFM的操作:
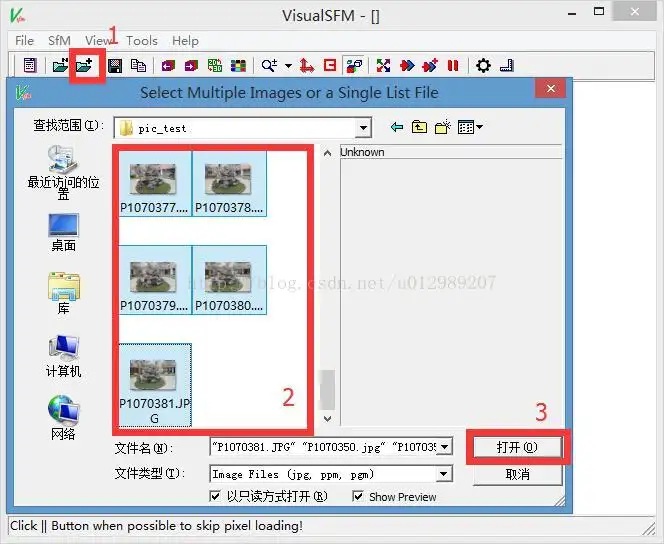
- 读取所需的照片
点击“open Multiple Images”按钮,选择所需的图片(运用shift选取),再点击“open”,如下图所示。
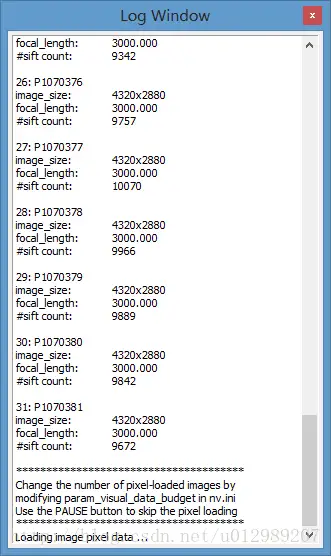
在Task Viewer window中可以看到处理的步骤及进度,如下图。
2. 匹配照片之间的特征点
点击“Compute Missing Matches”,如下图。

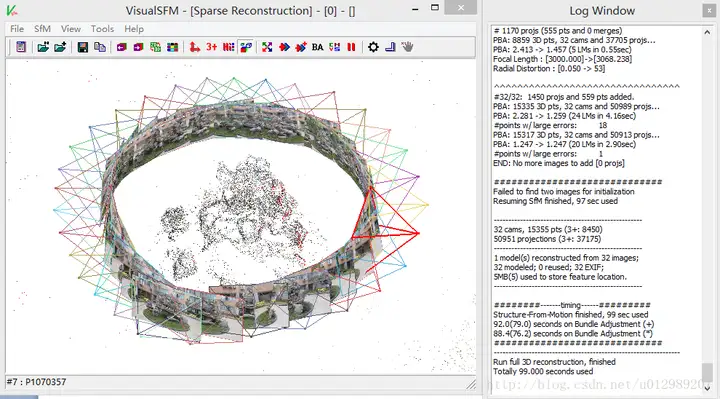
3. 进行稀疏重建
点击“Compute 3D Reconstruction”,如下图。

结果如下图:
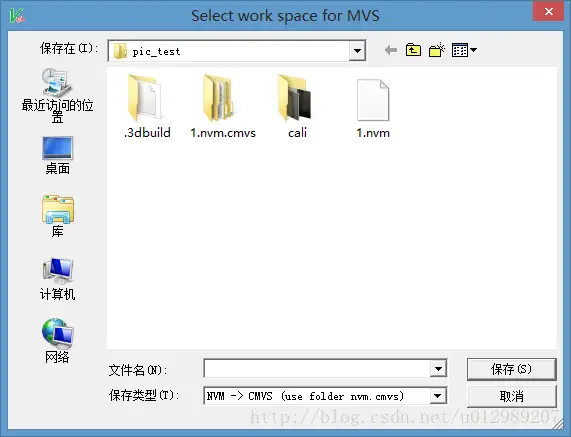
4. 进行稠密重建
点击“Run Dense Reconstruction”,如下图。

选择一个文件放置将要创建的模型,如下图。
在完成上面4步后,基本操作就完成了。
MeshLab
在VisualSFM中,已经根据图像重建出了三维点云,下一步就是使用meshlab把三维点云重建成三维模型。
meshlab 网址:http://meshlab.sourceforge.net/
接下来运行meshlab,如下所示:
- 打开文件,前面的visualSFM已经生成了一系列文件,这里打开生成的bundle.rd.out文件
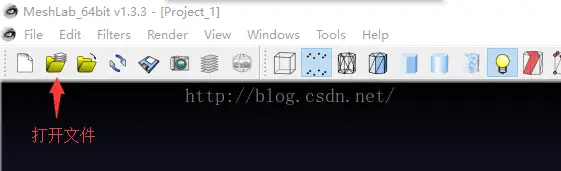
打开之后会提示打开使用的图像文件,这里只要选择同目录下的list.txt文件即可,打开后会载入一个稀疏的点云模型。
2. 选择File——> Import Mesh,导入00/models中的option-0000.ply文件。如下图所示:
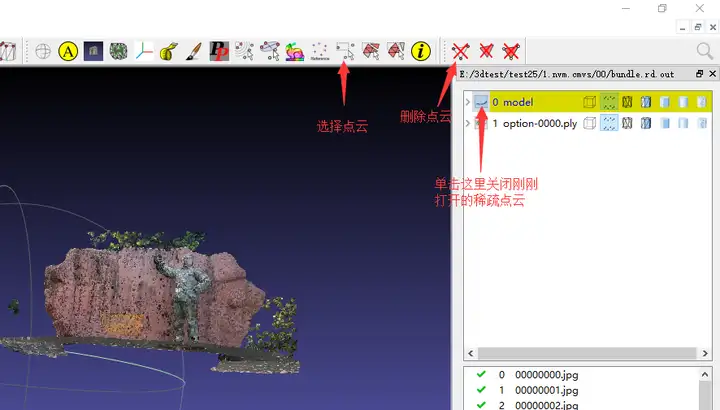
同时可以利用图中的按钮删除一些你不想要的杂点。
3. Filter –> Point Set–> Surface Reconstruction: Poisson进行网格化。
Octree Depth:控制着网格的细节,此值越大细节越丰富但占内存越大运行起来慢,一般设10,可慢慢调大。
4. 上面的操作会生成一个气泡把模型包起来,接下来使用Filters –> Selection –> Select faces with edges longer than把模型中多余的面去除。
5. 修复流型边缘,Filters –> Selection –> Select Non-Manifold edges
6. 参数化,Filter –> Texture –> Parameterization from registered rasters
7. 投影纹理,Filter –> Texture –> Project active rasters color to current mesh, filling the texture
这里可以设置分辨率,512的2的二次方倍:512 / 1024 / 2048 / 4096 / 8192…分辨率越高,则结果越清晰。
8. Export Mesh as...导出文件,最终结果如下图:
Linux下的Bundler + CMVS-PMVS
- 简介
Bundler和CMVS-PMVS是进行多视图三维重建的一套非常有用的工具包。Bundler利用一系列无序图片生成场景的稀疏点云,并且估计每一幅图片的相机参数(内参和外参)。CMVS-PMVS可以利用已知图片以及图片对应相机参数(使用Bundler求得)来进行稠密的三维重建(dense reconstruction)。
2. 源码下载
直接从github上来下载Bundler和CMVS-PMVS的源码,在linux 终端分别输入如下命令,等待下载完成。
git clone https://github.com/snavely/bundler_sfm.git
git clone https://github.com/pmoulon/CMVS-PMVS.git
由于Bundler要使用SIFT进行特征提取,我们还要去下面这个网站下载SIFT
3. 安装依赖
为了编译和运行Bundler,我们需要安装如下依赖
sudo apt-get install liblapack-dev libblas-dev minpack-dev f2c gfortran jhead imagemagick接下来继续安装SIFT依赖
sudo apt-get install libc6-dev-i386安装CMVS-PMVS依赖
sudo apt-get install libgtk2.0-dev libdevil-dev libboost-all-dev libatlas-cpp-0.6-dev libatlas-dev libcminpack-dev libgfortran3 libmetis-edf-dev libparmetis-dev freeglut3-dev libgsl0-dev4. 编译Bundler和CMVS-PMVS
首先我们编译Bundler,在linux 终端使用cd命令进入到bundler_sfm下,也就是Makefile文件所在的目录,然后在终端输入make命令,回车等待编译完成。编译完成后会在bin目录下会生成可执行文件。为了使Bundler顺利执行,我们还要进行如下操作:
- 找到下载的SIFT程序,解压之后将里边的sift可执行文件拷贝到bundler_sfm下的bin目录下。
- 安装依赖的时候我们安装了jhead,我们要将jhead文件拷贝到bundler_sfm下的bin目录下。可以使用命令
sudo cp /usr/bin/jhead bin/ - 将bundler_sfm/bin/目录下生成的libANN_char.so文件拷贝到系统库:
sudo cp bin/libANN_char.so /usr/lib/ 接下来我们继续对CMVS-PMVS进行编译,我们依然使用cd命令进入到CMVS-PMVS/program/下,然后依次执行以下命令:
 mkdir build && cd build
 cmake ..
 make
执行完成后,CMVS-PMVS也就编译完成了,生成的可执行文件位于build目录下的main目录中。为了接下来运行方便,我们将生成的可执行文件cmvs、genOption、pmvs2这三个文件拷贝到bundler_sfm目录的bin下。
5. 执行Bundler和CMVS-PMVS进行三维重建
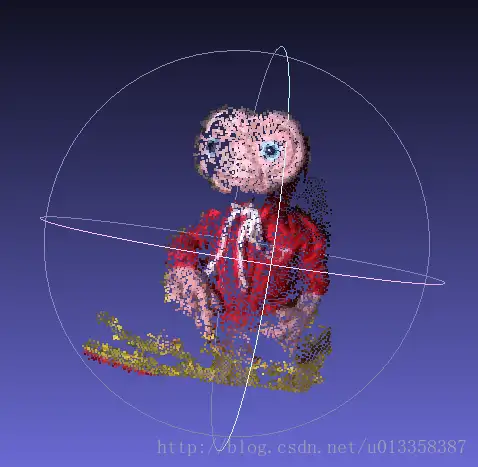
我们可以利用自带的example中的图片进行测试,我们以ET为例来说明如何进行三维重建。首先还是使用cd命令进入到ET文件夹下,然后执行以下命令:
../../RunBundler.sh最终会生成很多的结果文件,其中bundler文件夹下的bundler.out中存储了重建的稀疏点3D坐标和相机参数。
接下来我们就可以利用PMVS进行稠密点云的重建了,在这之前我们还需要将Bundler的输出转换为CMVS-PMVS的输入格式。我们利用bin下的Bundle2PMVS即可完成这一过程。
../../bin/Bundle2PMVS prepare/list.txt bundle/bundle.out此时会生成pmvs目录,在此目录下有prep_pmvs.sh文件,我们编辑此文件,将里边的BUNDLER_BIN_PATH修改为bundler的bin文件夹的实际路径。例如:
BUNDLER_BIN_PATH=/home/chao/AAAAAA/temp/bundler_sfm/bin
然后依次执行如下操作:
sh pmvs/prep_pmvs.sh
../../bin/cmvs pmvs/
../../bin/genOption pmvs/
../../bin/pmvs2 pmvs/ option-0000 (注意option之前的空格键)
生成的最终结果位于pmvs目录的models 文件夹下,名称为option-0000.ply,我们直接使用meshlab打开此文件便可以看到结果。如下图所示:
我们也可以自己拍照片来进行三维重建,但是要注意两个问题
- Bundler在进行三维重建时会使用jhead 读取照片信息,然后根据读取的相机型号从bin目录下的extract_focal.pl文件中读取ccd_widths,如果你使用的相机不在此文件列表中,你需要查询自己相机的ccd_widths并按照格式手动加入extract_focal.pl文件。
- 图片尺寸问题。笔者在跑数据时,由于图片尺寸过大,导致失败,此时只需要将图片按比例缩放即可。在linux下推荐使用imagemagick,方便快捷。
COLMAP
参考资料
三维重建_COLMAP安装、使用和参数说明(翻译自官方文档)
- 安装
COLMAP网址:Structure-From-Motion and Multi-View Stereo
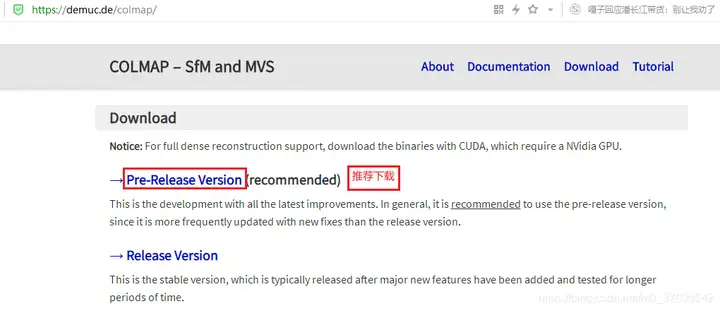
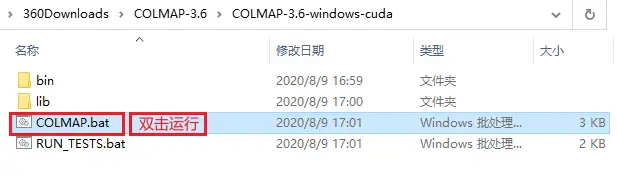
解压并运行COLMAP:
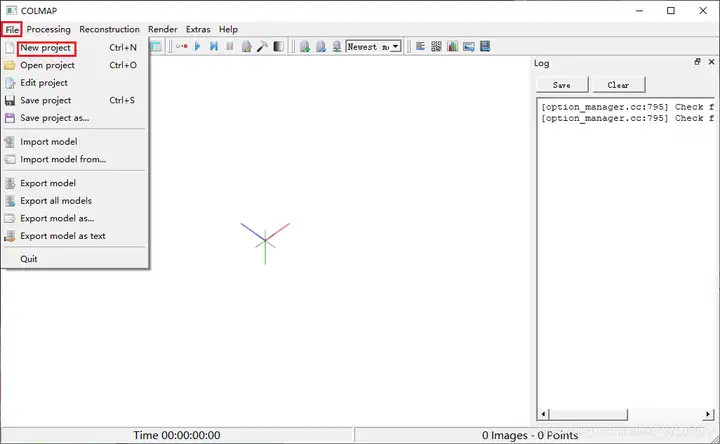
2. 新建项目
【File】–> 【New Project】
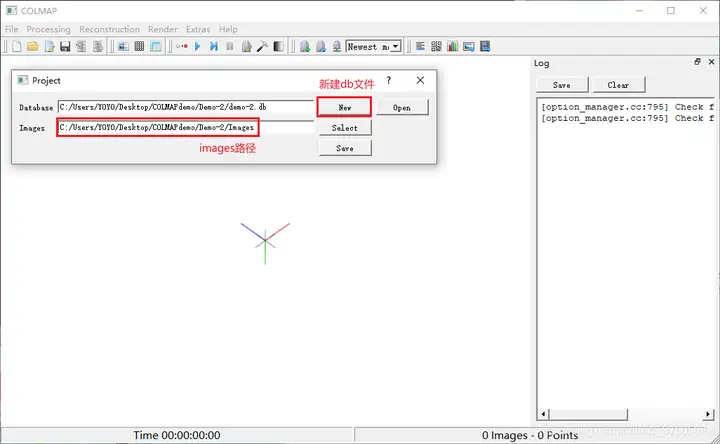
3. 新建database文件,选择images所在路径
【New】新建db文件
【Select】选择images所在路径
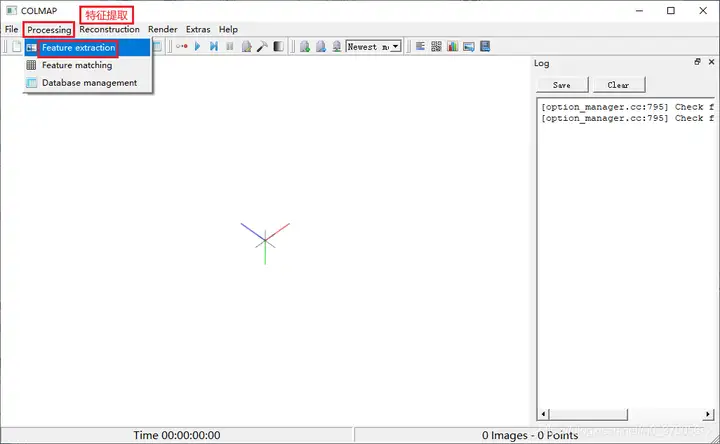
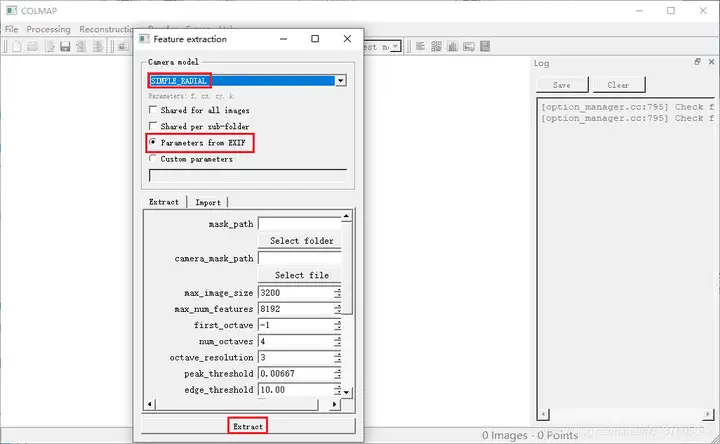
4. 特征提取
【Processing】–> 【Feature extraction】
Camera model选择【SIMPLE_RADIAL】
参数选择【Parameters from EXIF】
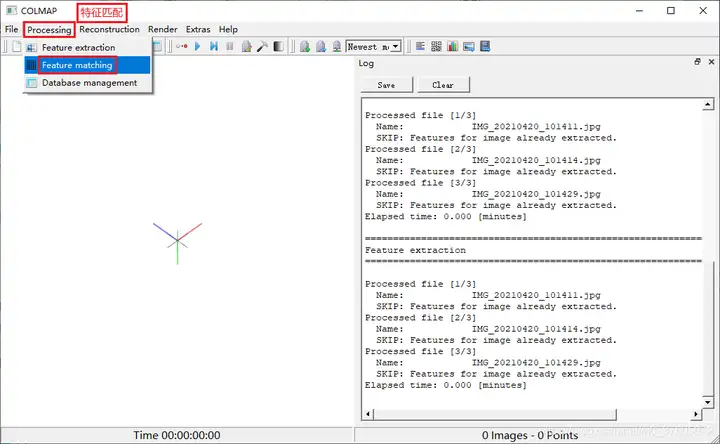
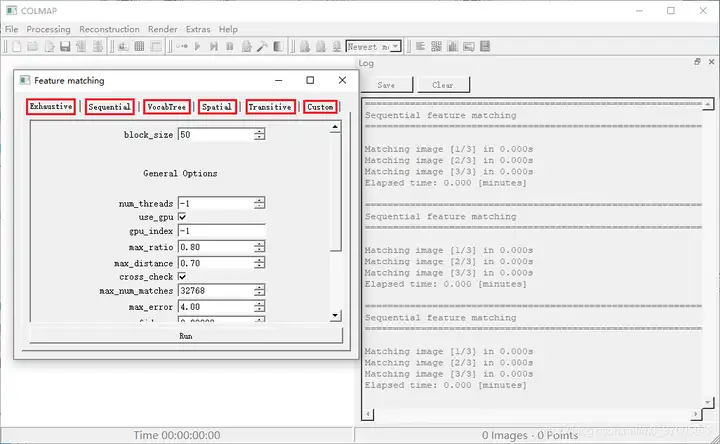
5. 特征匹配
【Processing】–> 【Feature matching】
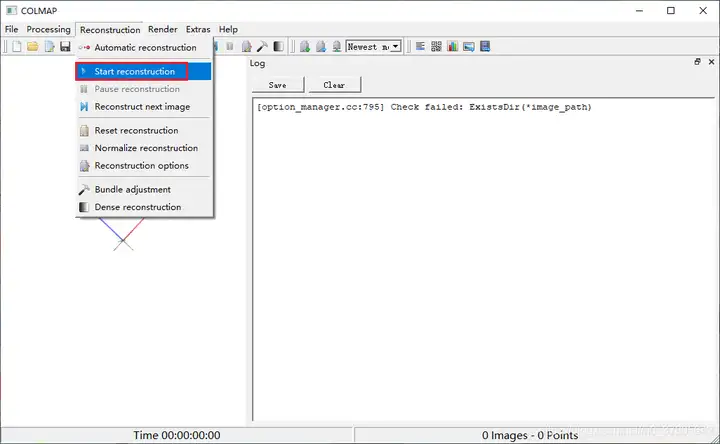
6. 稀疏重建
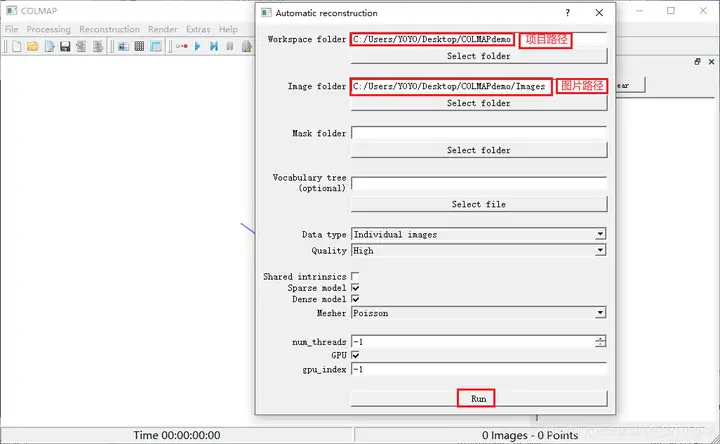
【Reconstruction】–> 【Automatic reconstruction】
或者【Reconstruction】–> 【Start reconstruction】
Workspace folder,【Select folder】选择项目目录
Image folder,【Select folder】选择图片路径
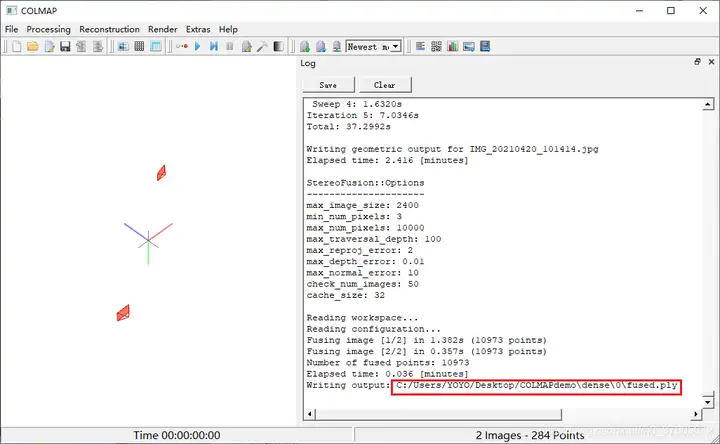
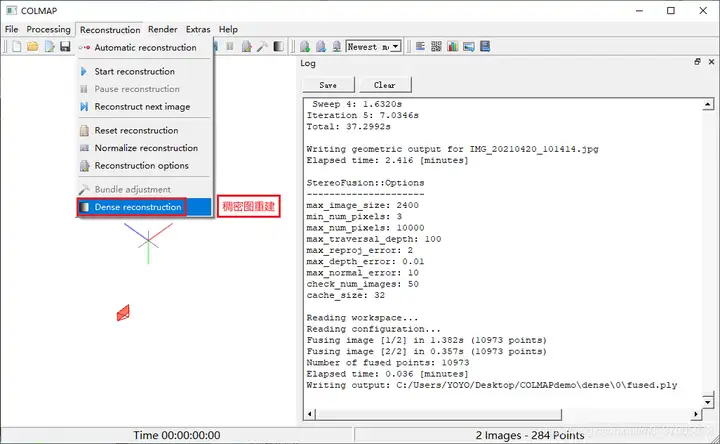
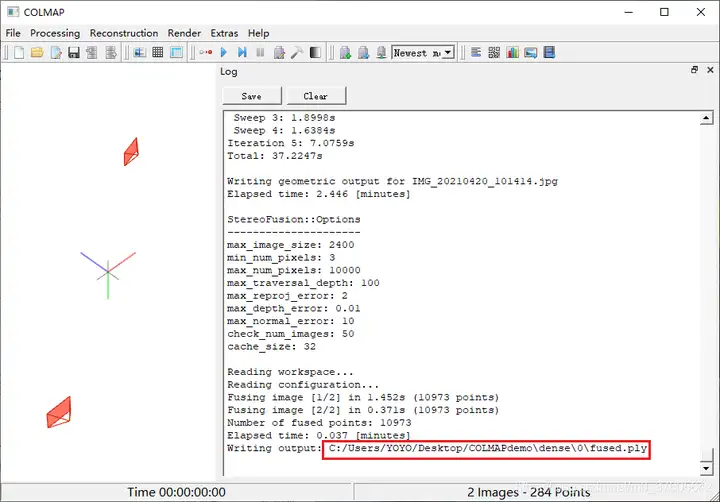
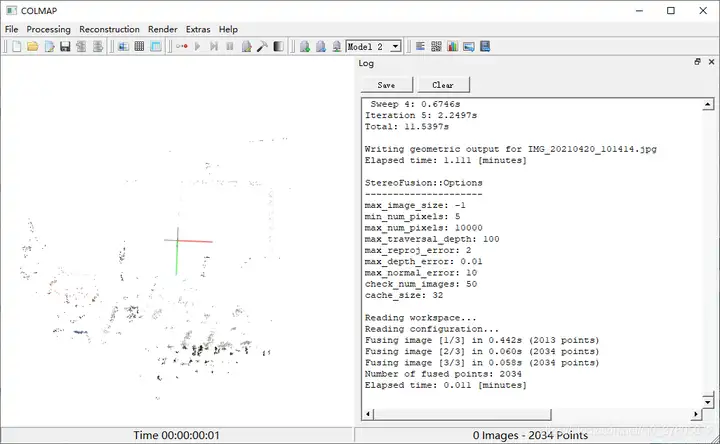
7. 稠密重建
【Reconstruction】–> 【Dense reconstruction】
Workspace工作空间,【Select】选择项目目录
【Undistortion】–> 【Stereo】稀疏重建 --> 【Fusion】所有点云融合
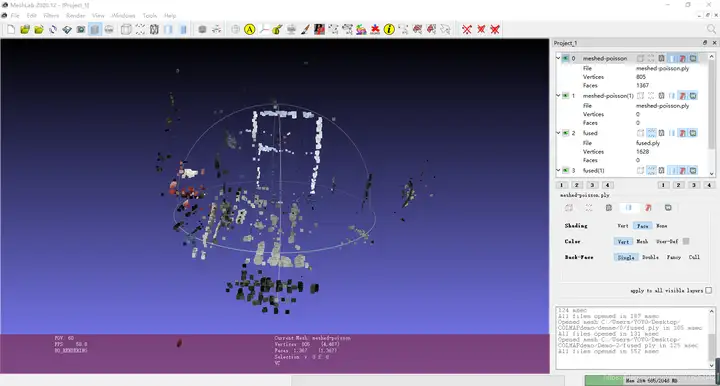
8. 重建后的点云在COLMAP中可视化不错,也可以用meshlab软件可视化:
MVE
MVS下载网址:https://www.gcc.tu-darmstadt.de/home/proj/mve/index.en.jsp
mve是加强版的三维重建开源软件,三维重建和纹理映射都有,功能齐全,但在国内用的不多。
系统:ubuntu17.10
编译器:gcc 7.2.0
MVE工具的编译:
- 下载源码
github:https://github.com/simonfuhrmann/mve
zip archive:https://github.com/simonfuhrmann/mve/archive/master.zip
或者应用git命令:
<span style="font-size:18px;">git clone https://github.com/simonfuhrmann/mve.git</span>2. 按照用户手册(user‘s guide)进行编译
可以选择直接阅读手册编译:
手册链接:https://github.com/simonfuhrmann/mve/wiki/MVE-Users-Guide
也可按照下面内容操作:
1)进入下载好的mve文件夹
<span style="font-size:18px;">cd mve</span>2)进行编译
<span style="font-size:18px;">make -j8</span>所有库安装好,编译完成,就可以使用了。
应用MVE前准备
同样在上面提到的用户手册(user guide)中,有说如何应用:
按照上述命令,一步一步处理序列图片,可以最终得到三维重建的结果。
不过在输入上述命令的时候,会遇到找不到命令的情况,因为上述的应用还尚未添加到环境变量中,所以不能直接在命令行下使用,所以为了方便使用,将这些所有的工具都添加到环境变量中去,添加环境变量的方式如下:
1)应用vi编辑器打开环境变量的文件(命令如下,即将mve的所有apps都添加到环境变量中):
<span style="font-size:18px;">vi ~/.bashrc</span>2)更新环境变量,使上述修改的环境变量能够生效
<span style="font-size:18px;">source ~/.bashrc</span>3. 数据准备
使用Der Hass数据集,里面包含一堆图片,可以把MVE的所有工具都能用一遍,生成一个ply的三维模型:

4. 应用MVE
1)下载得到数据集后解压:
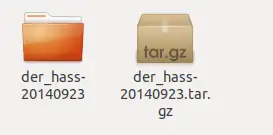
2)在上图所示的文件夹,即存放der_hass-20140923文件夹的目录下打开终端,输入命令(der_hass-20140923代表的时待处理的数据集,der_hass代表的是处理后输出的存放数据的文件夹):
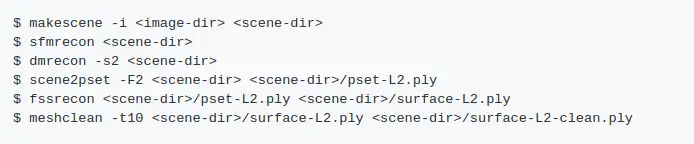
<span style="font-size:18px;">makescene -i der_hass-20140923 der_hass</span>3)处理完成后,依次输入下面的命令,每输入一次命令后,需要等待一段时间处理图像(提取特征点,匹配特征点的过程略漫长, sfmrecon的命令如图,其余命令文件夹的输入输出与2)中的文件夹输入输出一样):
<span style="font-size:18px;">sfmrecon der_hass
dmrecon -s2 der_hass
scene2pset -F2 der_hass der_hass/pset-L2.ply
fssrecon der_hass/pset-L2.ply der_hass/surface-L2.ply
meshclean -t10 der_hass/surface-L2.ply der_hass/surface-L2-clean.ply</span>
5. 结果展示
最后得到的各种ply文件如图:
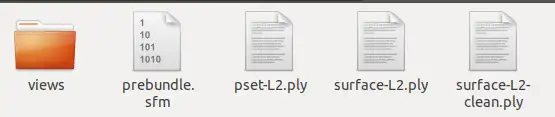
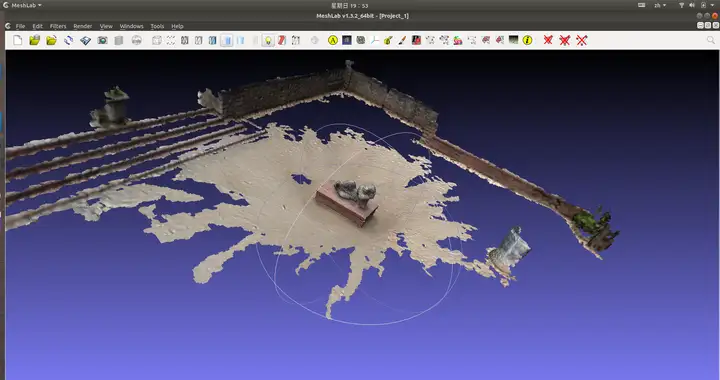
最后生成的文件为surface-L2-clean.ply,用meshlab打开的结果为:
OpenMVS
OpenMVS是三维重建的一个成熟开源框架,综合重建效果和性能,该算法是目前MVS(Multi-View Stereo)相关的所有开源库中最好的一个。
网址:GitHub - cdcseacave/openMVS: open Multi-View Stereo reconstruction library
用OpenMVS重建的结果如下所示:

详细步骤
- 安装依赖项
OpenMVS 依赖的几个开源库,有两个是可选的可以先不安装.
- Eigen version 3.2 (or higher on Windows only)
- OpenCV version 2.4 or higher
- Ceres version 1.10 or higher (可选)
- CGAL version 4.2 or higher
- Boost version 1.56 or higher
- VCG
- GLFW(可选)
2. 安装说明
工具:
- CMake
- git
- C/C++ compiler like Visual Studio or GCC
3. Linux 编译
Ubuntu 16.04
#准备一个空闲的机器安装:
sudo apt-get update -qq && sudo apt-get install -qq
sudo apt-get -y install git cmake libpng-dev libjpeg-dev libtiff-dev libglu1-mesa-dev

#安装Eigen (必需)
git clone https://gitlab.com/libeigen/eigen.git --branch 3.2
mkdir eigen_build && cd eigen_build
cmake . ../eigen make && sudo make install
cd ..


#安装Boost (必需)
sudo apt-get -y install libboost-iostreams-dev libboost-program-options-dev libboost-system-dev libboost-serialization-dev

#安装OpenCV (必需)
sudo apt-get -y install libopencv-dev


#安装CGAL (必需)
sudo apt-get -y install libcgal-dev libcgal-qt5-dev


#安装VCGLib (必需)
git clone https://github.com/cdcseacave/VCG.git vcglib


#安装Ceres (可选)
sudo apt-get -y install libatlas-base-dev libsuitesparse-dev
git clone https://ceres-solver.googlesource.com/ceres-solver ceres-solver
mkdir ceres_build && cd ceres_build
cmake . ../ceres-solver/ -DMINIGLOG=ON -DBUILD_TESTING=OFF -DBUILD_EXAMPLES=OFF
make -j2 && sudo make install
cd ..


#安装GLFW3 (可选)
sudo apt-get -y install freeglut3-dev libglew-dev libglfw3-dev


#安装OpenMVS
git clone https://github.com/electech6/openMVS_comments.git openMVS
mkdir openMVS_build && cd openMVS_build
cmake . ../openMVS -DCMAKE_BUILD_TYPE=Release -DVCG_ROOT="/path to vcglib/vcglib"


#如果想生成共享库,可以在cmake加如下命令:
#-DBUILD_SHARED_LIBS=ON


#生成 OpenMVS 库文件:
sudo make -j2 && sudo make install
可能存在的编译问题
opencv中部分函数未定义
先卸载:
sudo apt-get autoremove opencv-doc opencv-data libopencv-dev libopencv2.4-java libopencv2.4-jni python-opencv libopencv-core2.4 libopencv-gpu2.4 libopencv-ts2.4 libopencv-photo2.4 libopencv-contrib2.4 libopencv-imgproc2.4 libopencv-superres2.4 libopencv-stitching2.4 libopencv-ocl2.4 libopencv-legacy2.4 libopencv-ml2.4 libopencv-video2.4 libopencv-videostab2.4 libopencv-objdetect2.4 libopencv-calib3d2.4 再源码安装,可以安装比如4.1.1版本。
boost报错
解决方法:升级boost==1.6.3
使用说明
OpenMVS可执行文件生成在openMVS/openMVS_build/bin/里面,在openMVS_build文件夹下打开终端,按照顺序执行如下命令:(-w 设置的是数据的路径,-i 是输入的文件名,-o是输出的文件名)。
注意:colmap/openmvg计算的位姿可以通过作者提供的InterfaceCOLMAP,InterfaceVisualSFM转成稠密重建输入的*.mvs文件。这里我们主要关注mvs重建过程,未给位姿这个配置介绍(后面如果大家需求可以补充)。大家先根据提供的数据测试。
稠密重建
./bin/DensifyPointCloud -w /home/**/data/openMVS_sample -i scene.mvs -o test_dense.mvs 输出log:
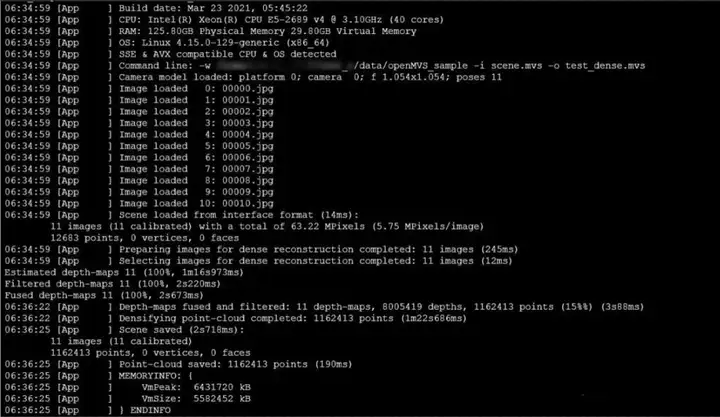
得到的稠密点云test_dense.ply:
曲面重建
./bin/ReconstructMesh -w /home/data -i test_dense.mvs -o test_mesh.mvs 输出的log :
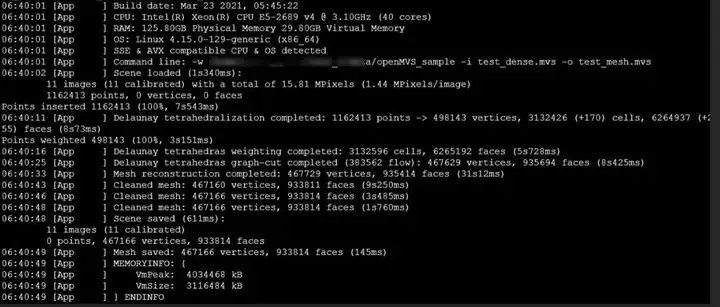
生成的网格模型test_mesh.ply:
网格优化
./bin/RefineMesh -w /home/data -i test_mesh.mvs -o test_refinemesh.mvs 输出的log :
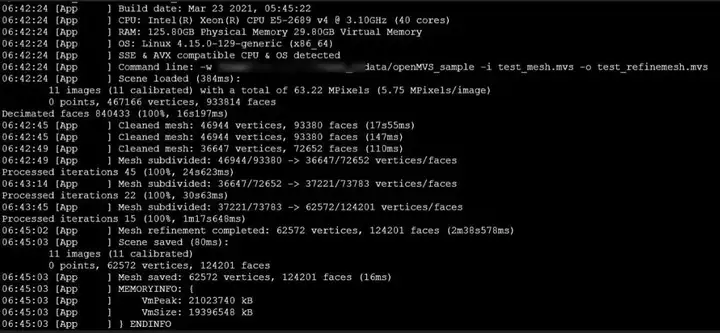
优化的模型test_refinemesh.ply:
纹理贴图
./bin/TextureMesh -w /home/data -i test_refinemesh.mvs -o test_texture.mvs 输出的log:
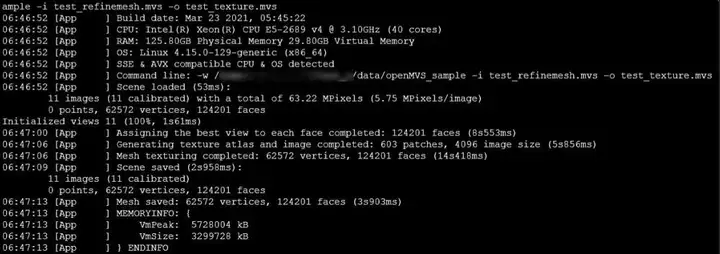
输出的结果 test_texture.ply test_texture.png。
OpenMVG
openMVG (Open Multiple View Geometry):开源多视角立体几何库,这是一个 cv 界处理多视角立体几何的著名开源库,信奉“简单,可维护”,提供了一套强大的接口,每个模块都被测试过,尽力提供一致可靠的体验。
下载网址:https://openmvg.readthedocs.io/en/latest/software/SfM/SfM/
CMVS-PMVS(a modified version):将运动结构(SfM)软件的输出作为输入,然后将输入图像分解成一组可管理大小的图像簇。 MVS 软件可以用来独立和并行地处理每个簇,其中来自所有簇的重建不错过任何细节。
常见的多视图三维重建管线:重建稀疏点云-Structure from Motion(Sfm)→重建稠密点云-Multi-View Stereo(MSV)→重建表面-Surface Generation(SG)→纹理映射-Texture Mapping(TM)
在本部分中,OpenMVG负责从原始图像到稀疏点云,PMVS负责重建稠密点云、重建表面和纹理映射。
- 安装OpenMVG+PMVS(Ubuntu16)
OpenMVG安装过程:
# 安装依赖 sudo apt-get install libpng-dev libjpeg-dev libtiff-dev libxxf86vm1 libxxf86vm-dev libxi-dev libxrandr-dev graphviz
# 克隆代码 git clone --recursive https://github.com/openMVG/openMVG.git
# configure && build mkdir openMVG_Build &&cd openMVG_Build cmake -DCMAKE_BUILD_TYPE=RELEASE ../openMVG/src/   -DOpenMVG_BUILD_TESTS=ON sudo cmake --build . --target install
# test make test ctest --output-on-failure -j
# .bashrcexport PATH=$PATH:/home/work/tools/openMVG_Build/Linux-x86_64-RELEASE/
CMVS-PMVS安装过程:
git clone https://github.com/pmoulon/CMVS-PMVS.git
cd CMVS-PMVS
mkdir build && cd build
cmake ../program/
make
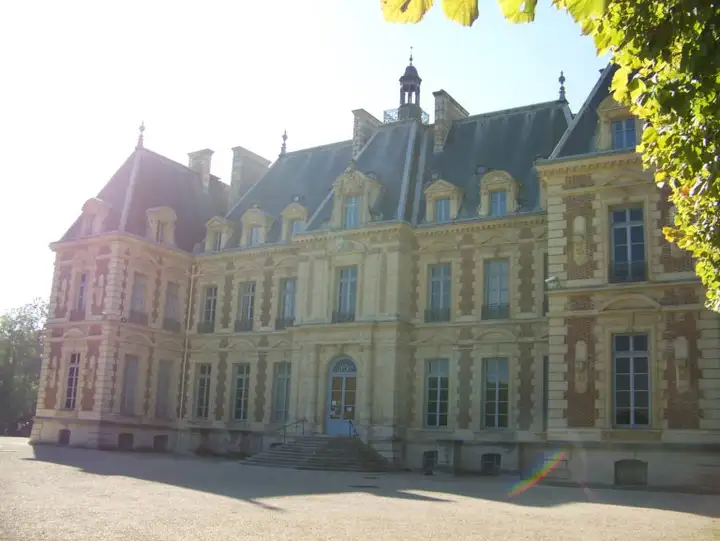
sudo cp main/pmvs2 main/genOption main/cmvs /usr/local/bin/2. 三维重建实例(城堡)
OpenMVG提取稀疏点云(参考:openMVG使用示例)
原始数据:11张从不同角度拍摄的城堡照片
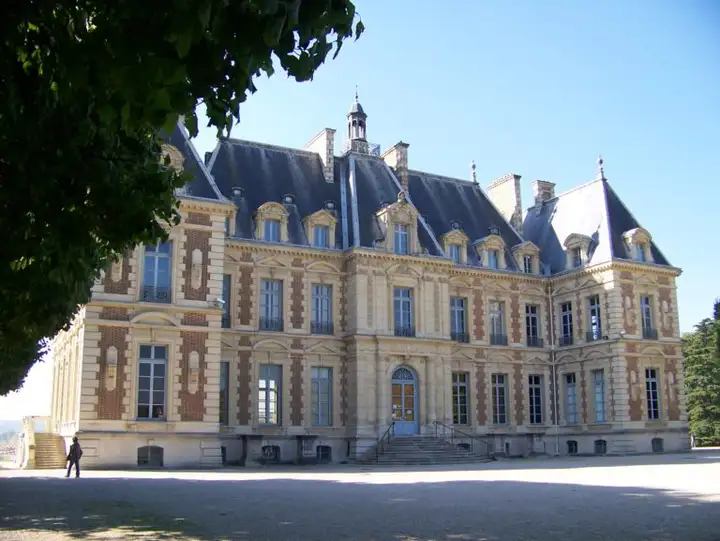
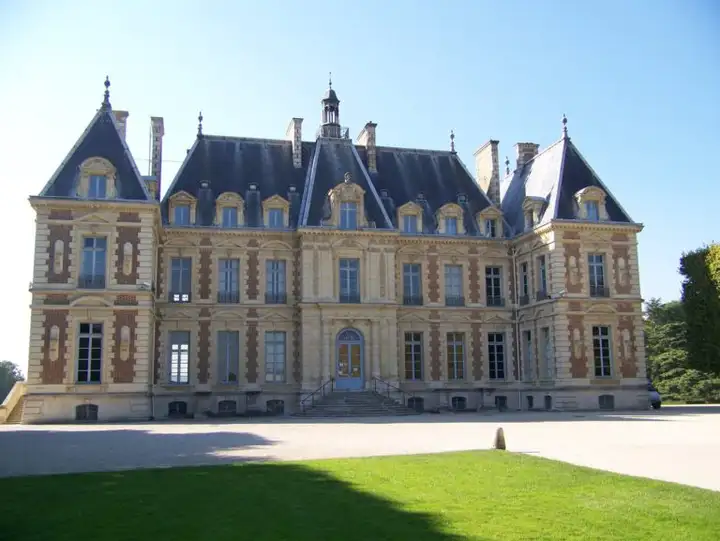
openMVG提取稀疏点云过程:(参考openMVG_Build/software/SfM/tutorial_demo.py,测试图片和脚本:openmvg_test.tar)
cd openMVG
vim 3dr_test.py
#!/usr/bin/python
#! -*- encoding: utf-8 -*-
# openmvg使用示例
# usage : python tutorial_demo.py
import os
import subprocess
import sys # openmvg编译bin目录(可cp -p到/usr/local/bin/)
OPENMVG_SFM_BIN = "/home/work/tools/openMVG_Build/Linux-x86_64-RELEASE"
# pmvs编译bin目录(可cp -p到/usr/local/bin/) PMVS_BIN = "/home/work/tools/CMVS-PMVS/build/main"
# openmvg相机参数目录
CAMERA_SENSOR_WIDTH_DIRECTORY = "/home/work/tools/openMVG/src/openMVG/exif/sensor_width_database"
# 0. 下载测试照片
os.chdir(os.path.dirname(os.path.abspath(__file__)))
data_dir = os.path.abspath("./book")
#data_dir = os.path.abspath("./ImageDataset_SceauxCastle")
'''if not os.path.exists(data_dir):
pImageDataCheckout = subprocess.Popen([ "git", "clone","https://github.com/openMVG/ImageDataset_SceauxCastle.git" ])
pImageDataCheckout.wait()'''
input_dir = os.path.join(data_dir, "images")
output_dir = data_dir
print ("Using input dir : ", input_dir)
print (" output_dir : ", output_dir)
matches_dir = os.path.join(output_dir, "matches")
camera_file_params = os.path.join(CAMERA_SENSOR_WIDTH_DIRECTORY, "sensor_width_camera_database.txt") #相机参数
if not os.path.exists(matches_dir):
os.mkdir(matches_dir)
# 1. 从图片数据集中生成场景描述文件sfm_data.json
print ("----------1. Intrinsics analysis----------")
pIntrisics = subprocess.Popen( [os.path.join(OPENMVG_SFM_BIN, "openMVG_main_SfMInit_ImageListing"), "-i", input_dir, "-o", matches_dir, "-d", camera_file_params, "-c", "3"] )
#*注:如果产出的sfm_data.json里intrinsics内容为空,通常是在图片没有exif信息导致获取不到相机焦距、ccd尺寸等参数,用带exif的原图即可。
pIntrisics.wait()
# 2. 计算图像特征
print ("----------2. Compute features----------")
pFeatures = subprocess.Popen( [os.path.join(OPENMVG_SFM_BIN, "openMVG_main_ComputeFeatures"), "-i", matches_dir+"/sfm_data.json", "-o", matches_dir, "-m", "SIFT", "-f" , "1"] )
pFeatures.wait()
# 3. 计算几何匹配
print ("----------3. Compute matches----------")
pMatches = subprocess.Popen( [os.path.join(OPENMVG_SFM_BIN, "openMVG_main_ComputeMatches"), "-i", matches_dir+"/sfm_data.json", "-o", matches_dir, "-f", "1", "-n", "ANNL2"] )
pMatches.wait()
# 4. 执行增量三维重建
reconstruction_dir = os.path.join(output_dir,"reconstruction_sequential")
print ("----------4. Do Incremental/Sequential reconstruction----------") #set manually the initial pair to avoid the prompt question
pRecons = subprocess.Popen( [os.path.join(OPENMVG_SFM_BIN, "openMVG_main_IncrementalSfM"), "-i", matches_dir+"/sfm_data.json", "-m", matches_dir, "-o", reconstruction_dir] )
pRecons.wait()
# 5. 计算场景结构颜色
print ("----------5. Colorize Structure----------")
pRecons = subprocess.Popen( [os.path.join(OPENMVG_SFM_BIN, "openMVG_main_ComputeSfM_DataColor"), "-i", reconstruction_dir+"/sfm_data.bin", "-o", os.path.join(reconstruction_dir,"colorized.ply")] )
pRecons.wait()
# 6. 测量稳健三角
print ("----------6. Structure from Known Poses (robust triangulation)----------")
pRecons = subprocess.Popen( [os.path.join(OPENMVG_SFM_BIN, "openMVG_main_ComputeStructureFromKnownPoses"), "-i", reconstruction_dir+"/sfm_data.bin", "-m", matches_dir, "-o", os.path.join(reconstruction_dir,"robust.ply")] )
pRecons.wait()
'''
# 使用全局SfM管道重建
Reconstruction for the global SfM pipeline
# 3.1 全局sfm管道几何匹配
print ("----------3.1. Compute matches (for the global SfM Pipeline)----------")
pMatches = subprocess.Popen( [os.path.join(OPENMVG_SFM_BIN, "openMVG_main_ComputeMatches"), "-i", matches_dir+"/sfm_data.json", "-o", matches_dir, "-r", "0.8", "-g", "e"] )
pMatches.wait()
# 4.1 执行全局三维重建
reconstruction_dir = os.path.join(output_dir,"reconstruction_global")
print ("----------4.1. Do Global reconstruction----------")
pRecons = subprocess.Popen( [os.path.join(OPENMVG_SFM_BIN, "openMVG_main_GlobalSfM"), "-i", matches_dir+"/sfm_data.json", "-m", matches_dir, "-o", reconstruction_dir] )
pRecons.wait()
# 5.1 计算场景结构颜色
print ("----------5.1. Colorize Structure----------")
pRecons = subprocess.Popen( [os.path.join(OPENMVG_SFM_BIN, "openMVG_main_ComputeSfM_DataColor"), "-i", reconstruction_dir+"/sfm_data.bin", "-o", os.path.join(reconstruction_dir,"colorized.ply")] )
pRecons.wait()
# 6.1 测量稳健三角
print ("----------6.1. Structure from Known Poses (robust triangulation)----------")
pRecons = subprocess.Popen( [os.path.join(OPENMVG_SFM_BIN, "openMVG_main_ComputeStructureFromKnownPoses"), "-i", reconstruction_dir+"/sfm_data.bin", "-m", matches_dir, "-o", os.path.join(reconstruction_dir,"robust.ply")] )
pRecons.wait()
'''
# 7. 把openMVG生成的SfM_Data转为适用于PMVS输入格式的文件 print ("----------7. Export to PMVS/CMVS----------")
pRecons = subprocess.Popen( [os.path.join(OPENMVG_SFM_BIN, "openMVG_main_openMVG2PMVS"), "-i", reconstruction_dir+"/sfm_data.bin", "-o", reconstruction_dir] )
pRecons.wait()
#*注:执行后会在-o路径下生成一个PMVS目录,包含 models, txt, visualize 三个子目录:models为空;txt包含对应图像的txt文档,每个里面都是一个3x4的矩阵,大概是相机位姿;visualize包含11张图像,不确定是原图像还是校正过的图像
# 8. 使用PMVS重建稠密点云、表面、纹理
print ("----------8. pmvs2----------")
pRecons = subprocess.Popen( [os.path.join(PMVS_BIN, "pmvs2"), reconstruction_dir+"/PMVS/", "pmvs_options.txt"] ) # 注:不要修改pmvs_options.txt文件名
pRecons.wait()
#*注:执行后会在./PMVS/models文件夹中生成一个pmvs_options.txt.ply点云文件,用meshlab打开即可看到重建出来的彩色稠密点云。
#执行三维重建测试
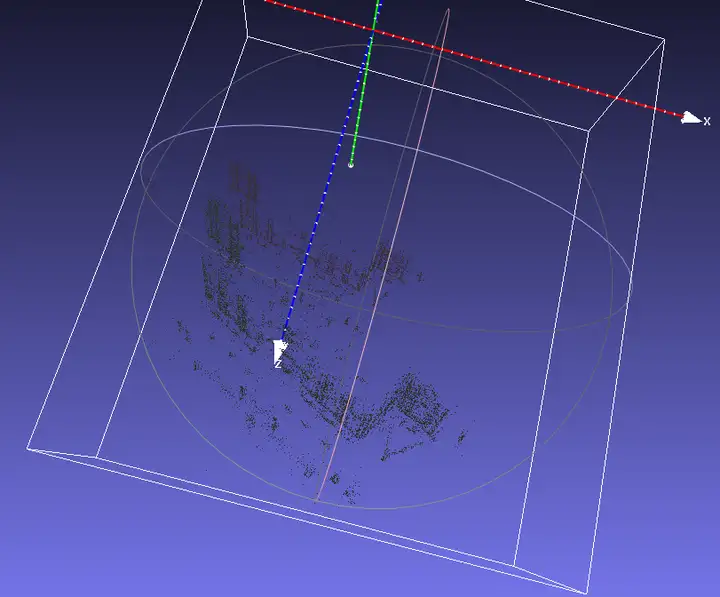
python 3dr_test.py3. 使用MeshLab,查看生成的稀疏点云文件
右上方俯视城堡稀疏点云 :(打开reconstruction_xxx下的colorized.ply或robust.ply)
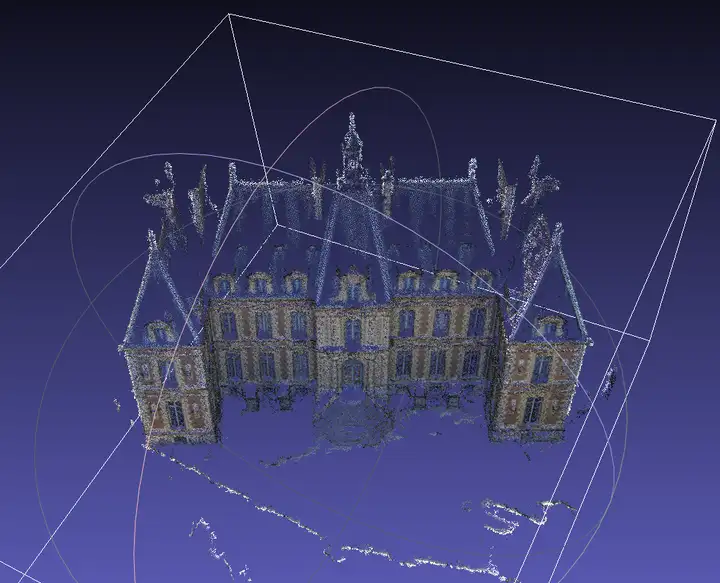
4. PMVS重建稠密点云、重建表面和纹理映射过程:(测试生成的PMVS目录:pmvs_test.tar)
# 1.  把openMVG生成的SfM_Data转为适用于PMVS输入格式的文件
cd openMVG/ImageDataset_SceauxCastle/reconstruction_global/
openMVG_main_openMVG2PMVS -i sfm_data.bin -o ./
*注:执行后会在-o路径下生成一各PMVS目录,包含 models, txt, visualize 三个子目录:models为空;txt包含对应图像的txt文档,每个里面都是一个3x4的矩阵,大概是相机位姿;visualize包含11张图像,不确定是原图像还是校正过的图像

# 2. 使用PMVS重建稠密点云、表面、纹理
pmvs2 ./PMVS/ pmvs_options.txt    # 注:不要修改pmvs_options.txt文件名

*注:执行后会在./PMVS/models文件夹中生成一个pmvs_options.txt.ply点云文件,用meshlab打开即可看到重建出来的彩色稠密点云。
生成的三维稠密点云俯视角:
原文链接:一篇文章教你学会使用三维重建知名开源系统