MariaDB Server 是一个通用的开源关系数据库管理系统(RDBMS),它是世界上最受欢迎的数据库服务器之一,拥有包括 Wikipedia、WordPress.com 和 Google 在内的知名用户
MariaDB Server 在 GPLv2 开源许可下发布,并保证保持开源
当 MariaDB Server 的前身 MySQL 于 2009 年被 Oracle 收购时,MySQL 创始人 Michael Widenius 出于对 Oracle 管理权的担忧而分叉了该项目,并将新项目命名为 MariaDB
MySQL 以他的第一个女儿 My 命名,而 MariaDB 则以他的第二个女儿 Maria 命名
部署环境:
Debian 12(bookworm)
mariadb-server 10.11
master:172.16.201.11(db-alpha)
slave:172.16.201.12(db-beta)
# 配置 IP 和主机名解析
vim /etc/hosts
172.16.201.11 db-alpha
172.16.201.12 db-beta
# 1. 双节点安装数据库服务
apt install -y mariadb-server
systemctl enable mariadb --now
# 2. 初始化数据库
mysql_secure_installation (数据库初始化命令)
Enter current password for root (enter for none): # 输入数据库当前 root 密码,第一次安装使用按 Enter 键
Switch to unix_socket authentication [Y/n] n # 是否切换到 unix_socket 身份验证
Change the root password? [Y/n] y # 更改数据库 root 用户密码
New password: 000000 # 输入数据库 root 密码 000000
Re-enter new password: 000000 # 再次输入密码 000000
Remove anonymous users? [Y/n] y # 删除数据库匿名用户
Disallow root login remotely? [Y/n] n # 允许 root 用户远程登录
Remove test database and access to it? [Y/n] y # 删除 test 数据库
Reload privilege tables now? [Y/n] y # 重载权限表
# 3. 配置 master 节点
vim /etc/mysql/mariadb.conf.d/50-server.cnf
bind-address = 172.16.201.11
server_id = 11
log_bin = /var/log/mysql/mysql-bin.log
# 重启数据库服务,并进入数据库
systemctl restart mariadb
mysql -uroot -p000000
MariaDB [(none)]> grant all privileges on *.* to root@'%' identified by "000000";
Query OK, 0 rows affected (0.02 sec)
MariaDB [(none)]> grant replication slave on *.* to 'replica'@'db-beta' identified by '000000';
Query OK, 0 rows affected (0.02 sec)
MariaDB [(none)]> flush privileges;
Query OK, 0 rows affected (0.03 sec)
# 4. 配置 slave 节点
vim /etc/mysql/mariadb.conf.d/50-server.cnf
bind-address = 172.16.201.12
server_id = 12
log_bin = /var/log/mysql/mysql-bin.log
# 重启数据库服务,并进入数据库
systemctl restart mariadb
mysql -uroot -p000000
MariaDB [(none)]> change master to master_host='db-alpha',master_user='replica',master_password='000000';
Query OK, 0 rows affected (0.024 sec)
MariaDB [(none)]> start slave;
Query OK, 0 rows affected (0.010 sec)
MariaDB [(none)]> show slave status\G
# Slave_IO_Running 和 Slave_SQL_Running 的状态都是 Yes,表示数据库主从集群配置成功

# 5. 验证数据库主从服务
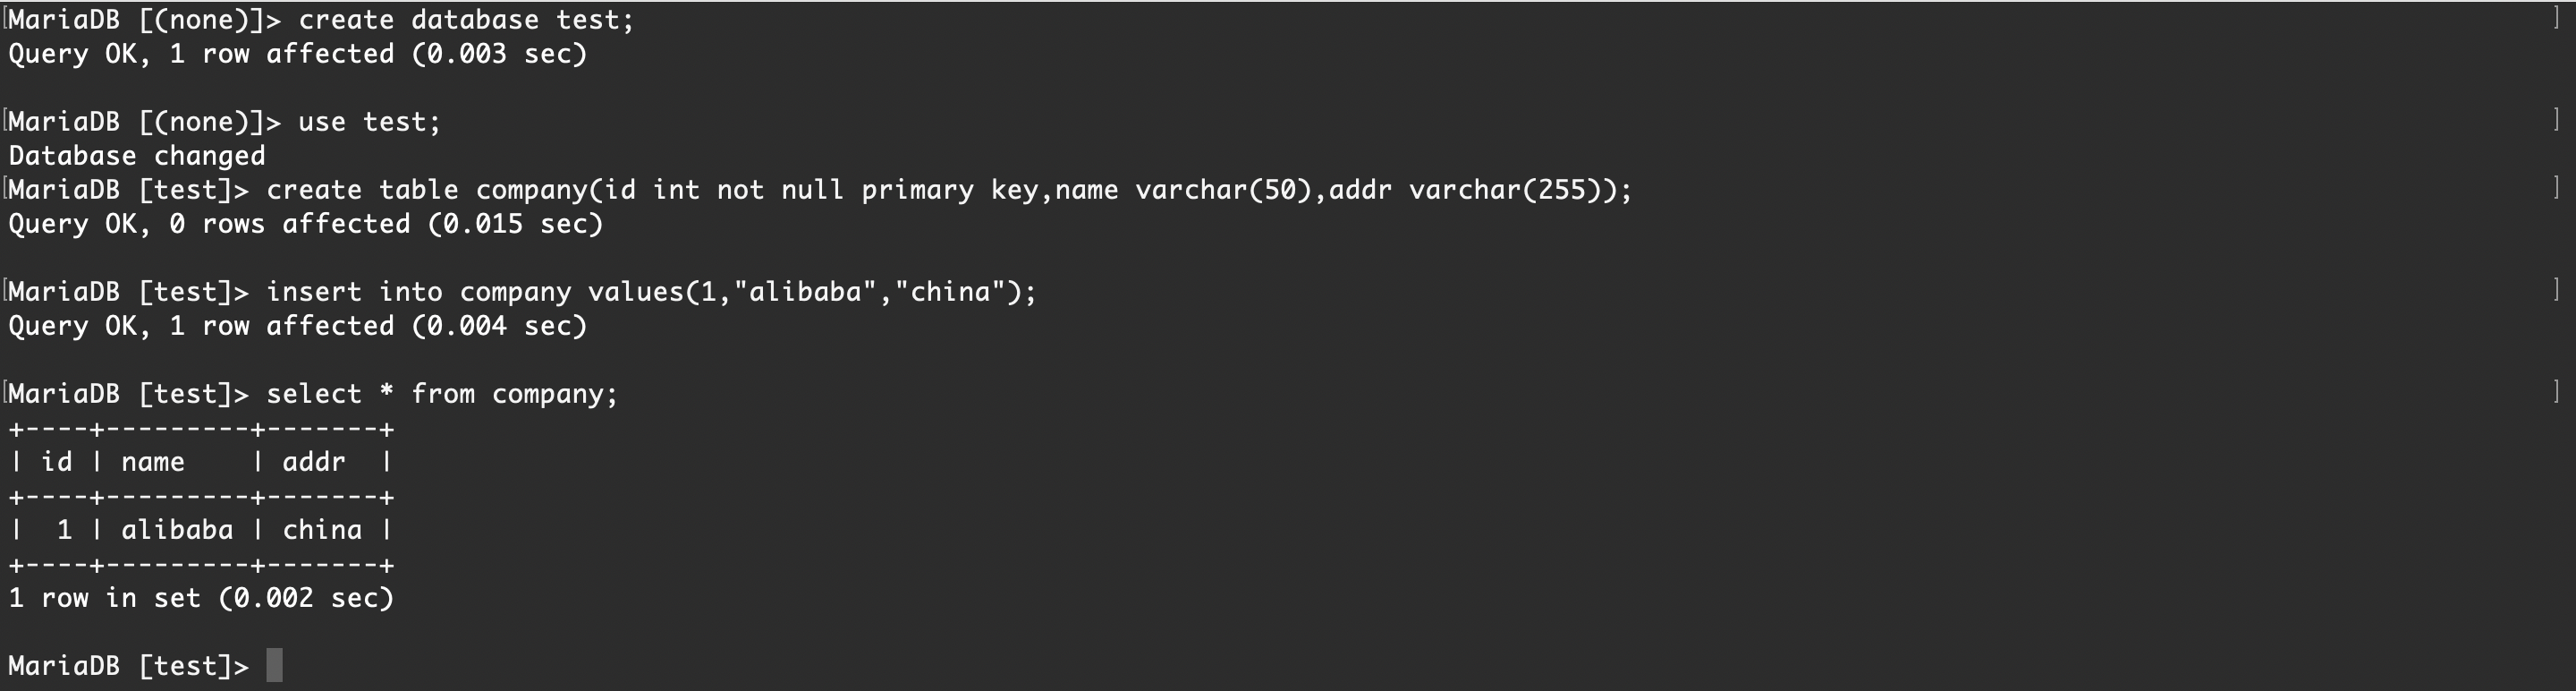
# 先在 master 节点 db-alpha 中创建库 test,并在库 test 中创建表 company,插入表数据,创建完成后,查看 company 表数据
root@db-alpha:~# mysql -uroot -p000000
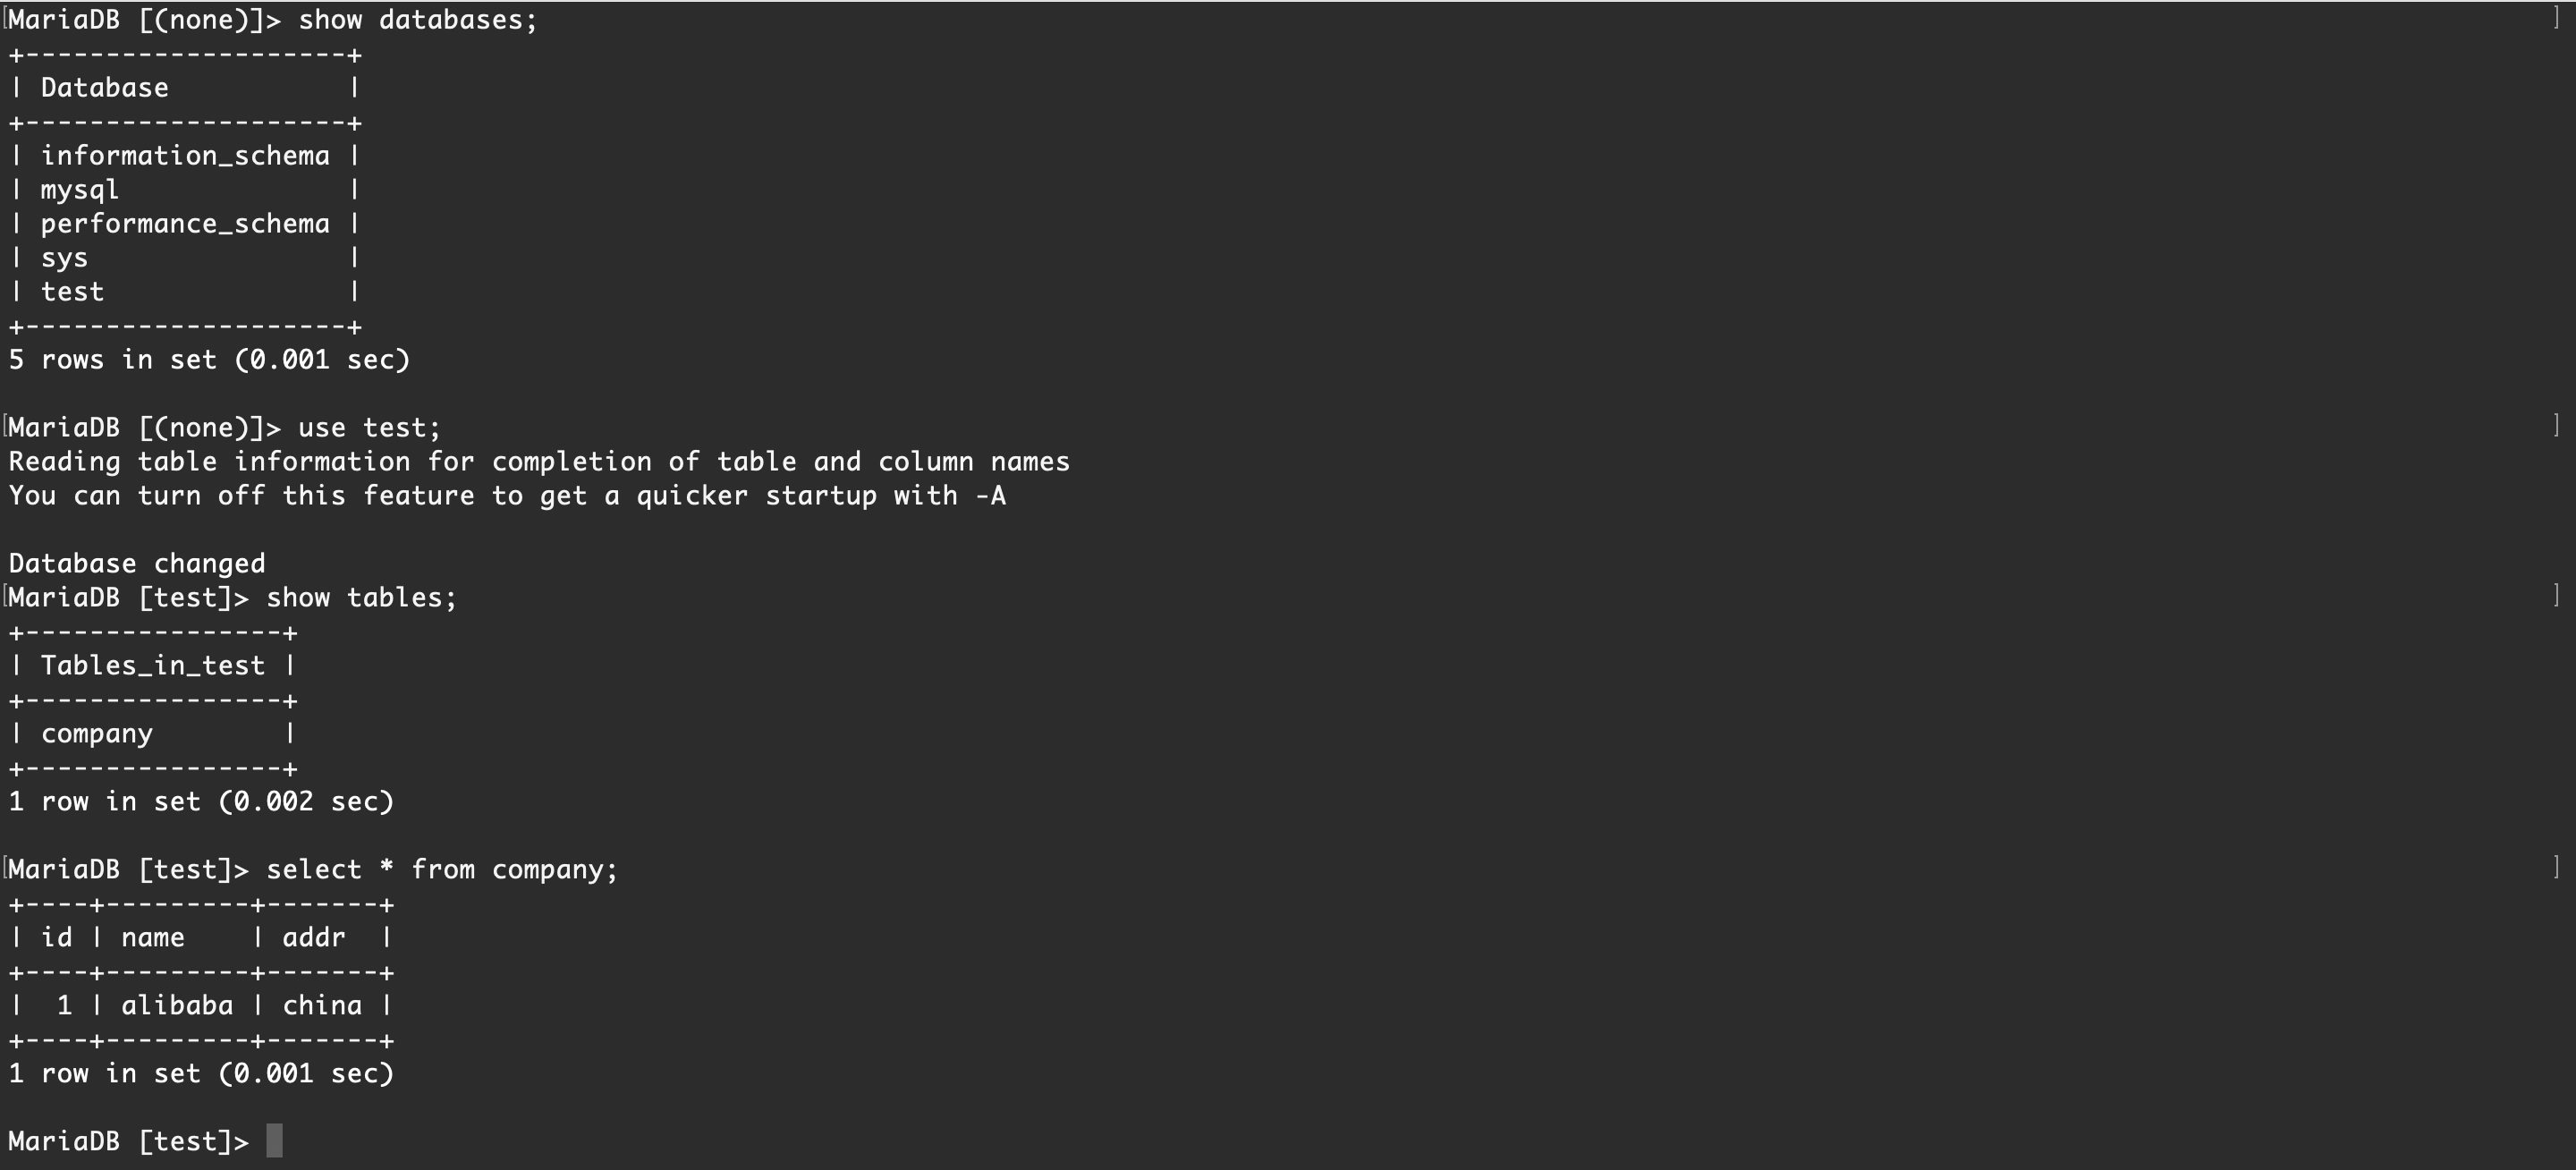
# 登录 db-beta 节点数据库,查看数据库列表。找到 test 数据库,查询表并查询内容验证从数据库的复制功能
root@db-beta:~# mysql -uroot -p000000