【开发步骤】
Gitee仓库中的示例代码很全,如果只是需要简单接入的话,可以精简一下代码。
一、引入三方库
首先,我们需要导入这个ohpm的组件库,可以参考demo中的命令行方式导入:
“ohpm install @ohos/zxing”
另一种方式是在oh-package.json5中配置,这边的版本选择的是2.0.0版本,配置如下:
 "dependencies": {
   "@ohos/zxing": "2.0.0"
 }
二、完成解析与生成相关代码
在src/main/ets目录下创建码解析与生成的工具类文件QRCode.ets
import {
 BarcodeFormat,
 MultiFormatWriter,
 BitMatrix,
 EncodeHintType,
 MultiFormatReader,
 DecodeHintType,
 RGBLuminanceSource,
 BinaryBitmap,
 HybridBinarizer
} from '@ohos/zxing';
import image from '@ohos.multimedia.image';

export default class QRCode {
 constructor() {

 }

 async encode(content: string, params: {
   width: number,
   height: number,
   format?: BarcodeFormat
 }): Promise<image.PixelMap> {
   const {width,height,format=BarcodeFormat.QR_CODE} = params
   const encodeHintTypeMap = new Map();
   // 设置二维码空白的宽度
   encodeHintTypeMap.set(EncodeHintType.MARGIN, 0);
   const writer: MultiFormatWriter = new MultiFormatWriter();
   let matrix: BitMatrix = writer.encode(content, format, width, height, encodeHintTypeMap);
   const PixelData = this.getMatrixPixelData(matrix, matrix.getWidth(), matrix.getHeight())
   return await image.createPixelMap(PixelData.buffer, {
     size: {
       width, height
     }
   })
 }

 async decode(image: image.PixelMap, params: {
   width: number,
   height: number,
   format?: BarcodeFormat
 }): Promise<string> {
   const {width,height,format=BarcodeFormat.QR_CODE} = params
   let num=image.getPixelBytesNumber()
   let arrayBuffer:ArrayBuffer=new ArrayBuffer(num);
   await image.readPixelsToBuffer(arrayBuffer)
   const int32Array=new Int32Array(arrayBuffer)
   const luminanceSource=new RGBLuminanceSource(int32Array,width,height)
   const binaryBitmap=new BinaryBitmap(new HybridBinarizer(luminanceSource))
   const reader=new MultiFormatReader()
   const hints=new Map();

   hints.set(DecodeHintType.POSSIBLE_FORMATS,[format]);
   reader.setHints(hints);
   let result=reader.decode(binaryBitmap);
   let text=result.getText();
   return text;
 }

 getMatrixPixelData(matrix, width, height) {
   const BLACK = 0xFF000000;
   const WHITE = 0xFFFFFFFF;
   const pixels = new Uint32Array(width * height);
   for (let y = 0; y < height; y++) {
     let offset = y * width;
     for (let x = 0; x < width; x++) {
       pixels[offset + x] = matrix.get(x, y) ? BLACK : WHITE;
     }
   }
   return pixels;
 }

}
encode编码方法:根据输入的参数生成码的方法,可以通过传入不同的BarcodeFormat完成不同格式的码的生成。
decode解码方法:对image组件中图片的pixelMap,进行解码操作获取对应的码值
getMatrixPixelData:这个方法是将matrix转成PixelData,用于获取pixelMap的buffer,我们可以在这个方法中定义条码的颜色
三、使用工具类完成解析与生成
最后我们在page页中使用刚刚的方法就可以完成码的解析与生成功能。这边需要注意的是encode()和decode()方法都是耗时操作,我们使用async/await来进行异步处理操作
import { BarcodeFormat } from '@ohos/zxing';
import QRCode from '../util/QRCode'
@Entry
@Component
struct Index {
@State message: string = 'Hello World'
@State pixelMap: PixelMap = undefined
qrcode = new QRCode()
async encode() {
this.pixelMap = await this.qrcode.encode("this is barcode", {
width: 260,
height: 80,
format: BarcodeFormat.CODE_128
})
}
async decode() {
try {
this.message = await this.qrcode.decode(this.pixelMap, {
width: 260,
height: 80,
format: BarcodeFormat.CODE_128
})
} catch (err) {
console.log('[Demo] decode error:' + JSON.stringify(err));
}
}
build() {
Row() {
Column() {
Text(this.message)
.fontSize(50)
.fontWeight(FontWeight.Bold)
Image(this.pixelMap).width(260).height(80).margin(30)
Button('生成一维码').fontSize(25).width(300).margin(20).onClick(() => {
this.encode();
})
Button('解析一维码').fontSize(25).width(300).margin(20).onClick(() => {
this.decode();
})
}
.width('100%')
}
.height('100%')
}
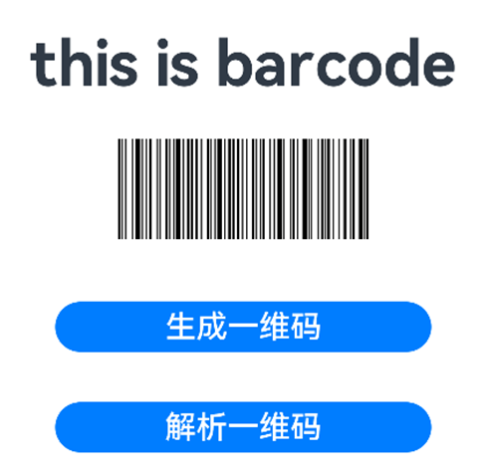
}上面代码中使用的码的格式是条码格式:BarcodeFormat.CODE_128,如果需要使用二维码也可以将这边的格式修改为:BarcodeFormat.QR_CODE
【最后】
至此我们就完成了Stage模型中条码生成与解析的基本操作,如果需要进一步自定义可以参考demo工程:OpenHarmony-TPC/zxing (gitee.com)。