Mirror Deployment Manual
Windows 10 installation: Make a boot disk and install the system tutorial using Ruffe-3.21
中文烧写参考地址:Windows 10 安装:使用rufus-3.21制作启动盘并安装系统教程 (baidu.com)
Windows 10 Boot disk creation
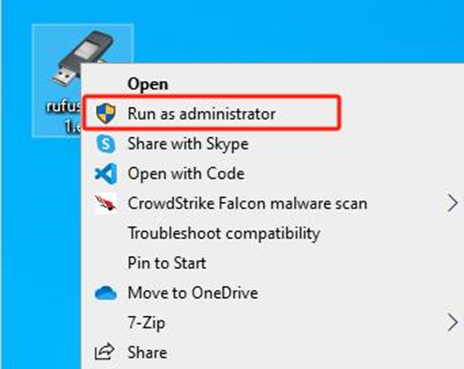
1.Open the rufus production boot disk: right-click rufus and select Run as Administrator.
【When the pop-up asks whether automatic update is required, disable automatic update】
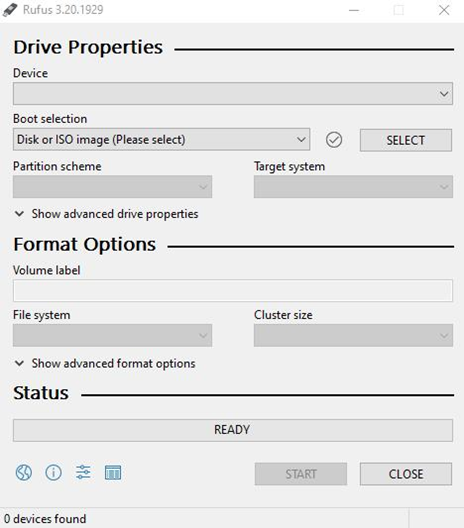
2. Start rufus to start the disk creation tool.
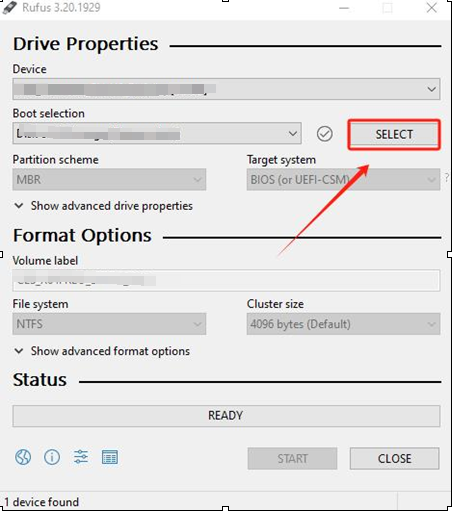
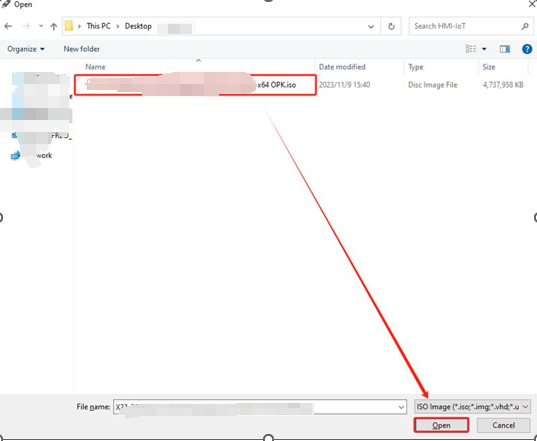
3, Insert the USB flash drive, you can see the USB flash drive name in the device column, click select, find the Windows 10 installation ISO file.
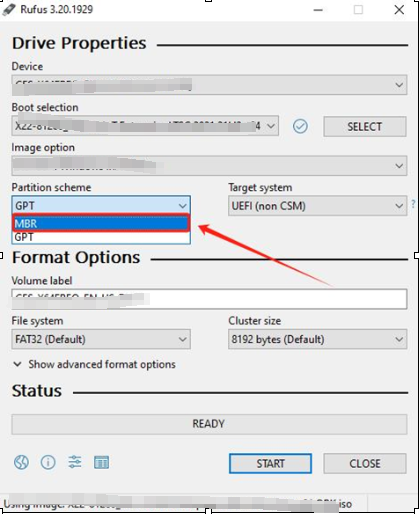
4, in the partition type select MBR, if your hard disk is GPT, select GPT
5. Click [Start] button to start the production of windows 10 installation USB boot disk. Keep all the pop-up options unchecked and click [ok].
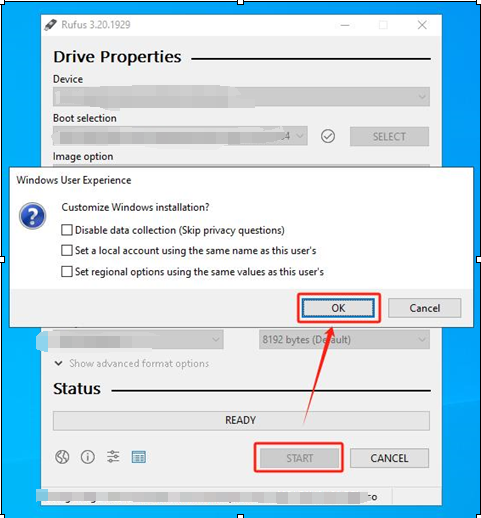
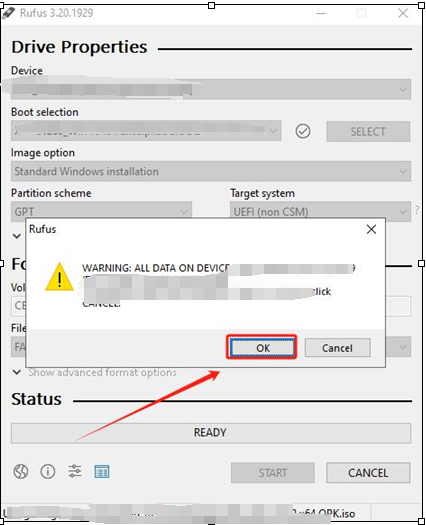
6. Click the [OK] button to turn off the warning.
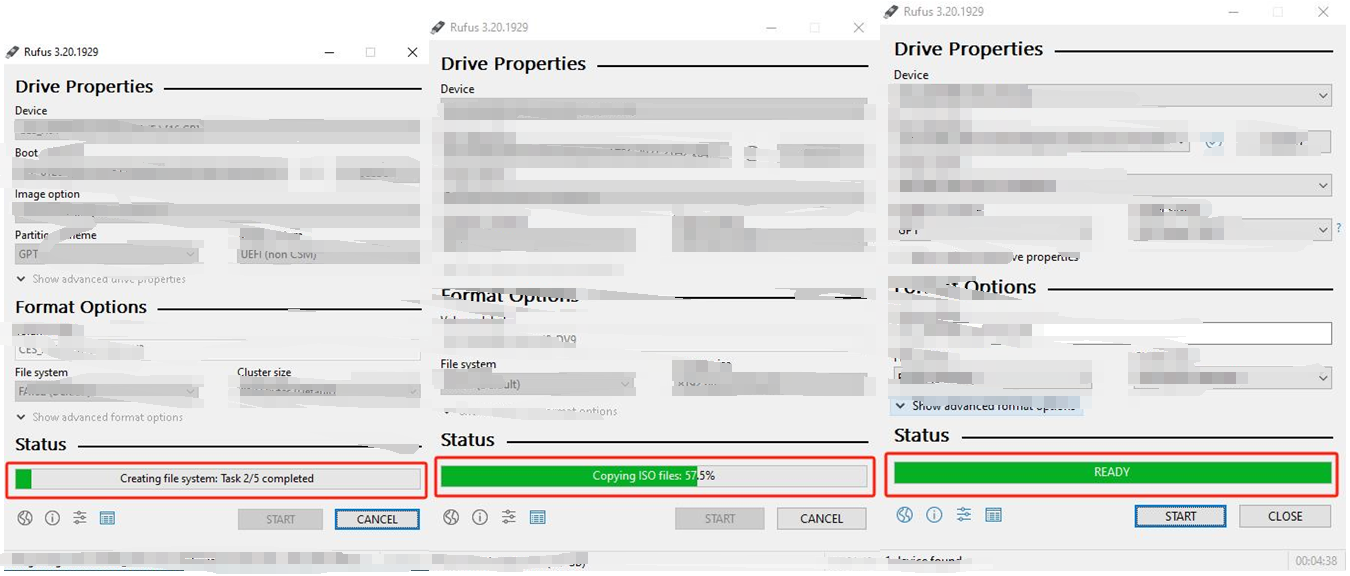
6. Rufus begins to make the windows 10 installation and boot disk.
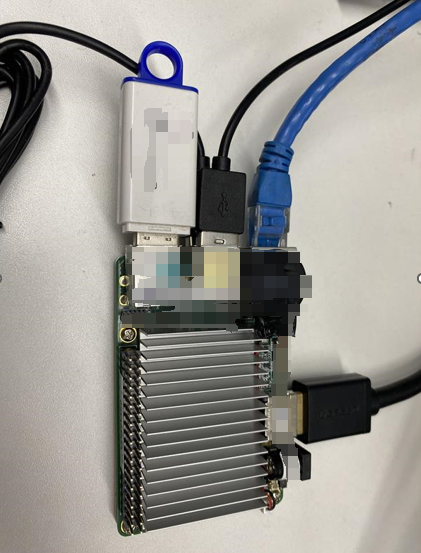
7. Insert the boot disk into the UP board and connect the power supply to start
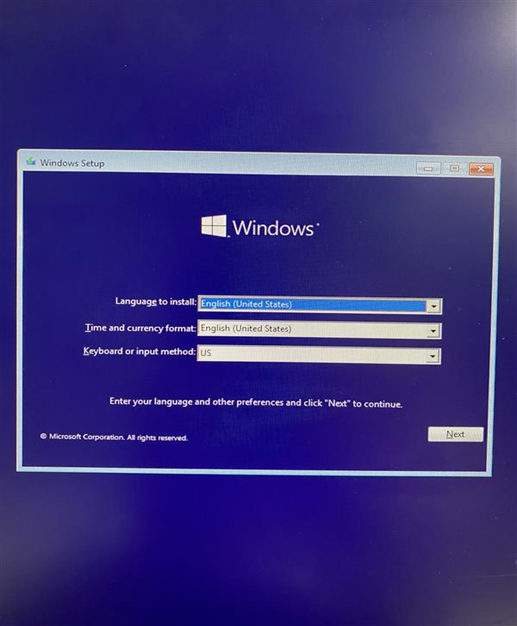
8. The UP board automatically recognizes the content of the boot disk, enters the installation interface, selects the language, and clicks [Next].
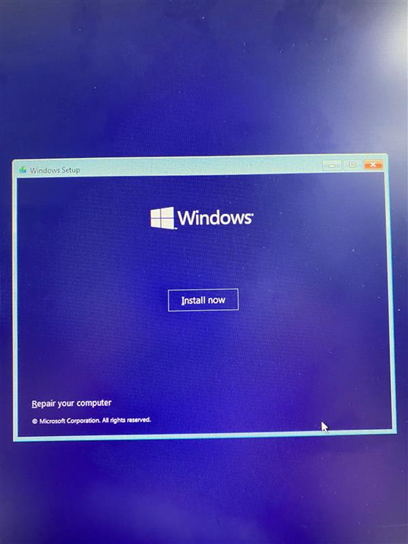
9. Select [Install now] to continue the installation of windows 10.
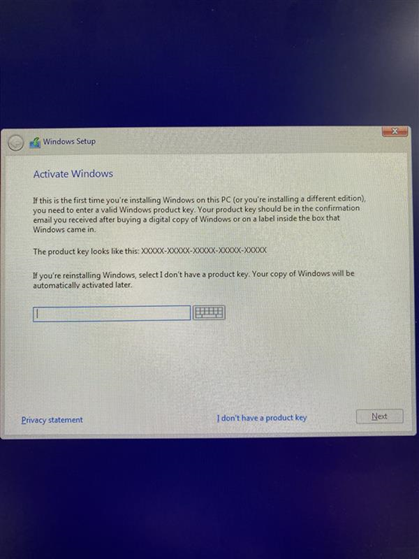
10. Install according to your own image version, some need to enter the serial number when installing, some do not need to install (serial number needs to be purchased)
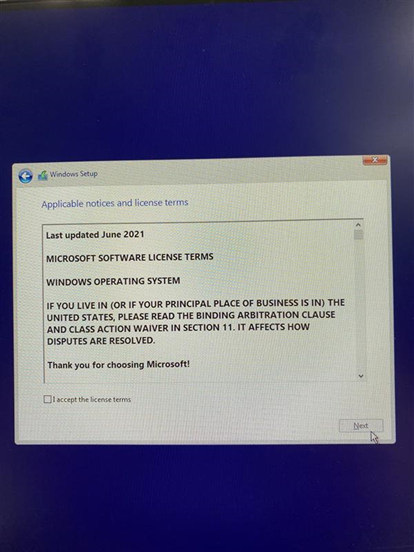
11. Check the box I accept the license terms.
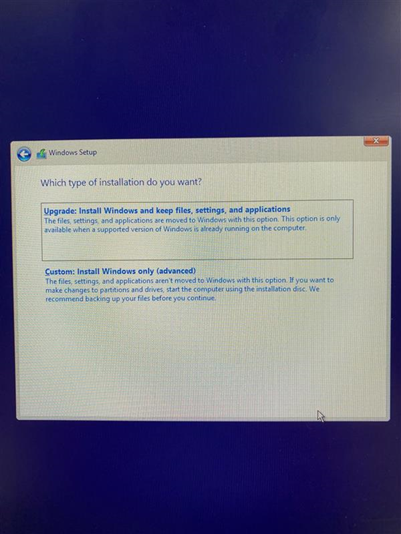
12. Select Custom to install.
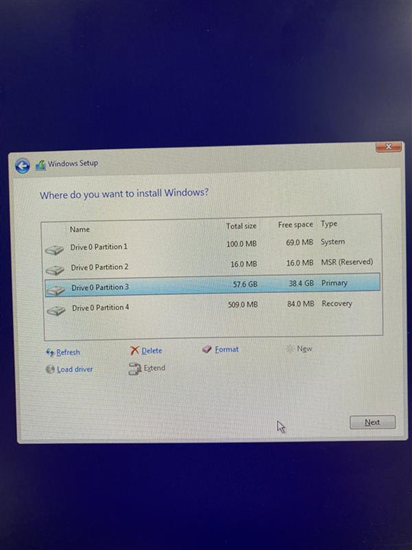
13. select windows to install the disk partition, one is [system partition], about 100M, the other is [MSR(reserved)] partition, about 16M, these two can not be installed, we can choose the third, usually visible C disk in our system, and then click next to continue.
Tip: If you have a very important file on your computer, don't try it without being sure.
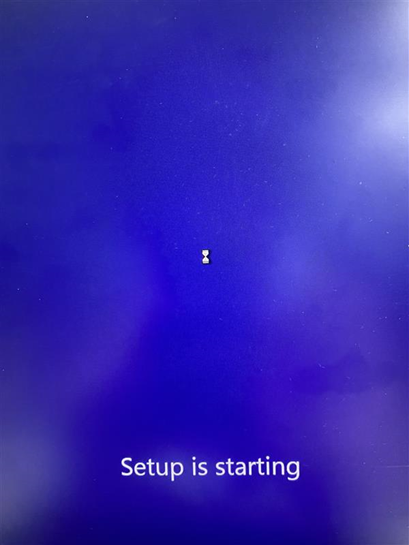
14. windows 10 is being installed and may reboot a few times during the installation process, we just have to wait.
15. After the installation, a prompt will appear: Unplug the boot disk, please unplug the boot disk and restart, it will be like the first start of the Win10 process
16. After the program is installed, you can create a single application kiosk for the program in Windows 10/11【Set up a single-app kiosk on Windows 10/11】
Reference link:Set up a single-app kiosk on Windows - Configure Windows | Microsoft Learn
17:
Windows 10 version 1809+ / Windows 11
When you set up a kiosk (also known as assigned access) in Settings for Windows client, you create the kiosk user account at the same time. To set up assigned access in PC settings:
- Open the Settings app > Accounts. Select Other users or Family and other users.
- Select Set up a kiosk > Assigned access, and then select Get started.
- Enter a name for the new account.
Note
If there are any local standard user accounts on the device already, the Create an account page will offer the option to Choose an existing account.
- Choose the app that will run when the kiosk account signs in. Only apps that can run above the lock screen will be available in the list of apps to choose from. For more information, see Guidelines for choosing an app for assigned access. If you select Microsoft Edge as the kiosk app, you configure the following options:
- Whether Microsoft Edge should display your website full-screen (digital sign) or with some browser controls available (public browser)
- Which URL should be displayed when the kiosk accounts signs in
- When Microsoft Edge should restart after a period of inactivity (if you select to run as a public browser)
- Select Close.
To remove assigned access, select the account tile on the Set up a kiosk page, and then select Remove kiosk.
Windows 10 version 1803 and earlier
When you set up a kiosk (also known as assigned access) in Settings for Windows 10 version 1803 and earlier, you must select an existing local standard user account. Learn how to create a local standard user account.
To set up assigned access in PC settings
- Go to Start > Settings > Accounts > Other people.
- Select Set up assigned access.
- Choose an account.
- Choose an app. Only apps that can run above the lock screen will be available in the list of apps to choose from. For more information, see Guidelines for choosing an app for assigned access.
- Close Settings – your choices are saved automatically, and will be applied the next time that user account signs in.
To remove assigned access, choose Turn off assigned access and sign out of the selected account.
如果需要软件Q:2783077712,备注来意
18.