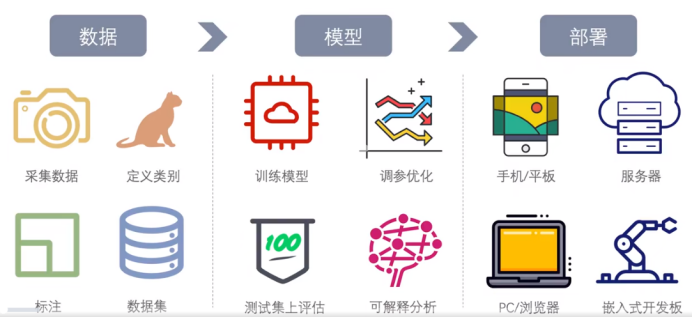
基于Aidlux平台的人工智能开发部署全流程

第一步:
连接Aidlux后,使用jupyter notebook --allow-root进行Aidlux平台联系的jupyter notebook安装配置环境:
1.安装 ONNX、ONNX Runtime
!pip install onnx onnxruntime
2.安装其他第三方工具包
!pip install protobuf==3.20.1
3.下载中文字体文件
!wget https://zihao-openmmlab.obs.cn-east-3.myhuaweicloud.com/20220716-mmclassification/dataset/SimHei.ttf
4.验证安装配置成功
import torch print('PyTorch 版本', torch.__version__)
import onnxprint('ONNX 版本', onnx.__version__)
import onnxruntime as ortprint('ONNX Runtime 版本', ort.__version__)
第二步:
准备ONNX模型文件:
!wget https://zihao-tutorial.obs.cn-east-3.myhuaweicloud.com/aidlux/ckpt/resnet18_imagenet.onnx
!wget https://zihao-tutorial.obs.cn-east-3.myhuaweicloud.com/aidlux/ckpt/resnet18_fruit30.onnx
resnet18_imagenet.onnx:PyTorch官方预训练模型-ImageNet1000类图像分类模型 转ONNX
resnet18_fruit30.onnx:自己训练得到的30类水果图像分类模型 转ONNX
第三步:
水果图像分类素材准备:
上传自己要测试的图像和视频。
下载类别ID和类别名称对应文件。
!wget https://zihao-openmmlab.obs.cn-east-3.myhuaweicloud.com/20220716-mmclassification/dataset/fruit30/idx_to_label
第四步:
使用 ONNX Runtime 推理引擎,载入自己训练得到的图像分类 onnx 模型,预测摄像头实时画面。
具体代码如下:
##导入工具包
import onnxruntime
import torchfrom torchvision import transformsimport torch.nn.functional as F
import pandas as pdimport numpy as np
from cvs import *from PIL import Image, ImageFont, ImageDraw
import matplotlib.pyplot as plt%matplotlib inline
# 导入中文字体,指定字号
font = ImageFont.truetype('SimHei.ttf', 32)
# 载入ONNX模型,获取ONNX Runtime推理器
ort_session = onnxruntime.InferenceSession('resnet18_fruit30.onnx')
# 载入类别和ID对应字典
idx_to_labels = np.load('idx_to_labels.npy', allow_pickle=True).item()
# 图像预处理
# 测试集图像预处理-RCTN:缩放裁剪、转 Tensor、归一化test_transform = transforms.Compose([transforms.Resize(256),
                                     transforms.CenterCrop(256),
                                     transforms.ToTensor(),
                                     transforms.Normalize(
                                         mean=[0.485, 0.456, 0.406],
                                         std=[0.229, 0.224, 0.225])
                                    ])
# 初始化摄像头
# 摄像头ID 0-后置 1-前置
Camera_ID = 0
cap = cvs.VideoCapture(Camera_ID)

# 调用摄像头获取一帧画面

img_bgr = cap.read()
img_bgr.shape
plt.imshow(img_bgr[:,:,::-1])
plt.show()
#画面转成 RGB 的 Pillow 格式
img_bgr.shape
img_rgb = cv2.cvtColor(img_bgr, cv2.COLOR_BGR2RGB) # BGR转RGB
img_pil = Image.fromarray(img_rgb)

#预处理
input_img = test_transform(img_pil)
input_tensor = input_img.unsqueeze(0).numpy()
#ONNX Runtime预测
# onnx runtime 输入
ort_inputs = {'input': input_tensor}
# onnx runtime 输出
pred_logits = ort_session.run(['output'], ort_inputs)[0]
pred_logits = torch.tensor(pred_logits)

pred_softmax = F.softmax(pred_logits, dim=1) # 对 logit 分数做 softmax 运算
pred_softmax.shape
#解析top-n预测结果的类别和置信度
n = 3top_n = torch.topk(pred_softmax, n) # 取置信度最大的 n 个结果pred_ids = top_n[1].cpu().detach().numpy().squeeze() # 解析出类别
confs = top_n[0].cpu().detach().numpy().squeeze() # 解析出置信度
#在图像上写中文
draw = ImageDraw.Draw(img_pil) # 在图像上写字
for i in range(len(confs)):
    pred_class = idx_to_labels[pred_ids[i]]
    text = '{:<8} {:>.2f}'.format(pred_class, confs[i])
    # 文字坐标,中文字符串,字体,rgba颜色
draw.text((50, 100 + 50 * i), text, font=font, fill=(255, 0, 0, 1))
img = np.array(img_pil) # PIL 转 array
plt.imshow(img)
plt.show()
#处理单帧画面的函数
# 处理帧函数
def process_frame(img):        '''    输入摄像头拍摄画面bgr-array,输出图像分类预测结果bgr-array    '''

    # 记录该帧开始处理的时间
    start_time = time.time()

    ## 画面转成 RGB 的 Pillow 格式
    img_rgb = cv2.cvtColor(img, cv2.COLOR_BGR2RGB) # BGR转RGB
    img_pil = Image.fromarray(img_rgb) # array 转 PIL

    ## 预处理
    input_img = test_transform(img_pil) # 预处理
    input_tensor = input_img.unsqueeze(0).numpy()

    ## onnx runtime 预测
    ort_inputs = {'input': input_tensor} # onnx runtime 输入
    pred_logits = ort_session.run(['output'], ort_inputs)[0] # onnx runtime 输出
    pred_logits = torch.tensor(pred_logits)
    pred_softmax = F.softmax(pred_logits, dim=1) # 对 logit 分数做 softmax 运算

    ## 解析top-n预测结果的类别和置信度
    n = 3
    top_n = torch.topk(pred_softmax, n) # 取置信度最大的 n 个结果
    pred_ids = top_n[1].cpu().detach().numpy().squeeze() # 解析出类别
    confs = top_n[0].cpu().detach().numpy().squeeze() # 解析出置信度

    ## 在图像上写中文
    draw = ImageDraw.Draw(img_pil)
    for i in range(len(confs)):
        pred_class = idx_to_labels[pred_ids[i]]
        text = '{:<8} {:>.2f}'.format(pred_class, confs[i])
        # 文字坐标,中文字符串,字体,rgba颜色
        draw.text((50, 100 + 50 * i), text, font=font, fill=(255, 0, 0, 1))
    img = np.array(img_pil) # PIL 转 array
    img = cv2.cvtColor(img, cv2.COLOR_RGB2BGR) # RGB转BGR

    # 记录该帧处理完毕的时间
    end_time = time.time()
    # 计算每秒处理图像帧数FPS
    FPS = 1/(end_time - start_time)
    # 图片,添加的文字,左上角坐标,字体,字体大小,颜色,线宽,线型
    img = cv2.putText(img, 'FPS  '+str(int(FPS)), (50, 80), cv2.FONT_HERSHEY_SIMPLEX, 2, (0, 0, 255), 4, cv2.LINE_AA)
    return img
#逐帧实时处理手机摄像头拍摄的画面
while True:
    img_bgr = cap.read()

    if img_bgr is None:
        continue

    img_bgr = process_frame(img_bgr)

    cvs.imshow(img_bgr)

#视频逐帧处理
import cv2import numpy as npimport timefrom tqdm import tqdm
# 视频逐帧处理代码模板# 不需修改任何代码,只需定义process_frame函数即可# 同济子豪兄 2021-7-10
def generate_video(input_path='videos/robot.mp4'):
    filehead = input_path.split('/')[-1]
    output_path = "out-" + filehead

    print('视频开始处理',input_path)

    # 获取视频总帧数
    cap = cv2.VideoCapture(input_path)
    frame_count = 0
    while(cap.isOpened()):
        success, frame = cap.read()
        frame_count += 1
        if not success:
            break
    cap.release()
    print('视频总帧数为',frame_count)

    # cv2.namedWindow('Crack Detection and Measurement Video Processing')
    cap = cv2.VideoCapture(input_path)
    frame_size = (cap.get(cv2.CAP_PROP_FRAME_WIDTH), cap.get(cv2.CAP_PROP_FRAME_HEIGHT))

    # fourcc = int(cap.get(cv2.CAP_PROP_FOURCC))
    # fourcc = cv2.VideoWriter_fourcc(*'XVID')
    fourcc = cv2.VideoWriter_fourcc(*'mp4v')
    fps = cap.get(cv2.CAP_PROP_FPS)

    out = cv2.VideoWriter(output_path, fourcc, fps, (int(frame_size[0]), int(frame_size[1])))

    # 进度条绑定视频总帧数
    with tqdm(total=frame_count-1) as pbar:
        try:
            while(cap.isOpened()):
                success, frame = cap.read()
                if not success:
                    break

                # 处理帧
                # frame_path = './temp_frame.png'
                # cv2.imwrite(frame_path, frame)
                try:
                    frame = process_frame(frame)
                except:
                    print('报错!', error)
                    pass

                if success == True:
                    # cv2.imshow('Video Processing', frame)
                    out.write(frame)

                    # 进度条更新一帧
                    pbar.update(1)

                # if cv2.waitKey(1) & 0xFF == ord('q'):
                    # break
        except:
            print('中途中断')
            pass

    cv2.destroyAllWindows()
    out.release()
    cap.release()
    print('视频已保存', output_path)
generate_video(input_path='fruits_video.mp4')
个人体会:
笔者是在Aidlux团队以及B站up主张子豪老师的训练营中学习而来,期间张子豪老师区别以往的视频课,以一种更加直观的方式展现出整个项目的流程与细节。不管是AI算法小白还是AI算法的老手都在这次训练营受益匪浅。Aidlux工程实践内容全是干货,同时过程也遇见了很多问题,但是张子豪老师和训练营的其他同学们都很认真为其他学员解决,耐心辅导,对我来言,刚刚接触这一领域,以及Aidlux平台的使用,让我耳目一新。整个流程下,我已经学会了如何在Aidlux进行ONNX Runtime模型部署,令我也感觉到成就感,在此特别感谢张子豪老师和Aidlux团队的贡献,希望他们以后在AI算法开发的道路事业更加顺利。
最后放上本次基于Aidlux平台实现ONNX Runtime部署-水果分类-摄像头和视频的效果视频的地址。
基于Aidlux平台实现ONNX Runtime部署-水果分类-摄像头实时:https://www.bilibili.com/video/BV1UX4y1L76H/?vd_source=d3b09cd0849dbba42c427a4dccbd3c54
基于Aidlux平台实现ONNX Runtime部署-水果分类-视频解析:https://www.bilibili.com/video/BV1HX4y1L7B4/?vd_source=d3b09cd0849dbba42c427a4dccbd3c54