今天研究了一下如何把Springboot+Mybatis和Vue+Element结合起来使用 详细写一篇博客来记录一下流程吧,因为途中发现了很多的问题 首先,创建Springboot项目,惯例添加依赖
<?xml version="1.0" encoding="UTF-8"?>
<project xmlns="http://maven.apache.org/POM/4.0.0" xmlns:xsi="http://www.w3.org/2001/XMLSchema-instance"
         xsi:schemaLocation="http://maven.apache.org/POM/4.0.0 https://maven.apache.org/xsd/maven-4.0.0.xsd">
    <modelVersion>4.0.0</modelVersion>
    <parent>
        <groupId>org.springframework.boot</groupId>
        <artifactId>spring-boot-starter-parent</artifactId>
        <version>2.7.16</version>
        <relativePath/> <!-- lookup parent from repository -->
    </parent>
    <groupId>com.example</groupId>
    <artifactId>Mybatisplus</artifactId>
    <version>0.0.1-SNAPSHOT</version>
    <name>Mybatisplus</name>
    <description>Mybatisplus</description>
    <properties>
        <java.version>1.8</java.version>
    </properties>
    <dependencies>
        <dependency>
            <groupId>org.springframework.boot</groupId>
            <artifactId>spring-boot-starter-web</artifactId>
        </dependency>

        <dependency>
            <groupId>org.springframework.boot</groupId>
            <artifactId>spring-boot-starter-test</artifactId>
            <scope>test</scope>
        </dependency>


        <dependency>
            <groupId>com.baomidou</groupId>
            <artifactId>mybatis-plus</artifactId>
            <version>3.4.2</version>
        </dependency>
        <dependency>
            <groupId>mysql</groupId>
            <artifactId>mysql-connector-java</artifactId>
            <version>5.0.7</version>
        </dependency>
        <dependency>
            <groupId>org.mybatis.spring.boot</groupId>
            <artifactId>mybatis-spring-boot-starter</artifactId>
            <version>2.1.3</version>
        </dependency>
        <dependency>
            <groupId>com.alibaba</groupId>
            <artifactId>druid</artifactId>
            <version>1.2.5</version>
        </dependency>
    </dependencies>

    <build>
        <plugins>
            <plugin>
                <groupId>org.springframework.boot</groupId>
                <artifactId>spring-boot-maven-plugin</artifactId>
            </plugin>
        </plugins>
    </build>

</project>
依赖添加完毕之后,创建项目目录,包括mapper、controller、entity

然后配置properties文件
spring.datasource.type=com.alibaba.druid.pool.DruidDataSource
spring.datasource.driver-class-name=com.mysql.jdbc.Driver
spring.datasource.url=jdbc:mysql://localhost:3306/mybatis??useUnicode=true&characterEncoding=utf8
spring.datasource.username=root
spring.datasource.password=*******
mybatis-plus.configuration.log-impl=org.apache.ibatis.logging.stdout.StdOutImpl
server.port:9090
端口可以修改,但是前端访问也要进行修改
然后对springboot主类进行配置
添加
@MapperScan("com.example.Vue2.mapper")
注解,注意路径
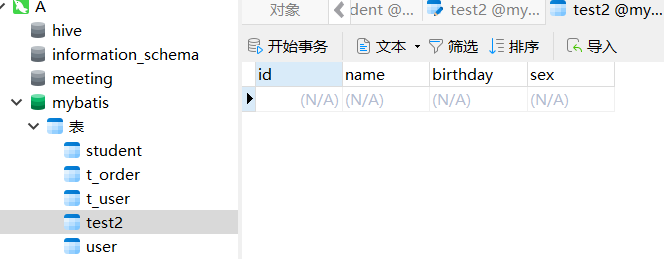
然后创建数据库,这里是一个测试的表test2
然后根据表内容进行封装,注意,如果你的实体类和表名称不一致,则需要添加@tablename注解,但是建议保持一致避免麻烦
然后是封装,包括get/set和tostring方法
package com.example.vue2.entity;

public class test2 {
    private int id;
    private String name;
    private String birthday;
    private String sex;

    public int getId() {
        return id;
    }

    public void setId(int id) {
        this.id = id;
    }

    public String getName() {
        return name;
    }

    public void setName(String name) {
        this.name = name;
    }

    public String getBirthday() {
        return birthday;
    }

    public void setBirthday(String birthday) {
        this.birthday = birthday;
    }

    public String getSex() {
        return sex;
    }

    public void setSex(String sex) {
        this.sex = sex;
    }

    @Override
    public String toString() {
        return "test2{" +
                "id=" + id +
                ", name='" + name + '\'' +
                ", birthday='" + birthday + '\'' +
                ", sex='" + sex + '\'' +
                '}';
    }
}
然后编写mapper接口
package com.example.vue2.mapper;

import com.example.vue2.entity.test2;
import org.apache.ibatis.annotations.*;

import java.util.List;

@Mapper
public interface test2Mapper {
    @Select("select * from test2")
    public List<test2> find();
    @Insert("insert into test2(name, birthday, sex) values(#{name},#{birthday},#{sex})")
    public int insert(test2 test2);
    @Delete("delete from test2 where id = #{id}")
    public int delete(String id);
    @Update("update test2 set name = #{name},birthday = #{birthday},sex = #{sex} where id = #{id}")
    public int update (test2 test2);
}
这里有个问题记录一下,数据库中的id为主键,不为空且自增,因此在执行insert的时候,由于id添加或许会存在问题,因此最好
直接指明添加的列,这样不容易出现bug
然后就是Controller类
package com.example.vue2.controller;

import com.example.vue2.entity.test2;
import com.example.vue2.mapper.test2Mapper;
import org.springframework.beans.factory.annotation.Autowired;
import org.springframework.web.bind.annotation.*;

import java.util.List;

@CrossOrigin(origins = "*")
@RestController
public class test2Controller {
    @Autowired
    private test2Mapper test2mapper;

    @GetMapping("/test2/findAll")
    public List<test2> find()
    {
        return test2mapper.find();
    }

    @PostMapping("/test/insert")
    public int insert(@RequestBody test2 t)
    {

        return test2mapper.insert(t);

    }

    @PostMapping("/test2/delete/{id}")
    public String delete(@PathVariable("id")String id)
    {
        System.out.println(id);
        int flag = 0;
        flag = test2mapper.delete(id);
        if(flag>0)
        {
            return "删除成功";
        }else
        {
            return "删除失败";
        }
    }

    @PostMapping("/test2/update")
    public String update(@RequestBody test2 student)
    {
        int flag = 0;
        flag = test2mapper.update(student);
        if(flag>0)
        {
            return "更新成功";
        }else
        {
            return "更新失败";
        }

    }

}
这里注意几个问题
1.前端传递的格式假设是 localhost:8080/test/delete/1
(1是id号,前端根据获取到的列id进行拼接的话)
一定要对id进行注解,不然会导致获取不到
@PathVariable("id")
也就是这行
2.前端传递的form,需要@RequestBody进行获取
就例如添加和更新的参数部分
这些都做完之后,后端就算是开发完毕了,测试一下

查询删除和更新都是post操作,在没有开发前端的前提下,可以使用Airpost工具进行测试,但是值得注意的是
Airpost中传递的form-data数据,如果想成功插入,需要去掉@RequestBody注解,但是vue传递的form必须要有
这我不太清楚为什么,但是当前先这样做
测试完成之后,着手进行前端的开发,流程如下
点击springboot项目下方的terminal
相当于打开了命令行,然后输入
vue init webpack vue-test2 --offline
解释一下:这是通过webpack在springboot项目中添加vue模块,但是存在一个问题,如果我直接进行vue init....
是无法成功的 具体原因我不知道为什么 反正显示连接超时,因此我下载了webpack的包,下载连接为:
mirrors / vuejs-templates / webpack · GitCode
https://gitcode.net/mirrors/vuejs-templates/webpack/-/archive/develop/webpack-develop.zip
下载完成之后放到C盘 用户 你的用户名 下的.vue-templates文件夹下,注意两个问题
1.下载的包名需要改成webpack
2.该路径下或许没有这个文件夹,自己创建一个就行了
然后继续

前四项就是项目名称、描述、作者、都可以选默认的
然后这个vue-router是vue的路由管理,建议Y,不然还得自己添加
然后一路都是no,最后选npm就行了
然后就是漫长无尽的等待
npm下vue的东西 不知道是我网络有问题还是其他的什么 反正很卡
下载完之后 cd到项目路径下,然后启动 npm run dev ,有些项目可能是 npm run serve
其实我用cli创建的就是serve启动 但是webpack的就是dev启动 总之他会给你提示的